-
See the Archives
- April 2015
- March 2015
- October 2014
- July 2014
- June 2014
- May 2014
- April 2014
- March 2014
- February 2014
- January 2014
- December 2013
- November 2013
- October 2013
- September 2013
- August 2013
- July 2013
- June 2013
- May 2013
- April 2013
- March 2013
- February 2013
- January 2013
- December 2012
- October 2012
- September 2012
- August 2012
- July 2012
- June 2012
- May 2012
- Filter by Category
Cadillac Exhaust System
It’s always enjoyable building functional art and in this case it’s a Cadillac exhaust system built for a straight up show car. The requirements for this project are:
- everything must be 304 stainless steel
- everything must be tucked tightly to the underside of the car as it can lay on the ground (has bags)
- all welds must be blended and not visible
- must be polished
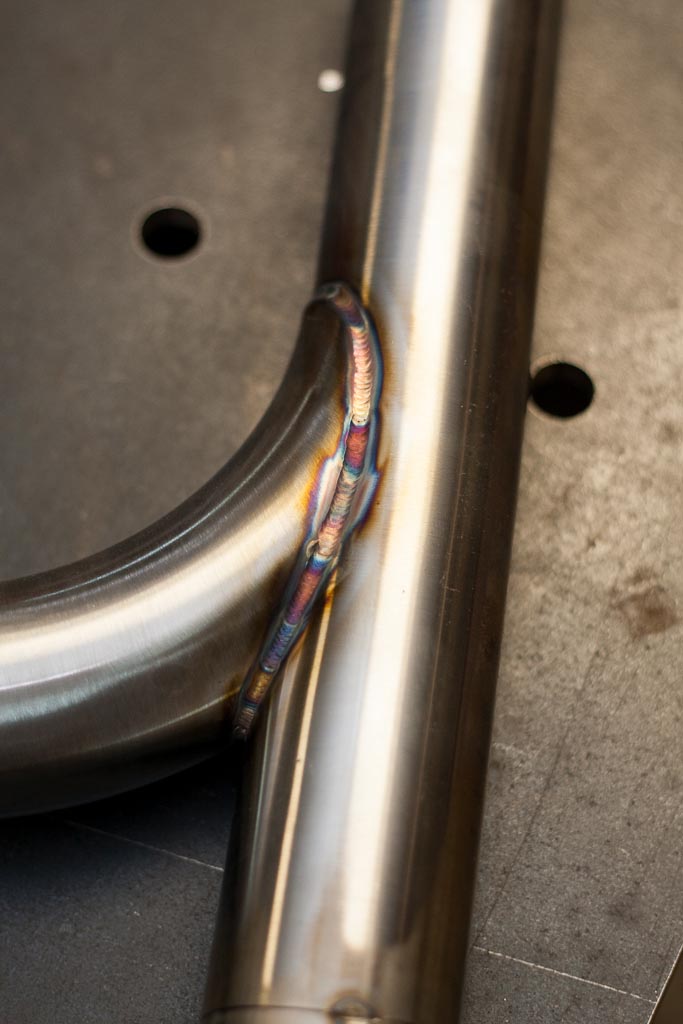
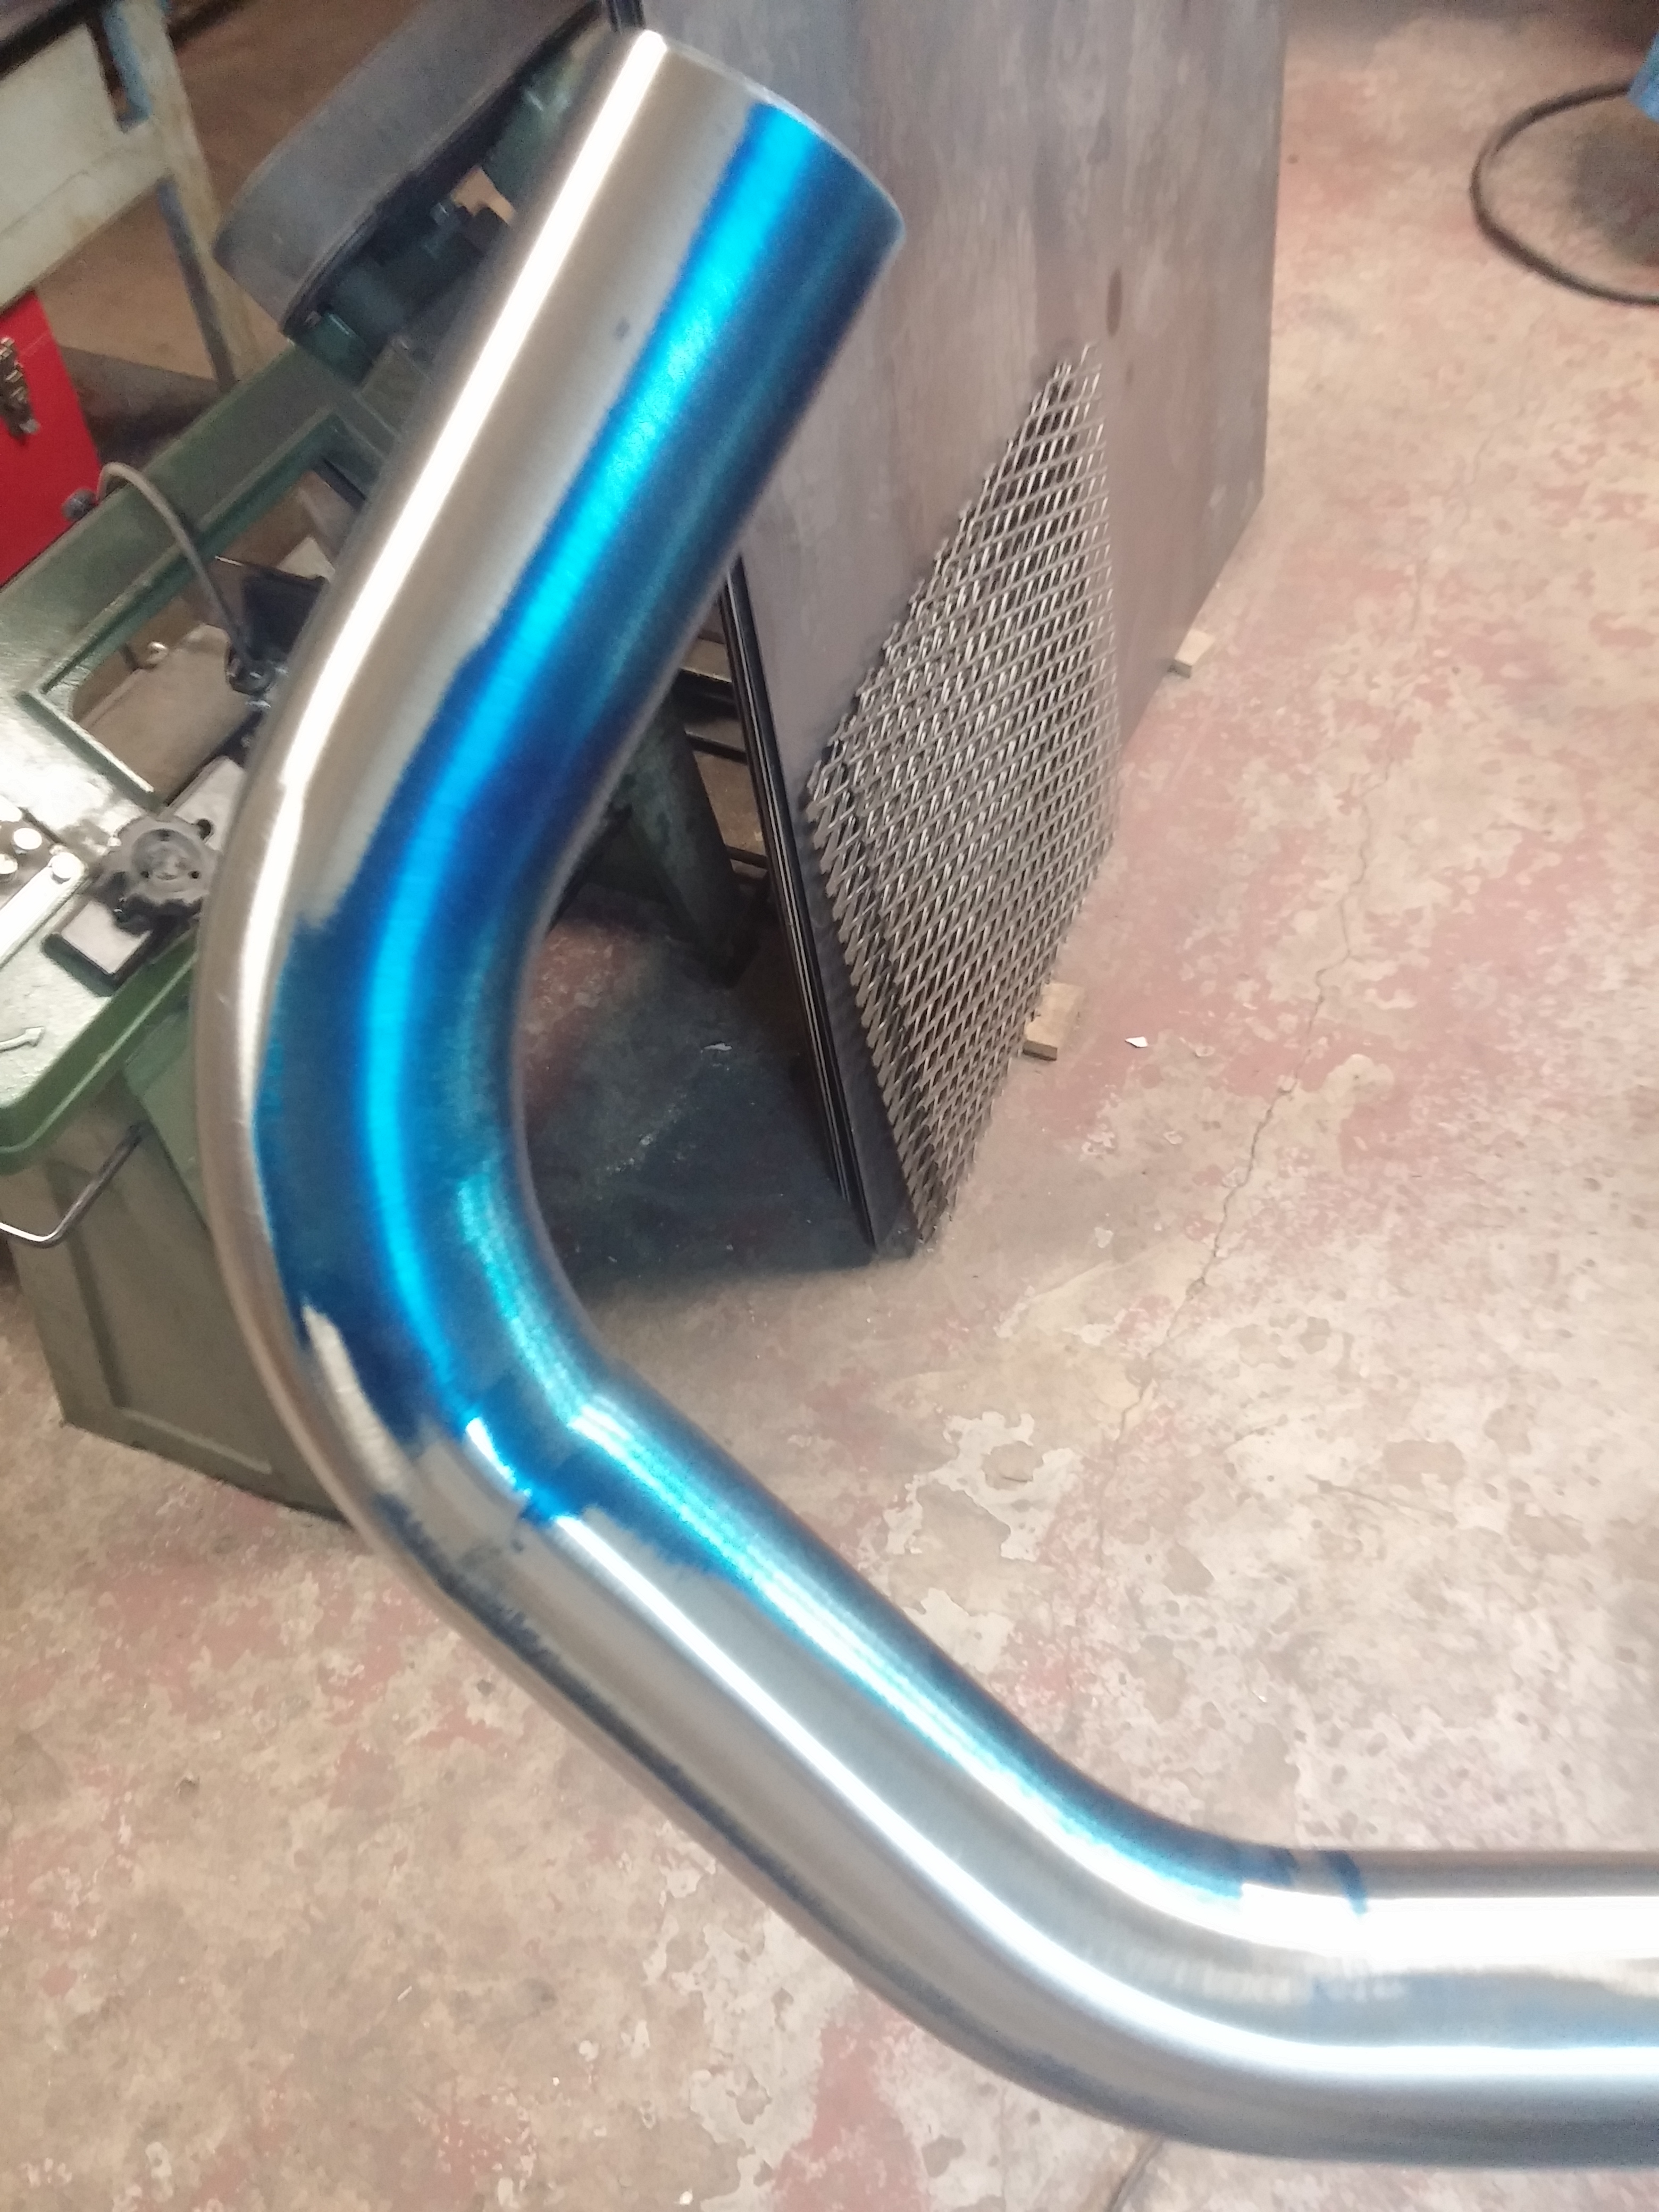
And that’s it! Working with raw materials and getting it to this level of quality takes a considerable amount of time. Building a stainless exhaust alone requires the material to be TIG welded, properly backpurged and with the additional requirement of blending the welds, sanding and the final polishing.
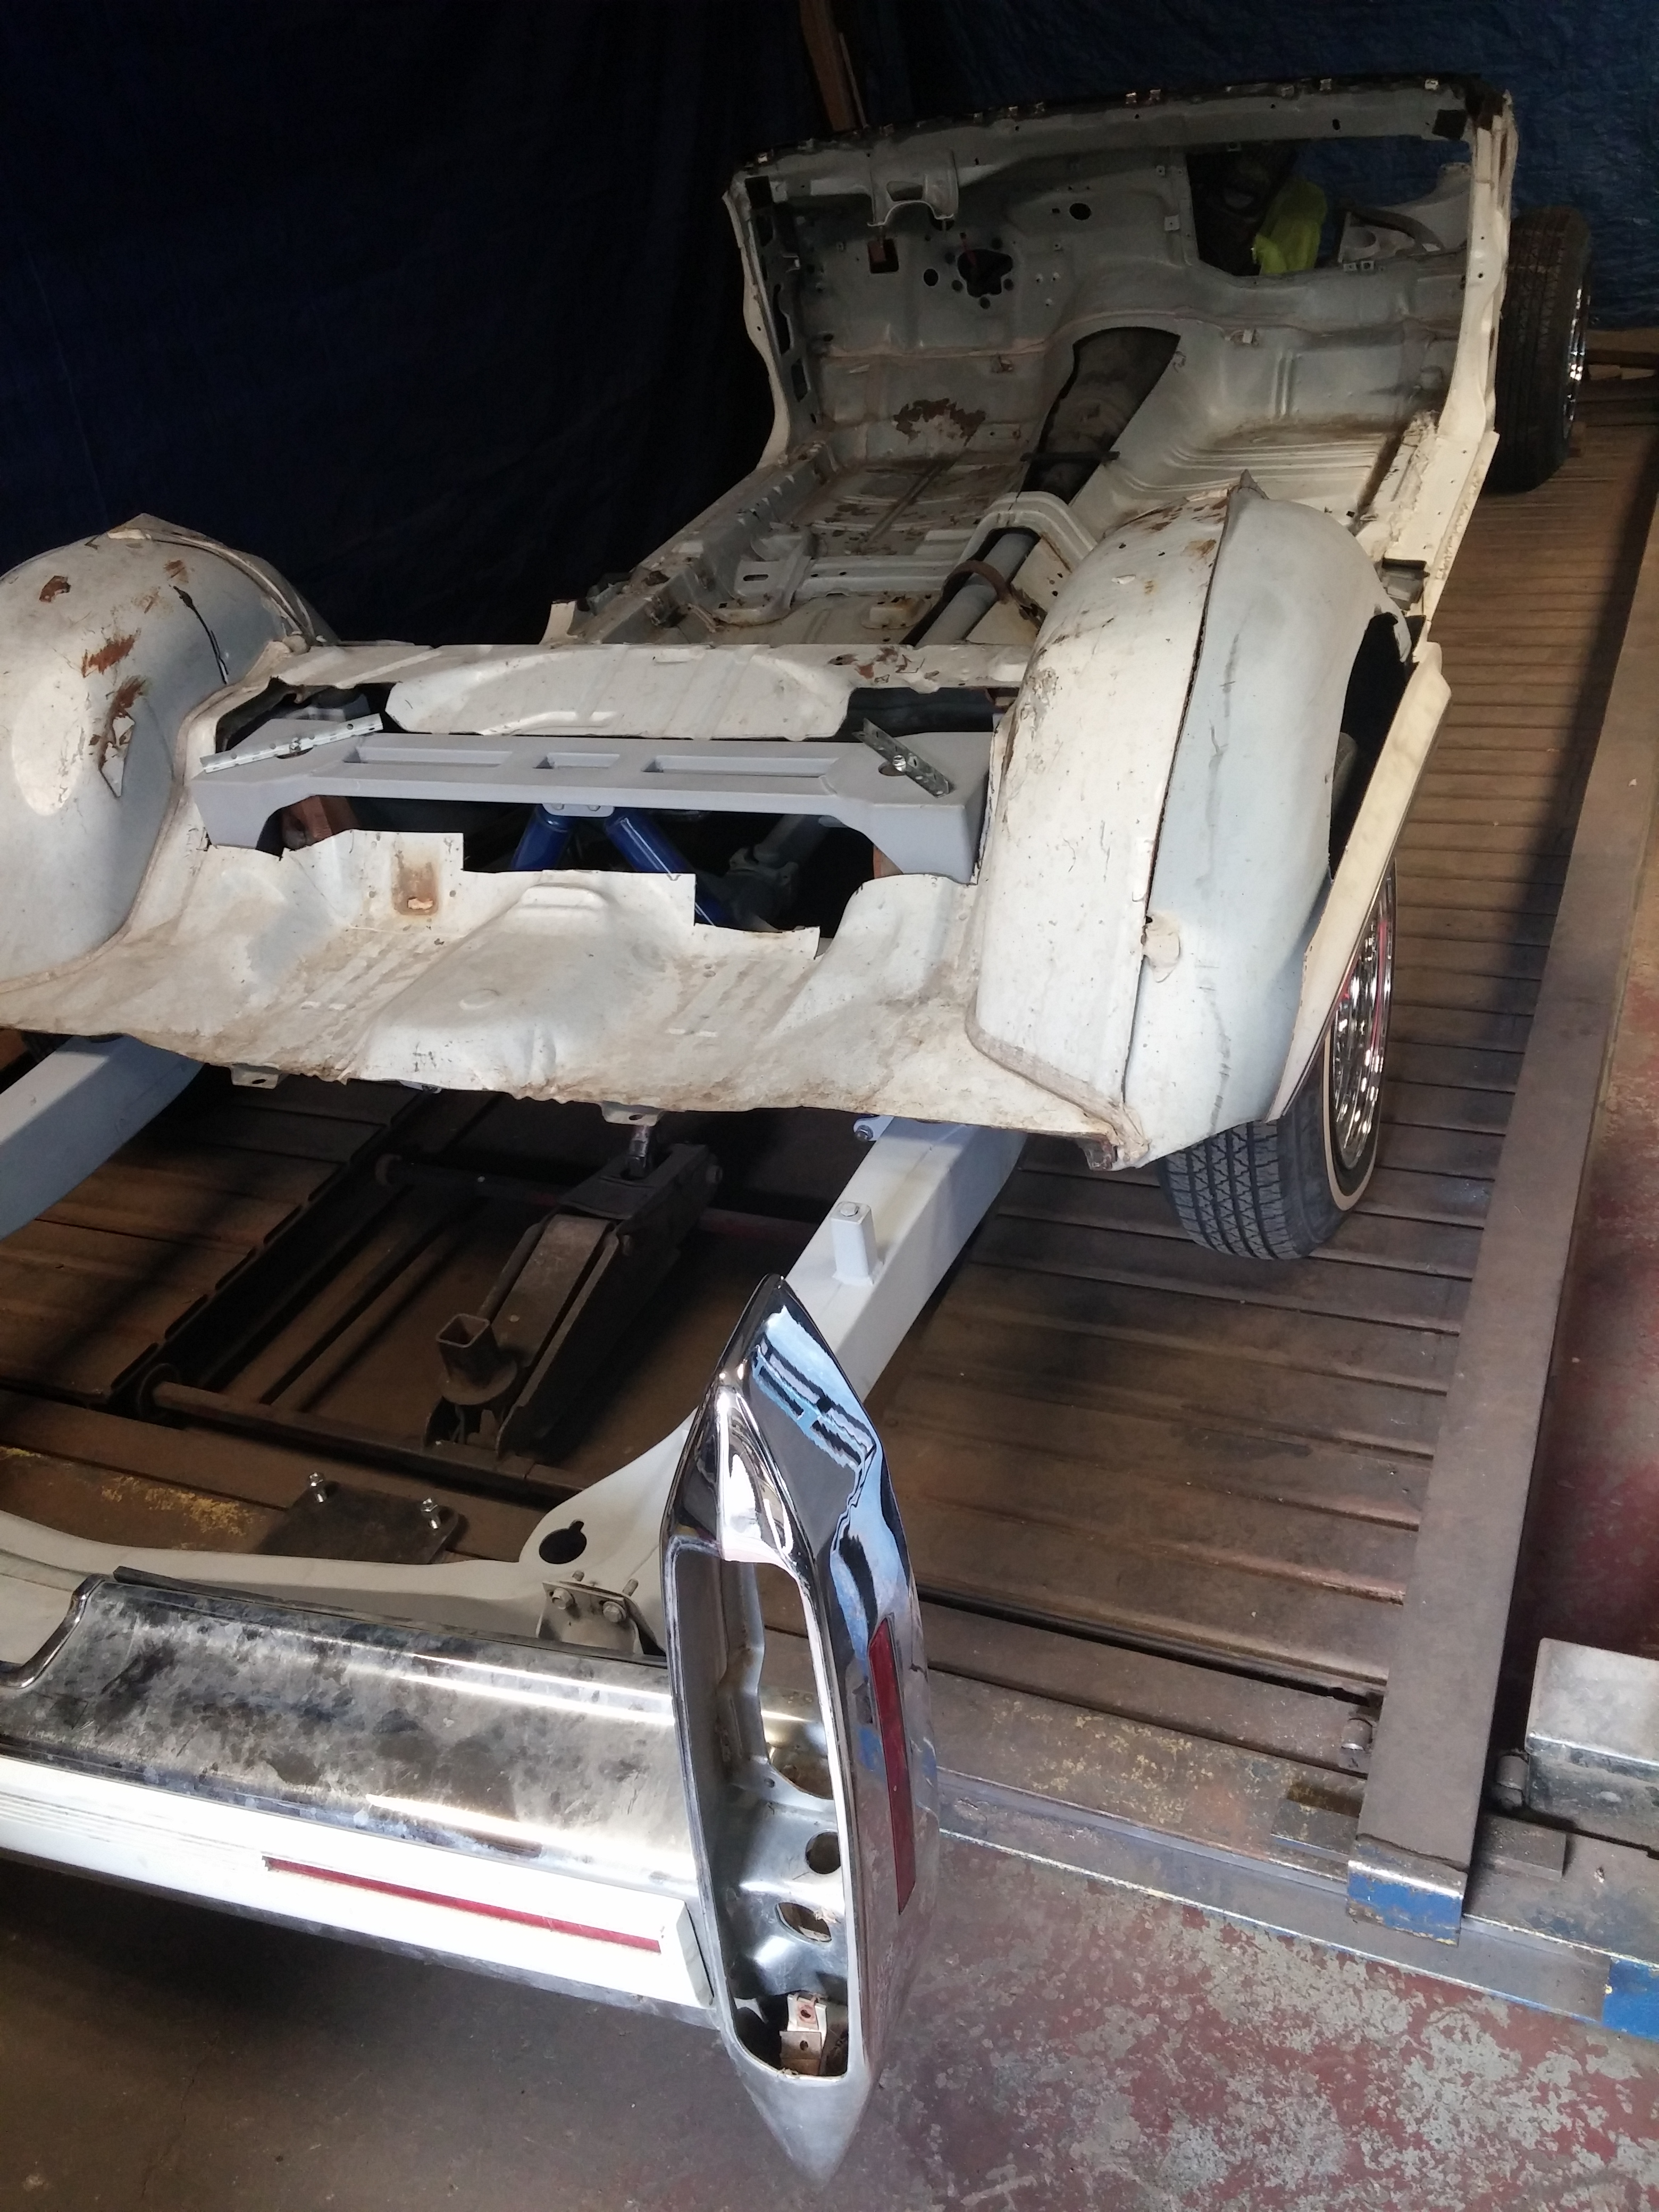
The Cadillac was dropped off with a donor floor pan on it, many mock up parts and a simple primed frame. This allowed a clean slate to allow fitting this 2″ tubing as tight as possible to the underside of the car and snaking it through the rear axle area. First off we unload all our materials to begin!

Second was unloading the car off the flat deck and onto the hoist. We had to get a bit creative as the rolling chassis didn’t have any springs in place and only had wood blocks to keep the wheels from rubbing and the rails from completely dropping to the floor.
Fabrication
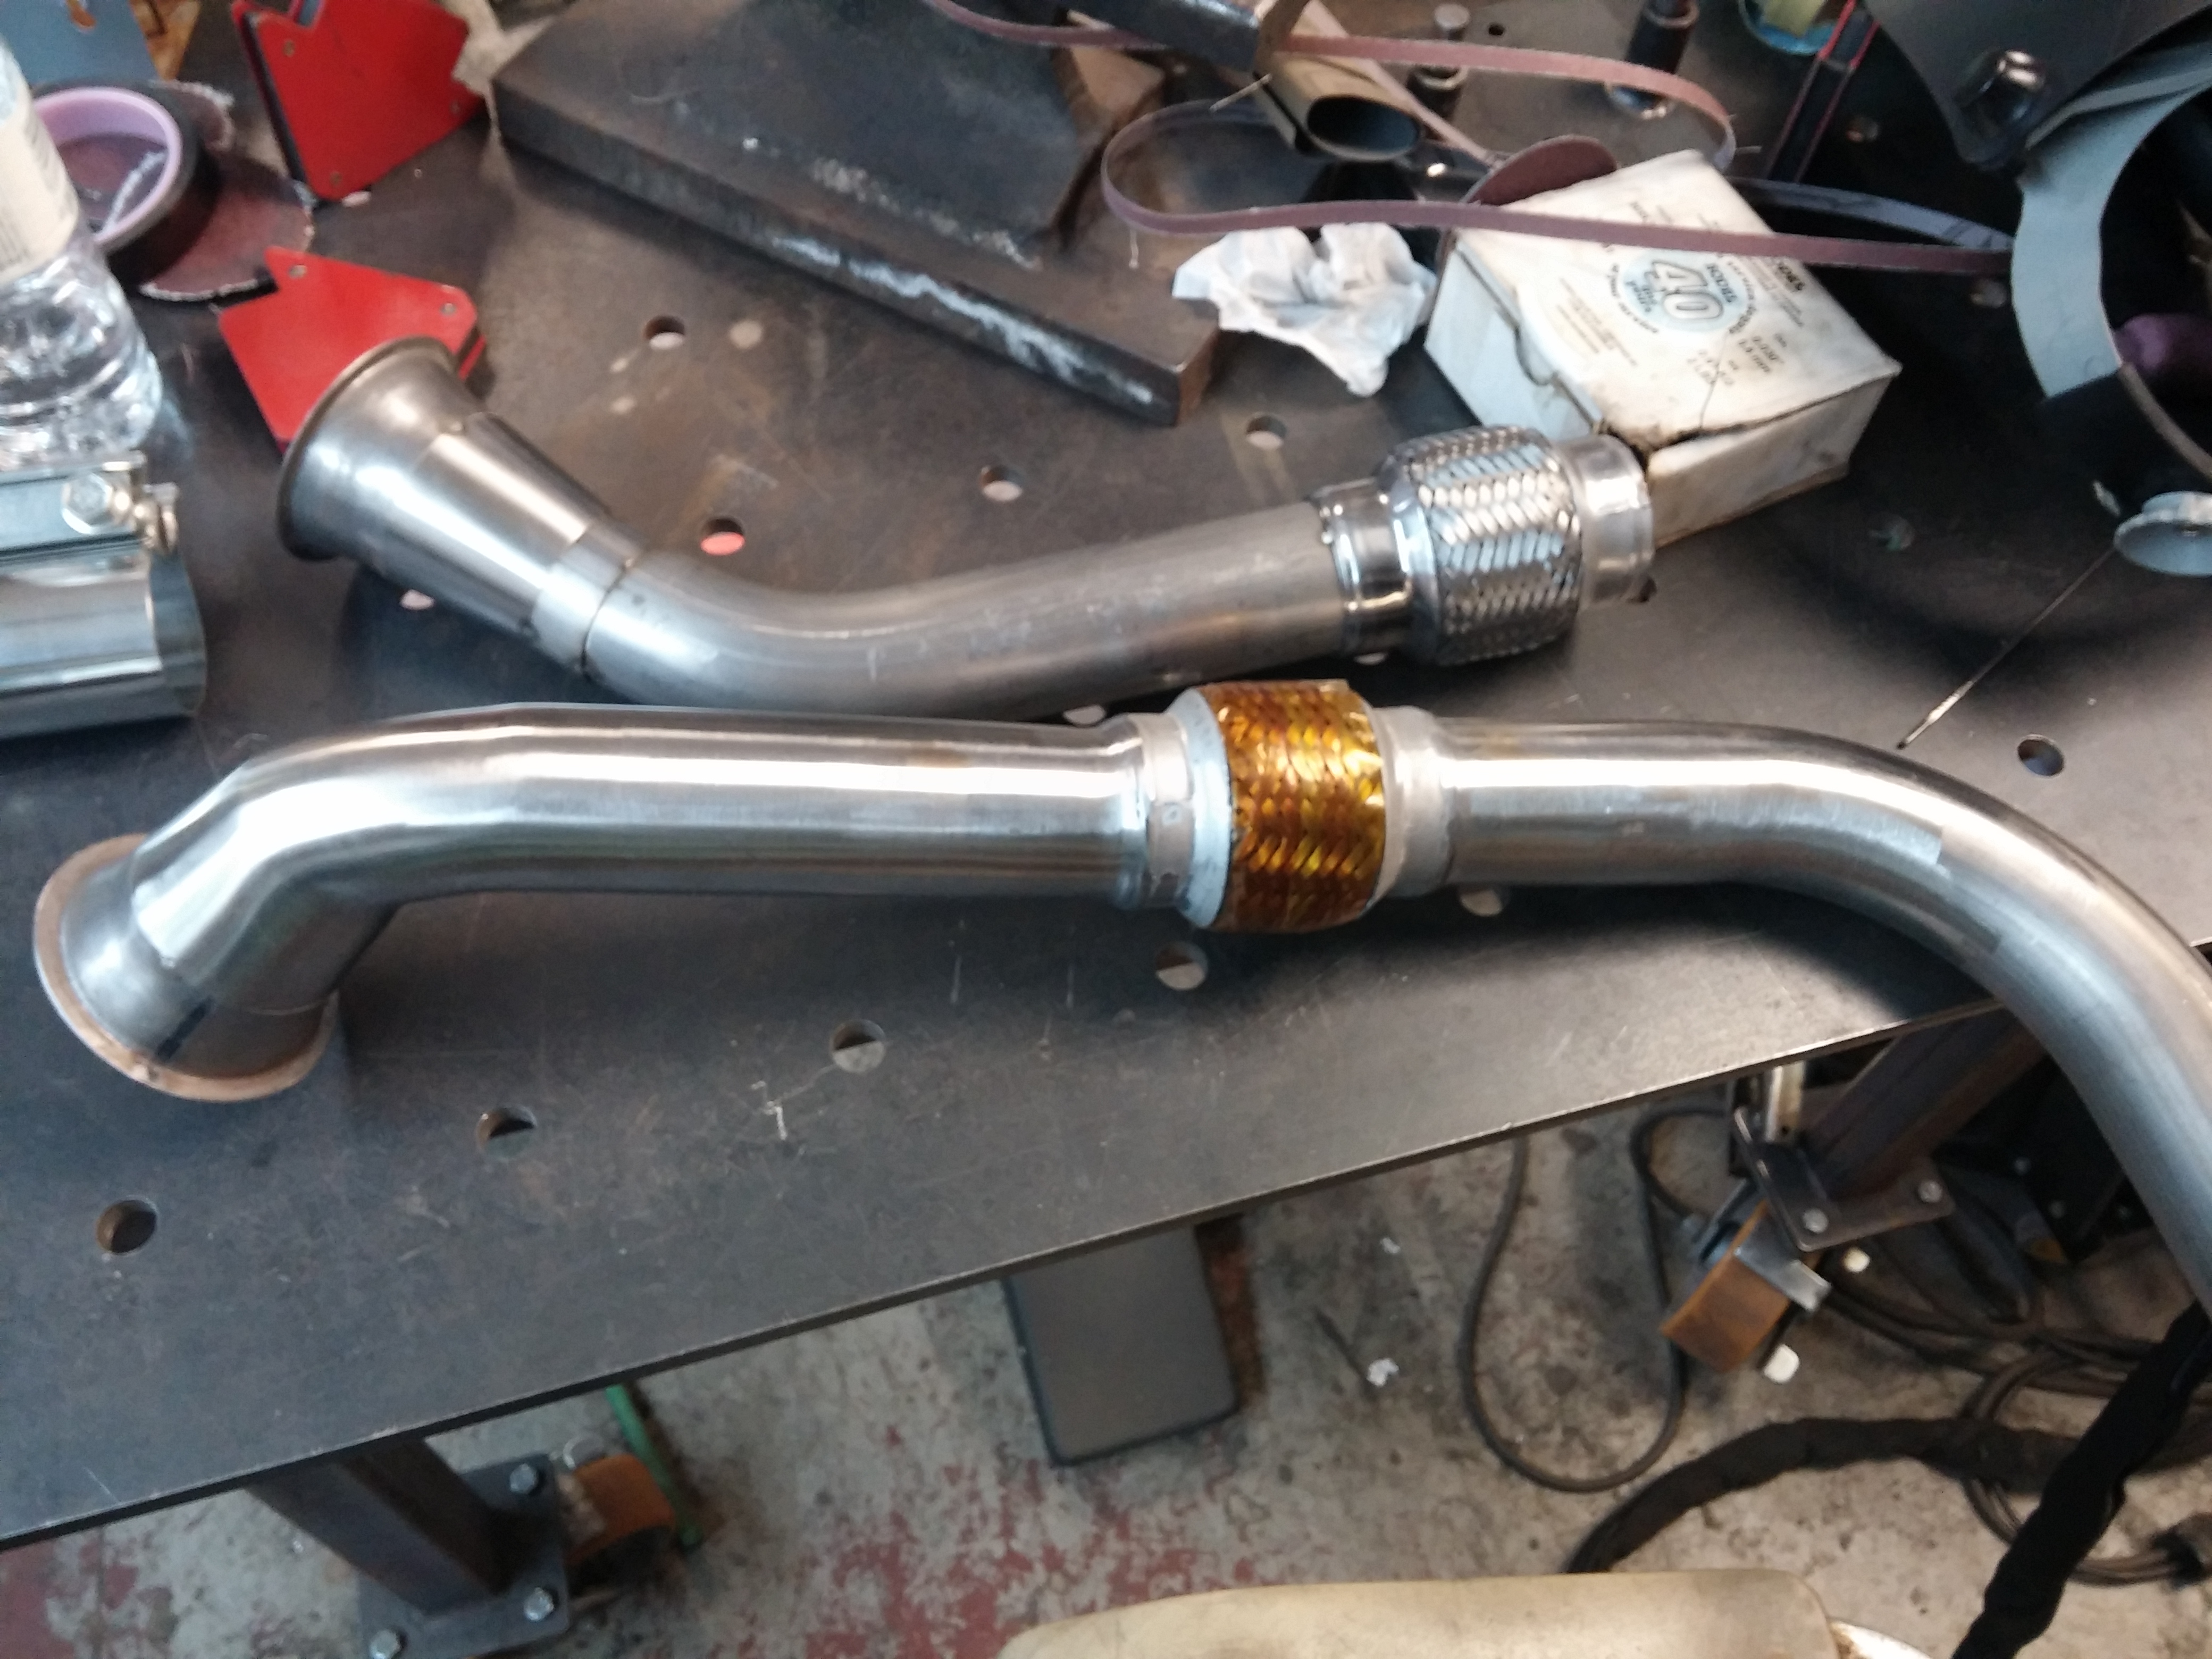
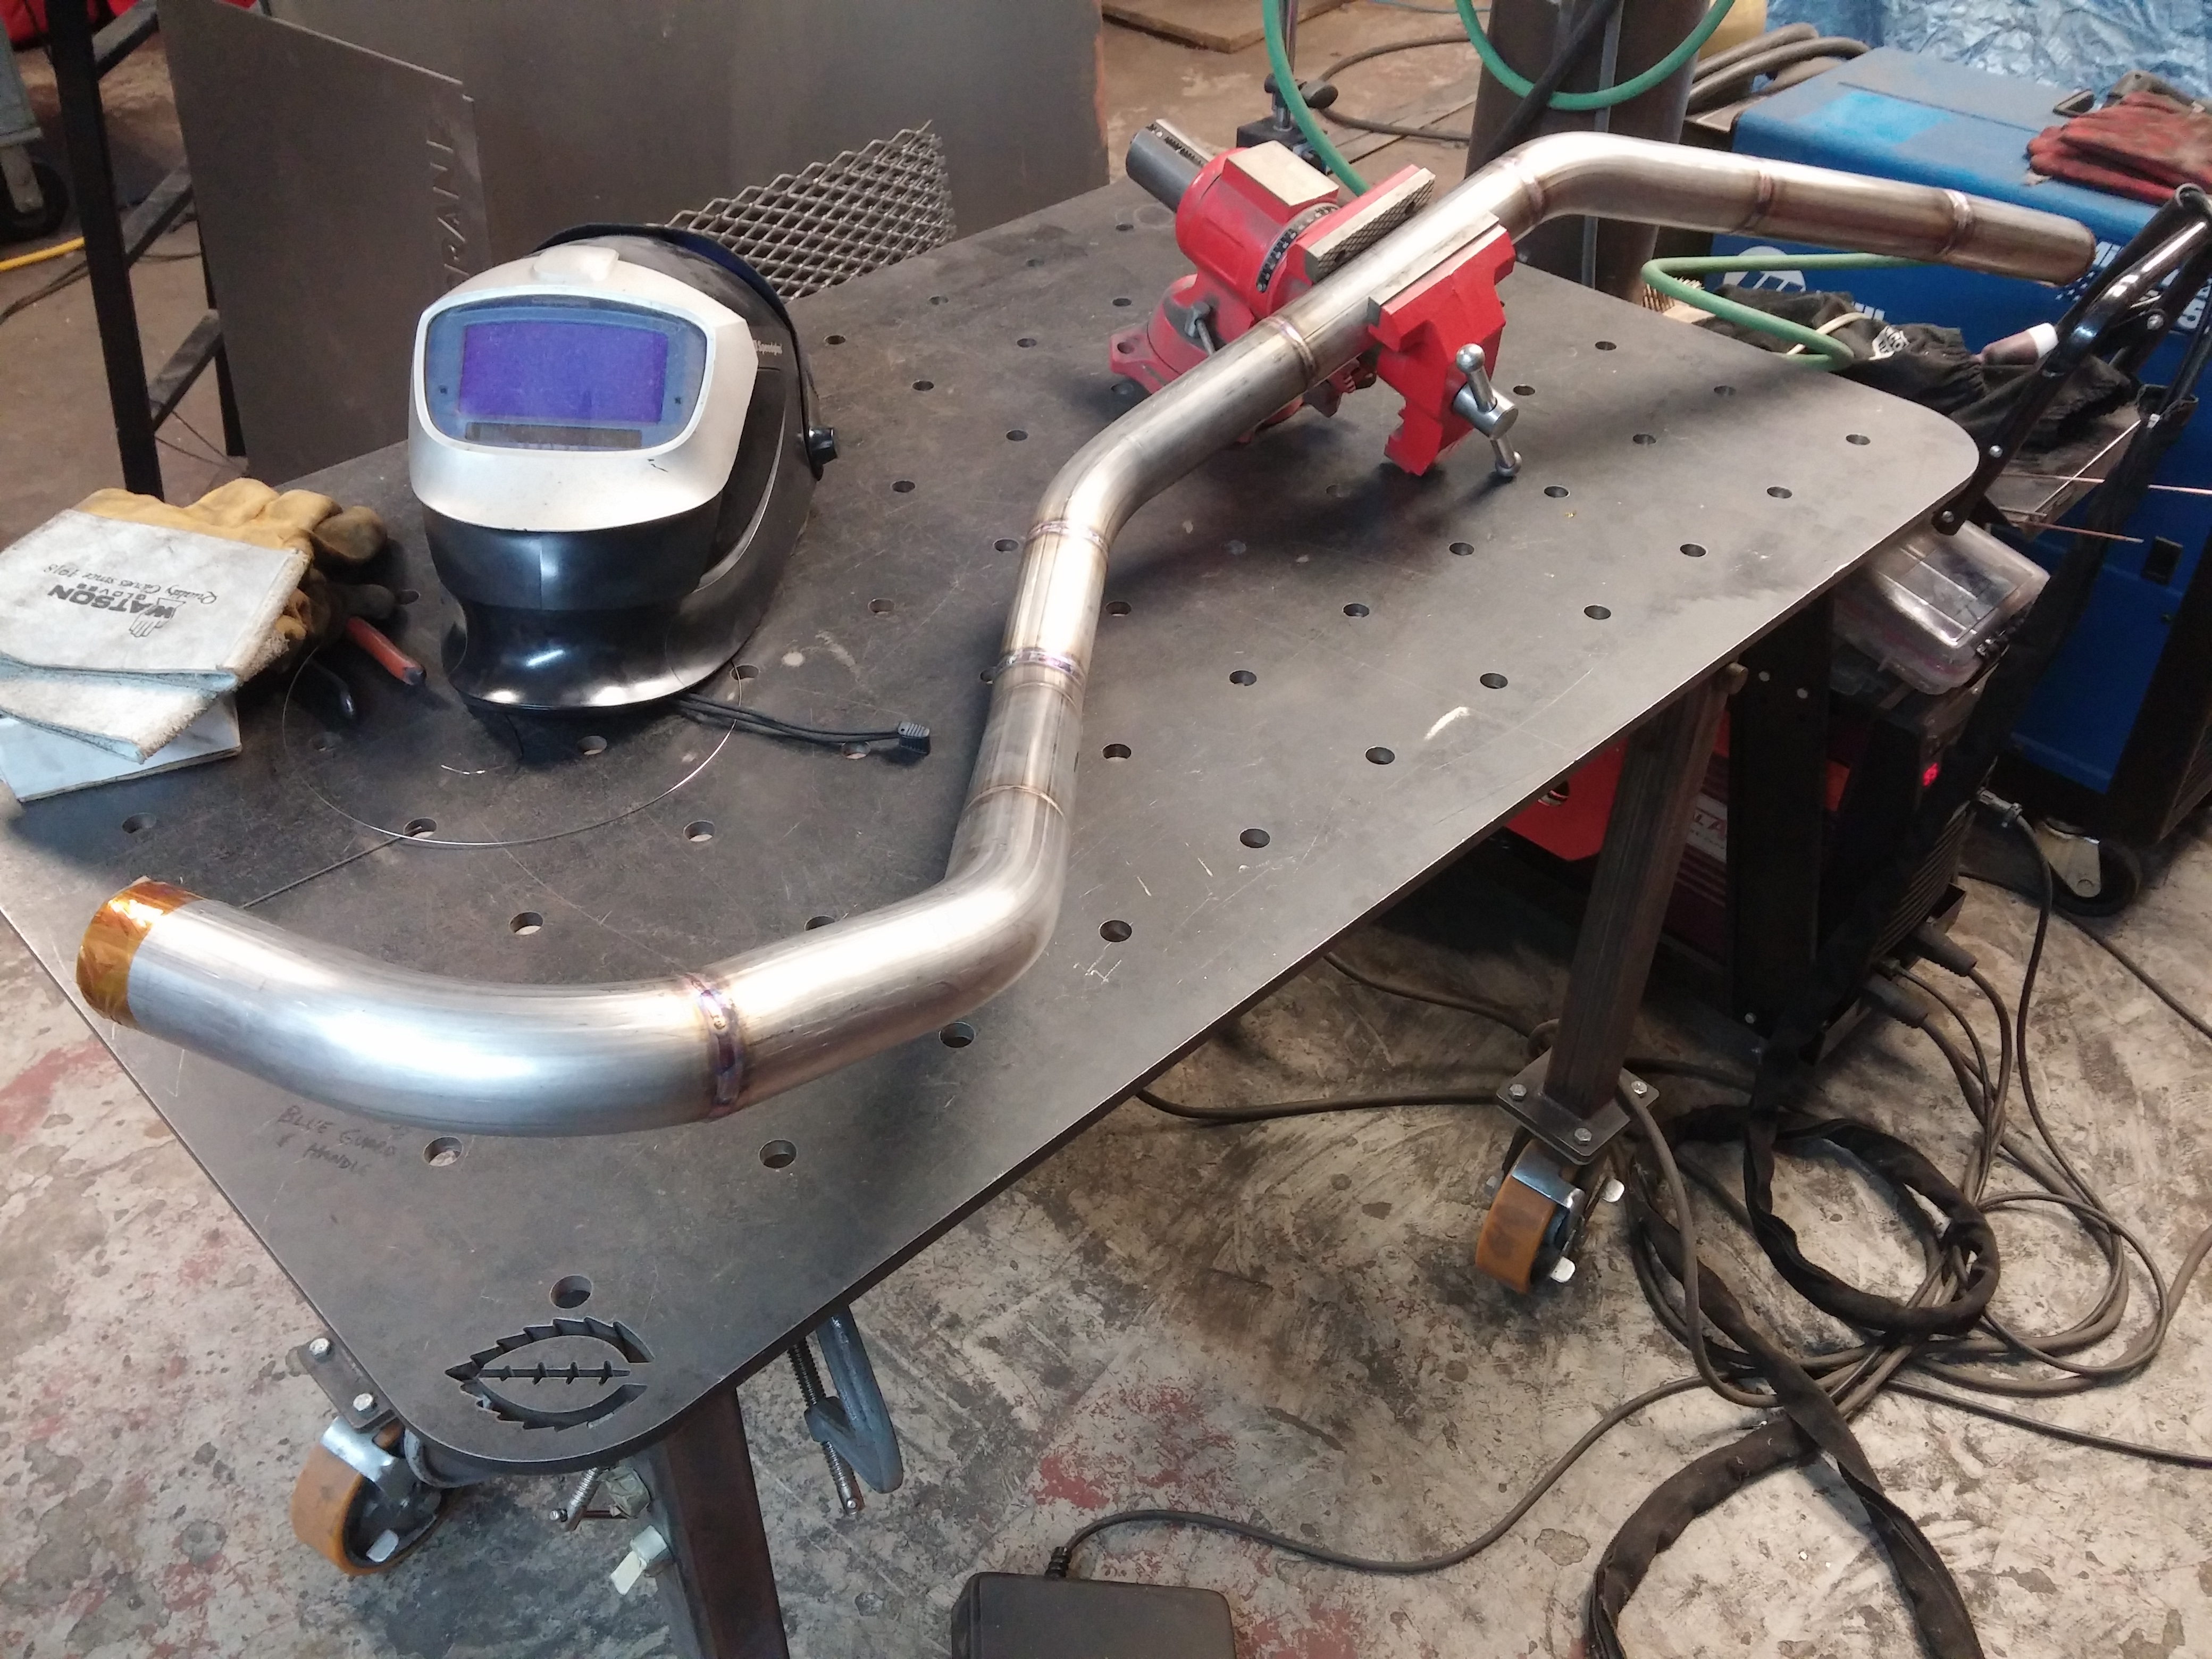
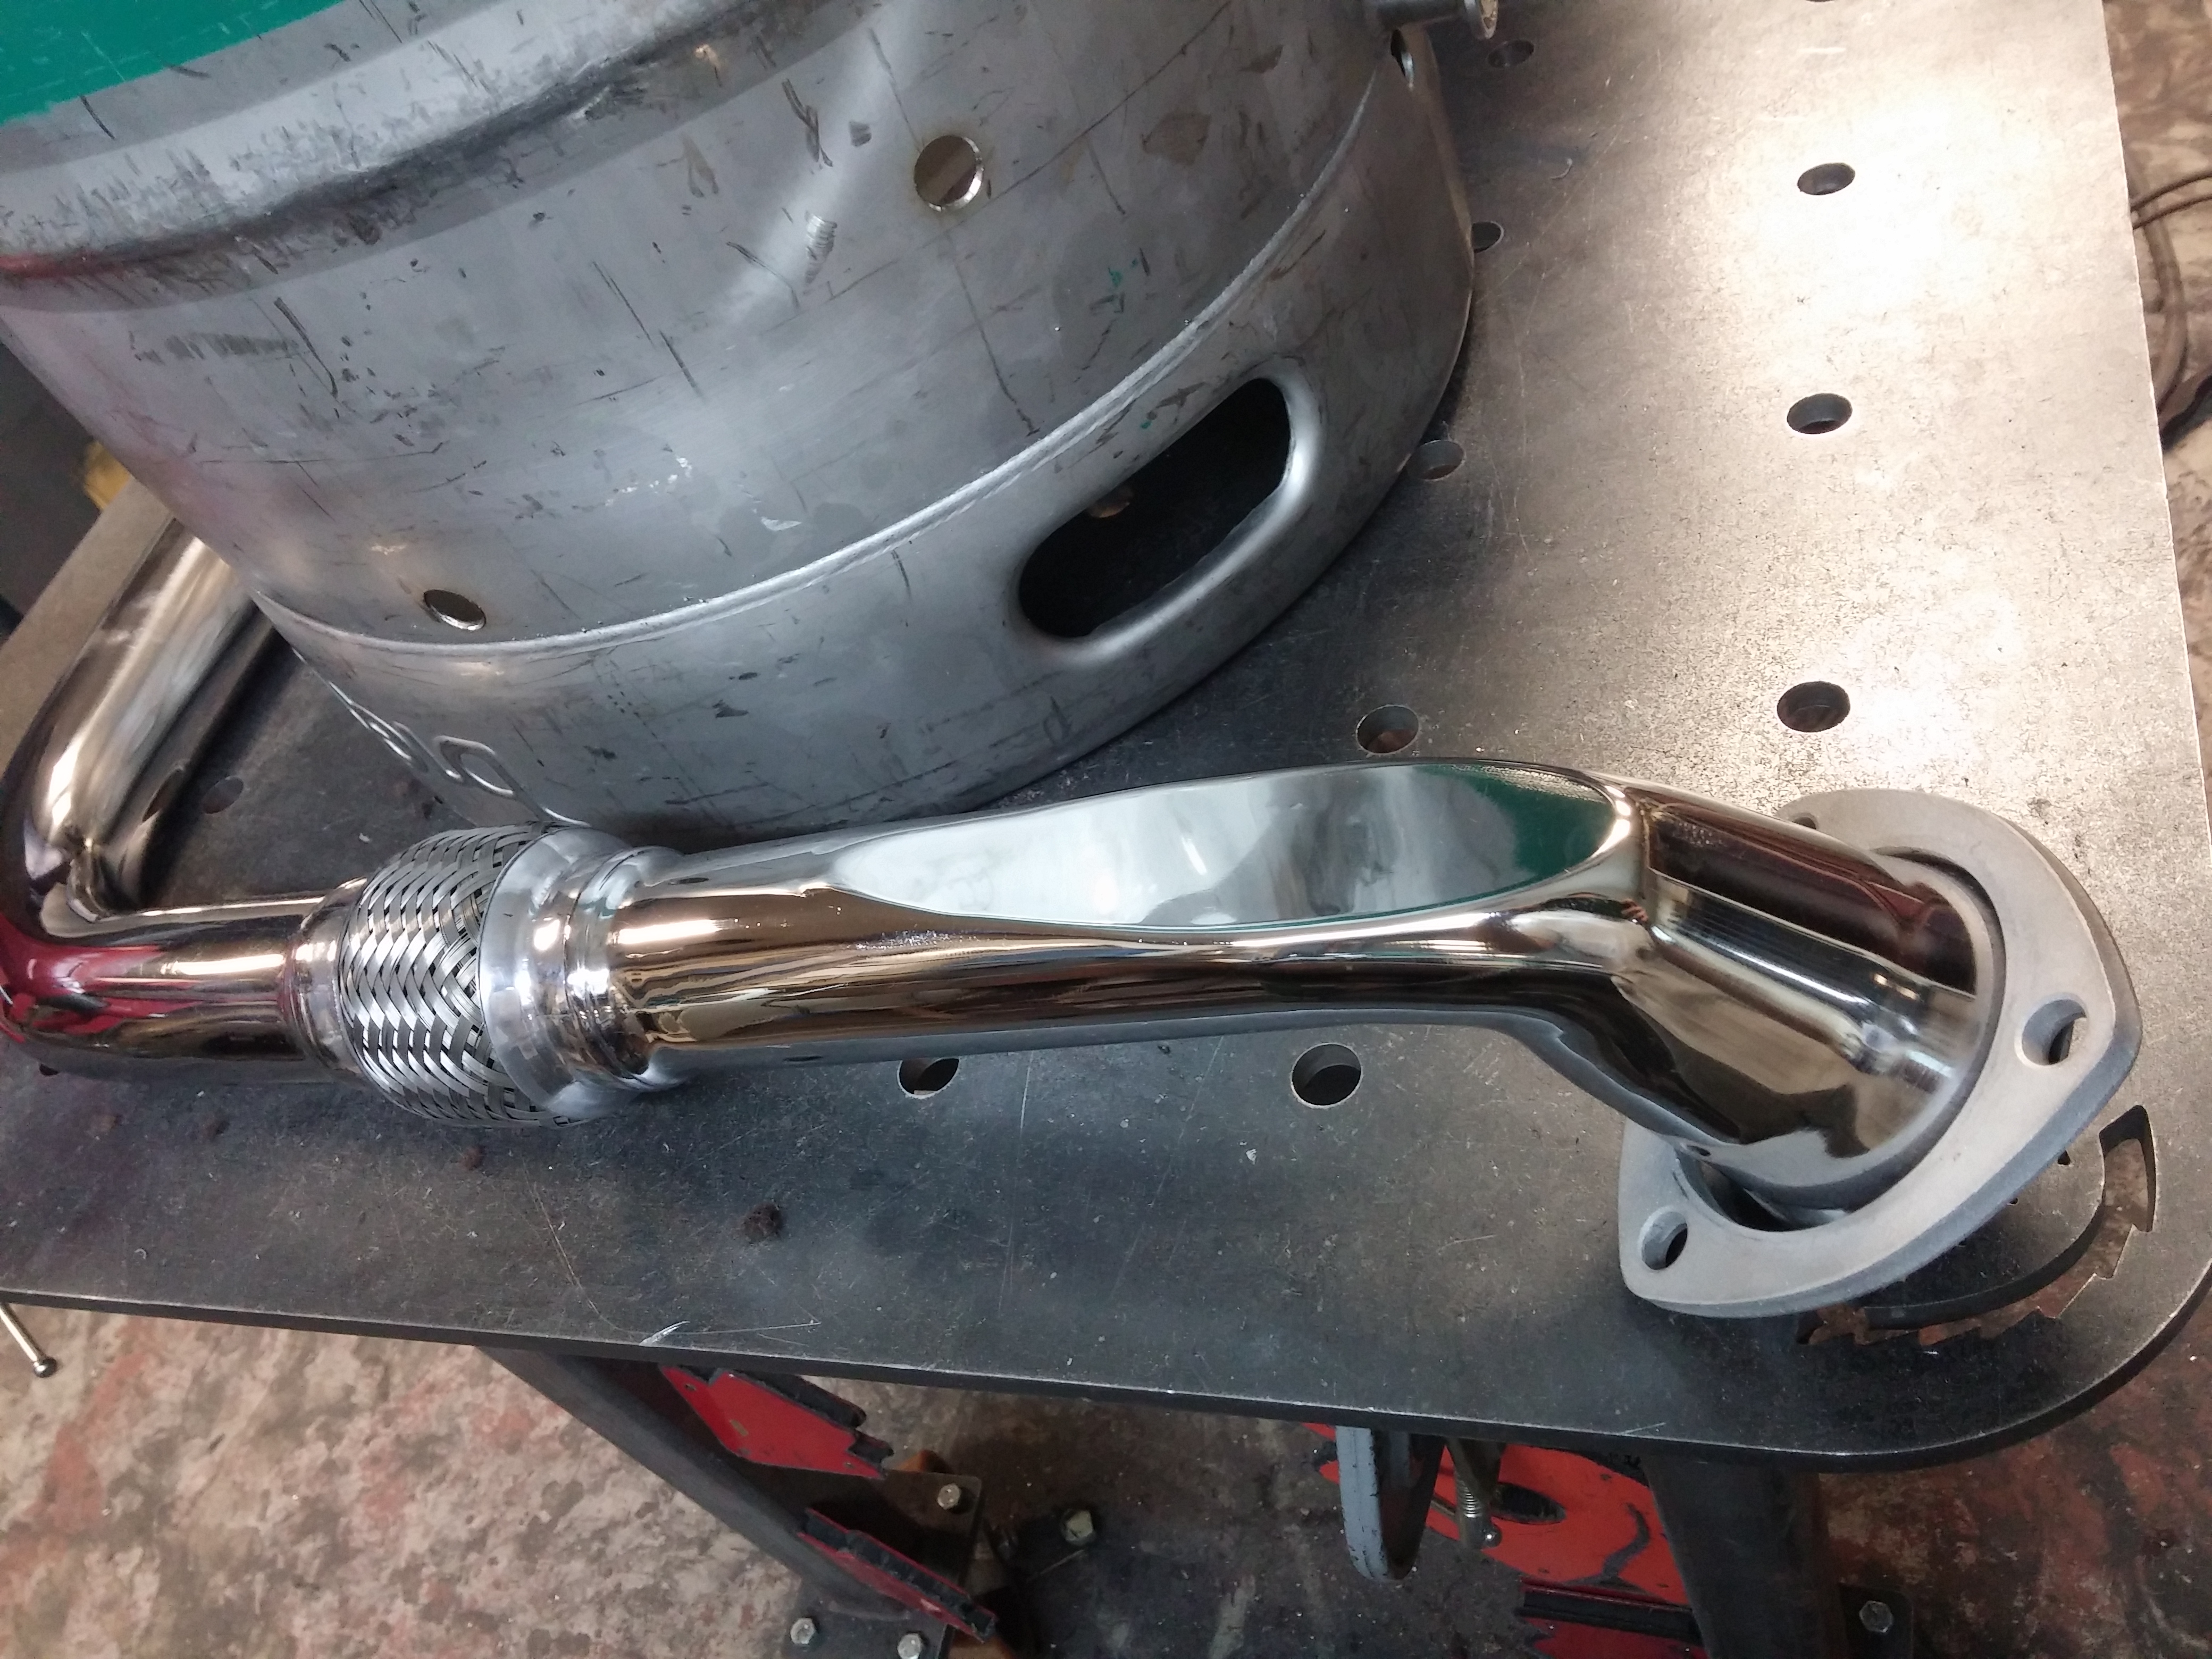
This system was built in four separate sections to allow for easy assembly/disassembly. Below are a few photos of the hours of mock up, tacking, welding and blending process.
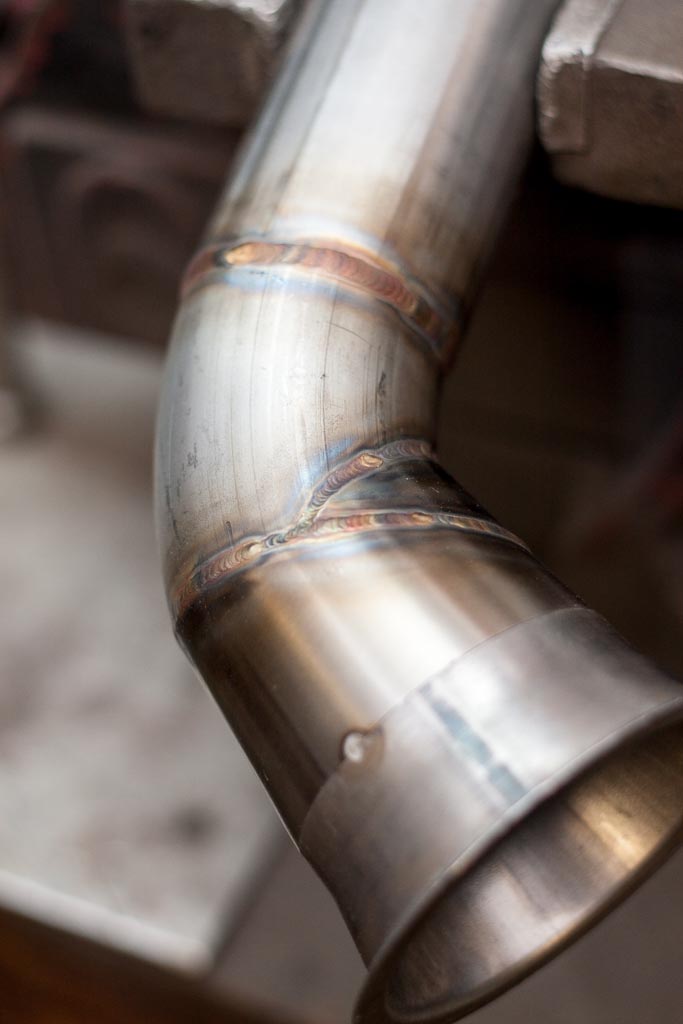
Take special note at the Kapton tape on the flex section. This is for two purposes, one to protect the woven stainless steel from arcing while tacking/welding and also eliminating snags and potential damage during sanding/polishing.


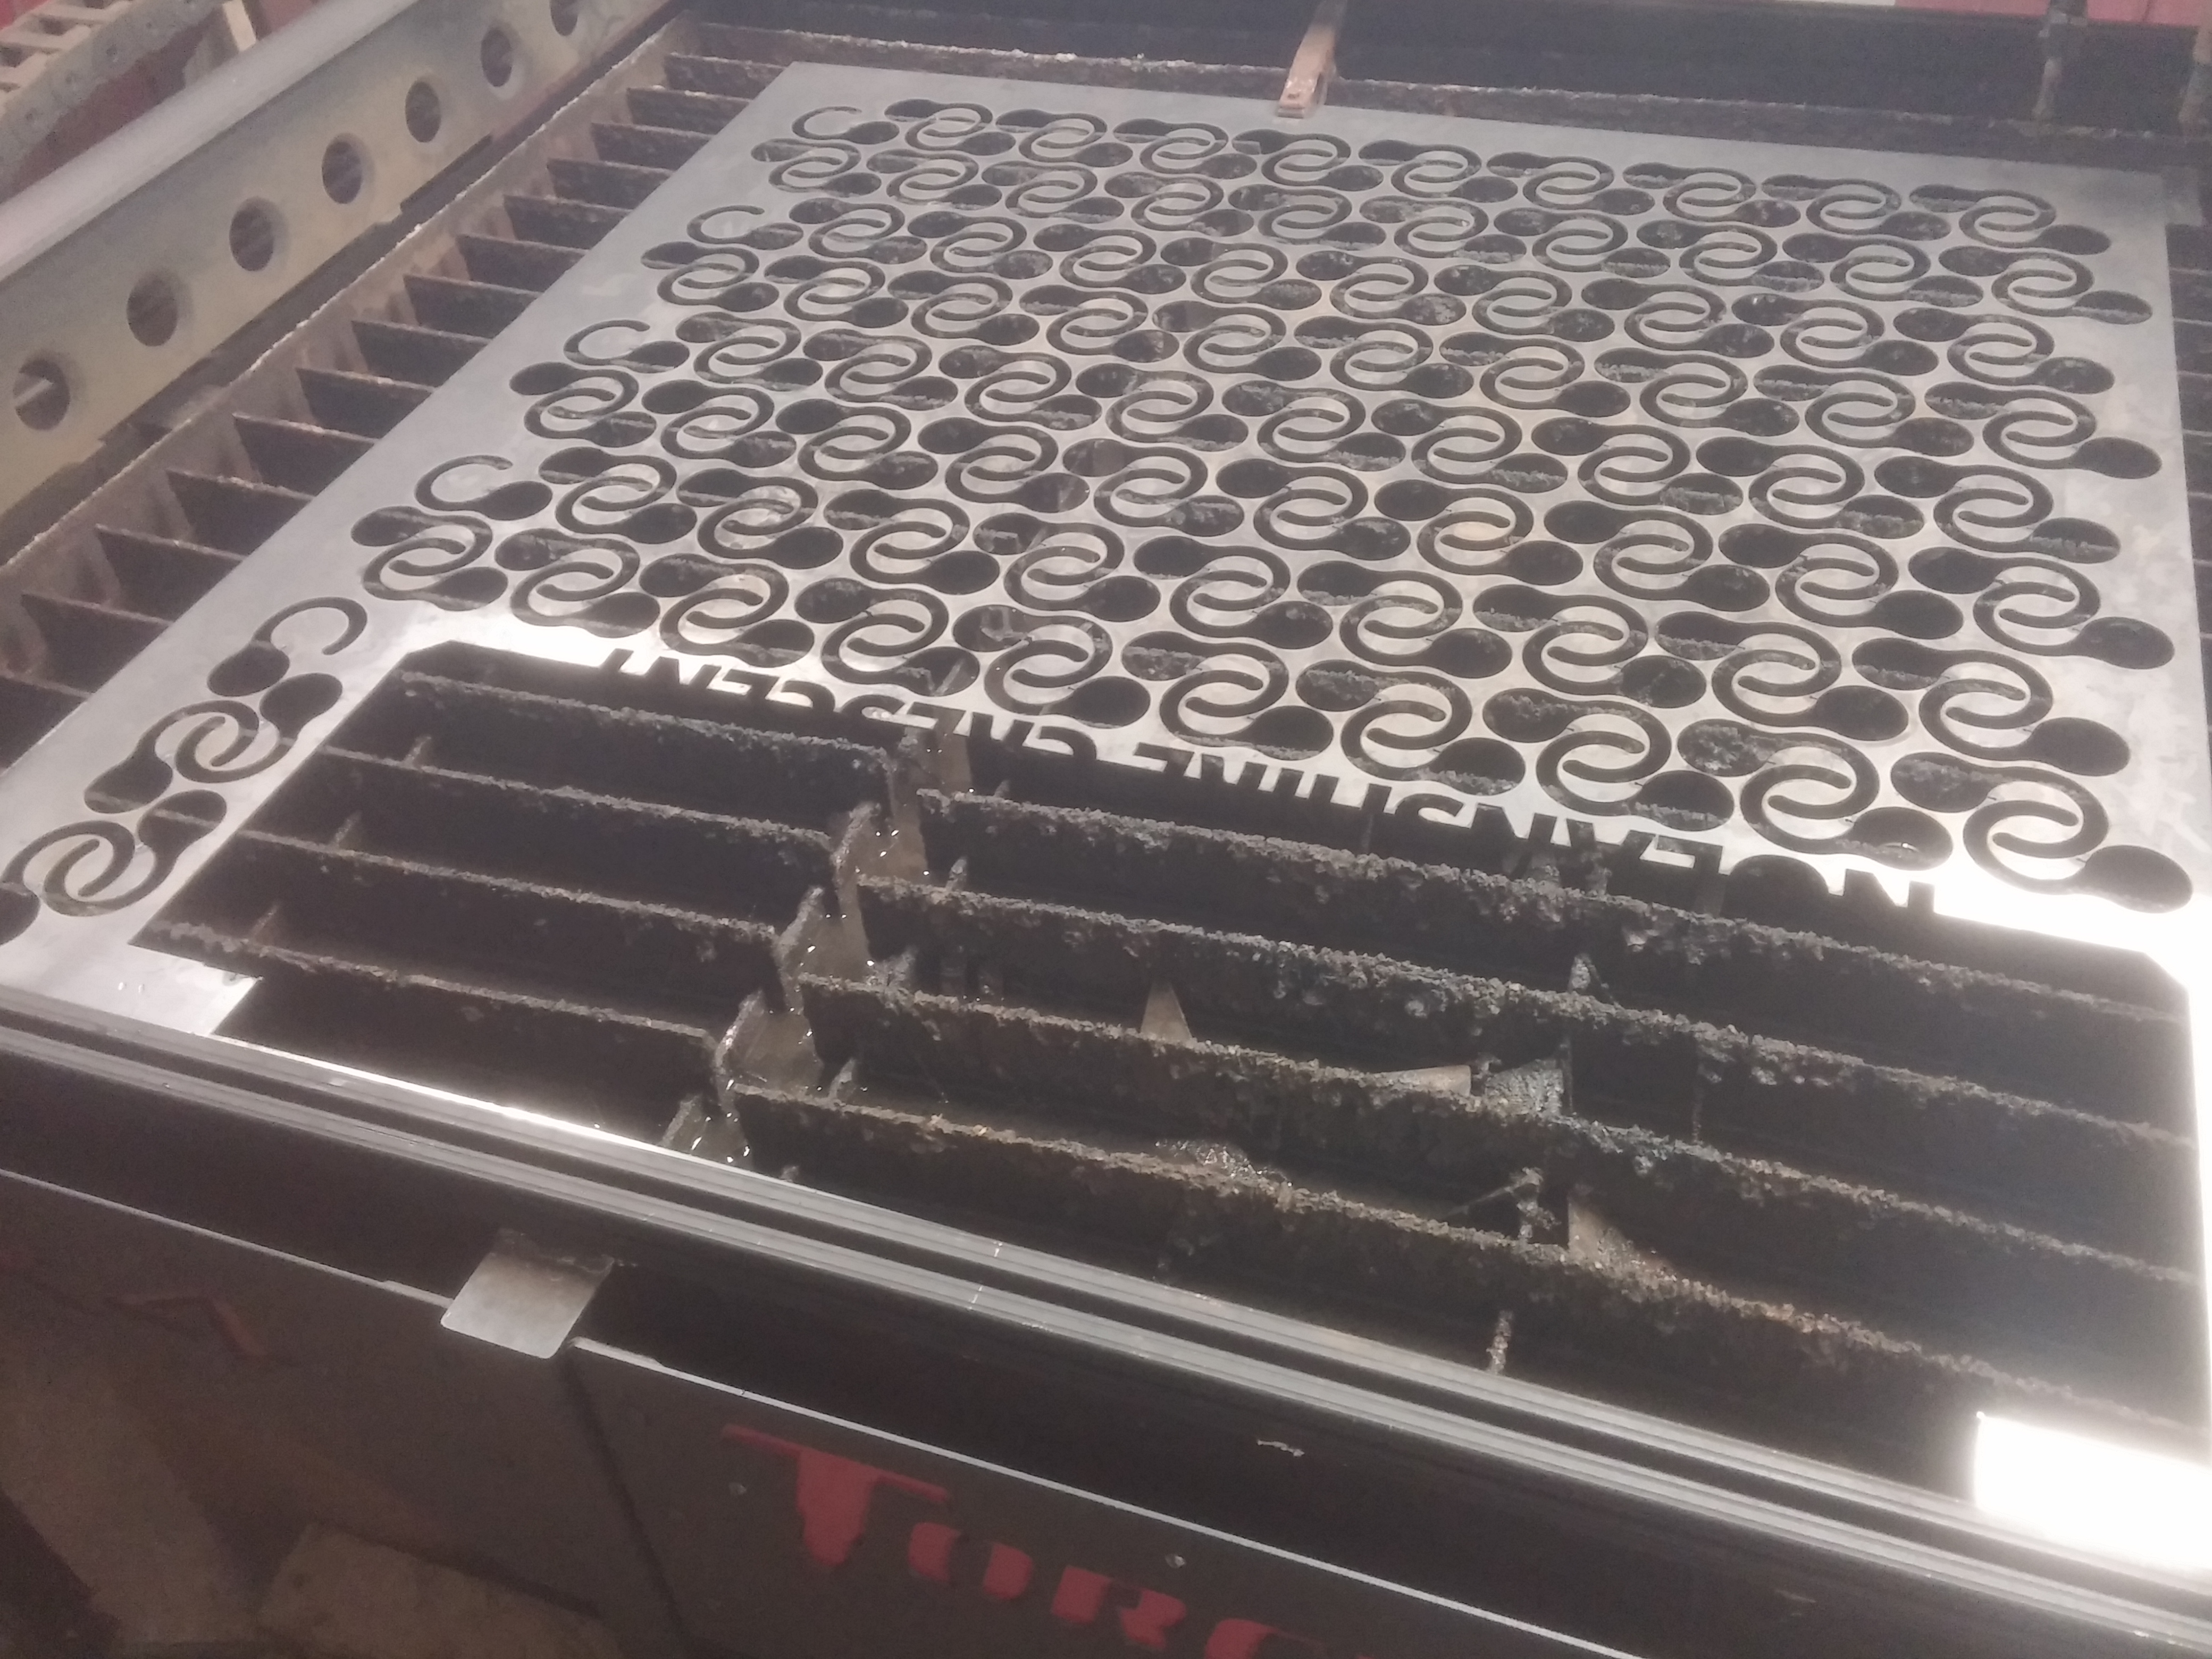
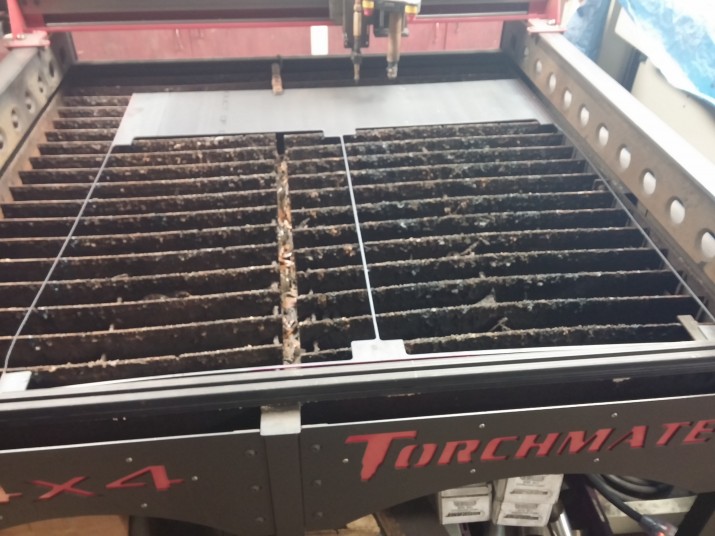
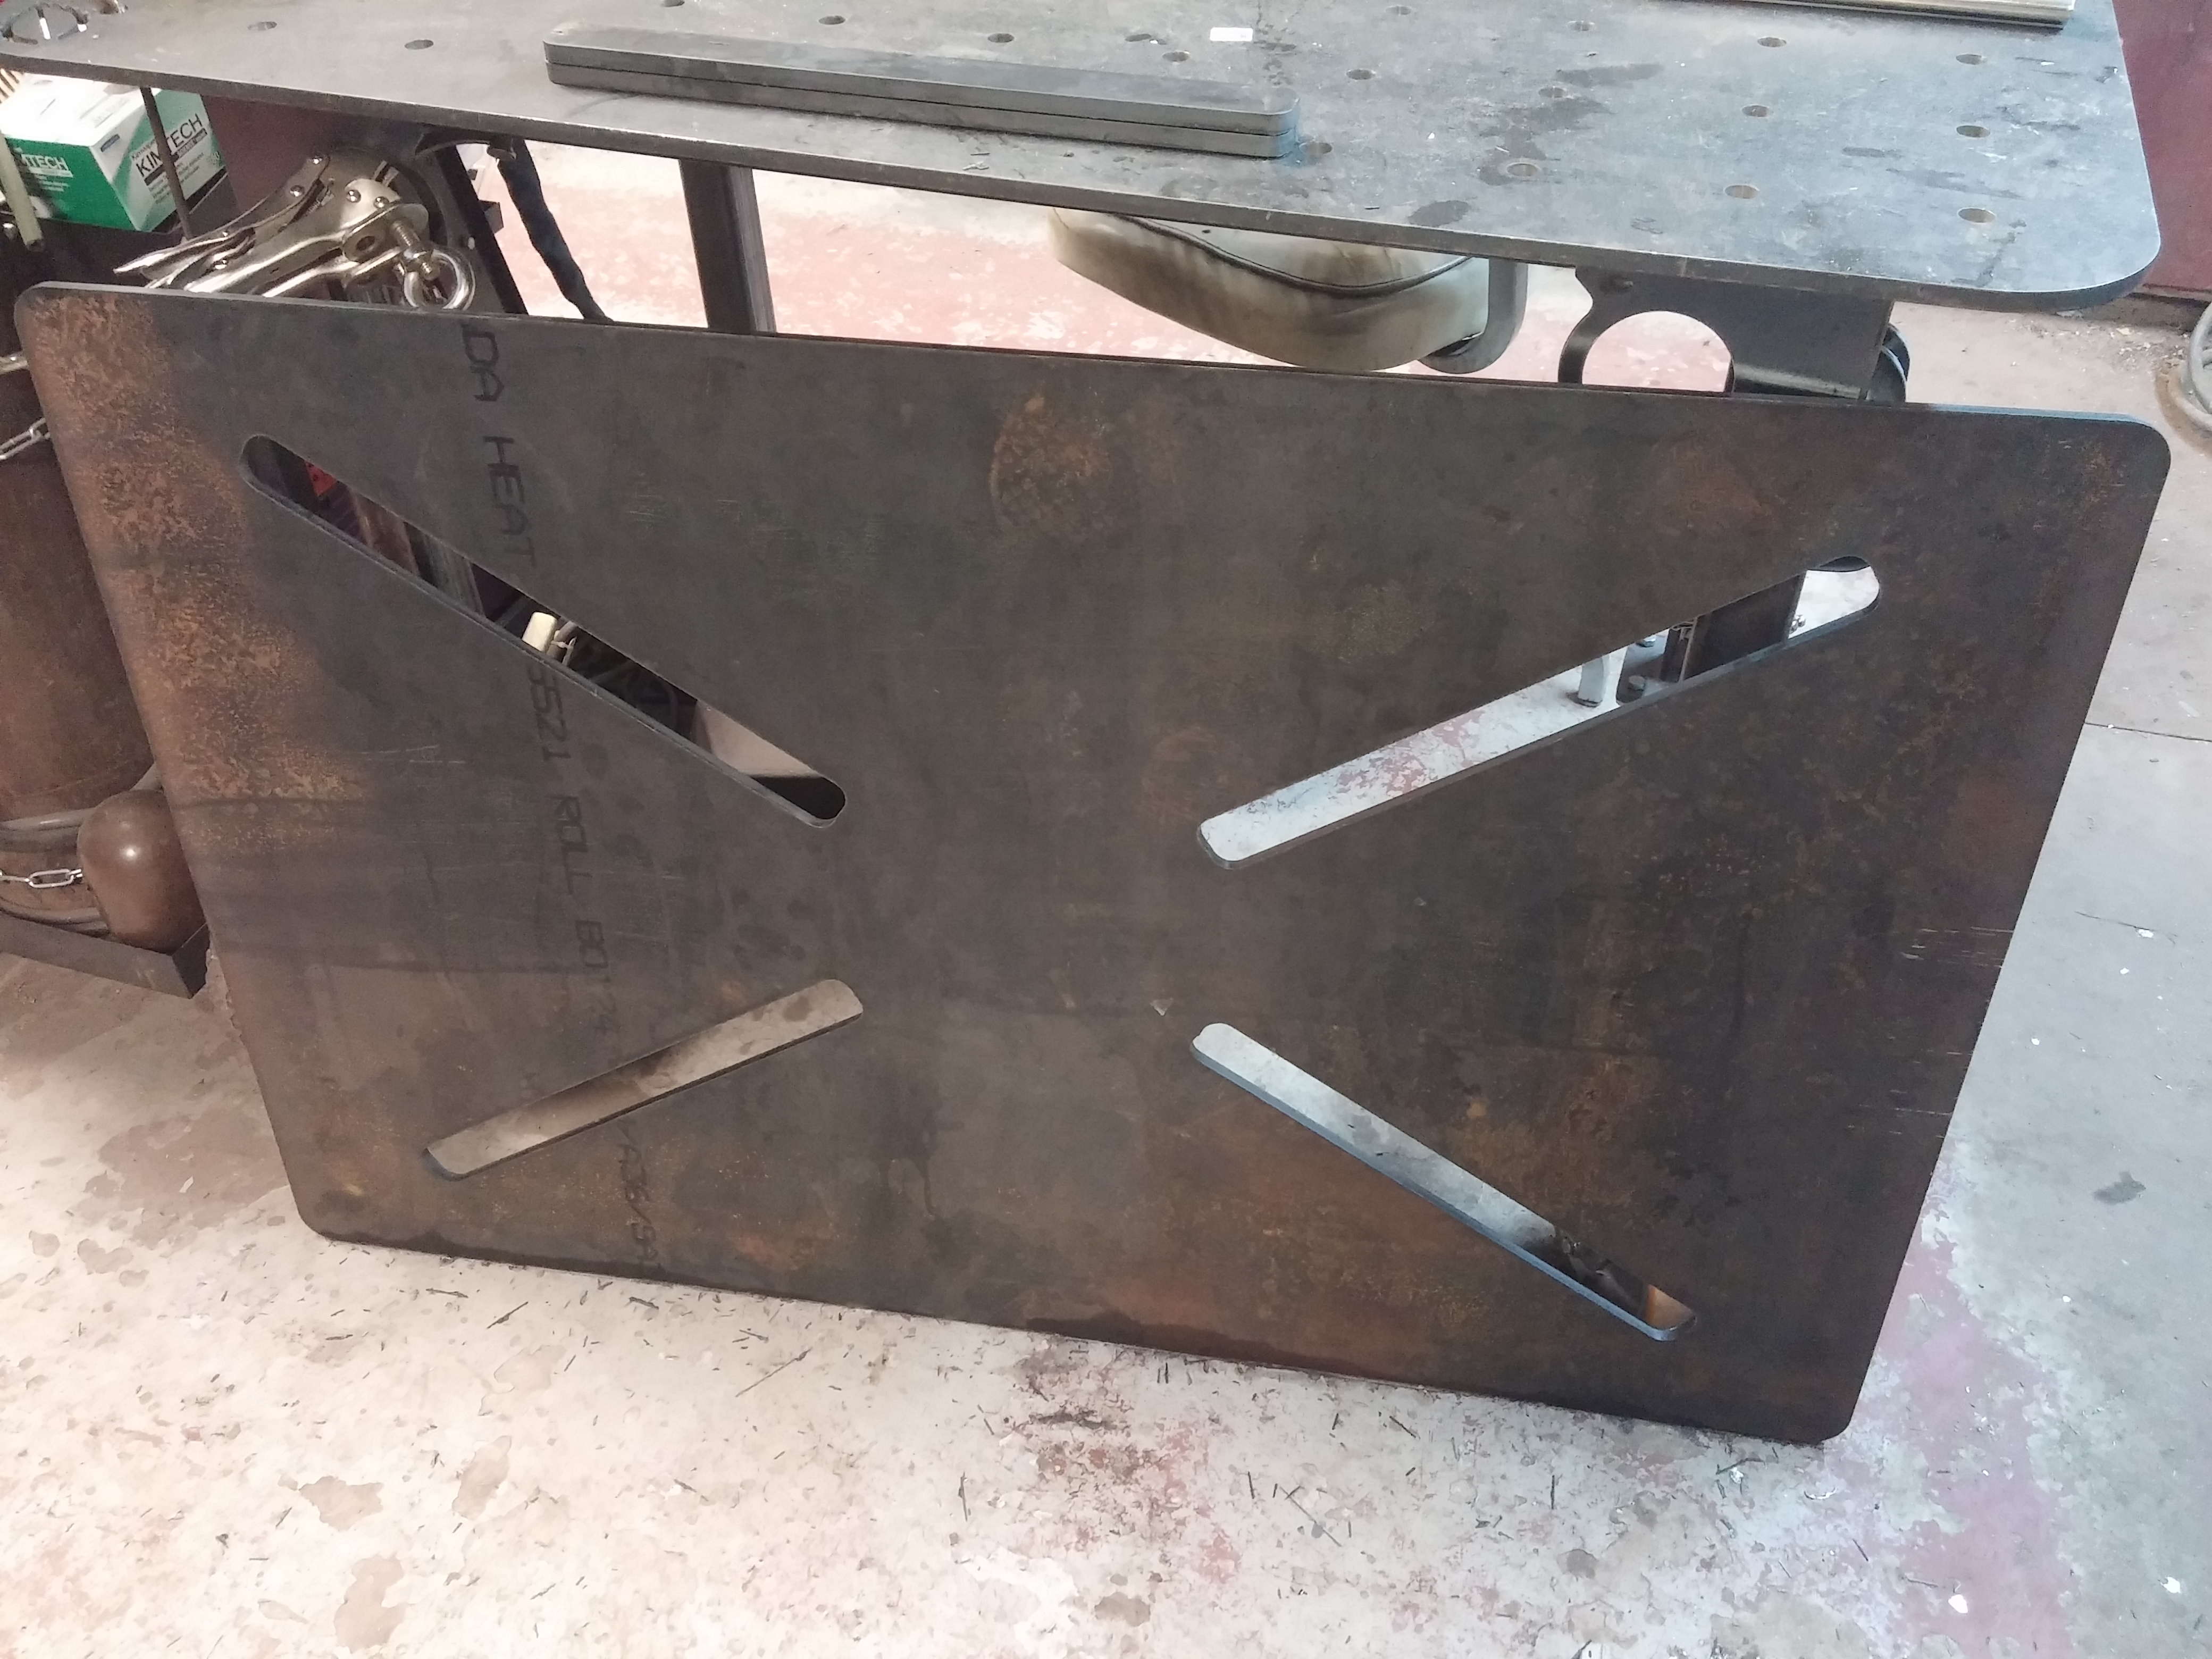
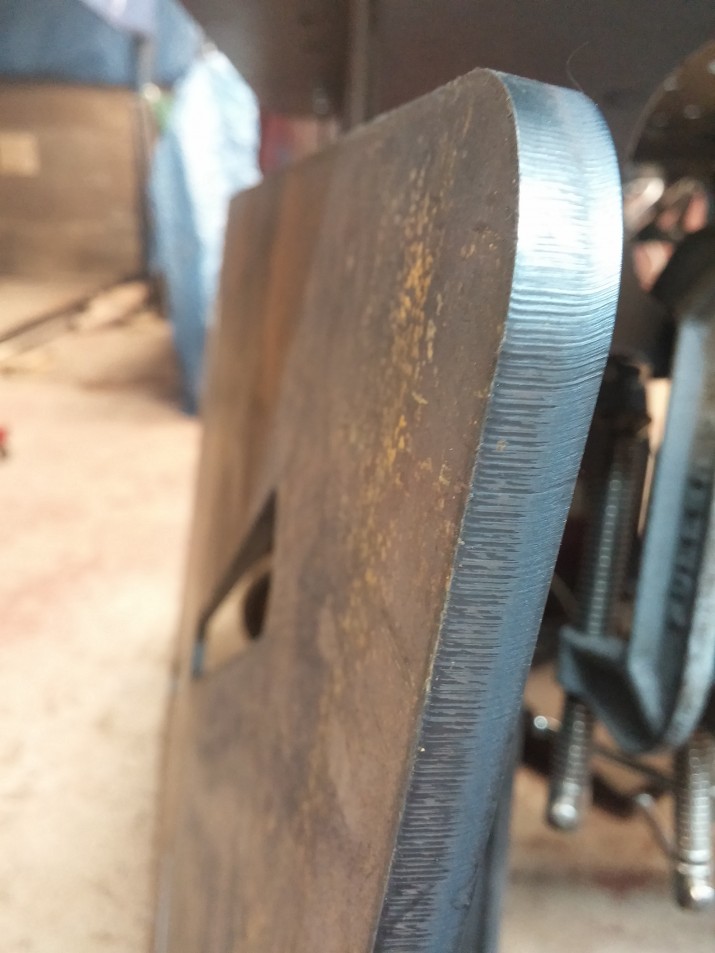
Since the exhaust is tucked so tight there has to be minimal movement, one mounting location the exhaust will be hard mounted to is this bushing location. First a cardboard template is made and then it is CNC cut on the plasma table, and then welded on. With the CNC cutting the hole is slotted to allow for some wiggle room during installation.


Note the existing hole right just above the rear exhaust tip. That hole was already existing, instead of drilling new holes along the frame that hole was used (along with a necessary one drilled adjacent to it) to allow for securing the rear of the exhaust.

Prepping the rear section for final welding. Kapton tape used to ensure no air is brought inside the tubing during purging, and also to reduce the waste of argon. Kaptop tape has a decent temperature rating, so if it’s close to another weld and gets a bit warm, when it’s removed it doesn’t leave any adhesive behind. This saves time having to clean up adhesive residue and just allows us to get on with welding right away.

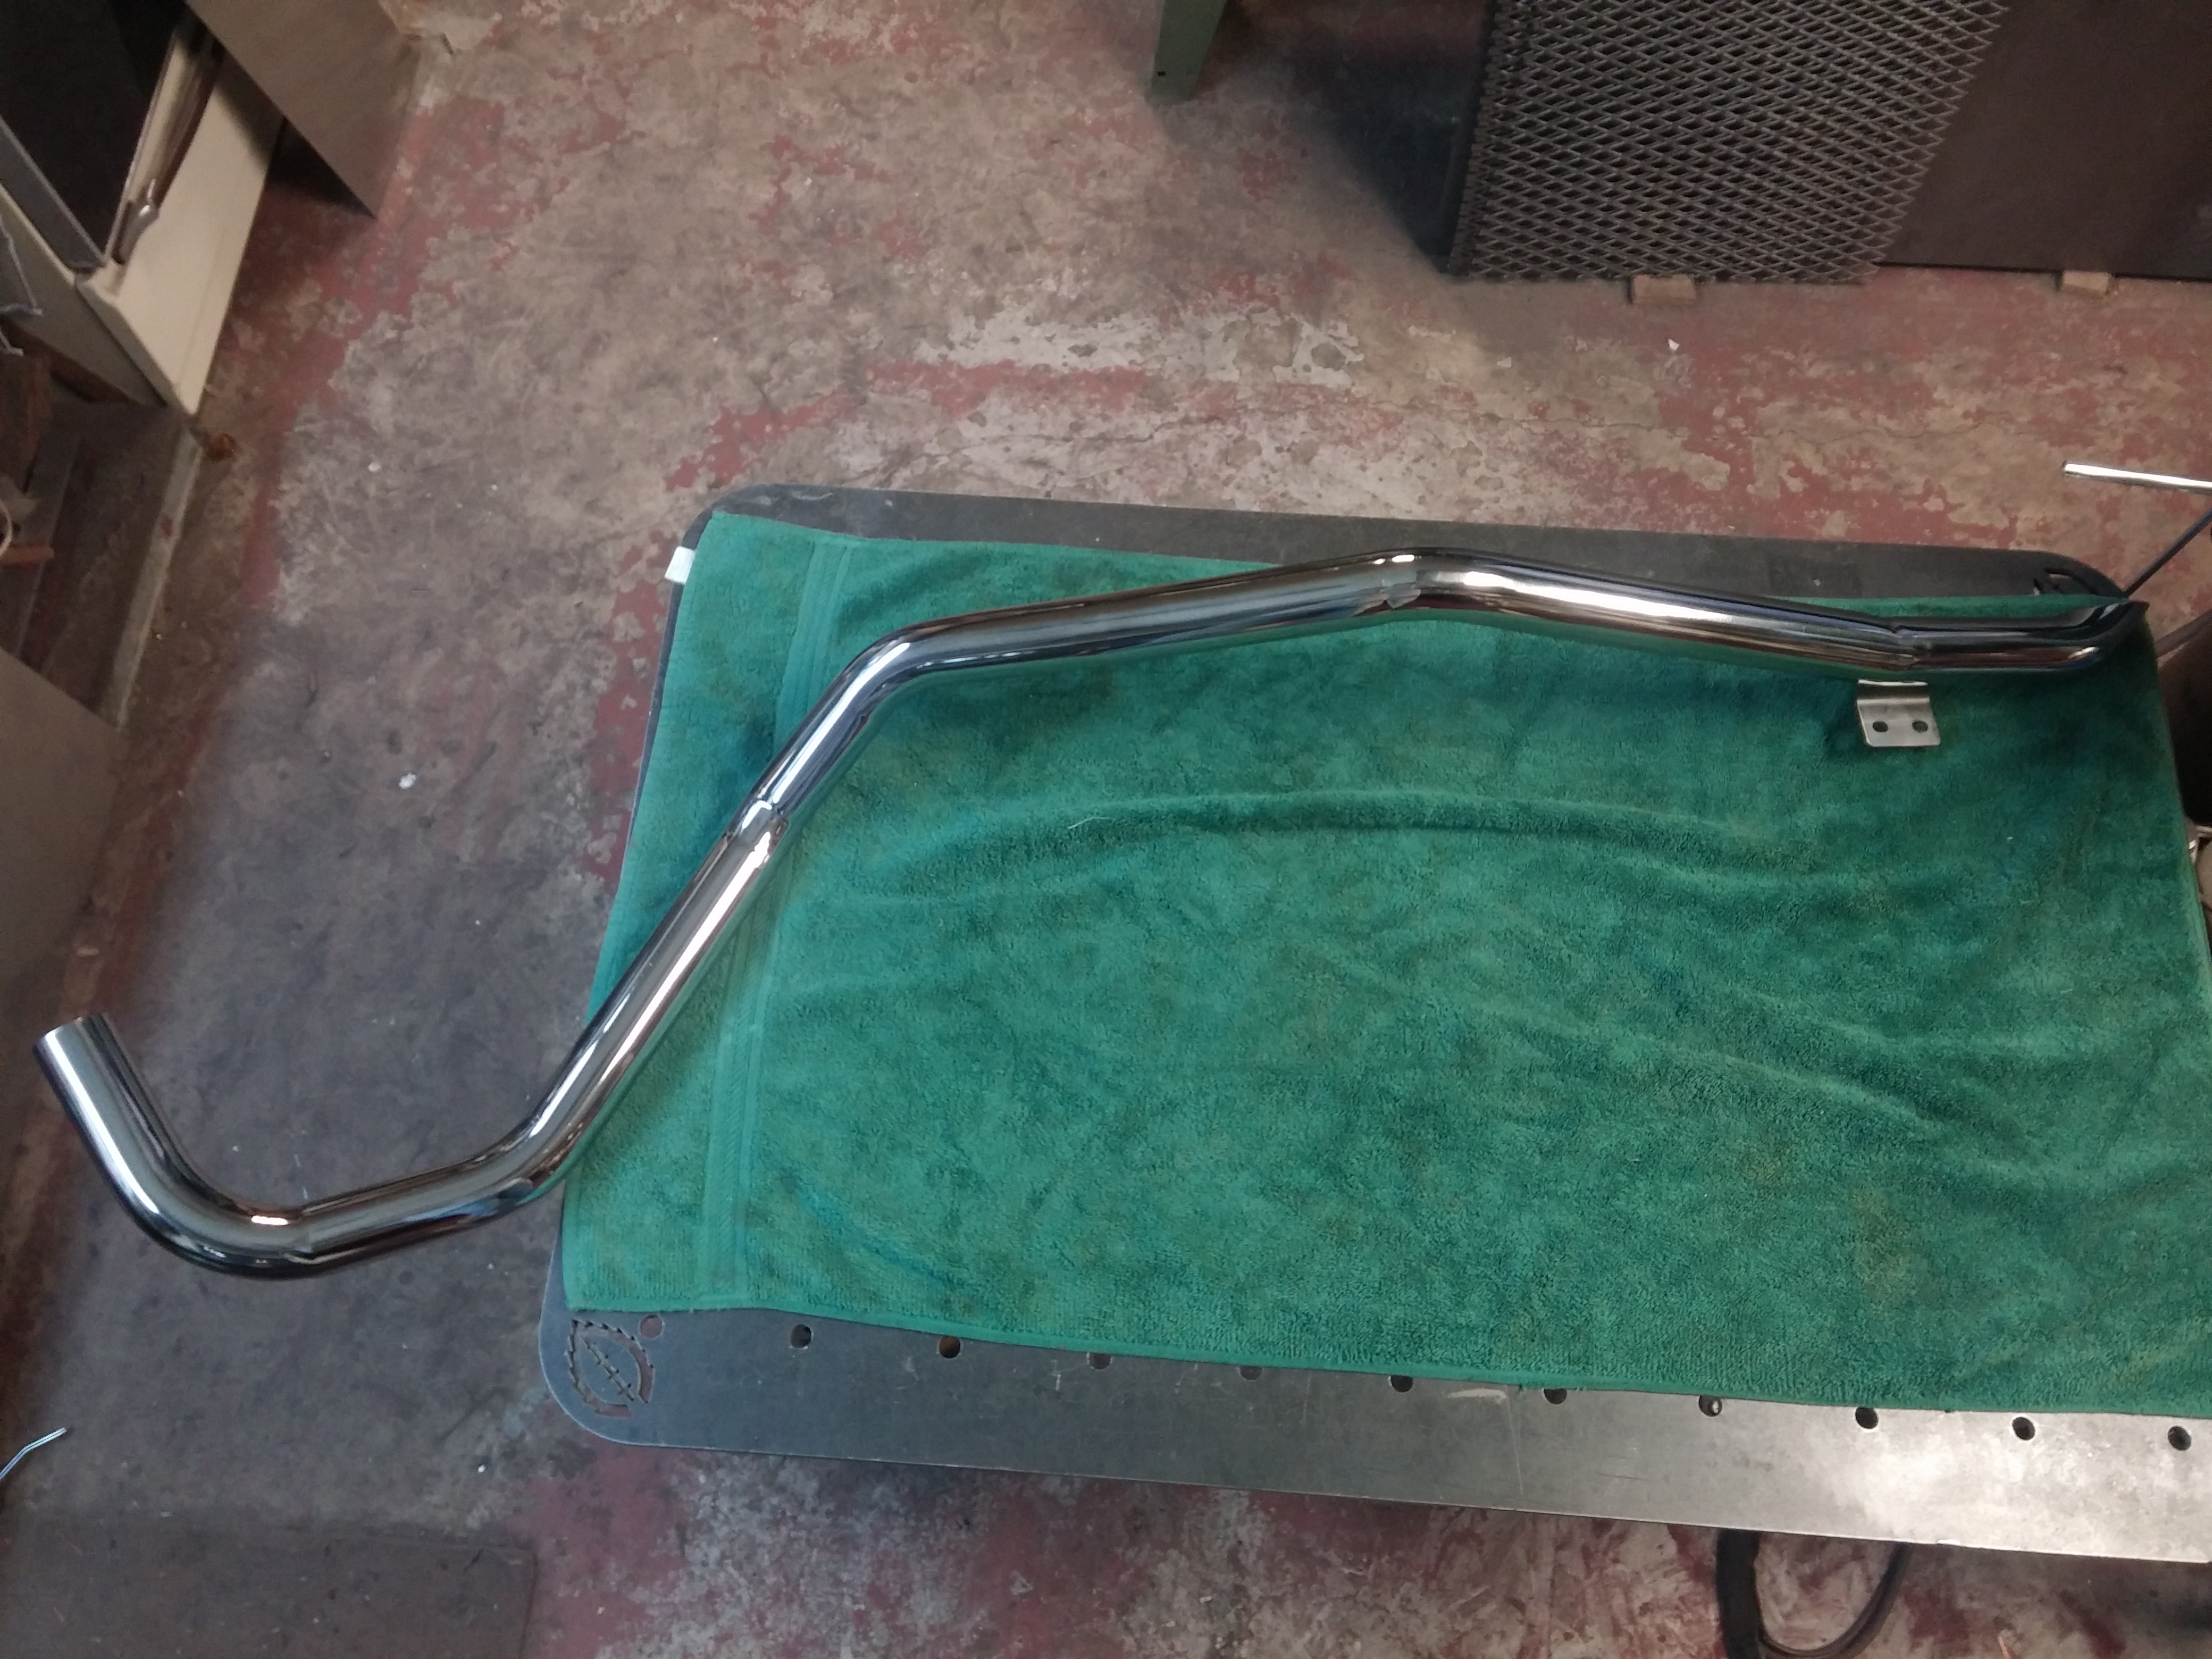
Once the welding was completed the tip was polished prior to the hanger being welded on. Once the hanger is installed it is very difficult to polish the pipe, so all the hanger sections have to be pre-polished prior to the hangers being welded on. Then the area is protected and ultimately repolished when the rest of the exhaust system is polished.
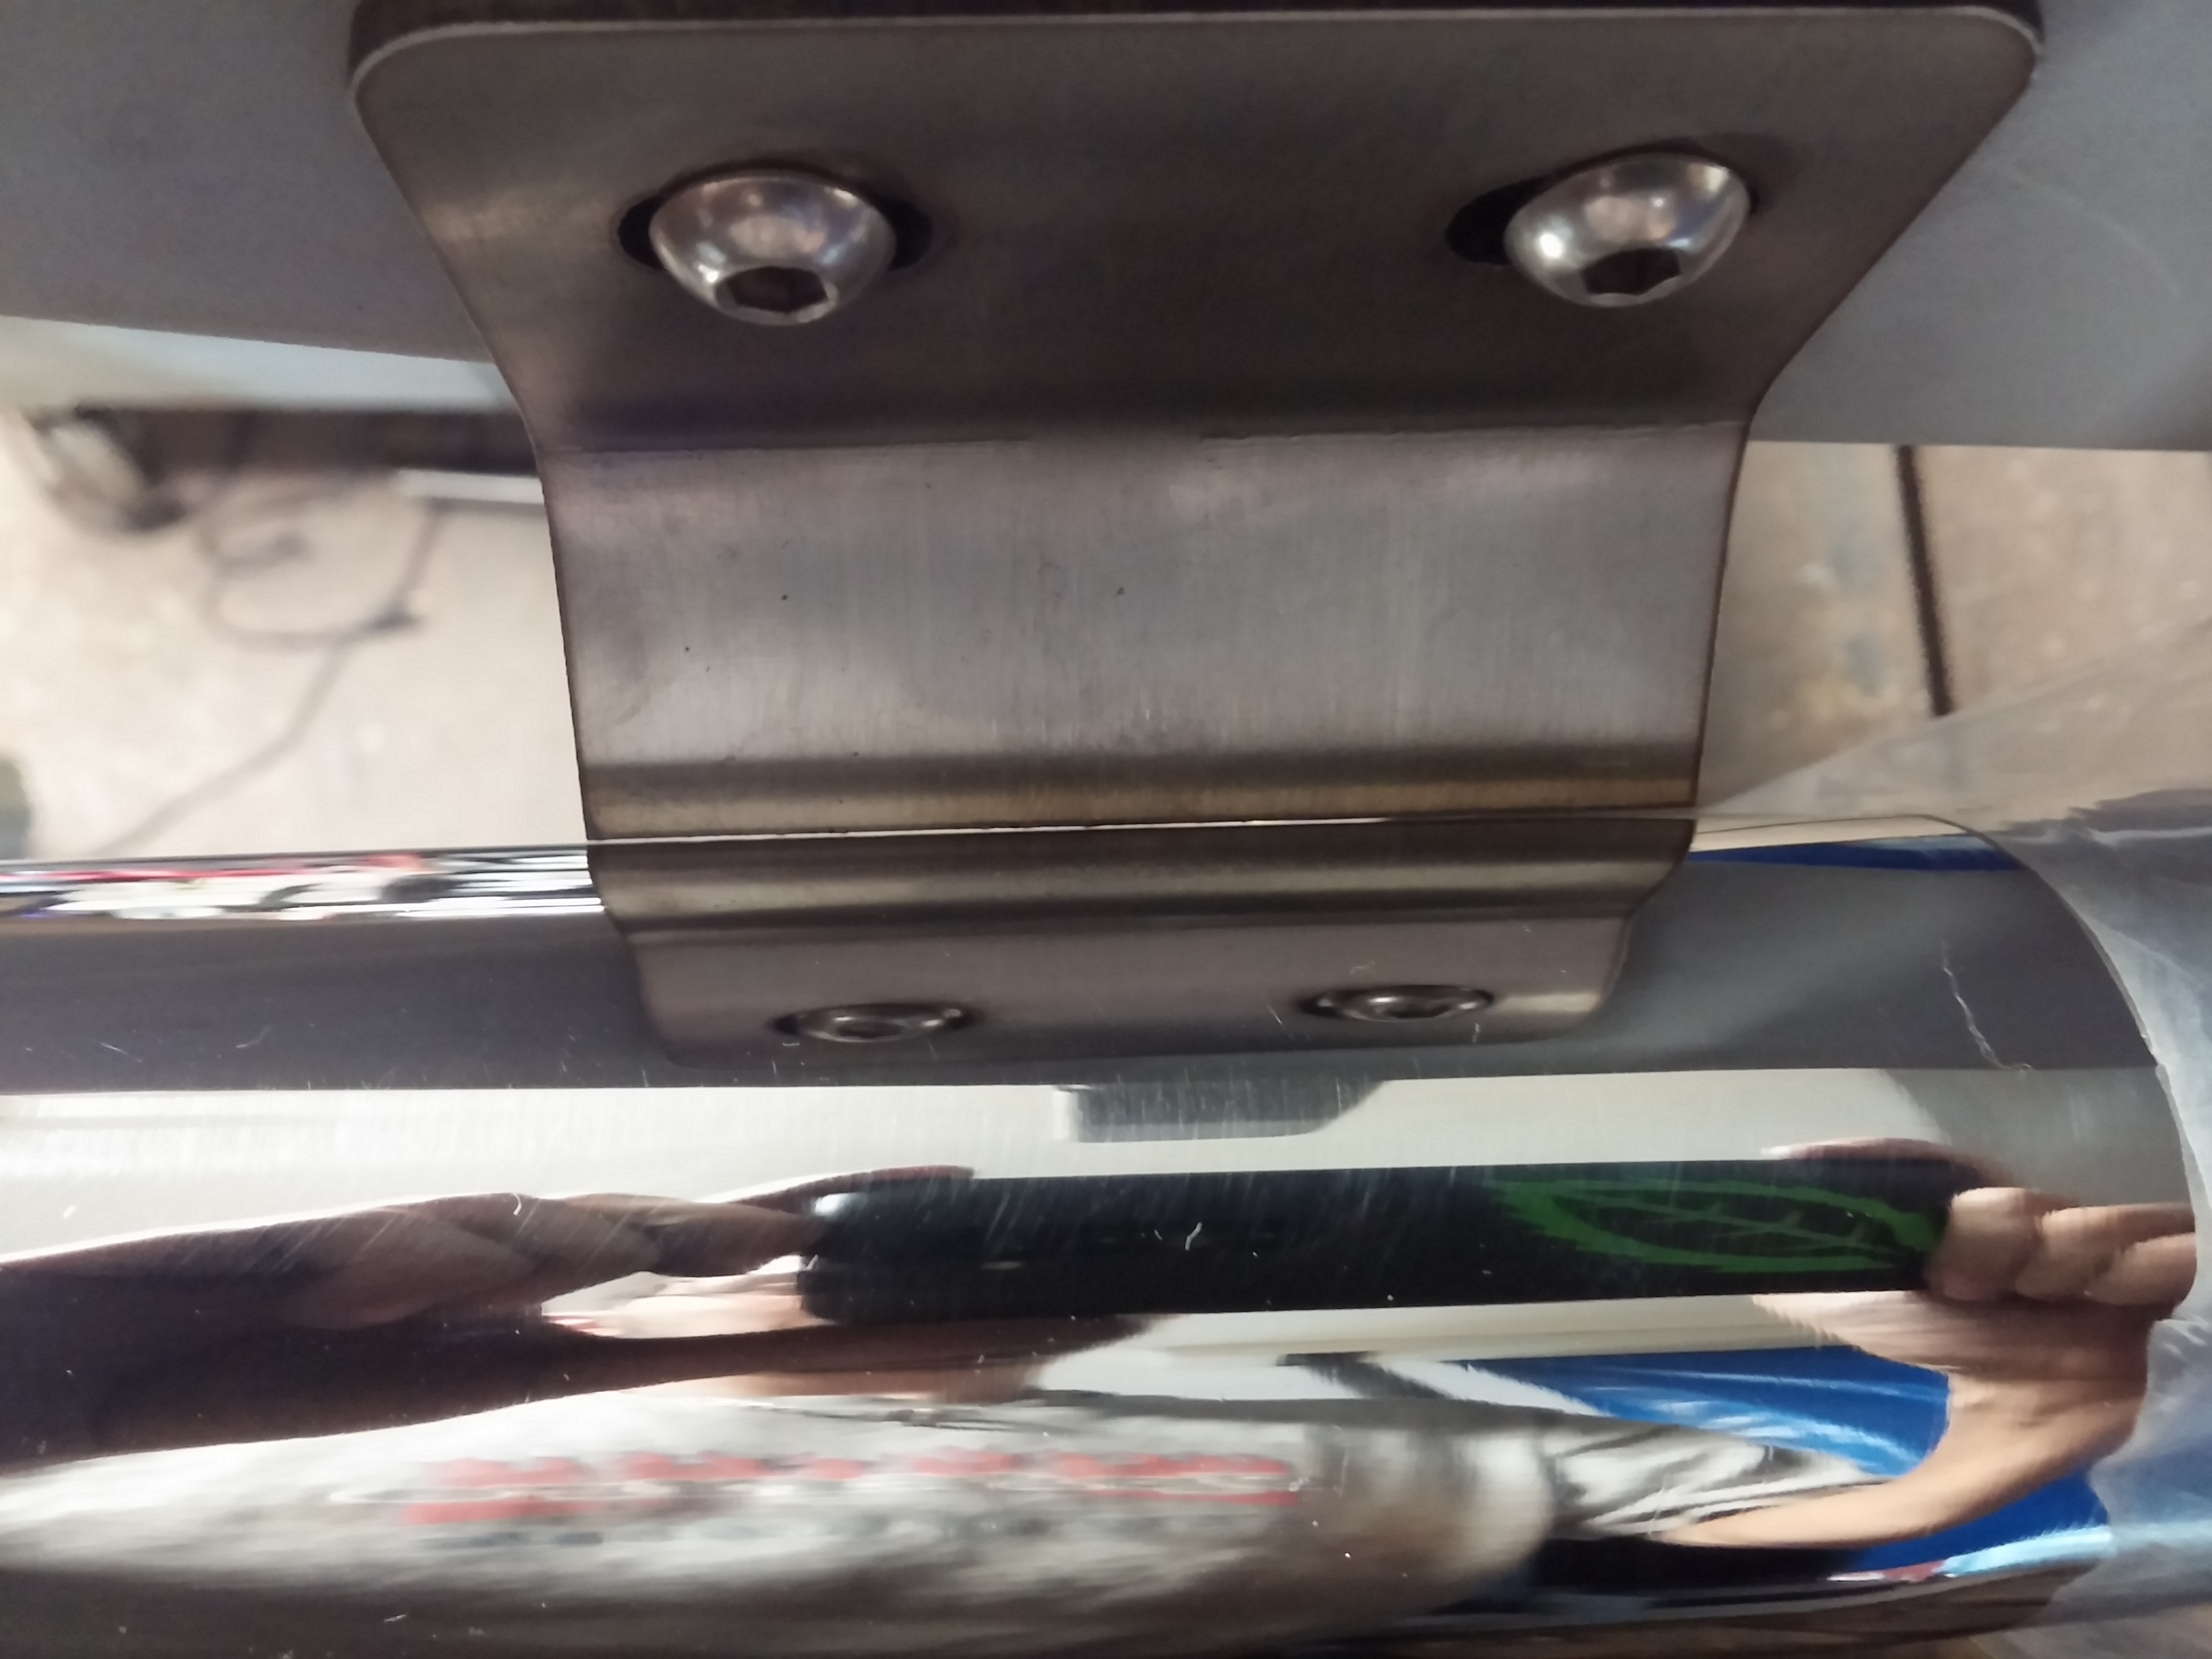
And welded on. The hanger was also CNC cut and is slotted to allow for some movement during installation. The hardware threads into two Rivnuts installed on the frame rail.
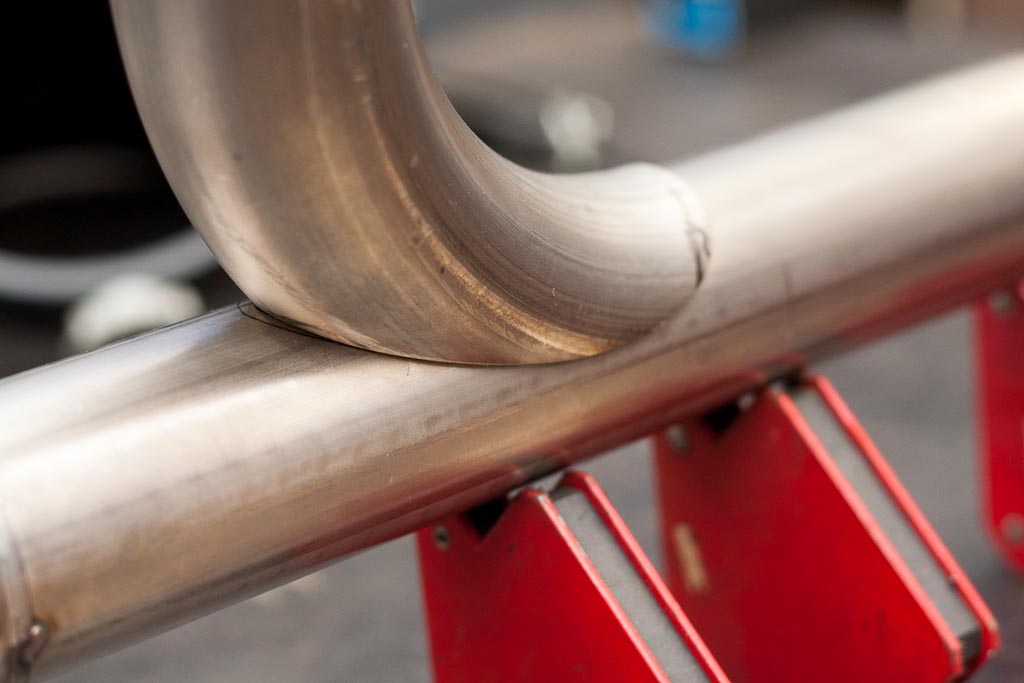
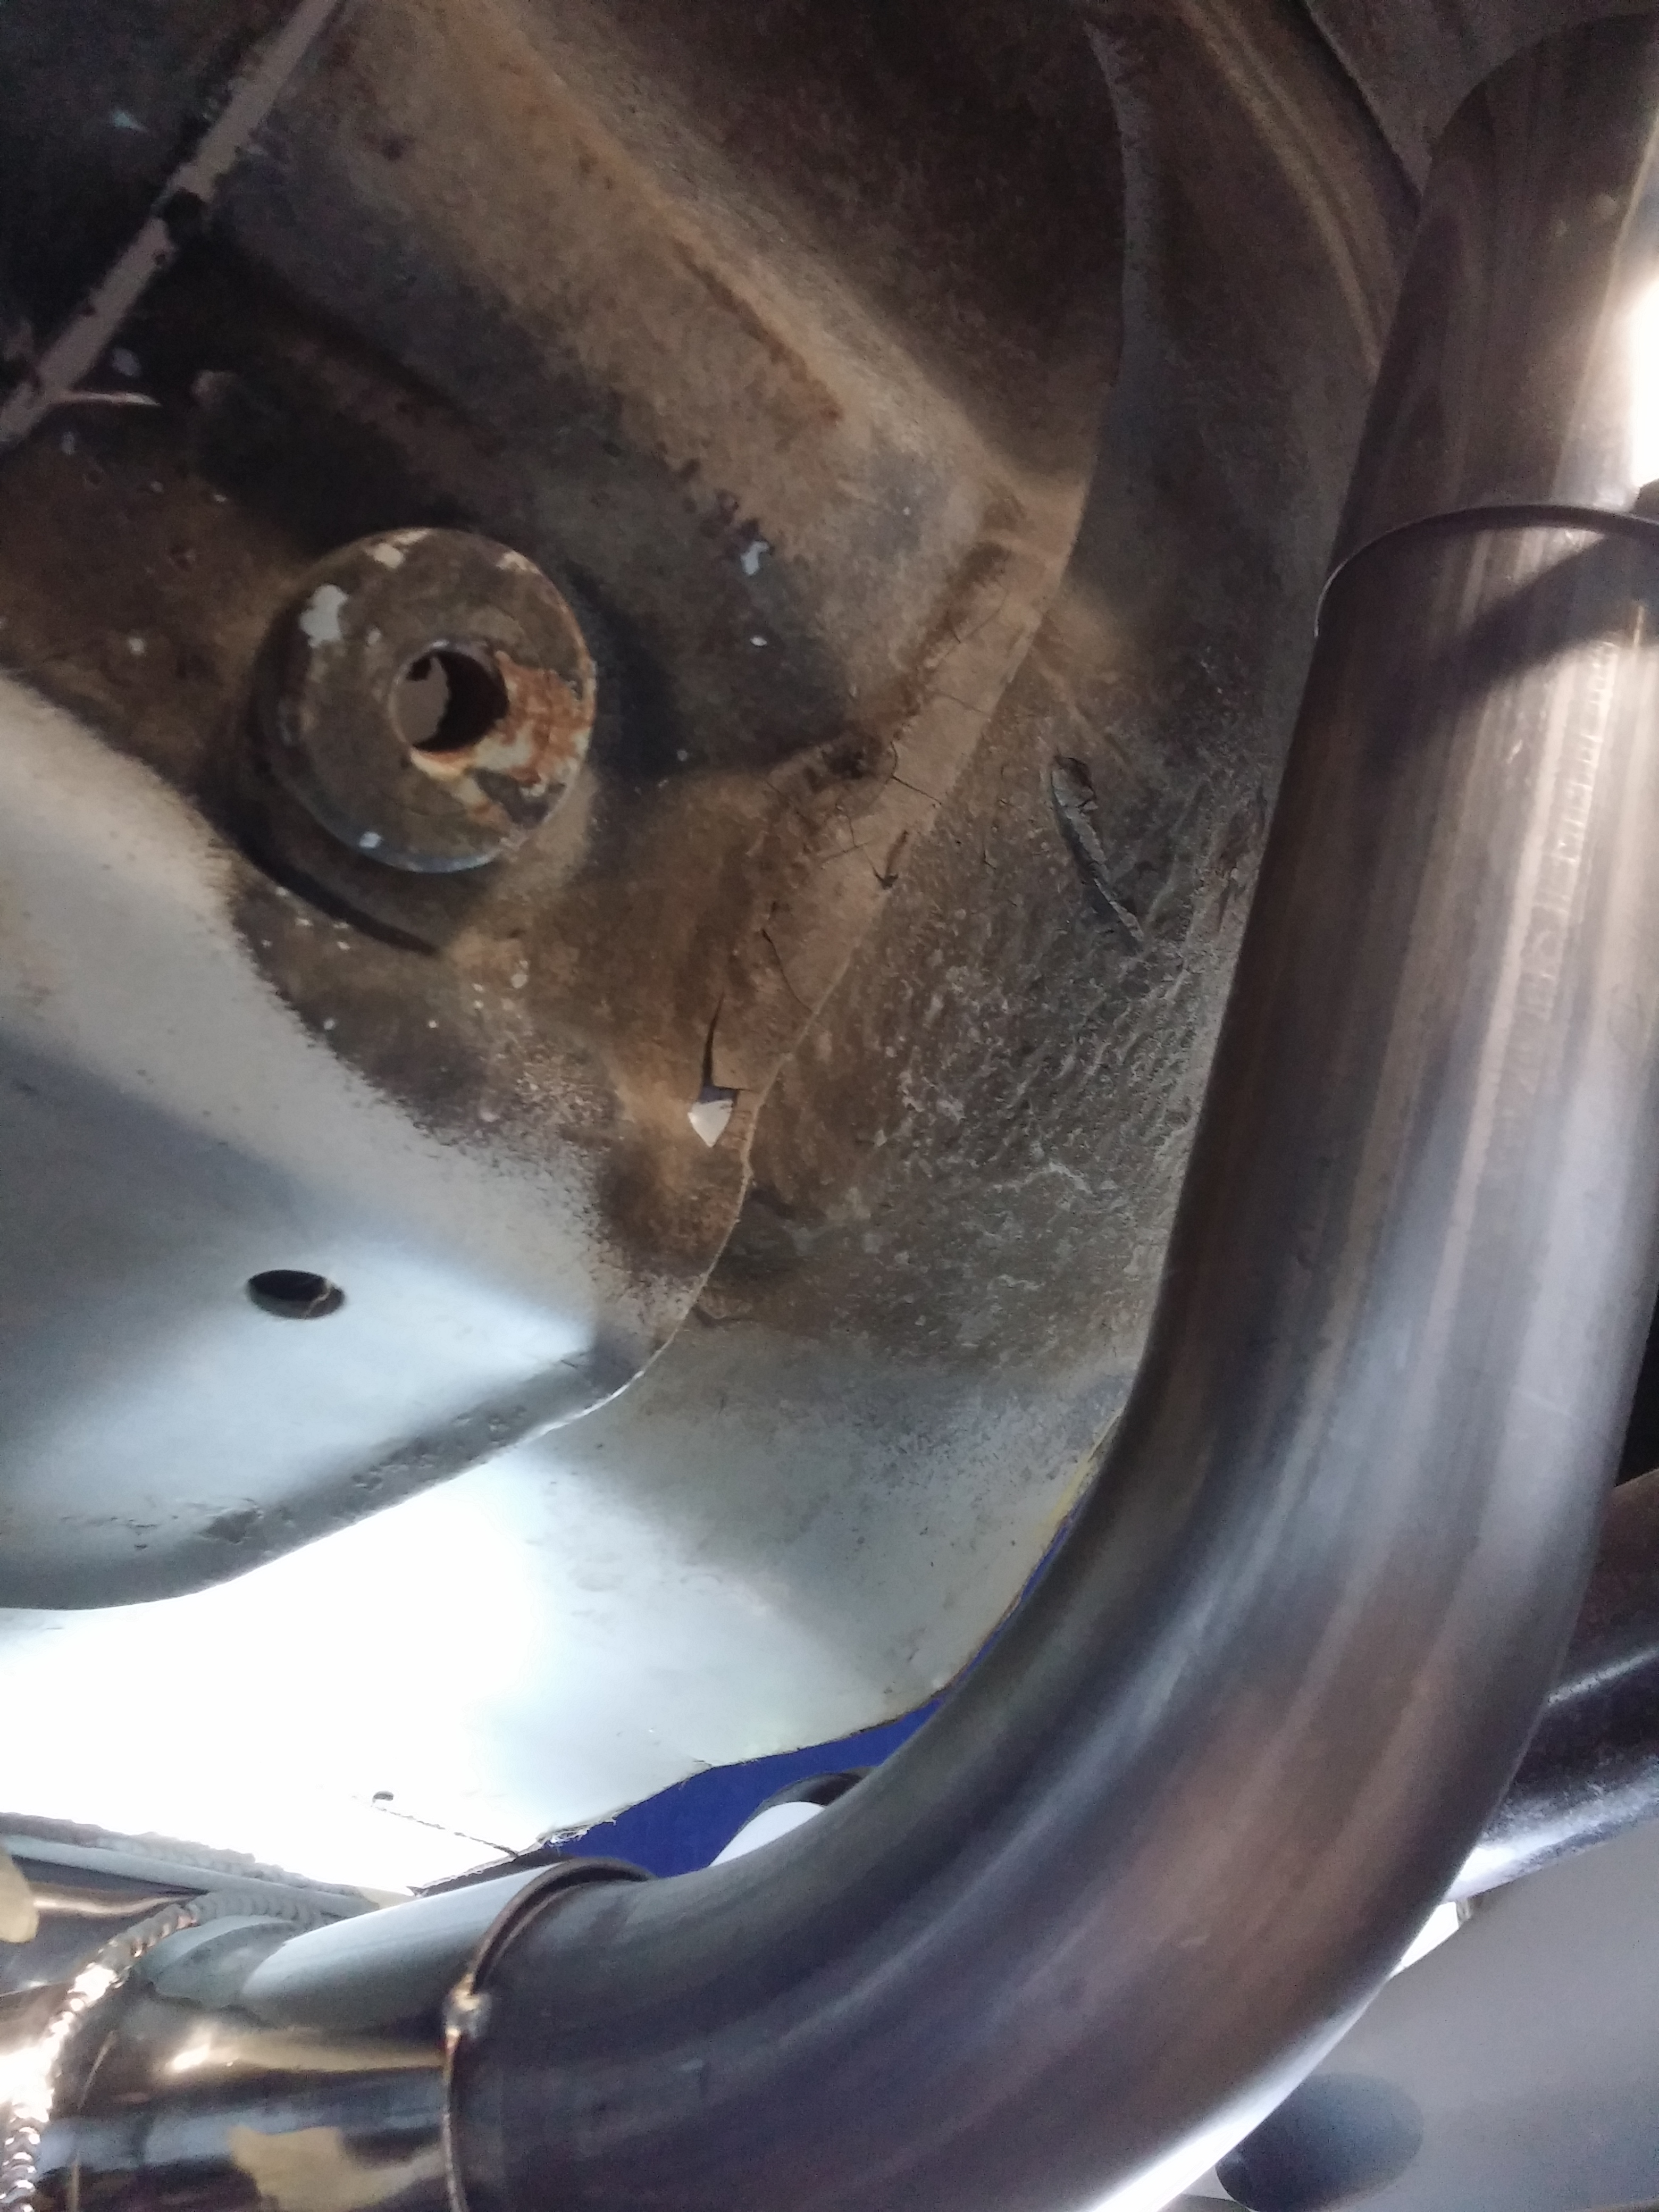
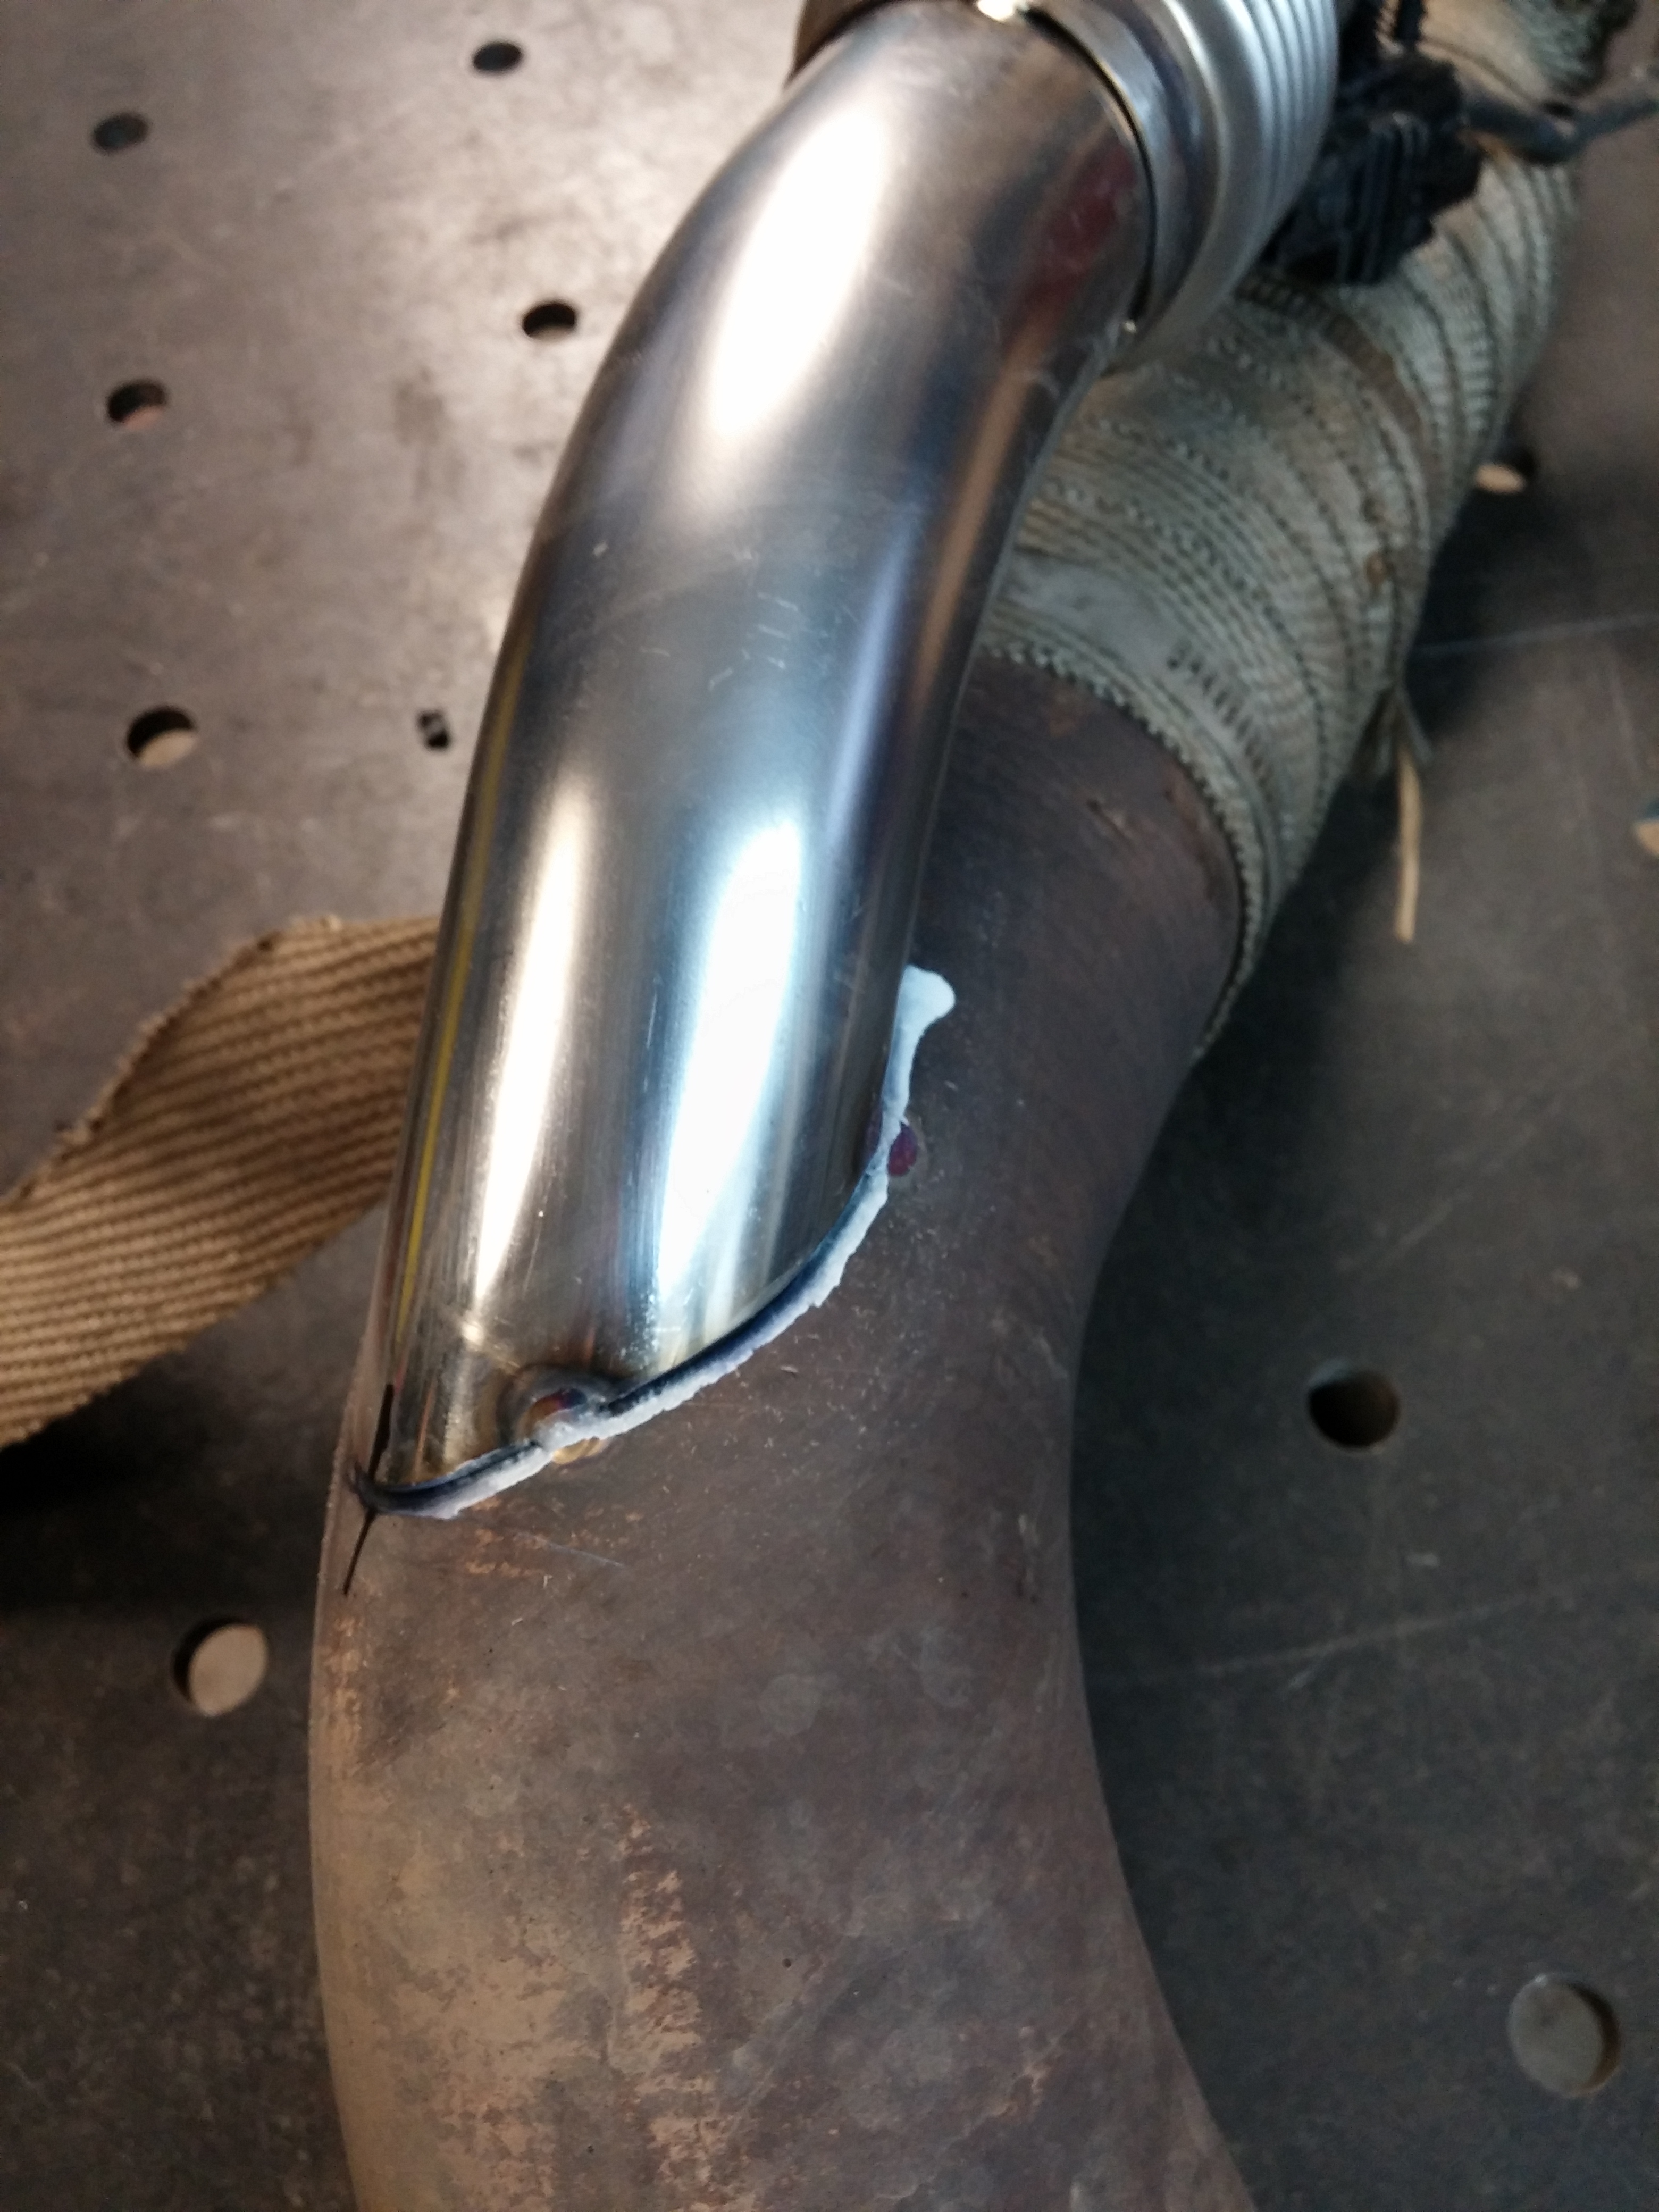
One last modification. Removing a bit of material and welding in a section to allow the pipe to tuck tight enough under the car to allow it to sit on the ground. Material removal is done with a handheld plasma cutting torch, then the surface is sanded flat and deburred. The hole is then transferred to a piece of paper and then ultimately to a sheet of stainless that is cut by hand in the bandsaw. It is welded on with a taller than normal bead to allow for blending.
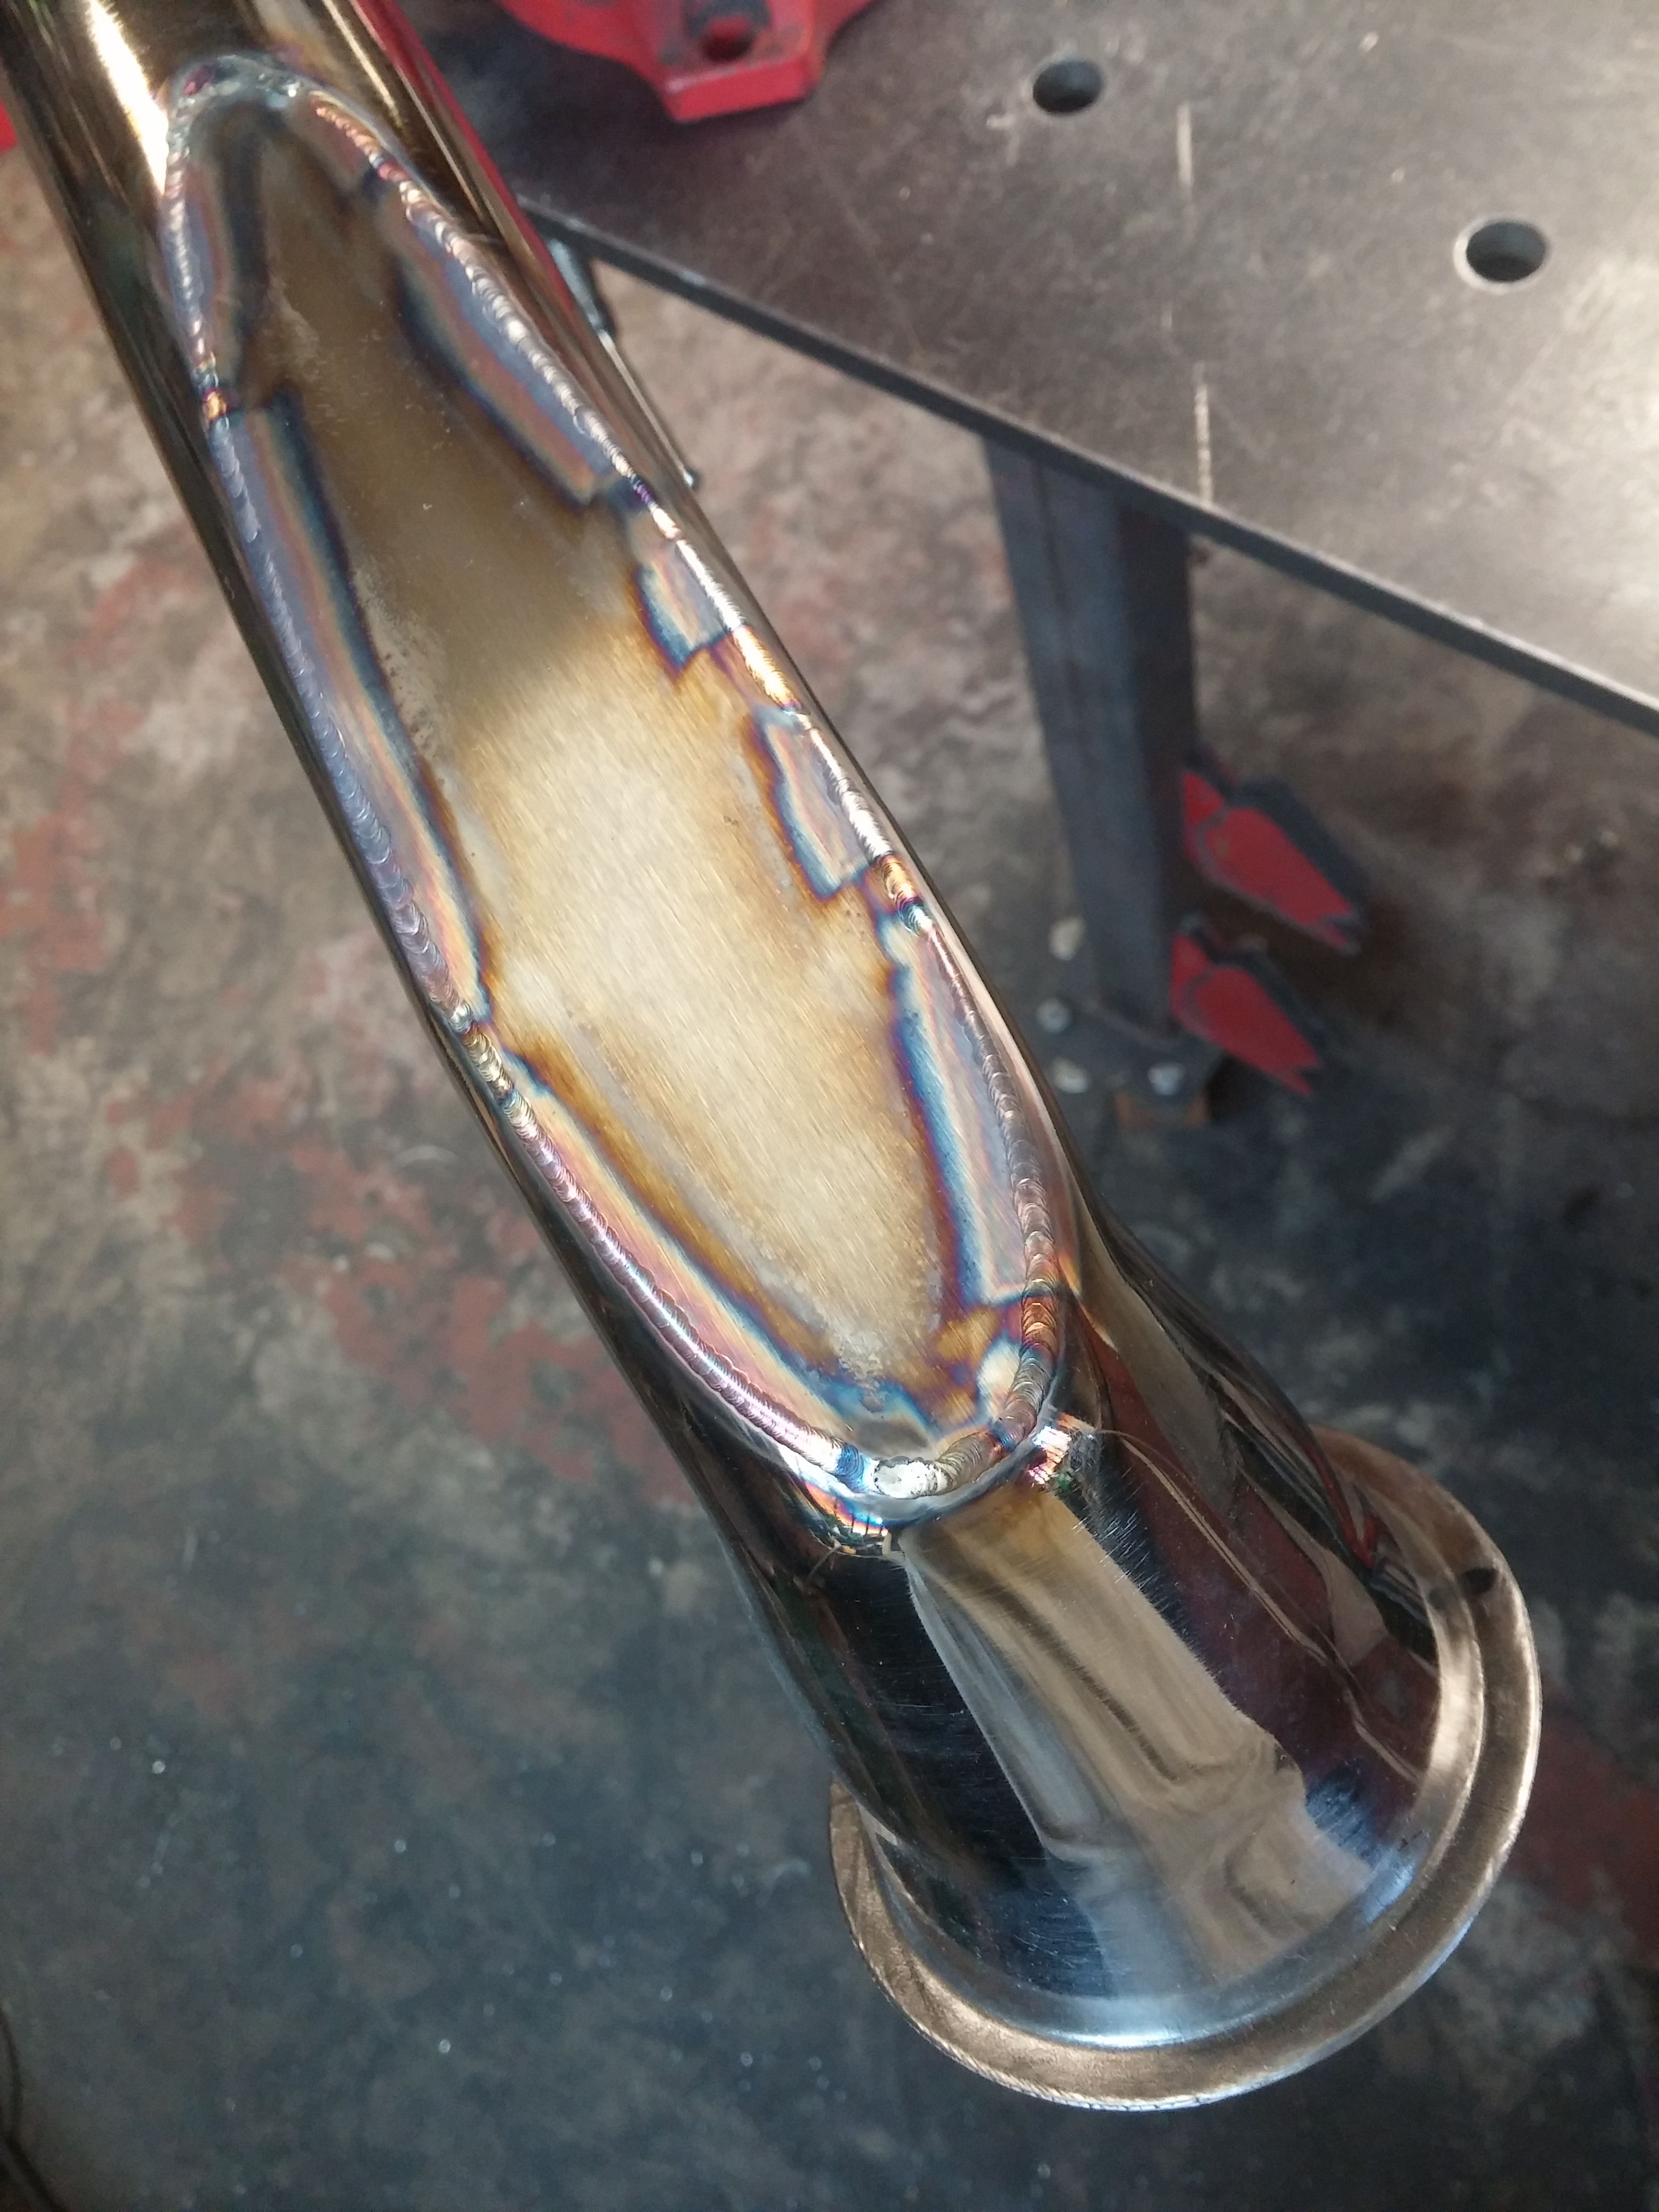

Once the system is fully welded and all the hangers are on, then the bulk of blending, sanding and polishing comes into play.
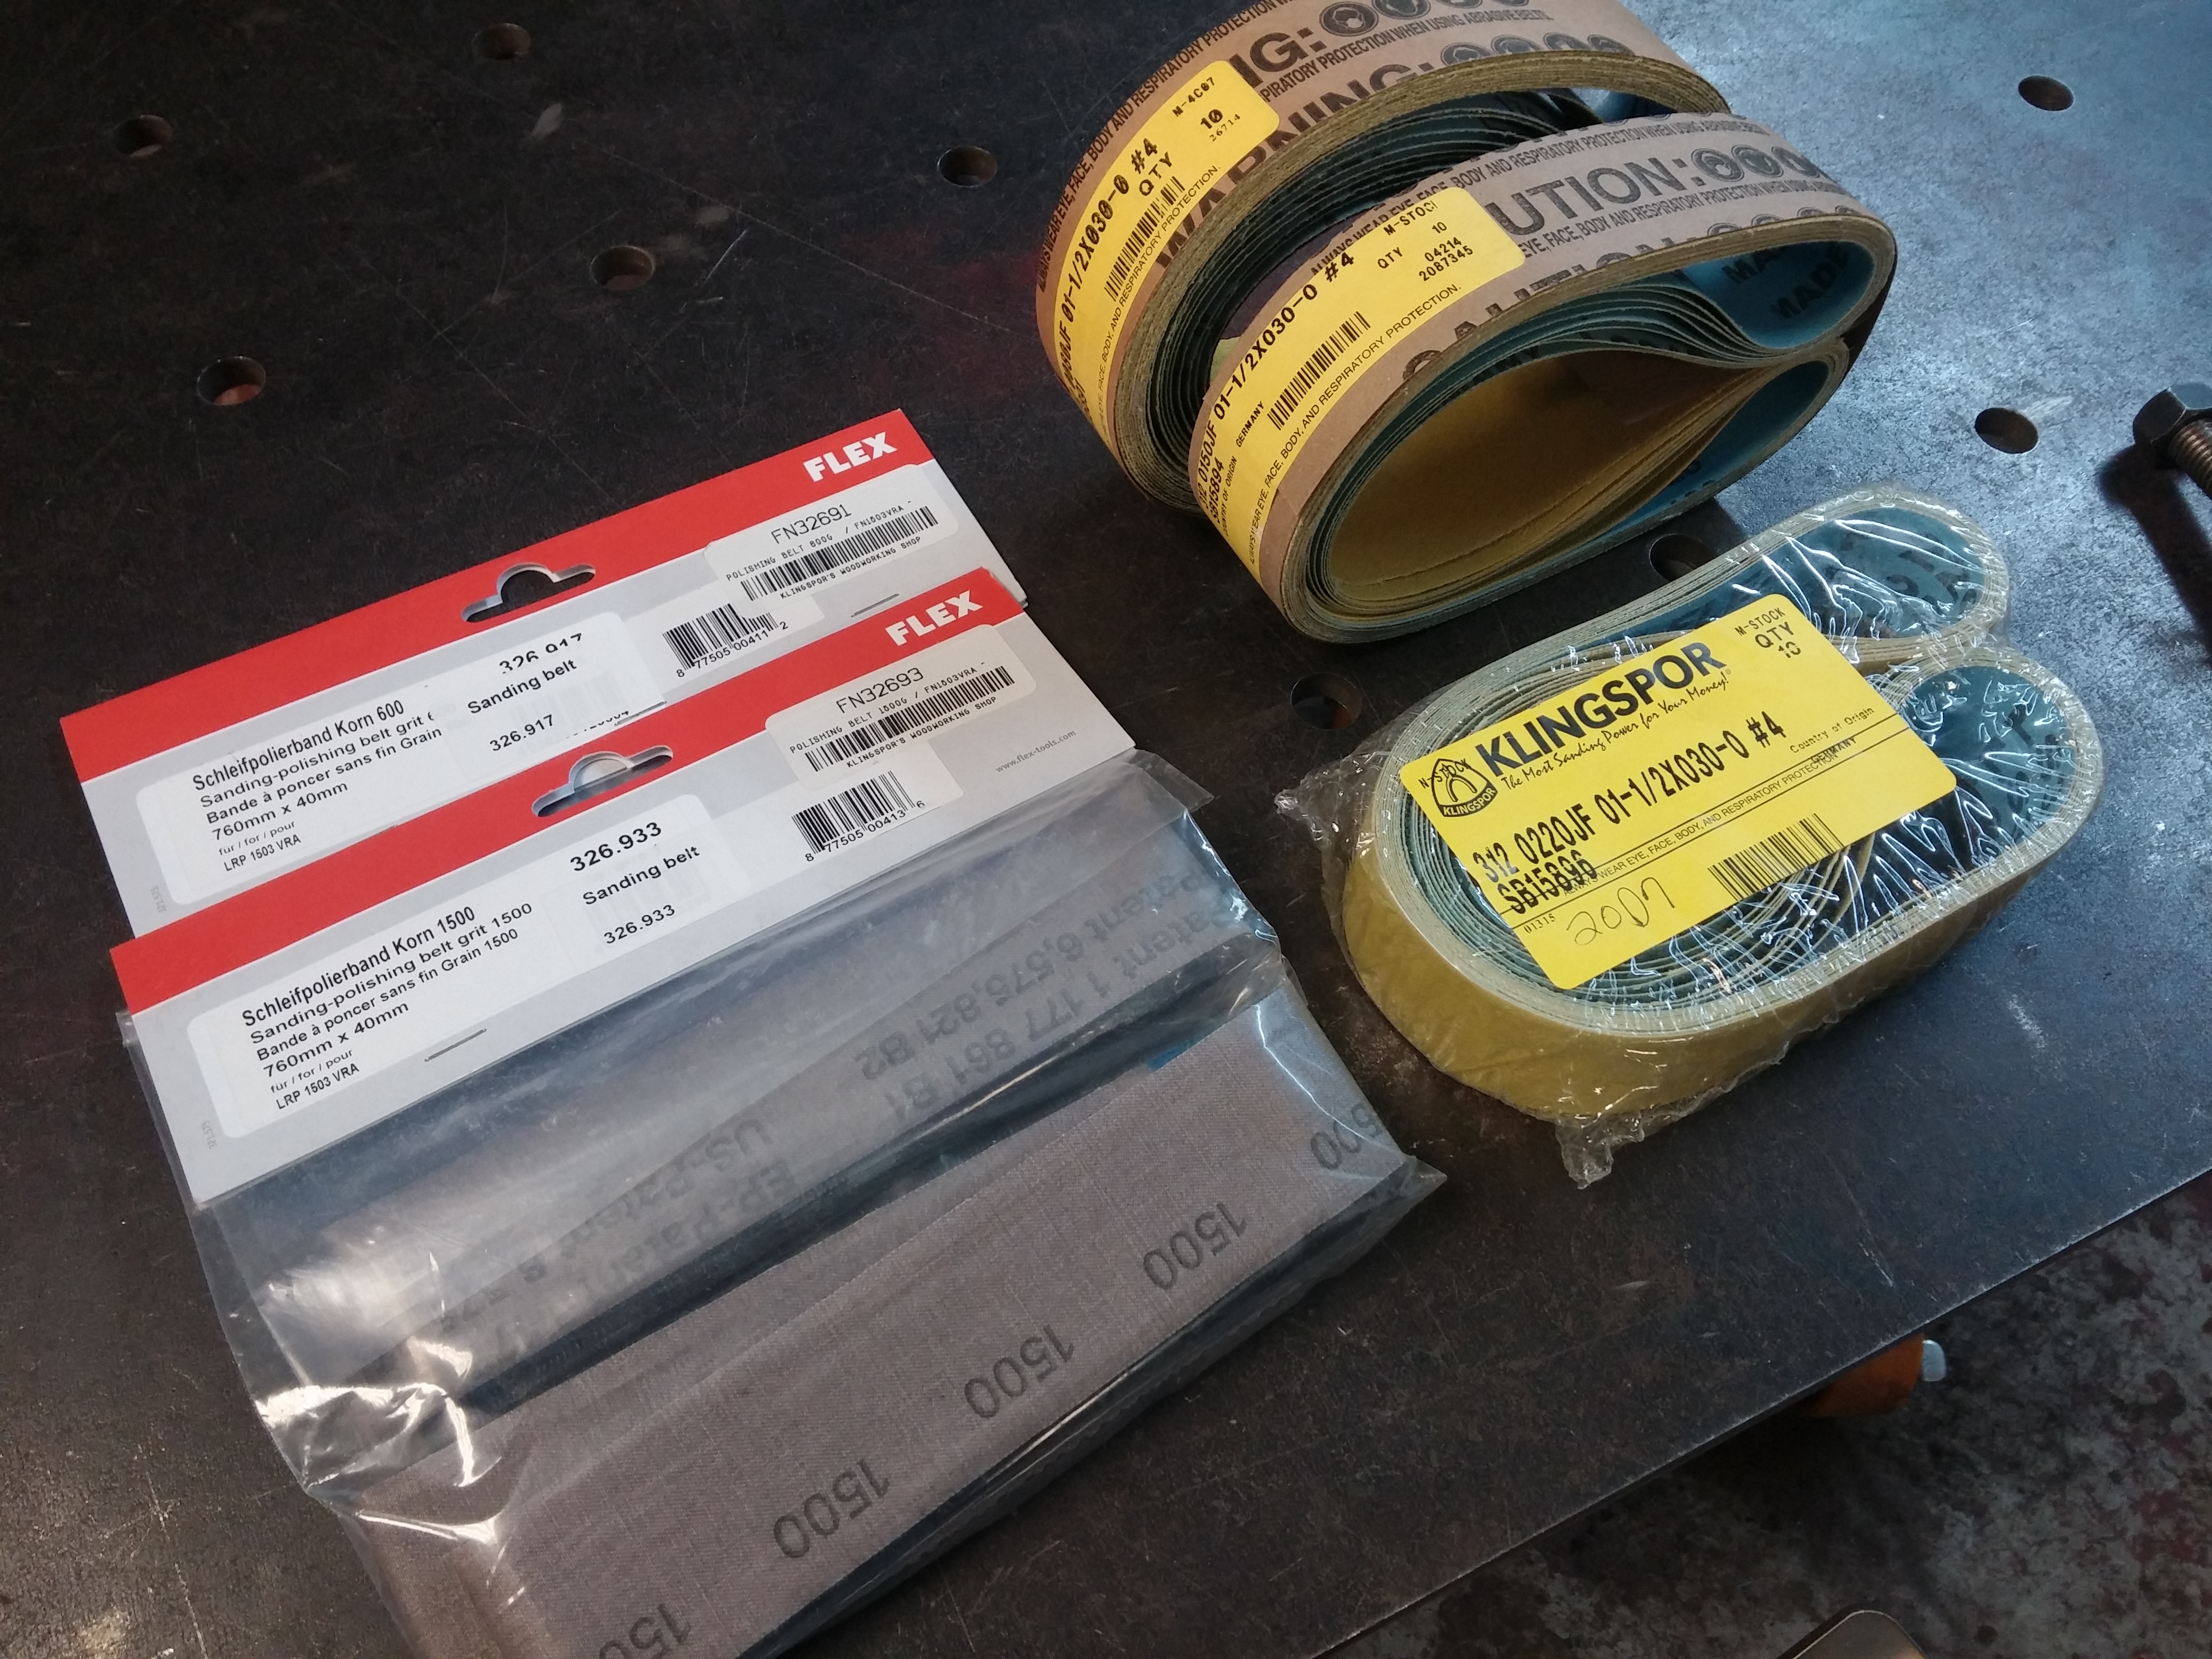
Some of the many many belts that were used to sand and polish the tubing.
A neat trick to share. Spray machinist layout fluid on the tubing in order to see where you have sanded and where there may be small divots in the tubing (you can see one easily in this picture). the layout fluid is essentially like very thin quick drying spray paint. However unlike spray paint you can take it off with a remover as well, in this case it was just sanded off. It’s thin enough that it doesn’t clog the belt even at the finer grit levels.


Not a lot of exhausts get this form of treatment but when you’re building a piece for a show car, it has to shine! Here’s a picture of the car (courtesy of the owner __dekay__ on Instagram) at the first car show it was entered in:
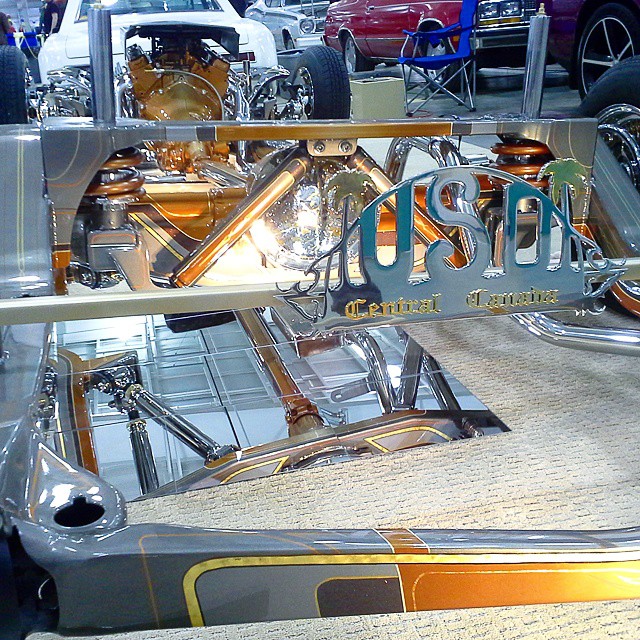
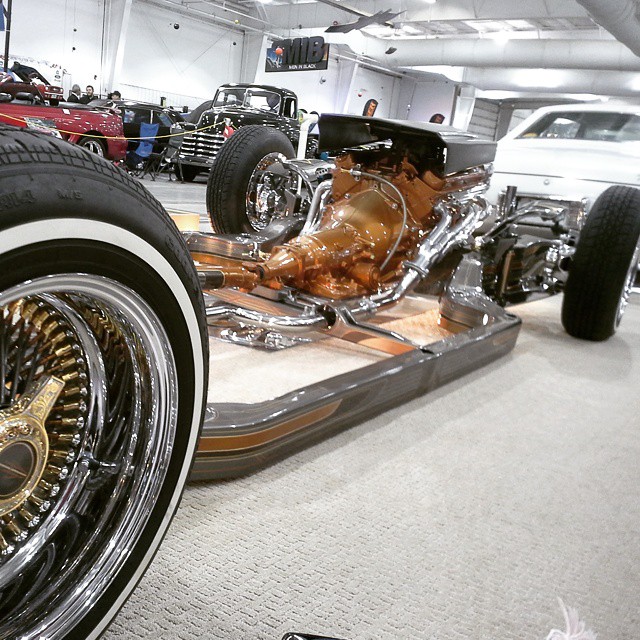
This car will be insane when it’s completed. Thanks for looking!
Trade Show Racking
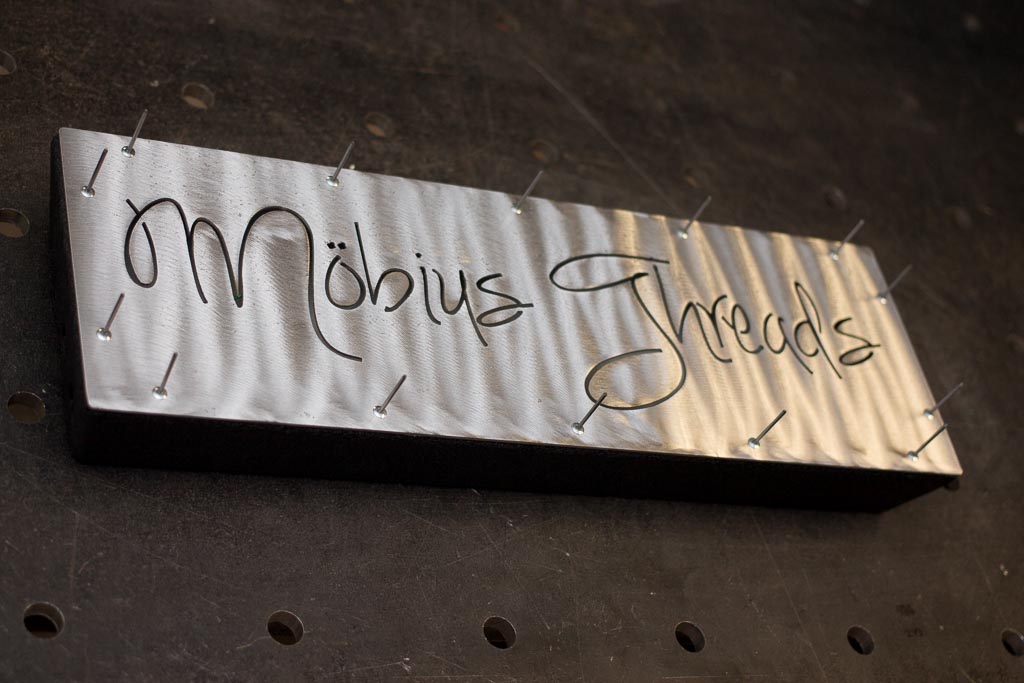
This was a unique project. Create trade show racking that would be able to be self standing, able to hang at least 160 scarves or headbands from and be somewhat easy to assemble. This project was completed for Möbius Threads; a scarf/headband company for use at trade shows all across the province. First we need to cut some hangers. 14ga hot rolled steel, heavily nested with very little scrap!
Not much work needed to clean them up off the table. We cut a lot of 14 ga steel and they come off the table virtually dross free, these went in an acid bath to strip off the mill scale and any minute dross. The only problem with acid bathing parts with very little dross is that the parts tend to stick together and don’t get 100% clean, so they need to be agitated from time to time to ensure all the surfaces are exposed to the acid. Heavier dross parts don’t have this problem as the dross naturally spaces the parts apart while the acid removes the mill scale and ultimately the dross falls off at the end of the process.
Here we have the feet. They are designed in Solidworks as a solid body, then converted to a multi-sheet metal part. So in this case each leg has five pieces split apart from one model. This allows the part to be easily fabricated and functions exactly as intended. Having the bends where the tube will slide into the “receiver” portion is nice as it’s a smooth radius, not a welded edge that would then require blending to make totally smooth. Just simple tweaks to making a simple to produce part. Here they are being tacked and partially welded on the inside. Utimately the perimeter is welded and the welds are blended away.

This is what the feet look like in CAD, exactly like the real thing. Very simple to produce and not requiring much effort or skill. Just time to ensure everything is square, tight and that saves time on the blending the welds at the end. The parts were all shot with a hammer tone paint to mask the inevitable scratches and dings that would occur setting up and tearing down at a trade show.
This is what the initial rendering looked like.
And here it is at the first Möbius Threads trade show in Saskatoon!

Thanks for looking! If you are interested in any of our services please take your time to browse the site. Any questions or if you want us to begin your future project, don’t hesitate to contact us via the Contact page.
Charcoal Air Filter Housings
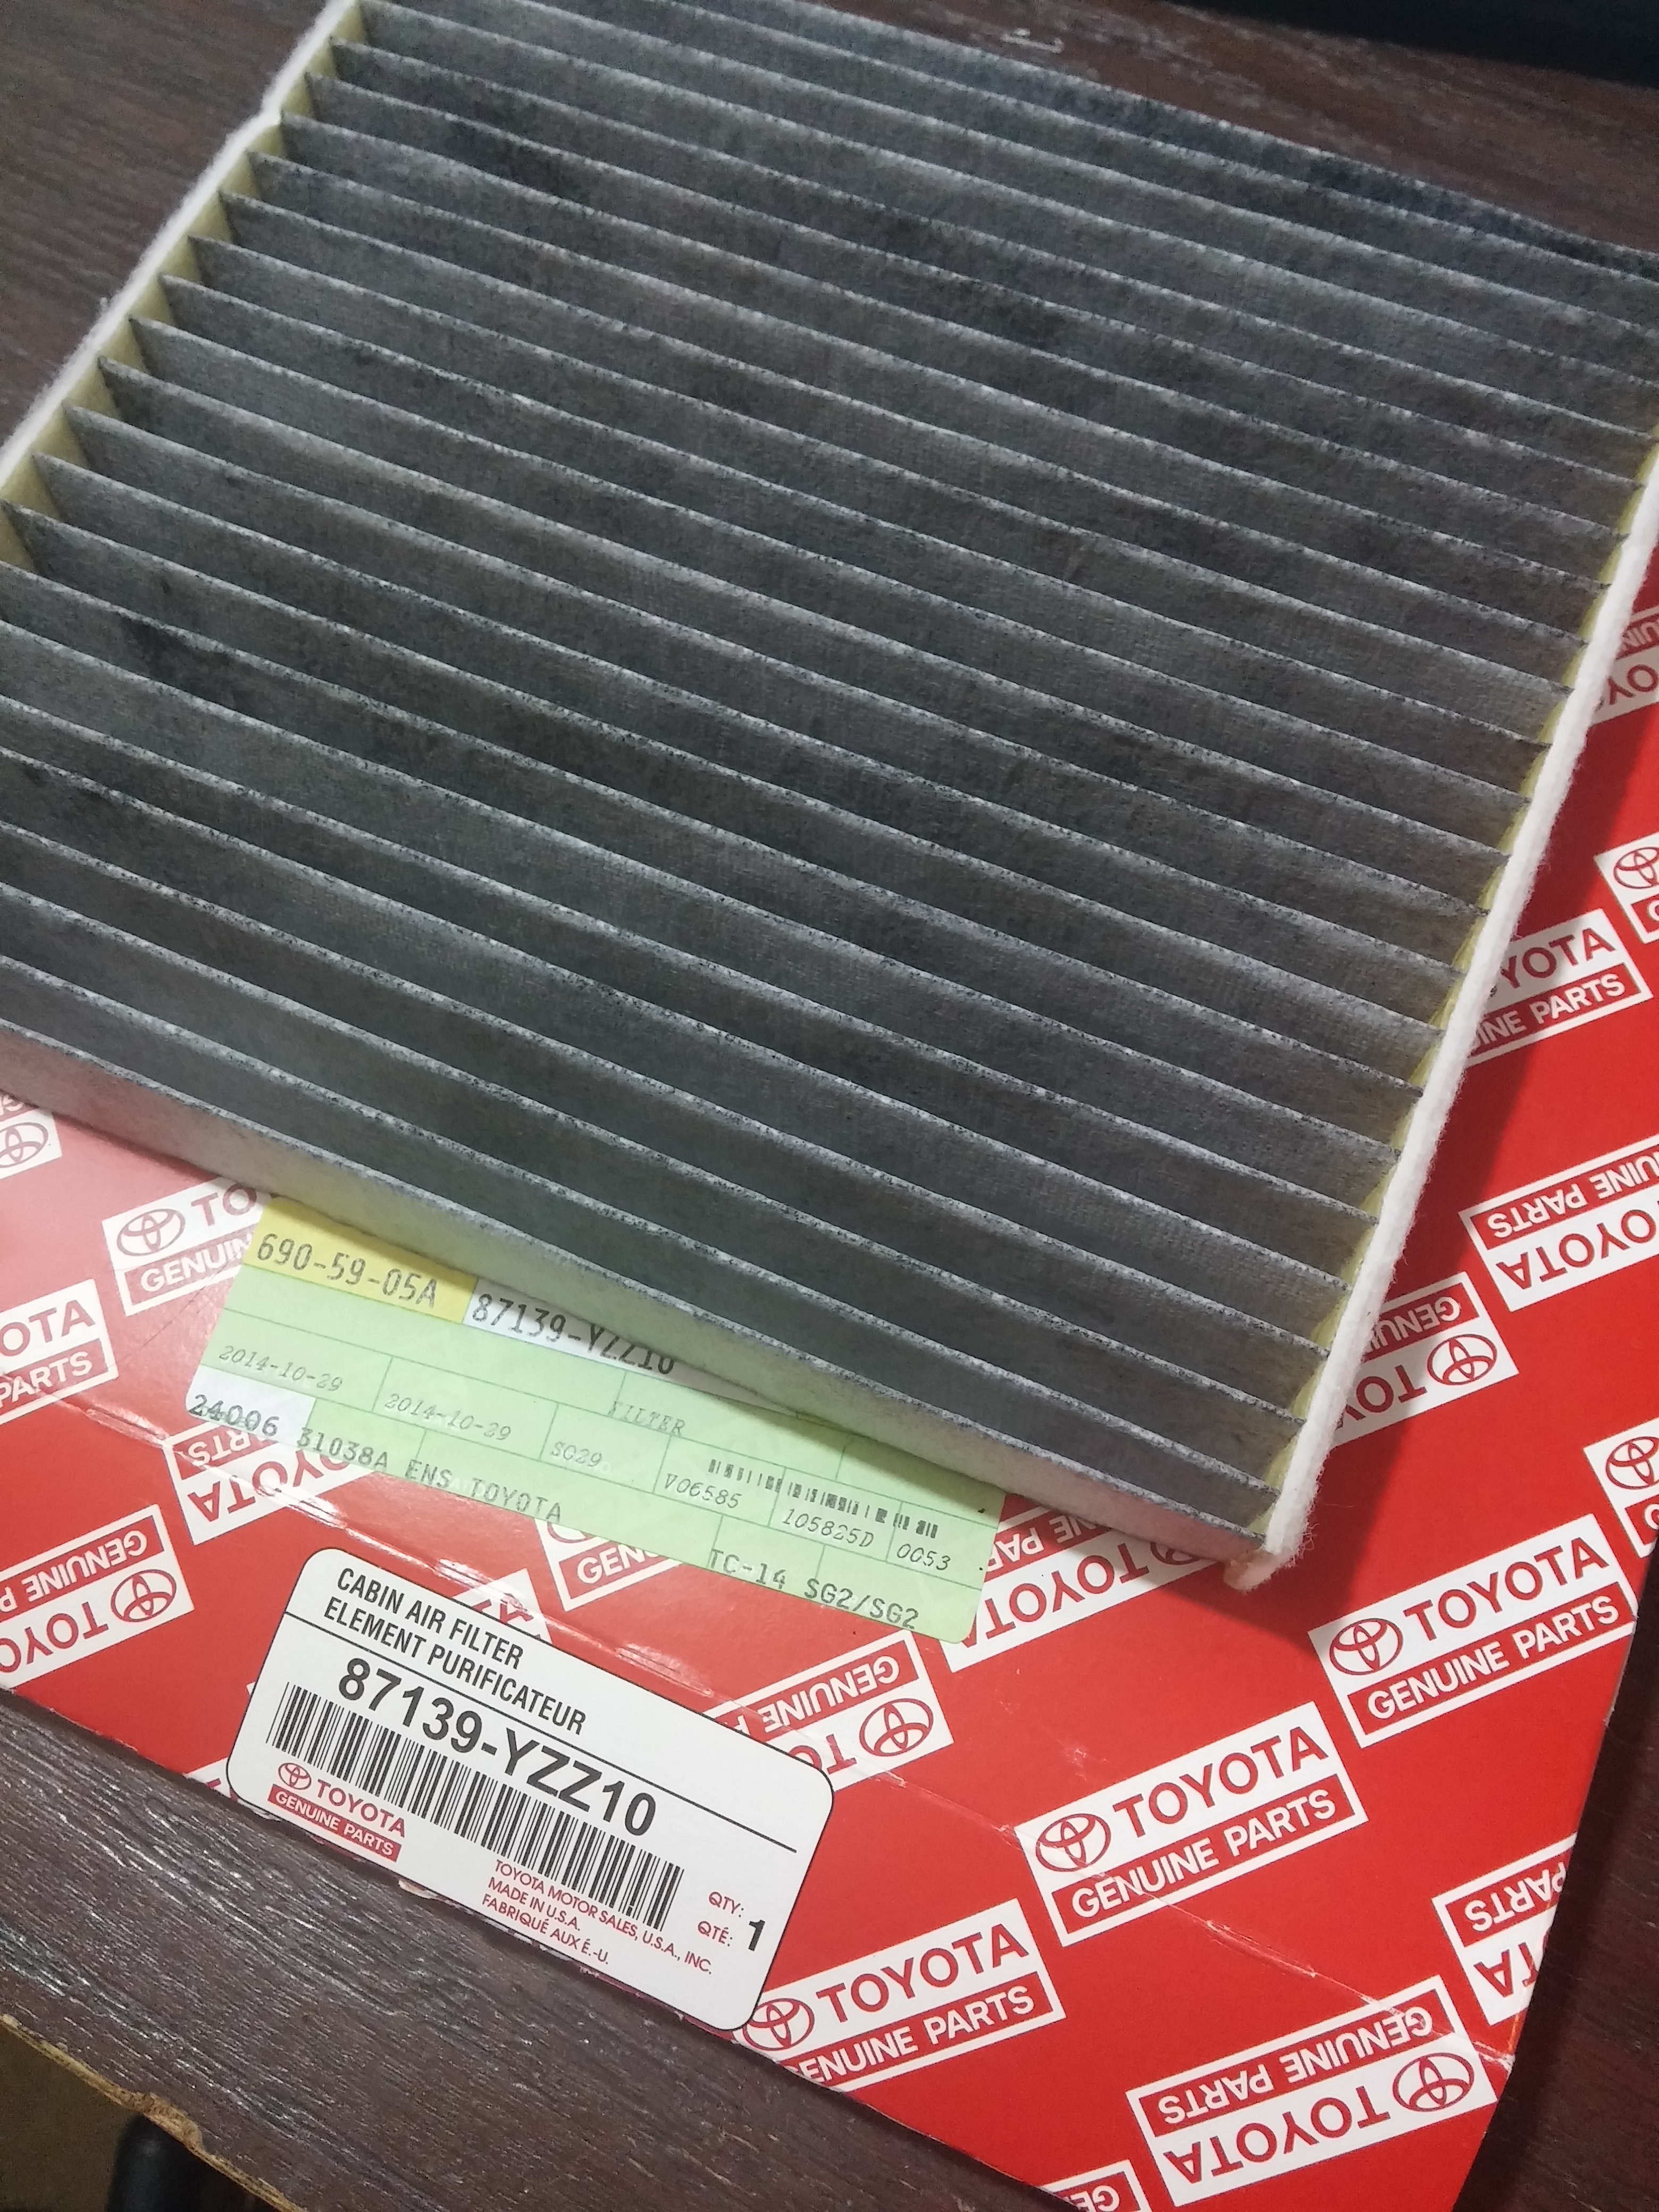
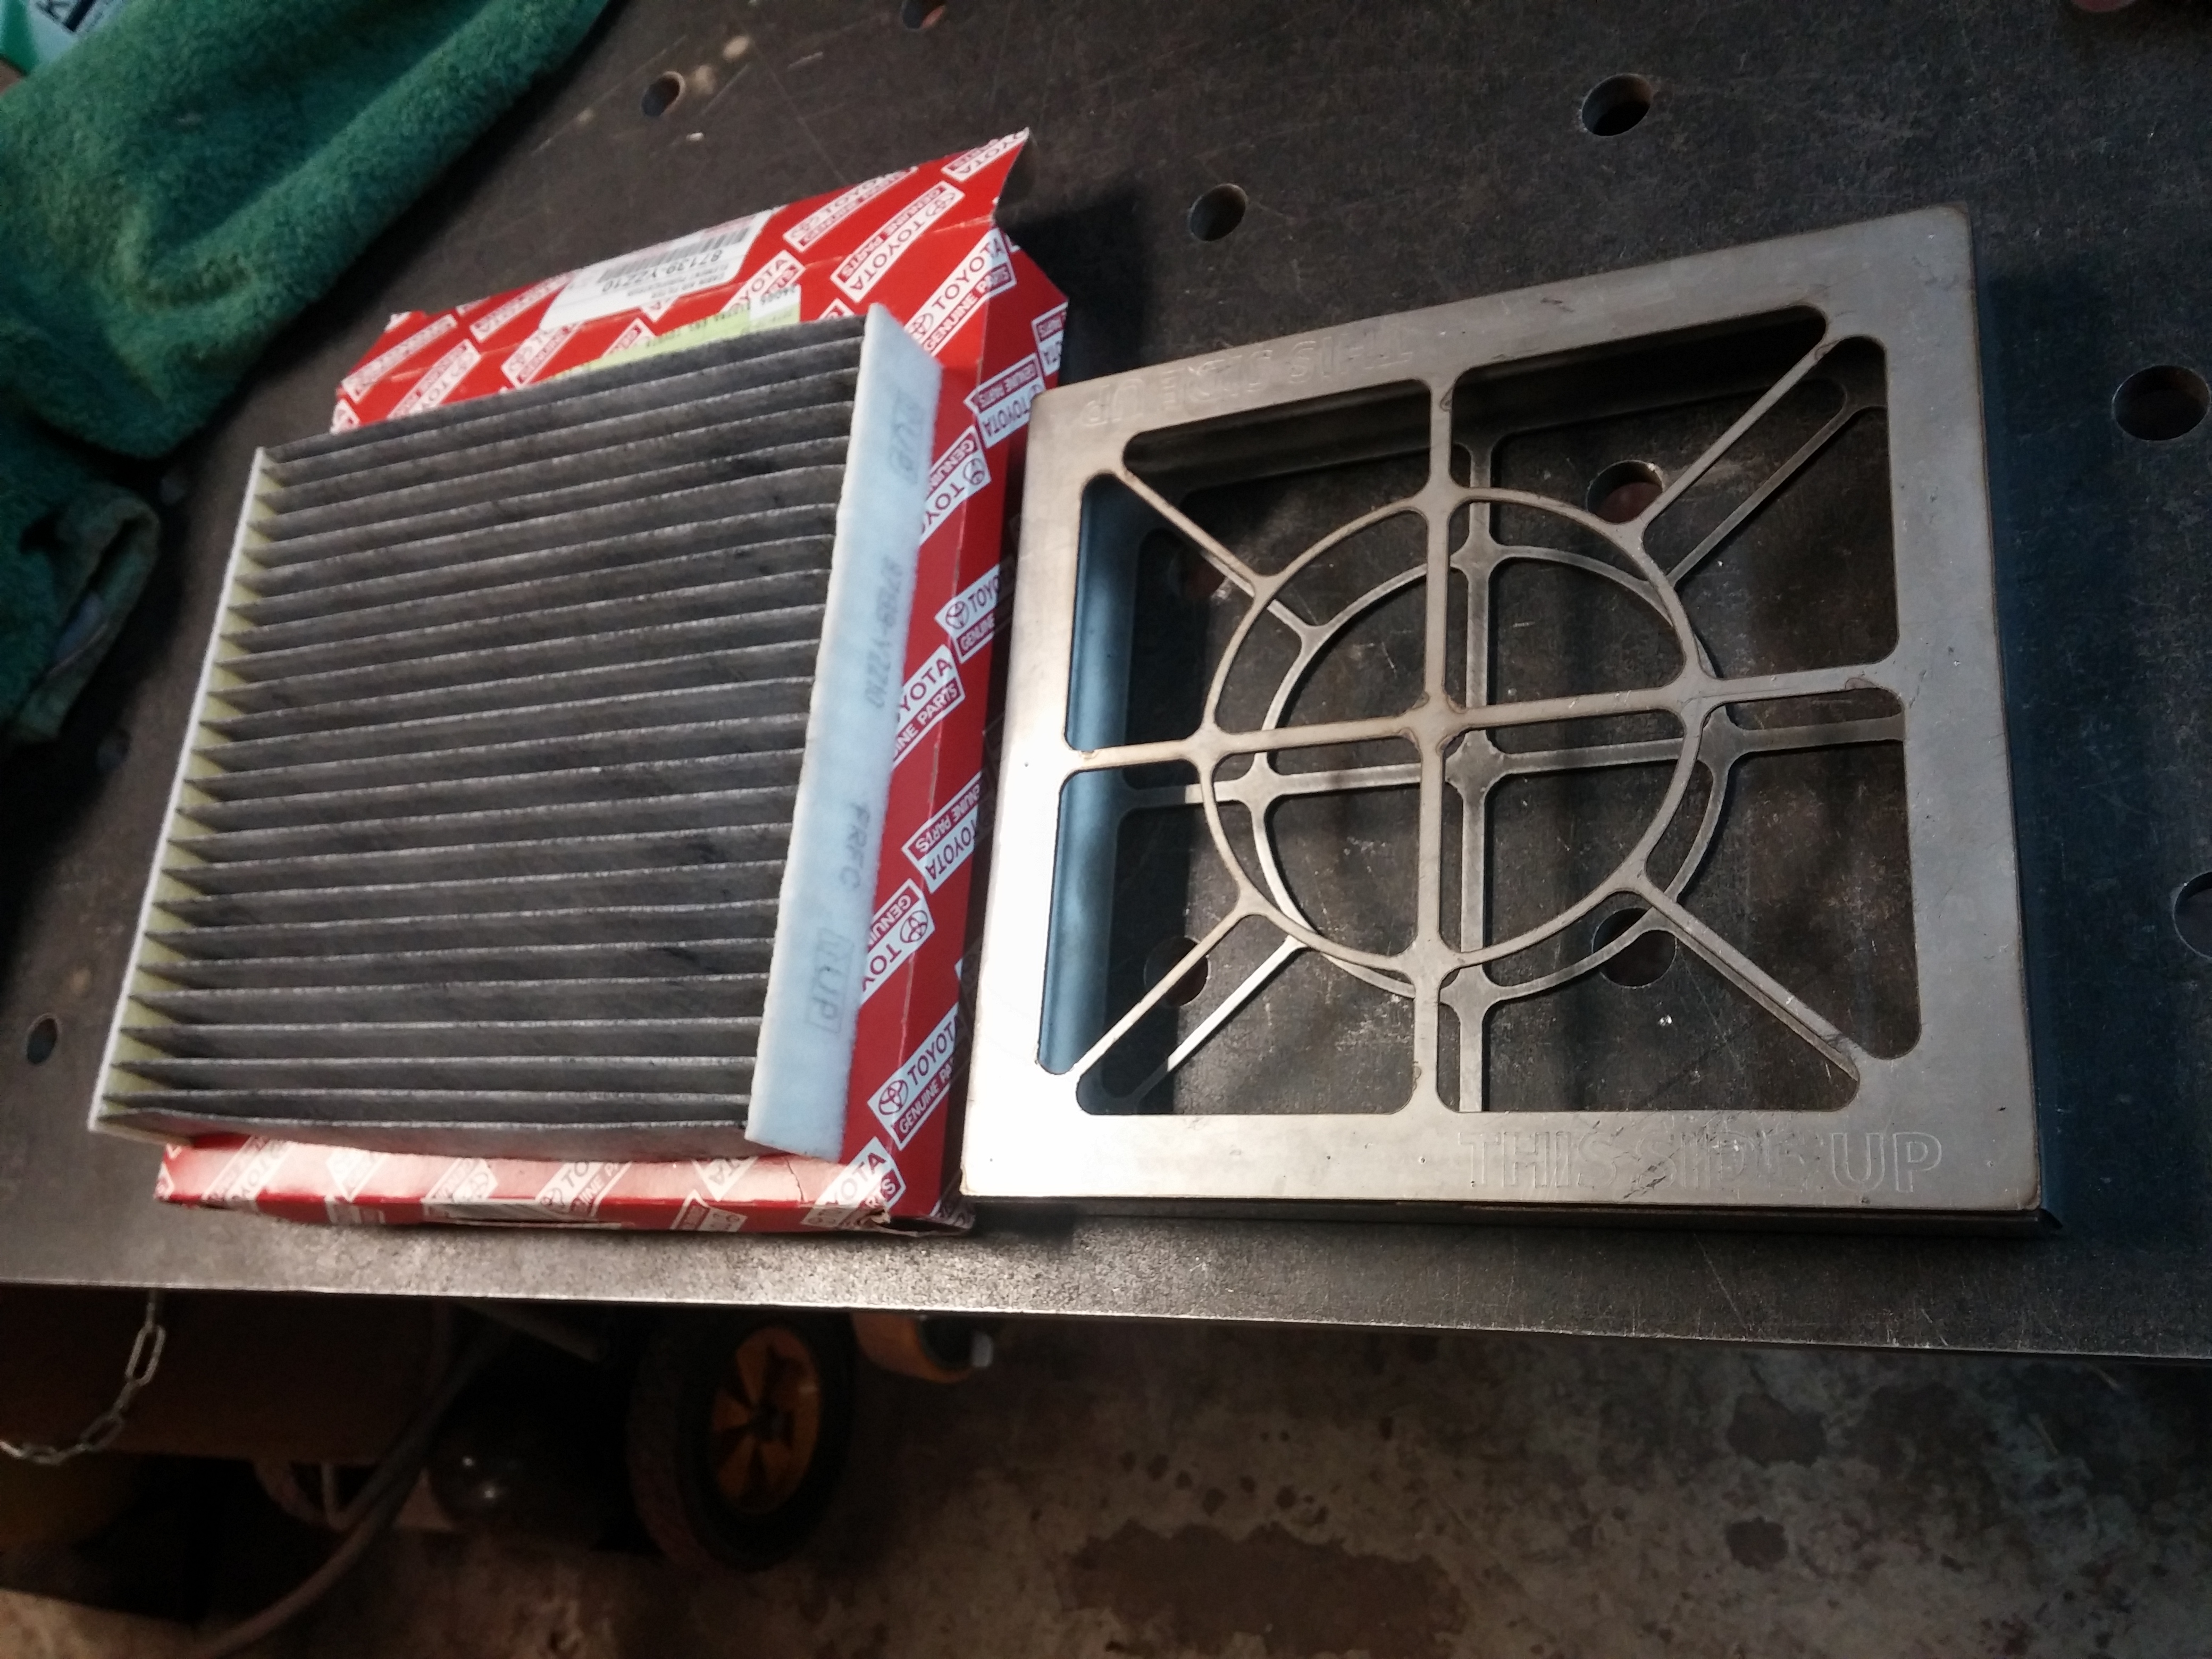
With this project we had a client come to us with respiratory issues and had a very strict requirement for clean air. These are two projects rolled into one, one of which we had something to improve, a premium OEM passenger vehicle pleated paper filter which is charcoal impregnated. And the other we had to create from scratch, creating a charcoal filter basket to fit an existing housing that would be secured to the top of a motor home.
Housing number one was fairly straightforward, measuring the existing filter, mocking it up in CAD and then creating a sheet metal part that will be a slide in replacement. The one thing to note (that the pictures don’t show) is that with a slide in metal box, there would be a concern about vibration noise, so we made the part smaller and lined two of the edges (like the OEM filter) with black felt.
Here are the 18ga 304 stainless steel pieces cut on the CNC table, lightly orbital sanded to give a consistent finish and self-clinching fasteners CLS-440 (otherwise known as PEM’s) installed. Note you can lightly see the plate marked bend bend lines for the piece on the right. It makes bending material so much easier and faster! It beats having to create a flat pattern drawing and dimensioning all the bend locations, then using a pair of calipers and scribing those locations onto the part. It’s all done during the CNC process. Also due to the small size of hardware (#4-40) and the tolerance on the hole needed for a self-clinching fastener, all the holes were centermarked with the plate marker and easily drilled out to the correct size. The piece of the left had the holes drilled and countersunk to allow the countersunk undercut screws to fit flush and ensure no binding when it is installed.
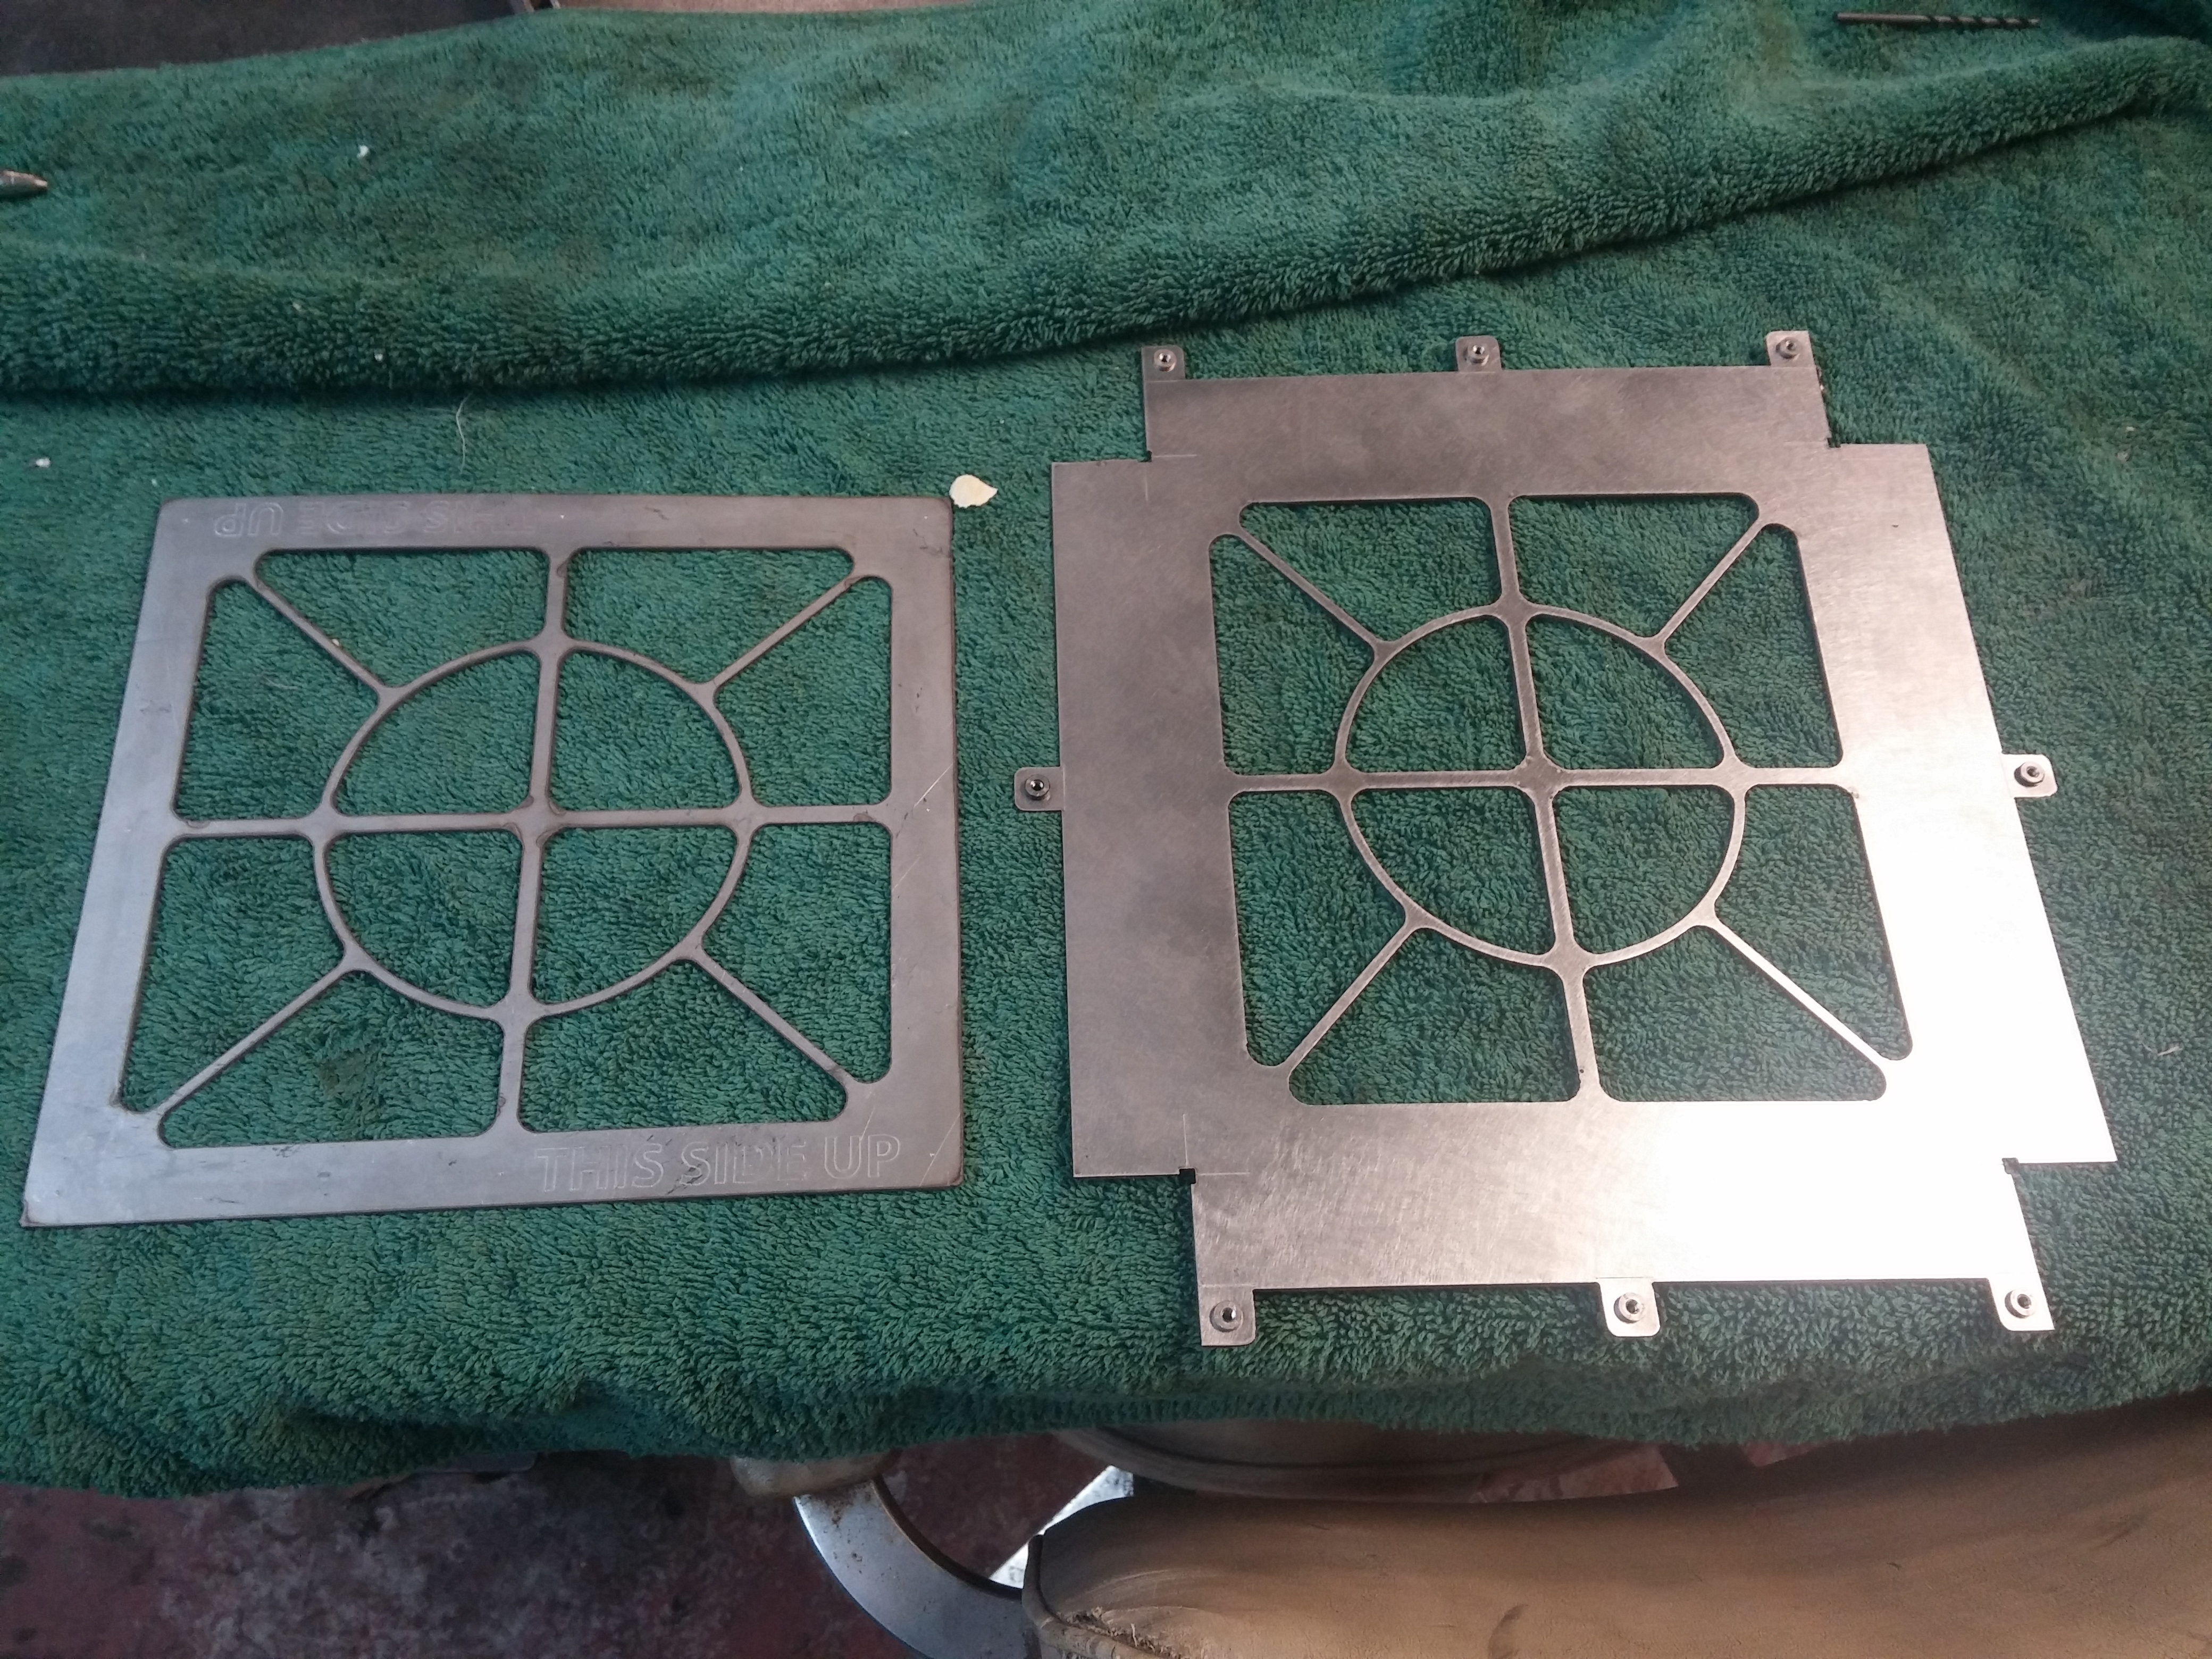
The OEM piece and the custom piece (still need holes drilled in the cover). Onto the next one!
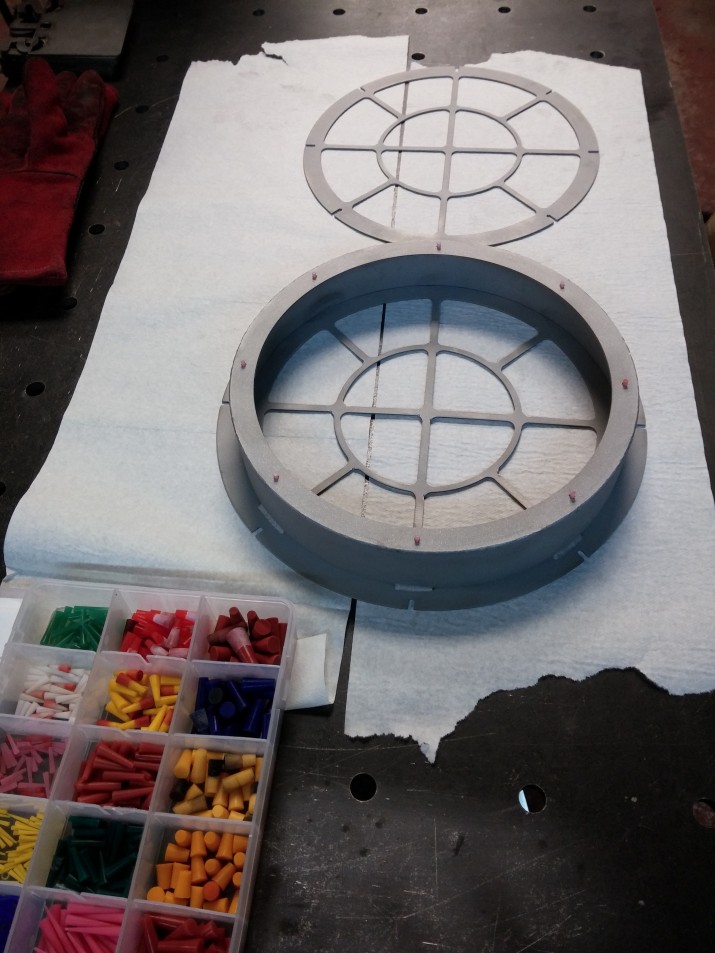
There are a few projects sitting on the table, what to take notice of is the three round pieces and the long flat piece on the right. The flat piece is slip rolled and is used to attach two of the rings (the top two rings) together. Then the ring on the bottom will get secured with #4-40 screws. Note the use of slots on the bottom ring, the cover, this allowed the perimeter to be cut in one shot, allow for some adjustment while screwing the hardware in. This will also eliminating a post drilling operation, which saves time and the customer money.

Here’s the welding time lapse video of the welding process. Just a quick 30 second snippet!
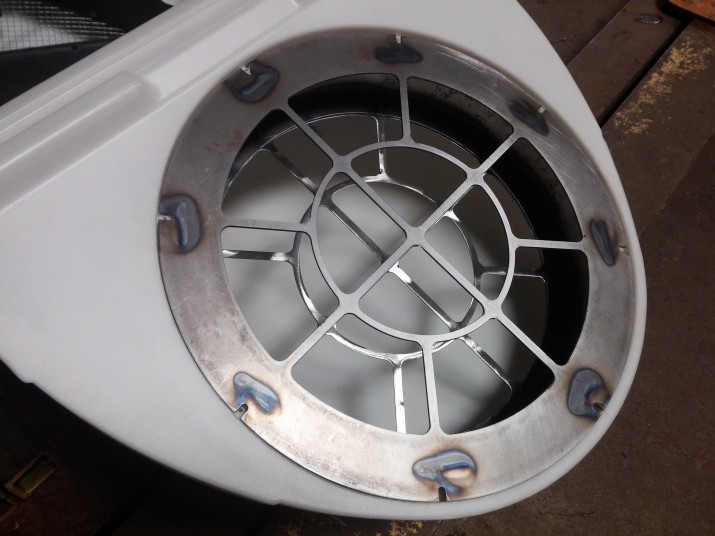
And here’s the fabrication completed and test fitted part on the housing for the motor home. Just making sure everything fits and nothing was overlooked prior to prepping the part for powder coat.
The parts are now blasted and have silicone plugs installed to prevent powder from building up in the threads.
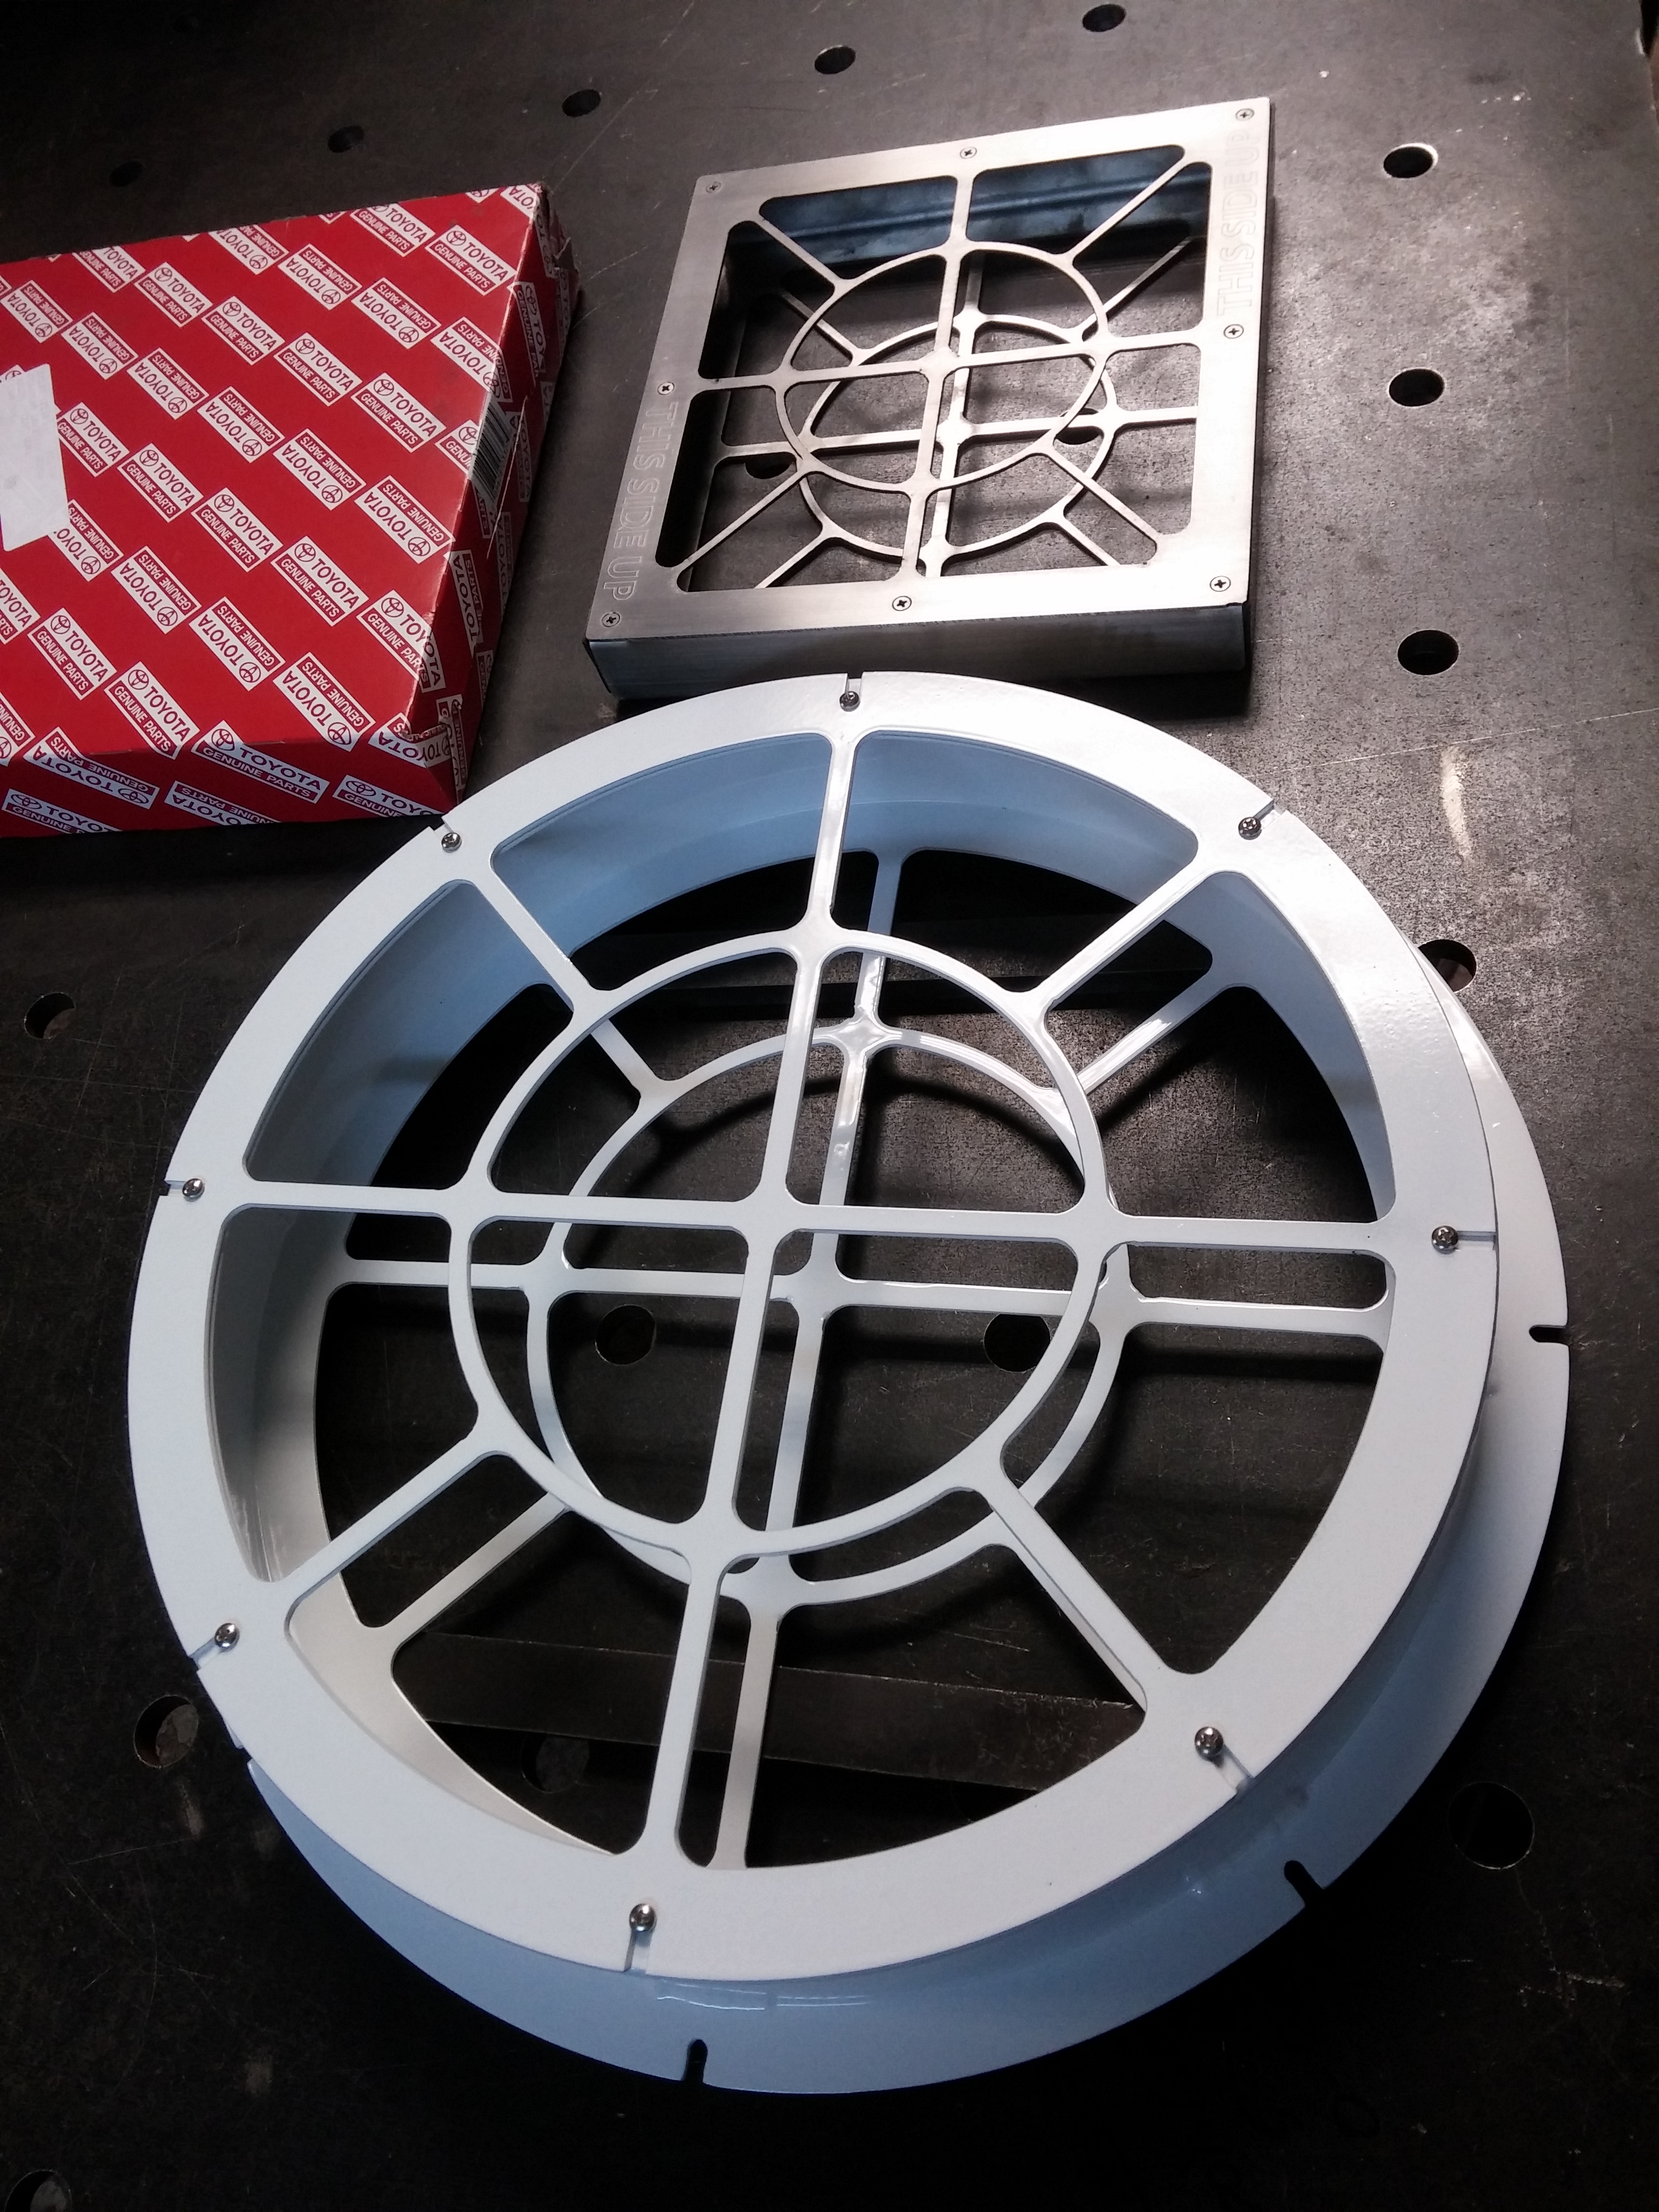
It worked out perfectly having two sacrificial #4-40 screws to allow the entire piece to hang horizontally during powder application and when it goes into the oven. Note: MIG welding wire makes great disposable hanger material.

Here are the final products. Brushed 18ga stainless steel and 14ga steel powder coated with super durable wet white powder. Both using #4-40 stainless steel screws and self-clinching fasteners. The client will cuts out a cotton filter which is reinforced with wire mesh that will go on the bottom of the filter cartridge, the filter is filled with high quality charcoal and then another cotton filter is placed on top. The cover is secured and the cartridge is put in the air stream and ready to be put to use!
Thanks for reading and we’ve got a lot more to show! So please hit that follow button if you want to keep up to date of the projects we’re working on. Or browse through our list of services to allow us to help you create your next project!
Stainless Steel Urn
This project was for my wife. She whole heartily supports Mint Design and understands the long hours required to build awesome projects for our awesome clients. So I show my appreciation in many ways, but fabrication is how I do it best. This is a small urn for my father-in-law that passed away from cancer in 2013. I only had a few days to make the urn that would be buried, which can be seen in this blog post; Stainless Steel Urn.
Since that time my very patient wife wanted a smaller version that would be used to keep a small part of his ashes safe and secure in our home for all of time. I took the original model, scaled it down 3:1 and changed how the text would be laid out. Since it was three sided it seemed quite fitting to have his first, middle and last name engraved on each side.
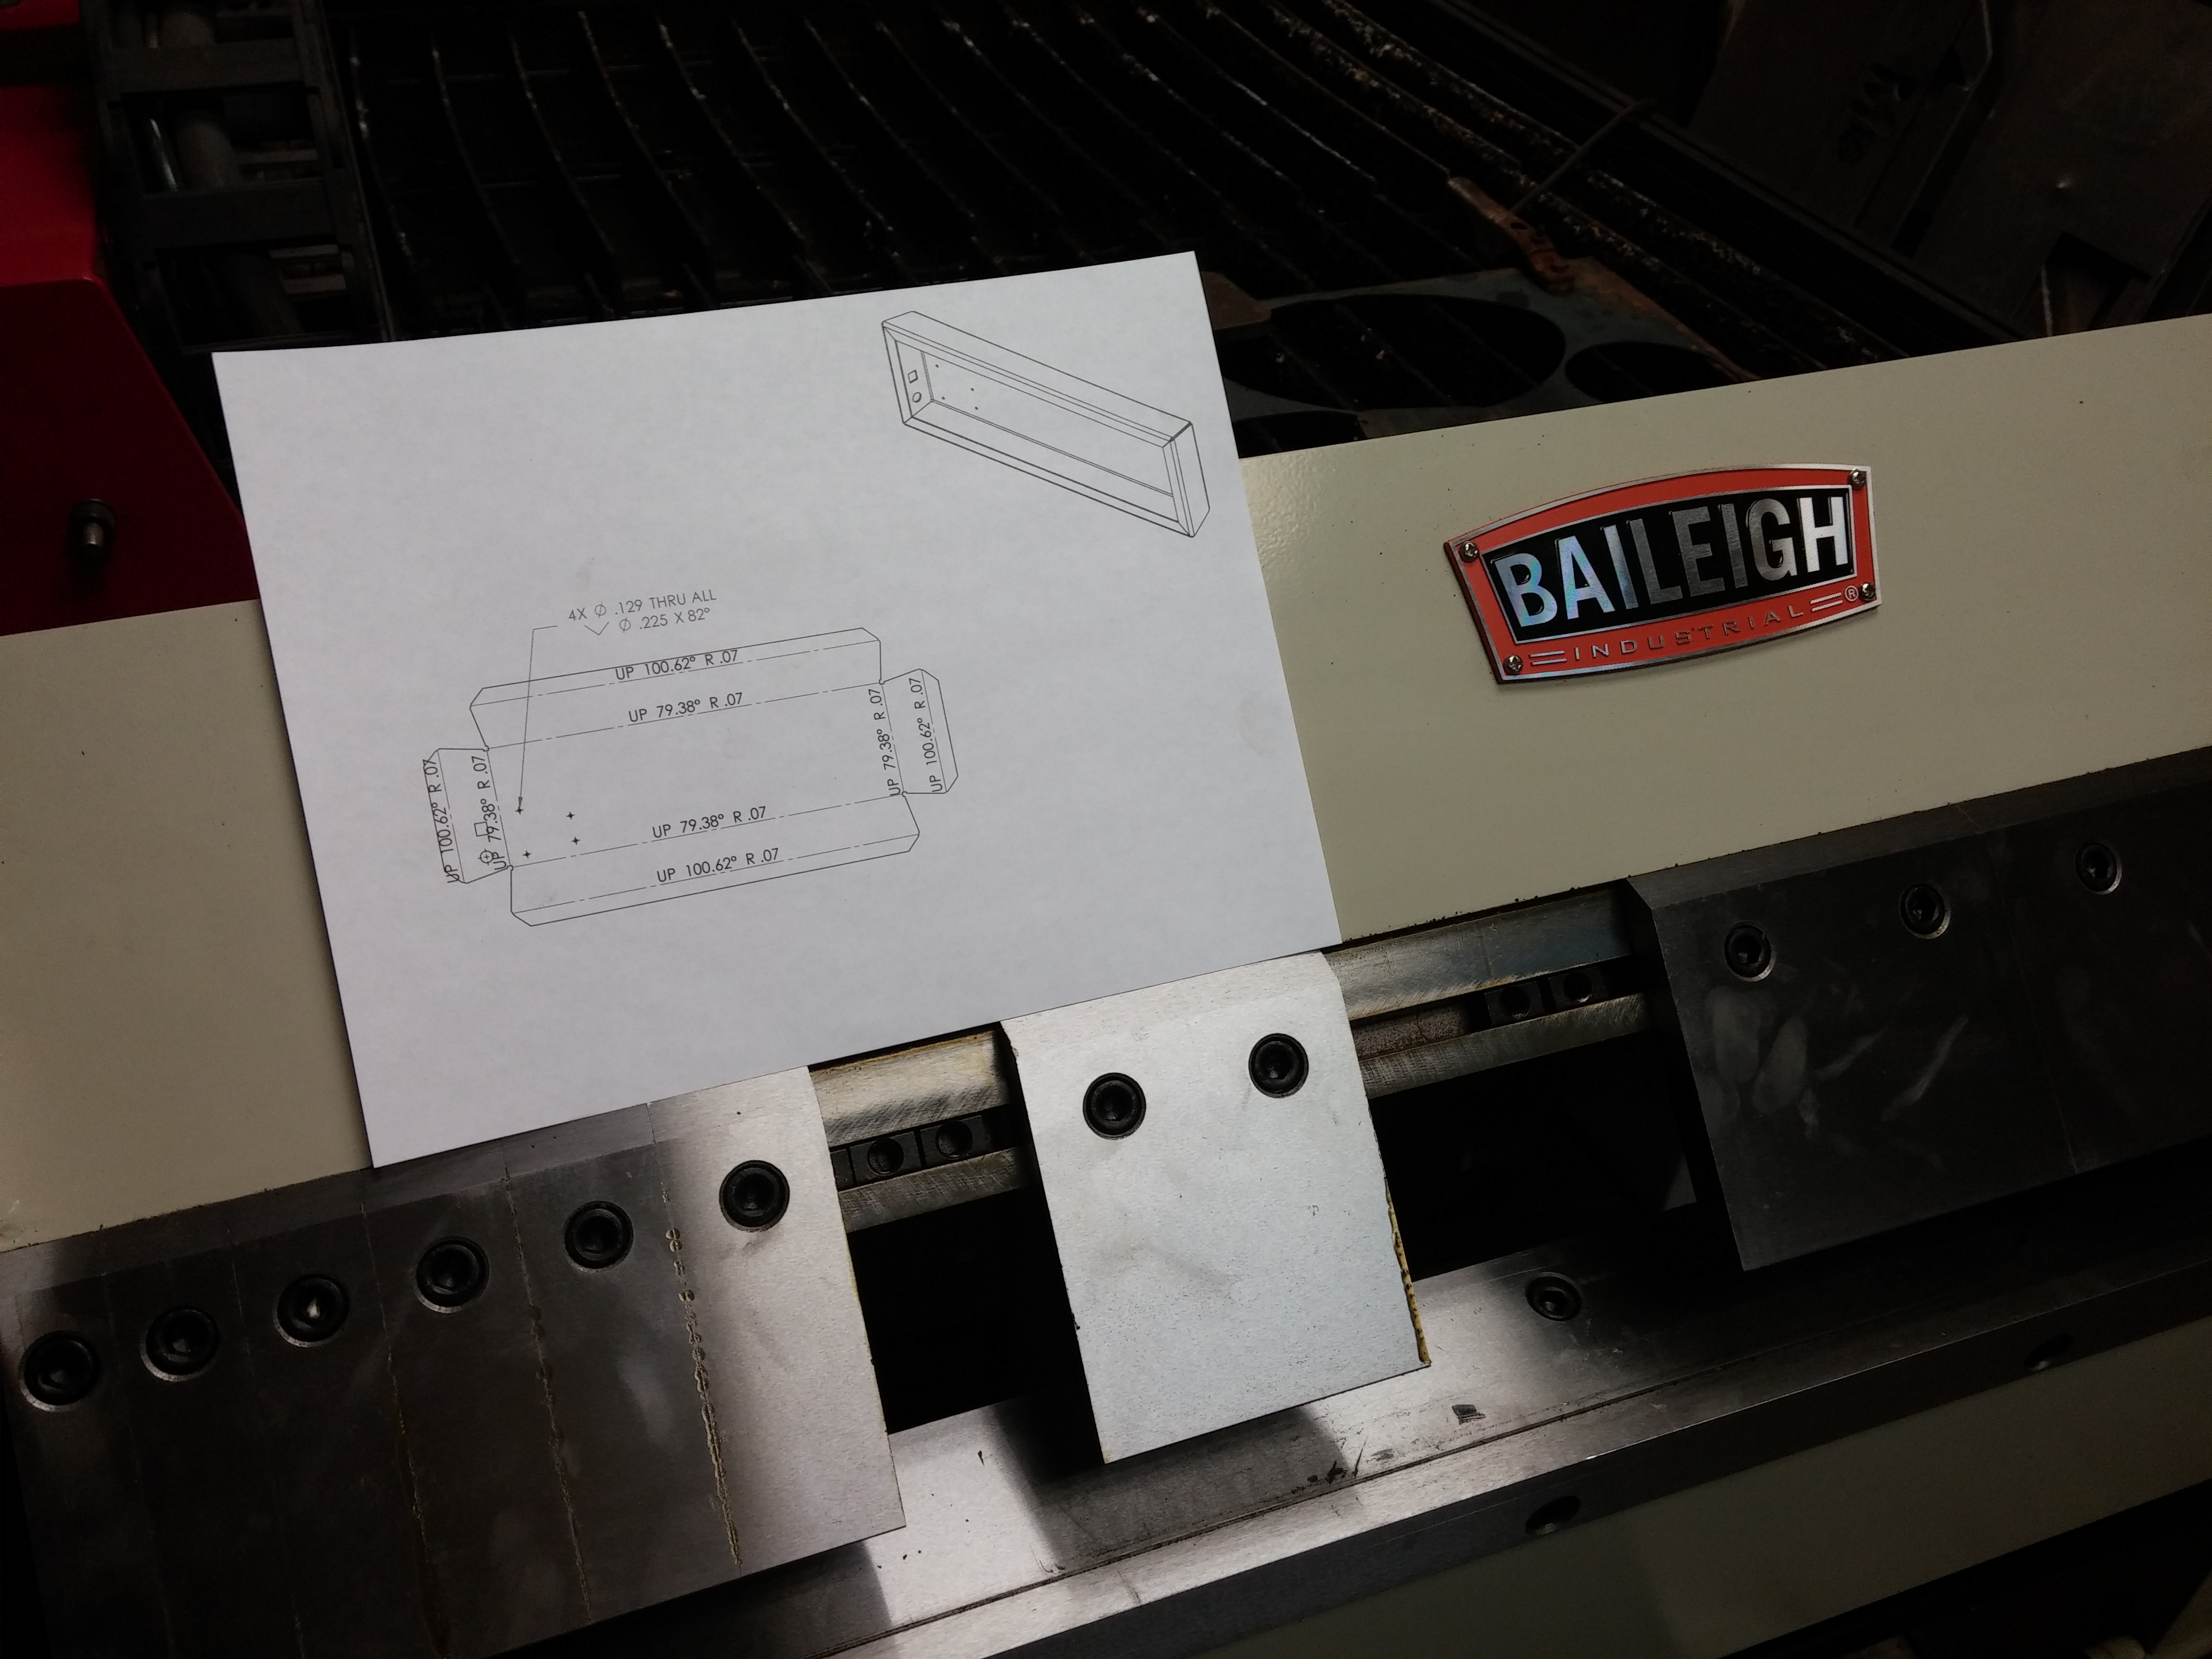
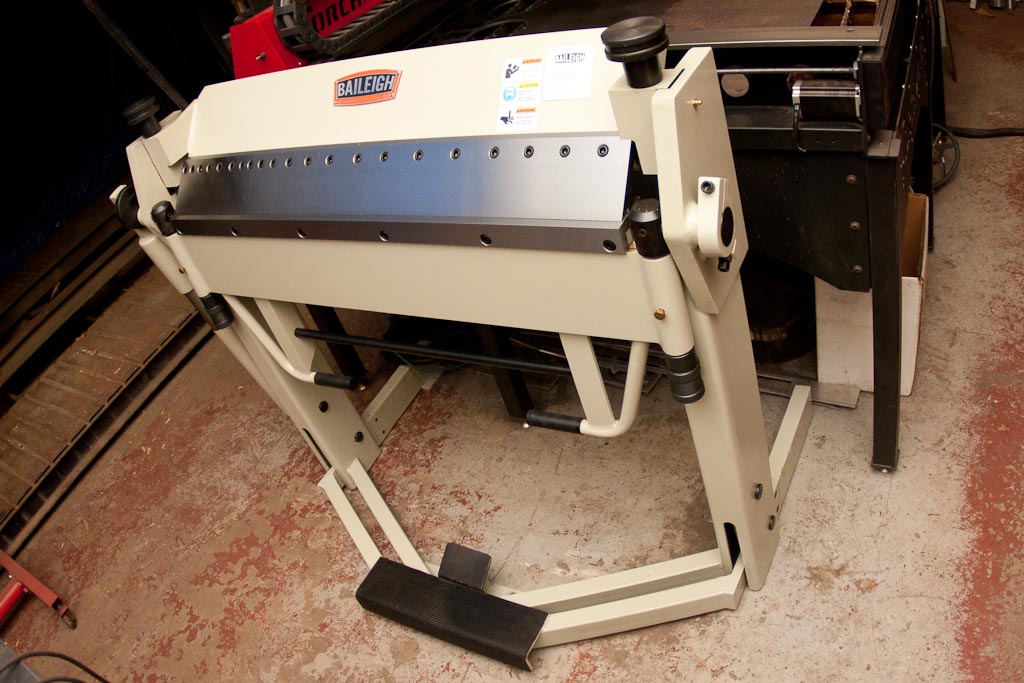
Here we have the four pieces cut out of 18ga 304 stainless steel. The paper templates on the top right are used as guides to show where the bend lines should be. The Baileigh sheet metal brake we have has been modeled in CAD (it was done the first week we had it in the shop) in order to allow us to see bend sequences or raise any red flags if there was any issue with forming a part in the brake. As you can see on the printout, there is no way to do it as one piece (which was obvious), however it did allow us to figure out the best place to split up the sheet metal piece.

Here we have all the pieces formed and ready for TIG welding.
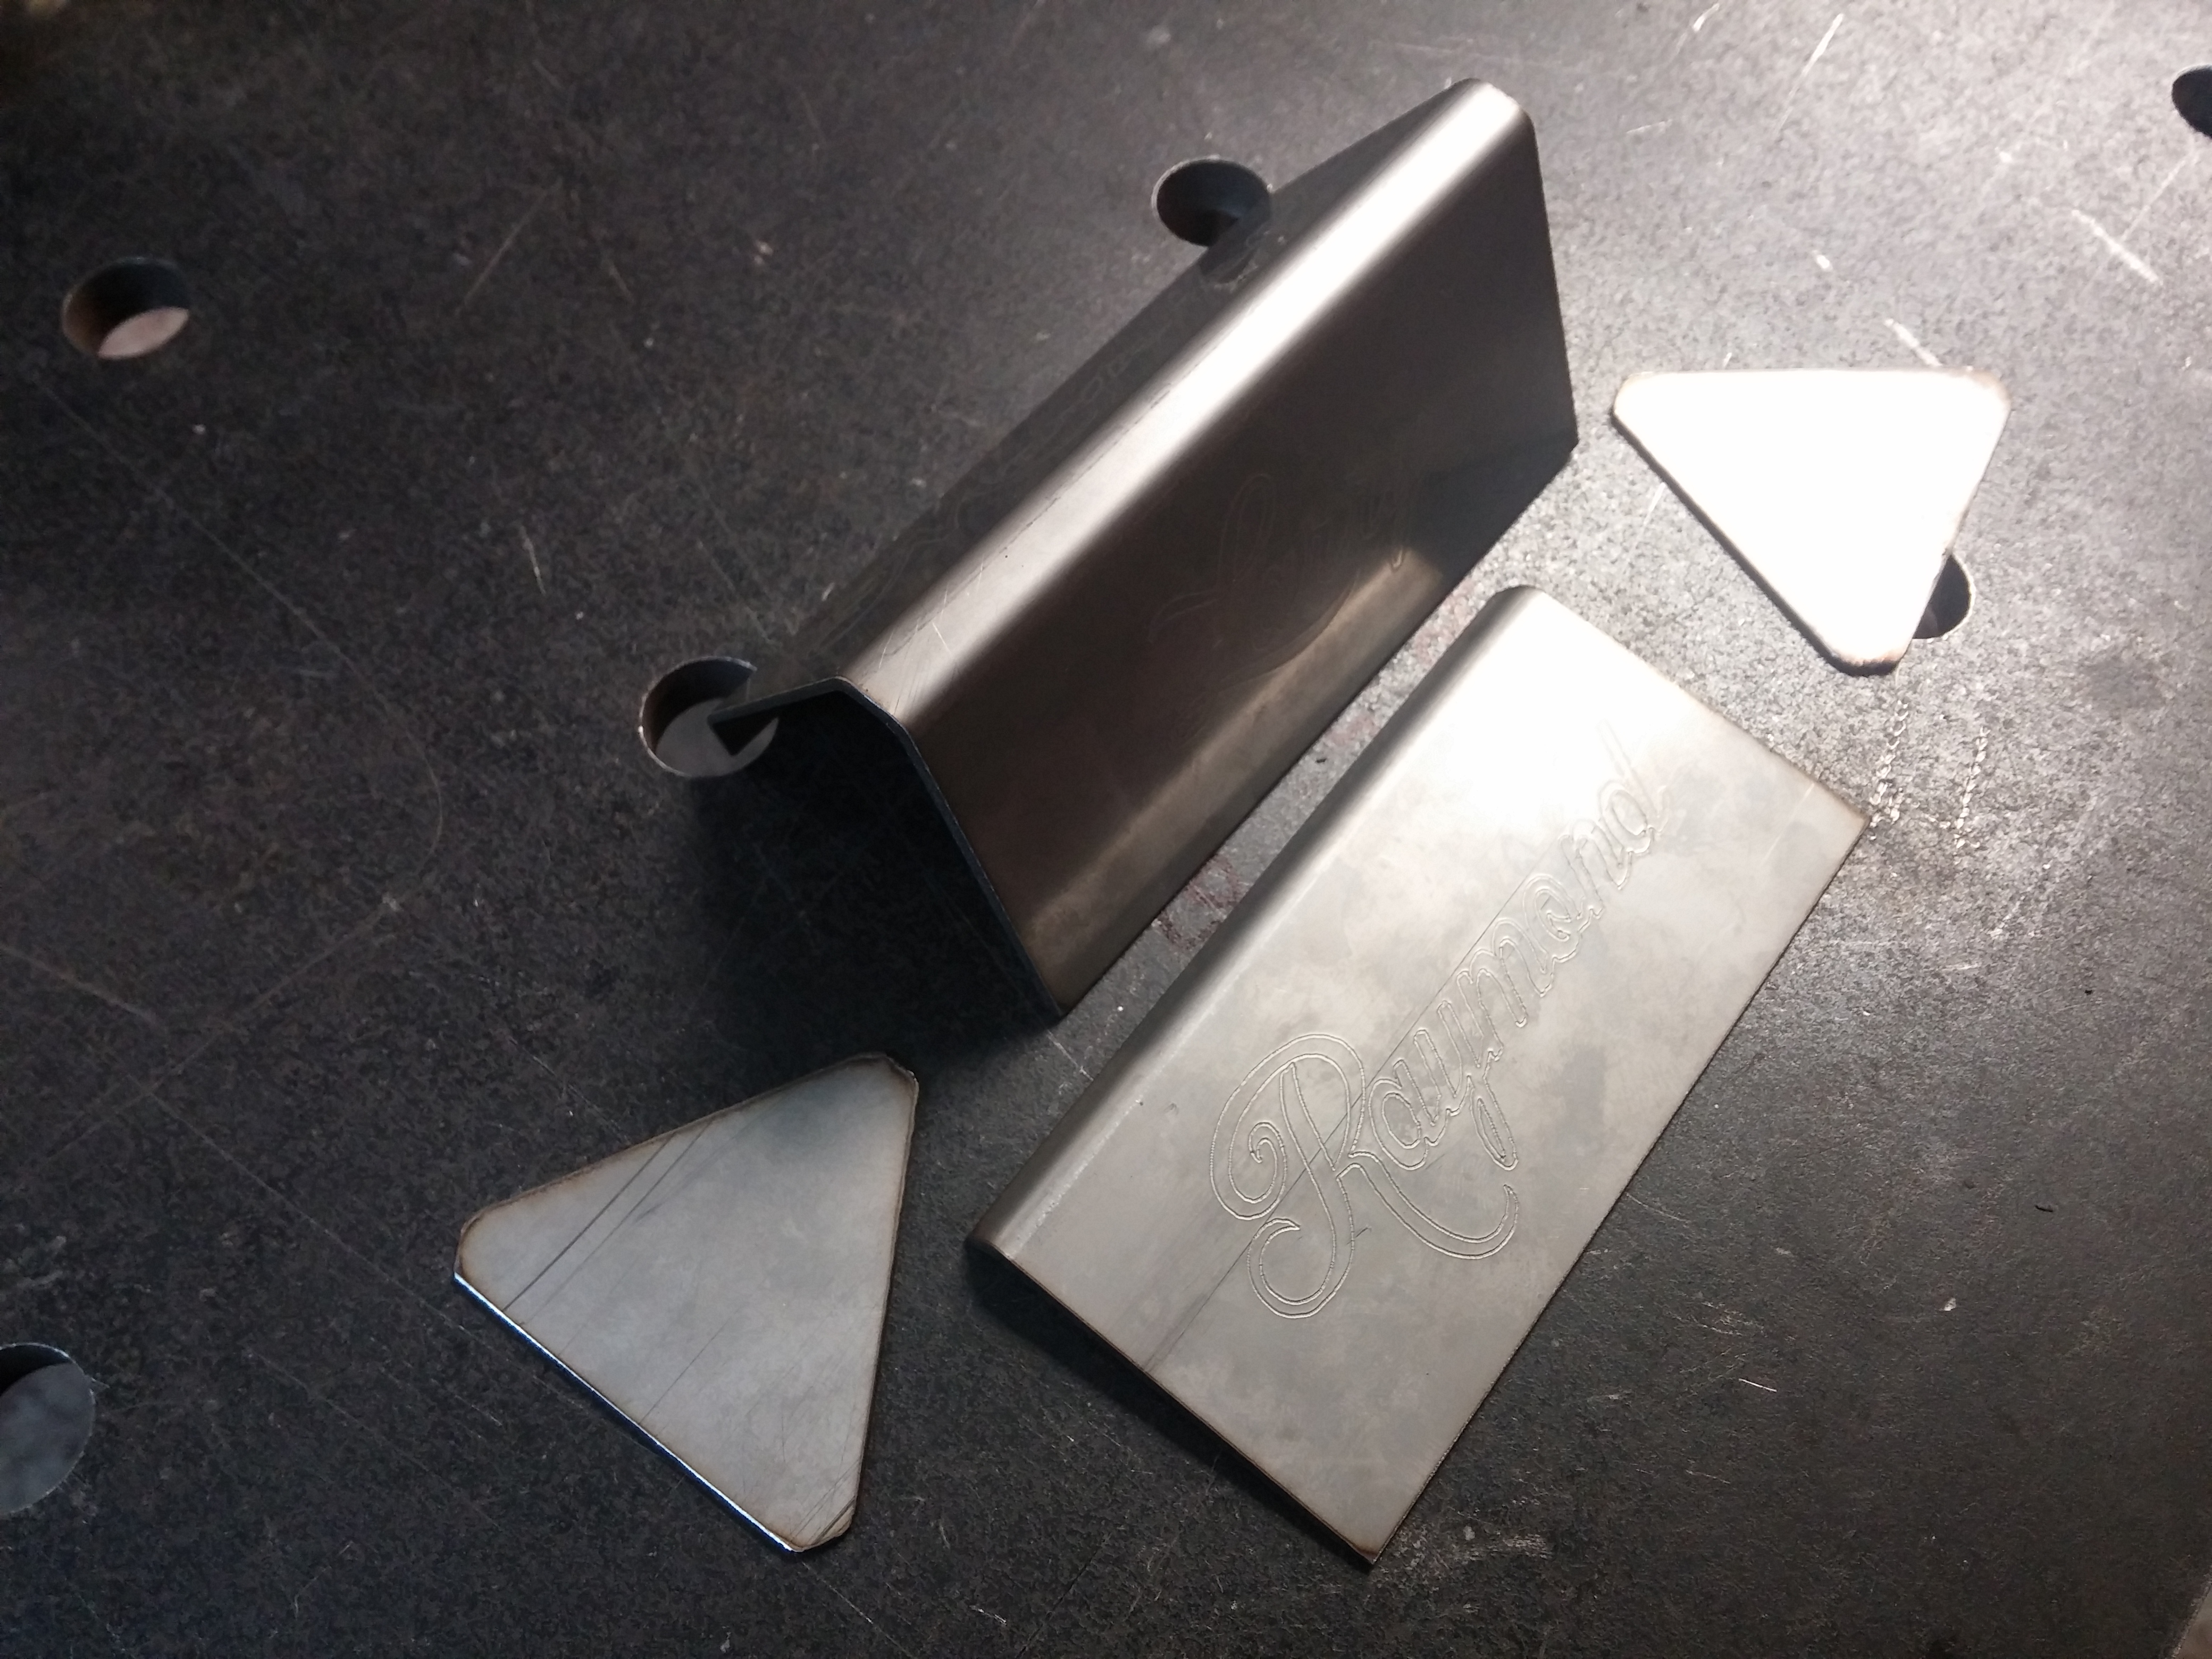

Before welding the final result known was that all the welds would be blended away, so in order to ensure a nice radius’d corner the weld puddle was deliberately made a bit tall. This allows for a bit more material to remove, but ensures there won’t be any divots or shallow spots on the radius being blended in. The welds were also made short and back stepped in order to minimize any distortion, of which would be very noticeable on a brushed surface.
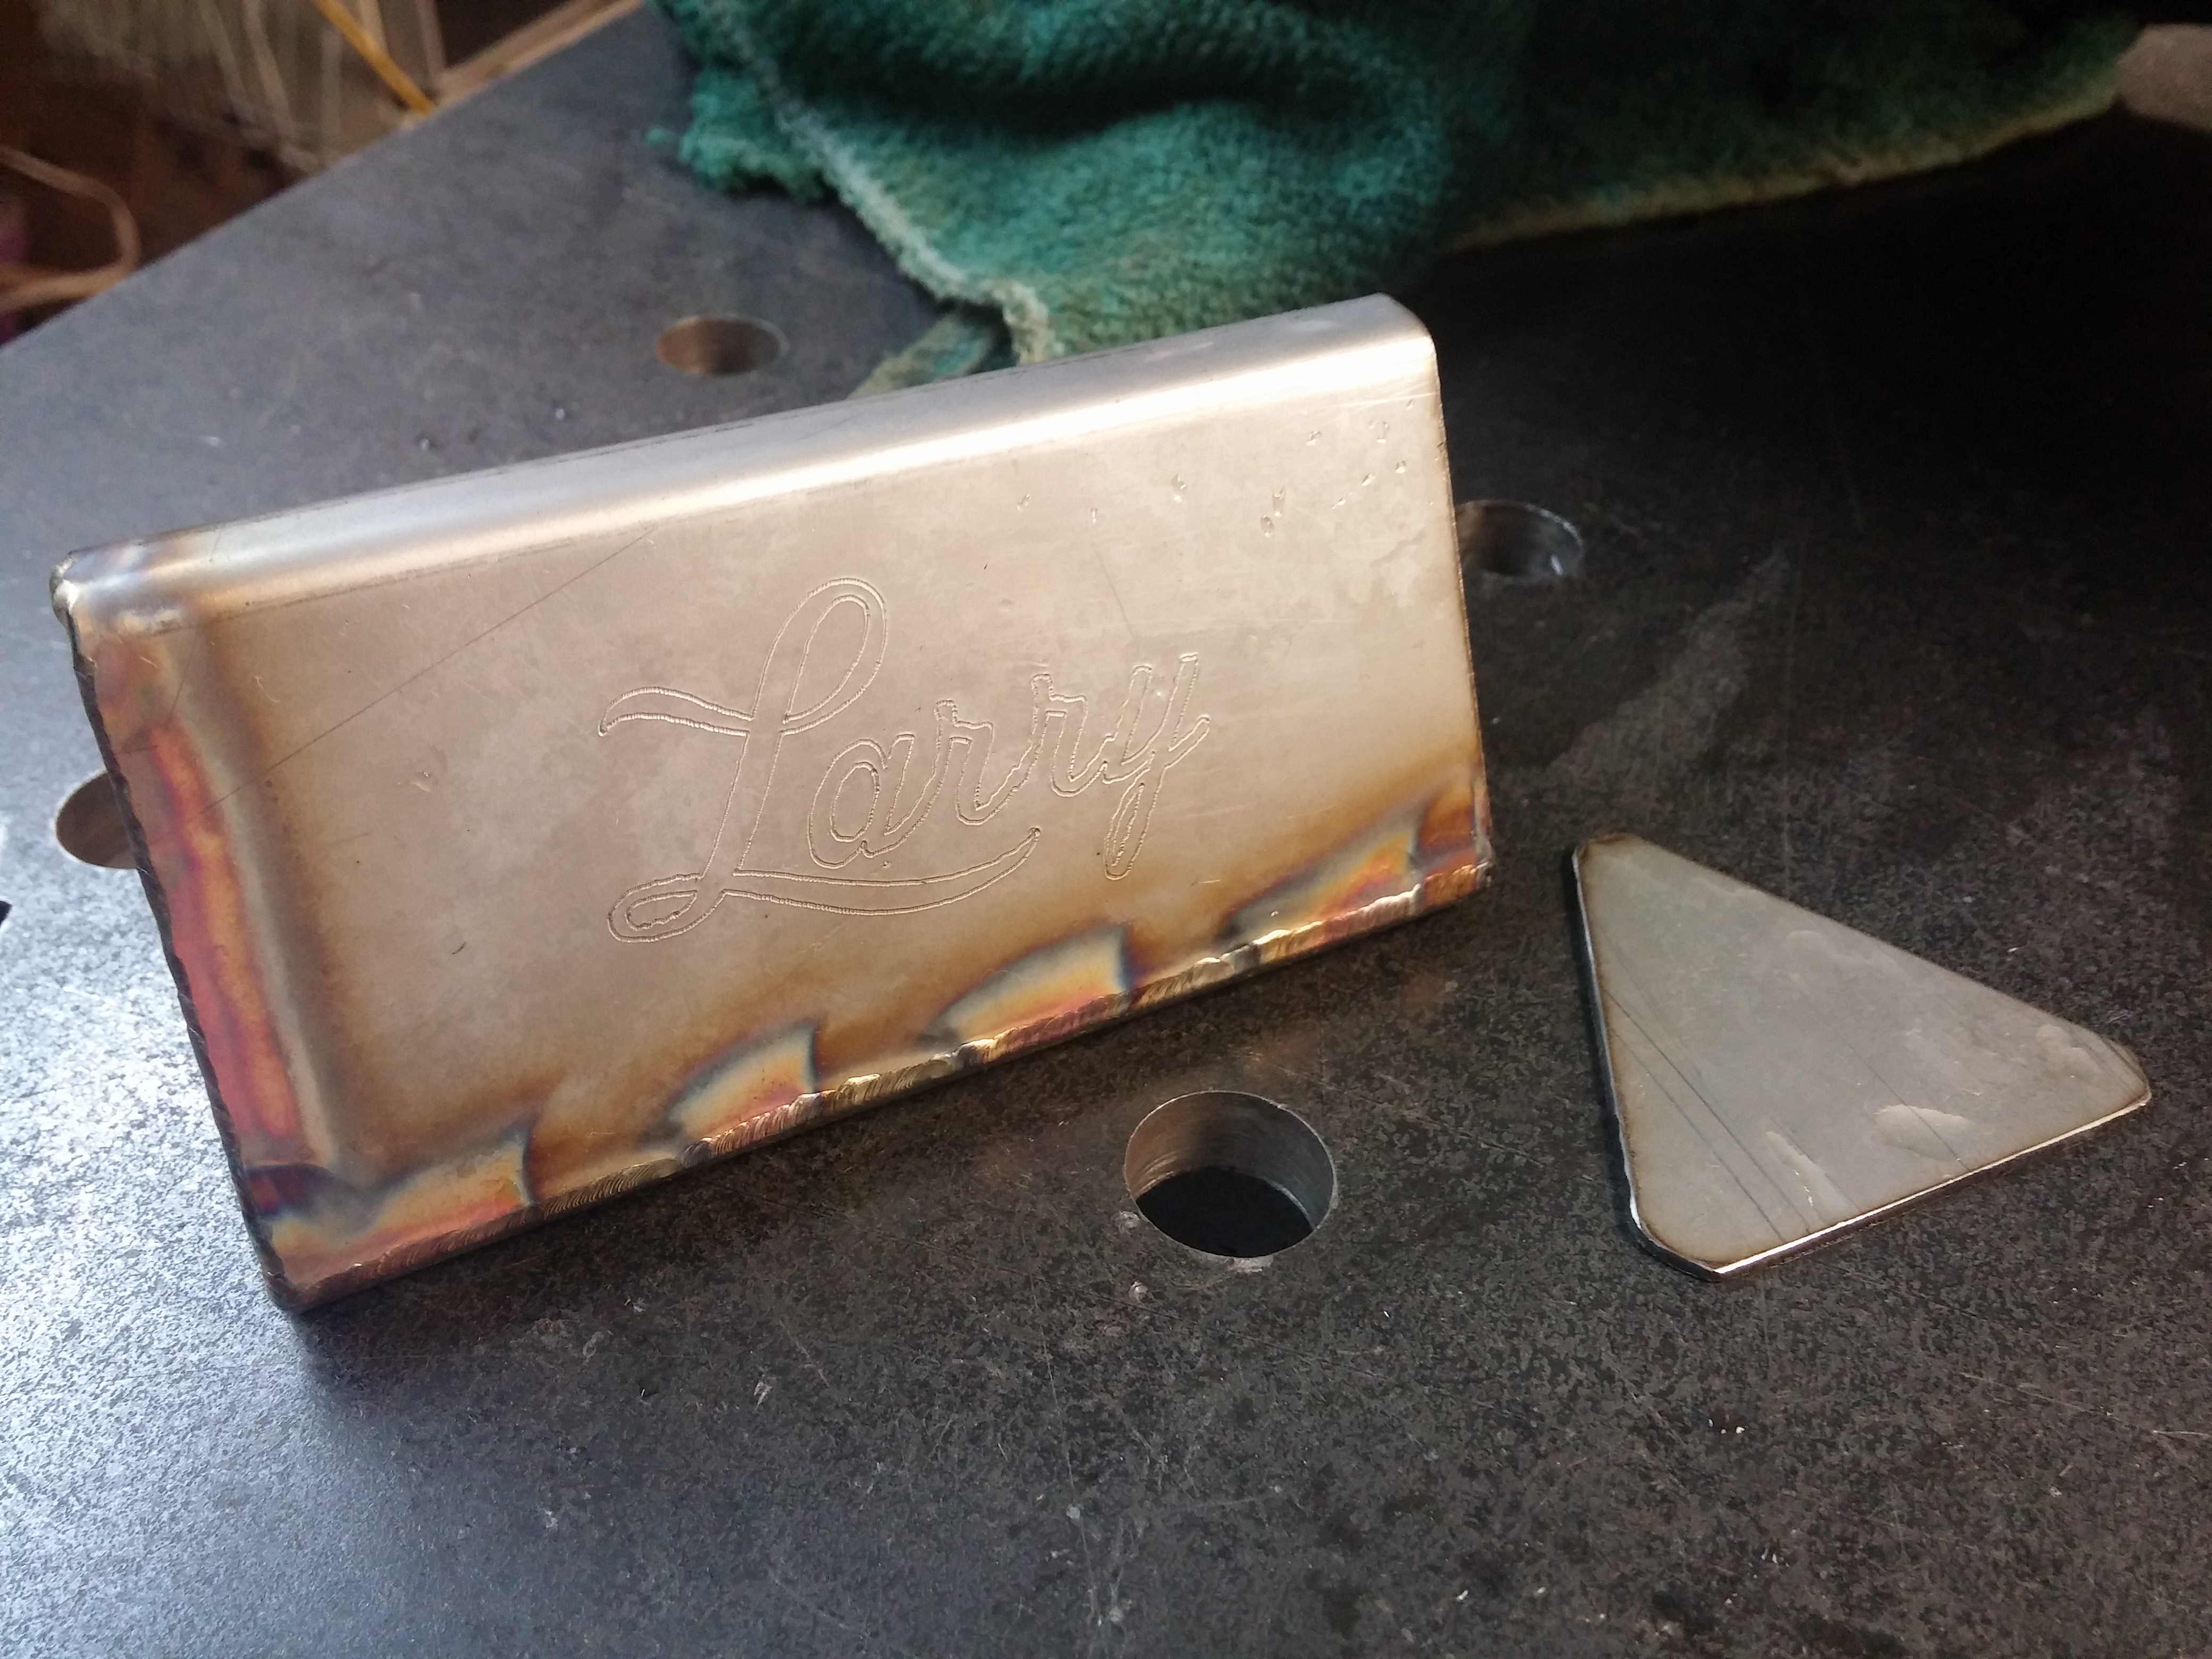
Here it is completed.
Rest in peace Larry.
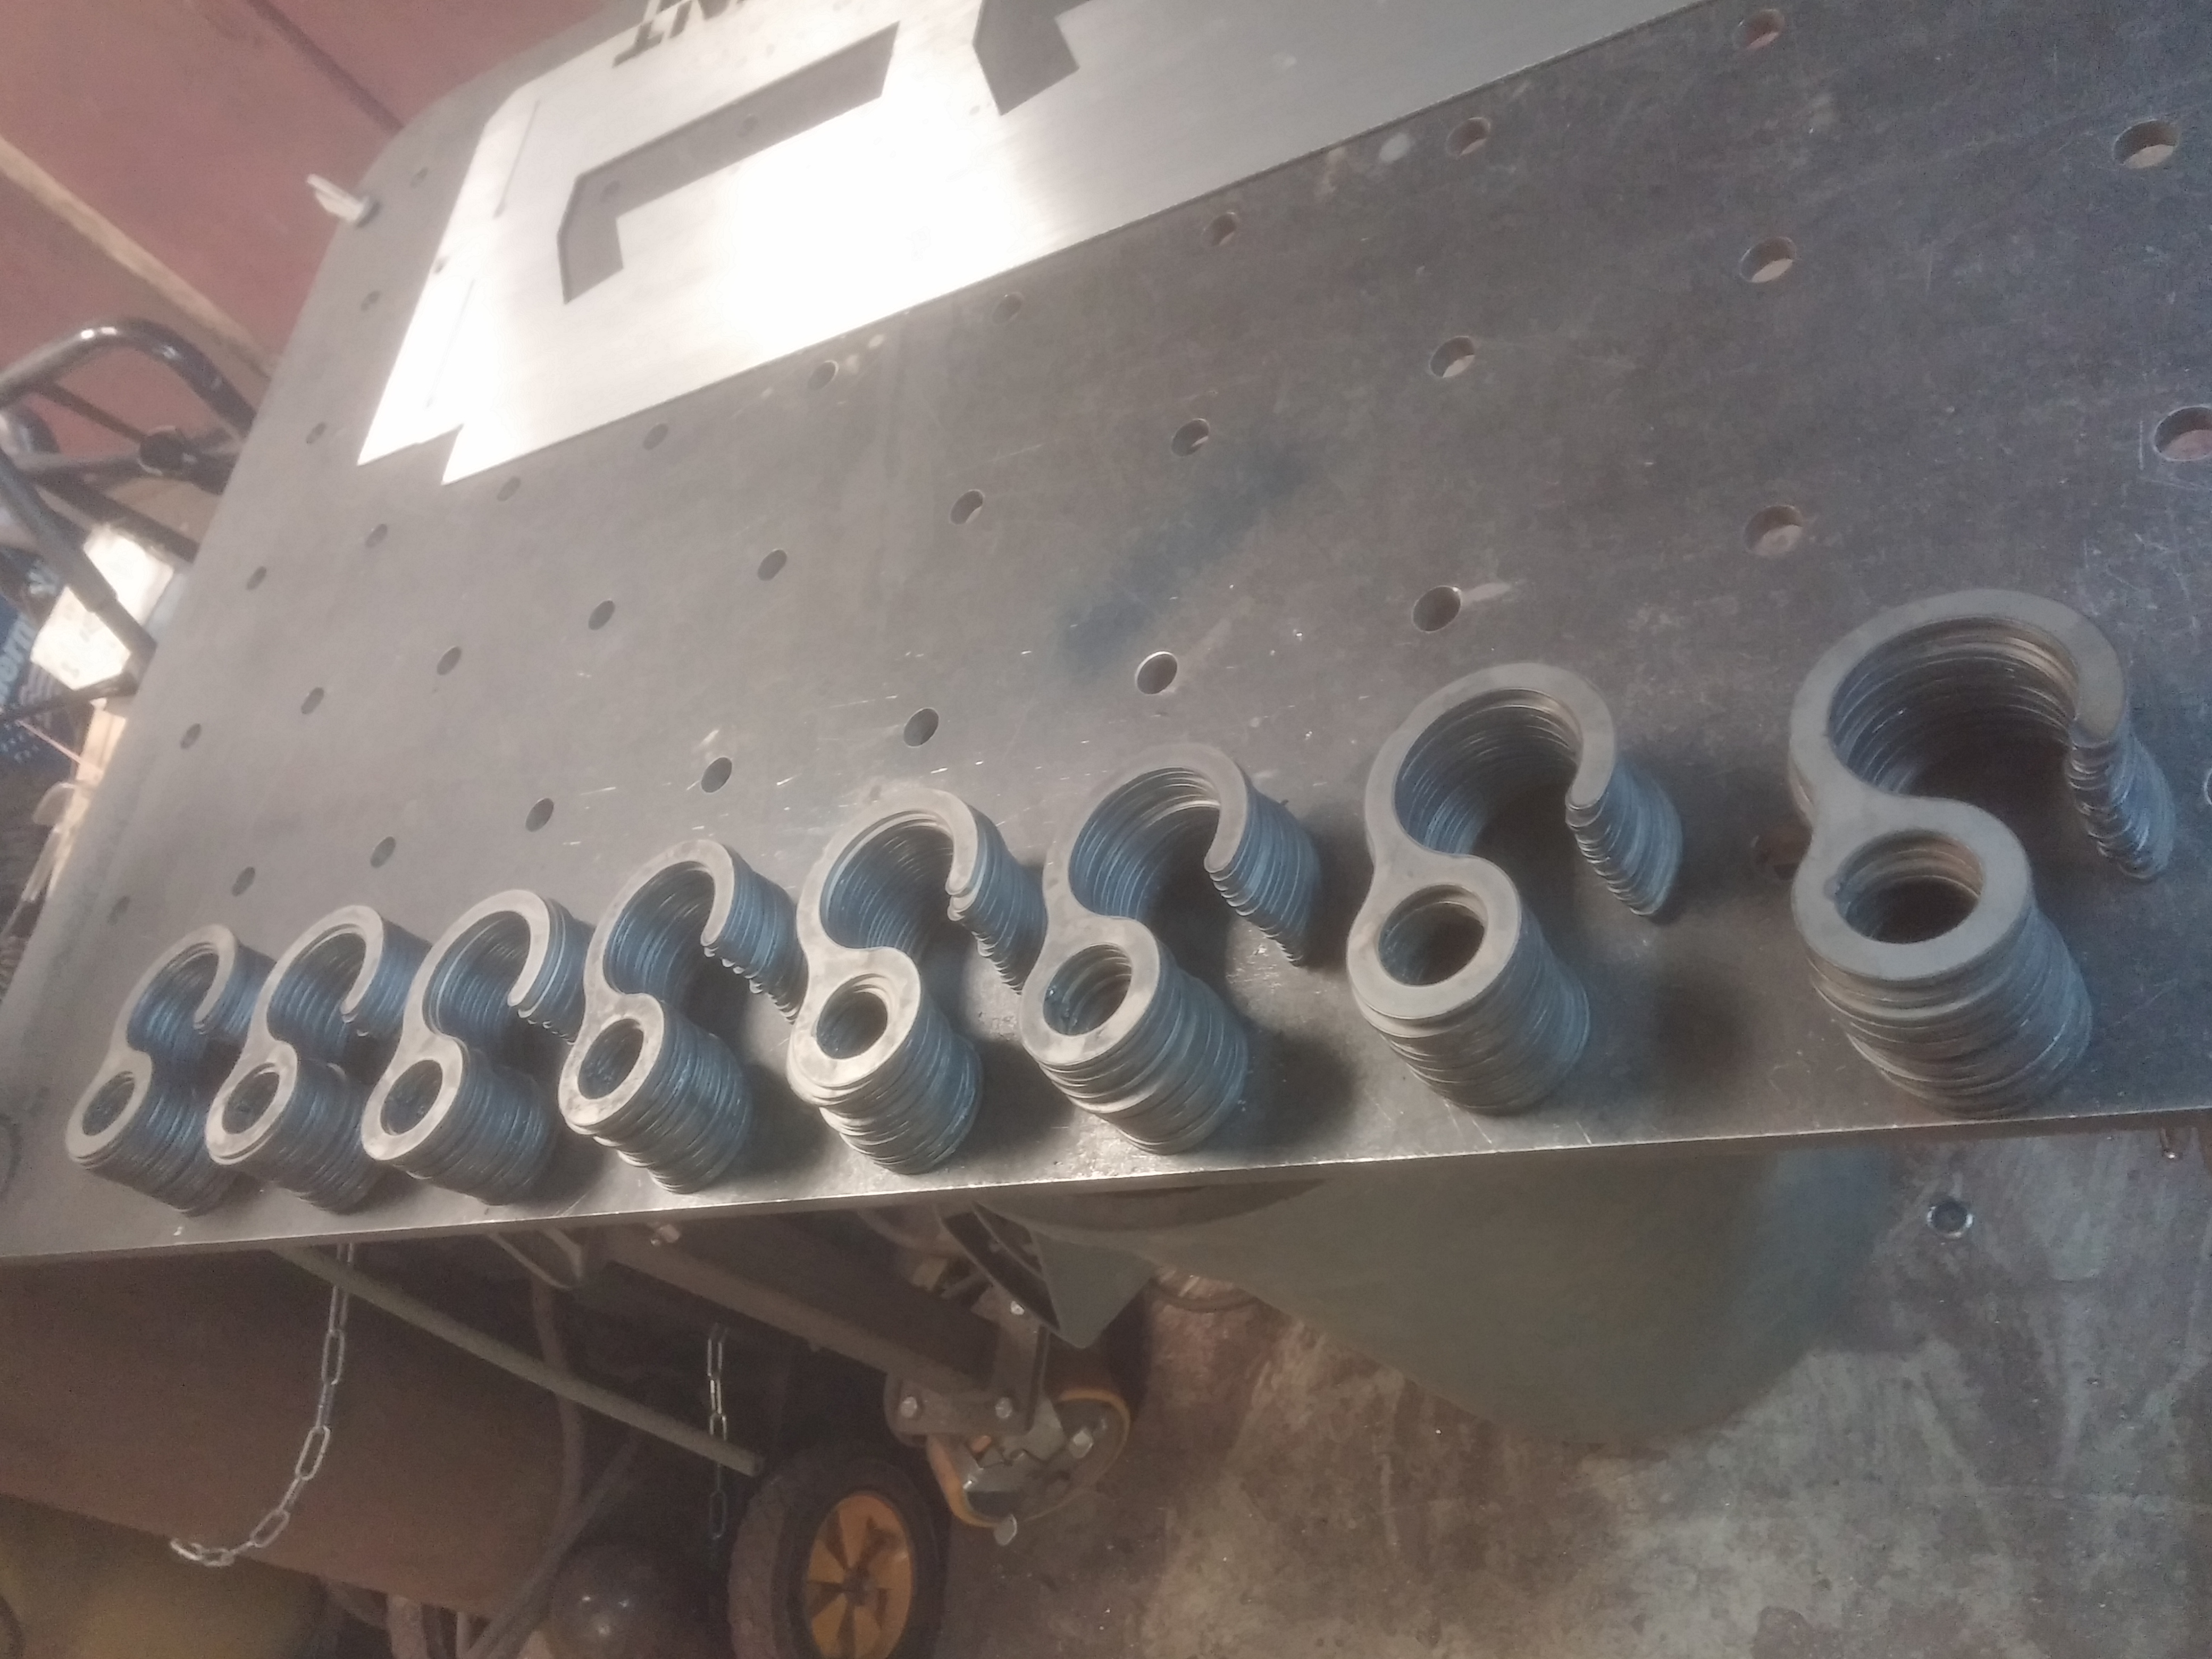
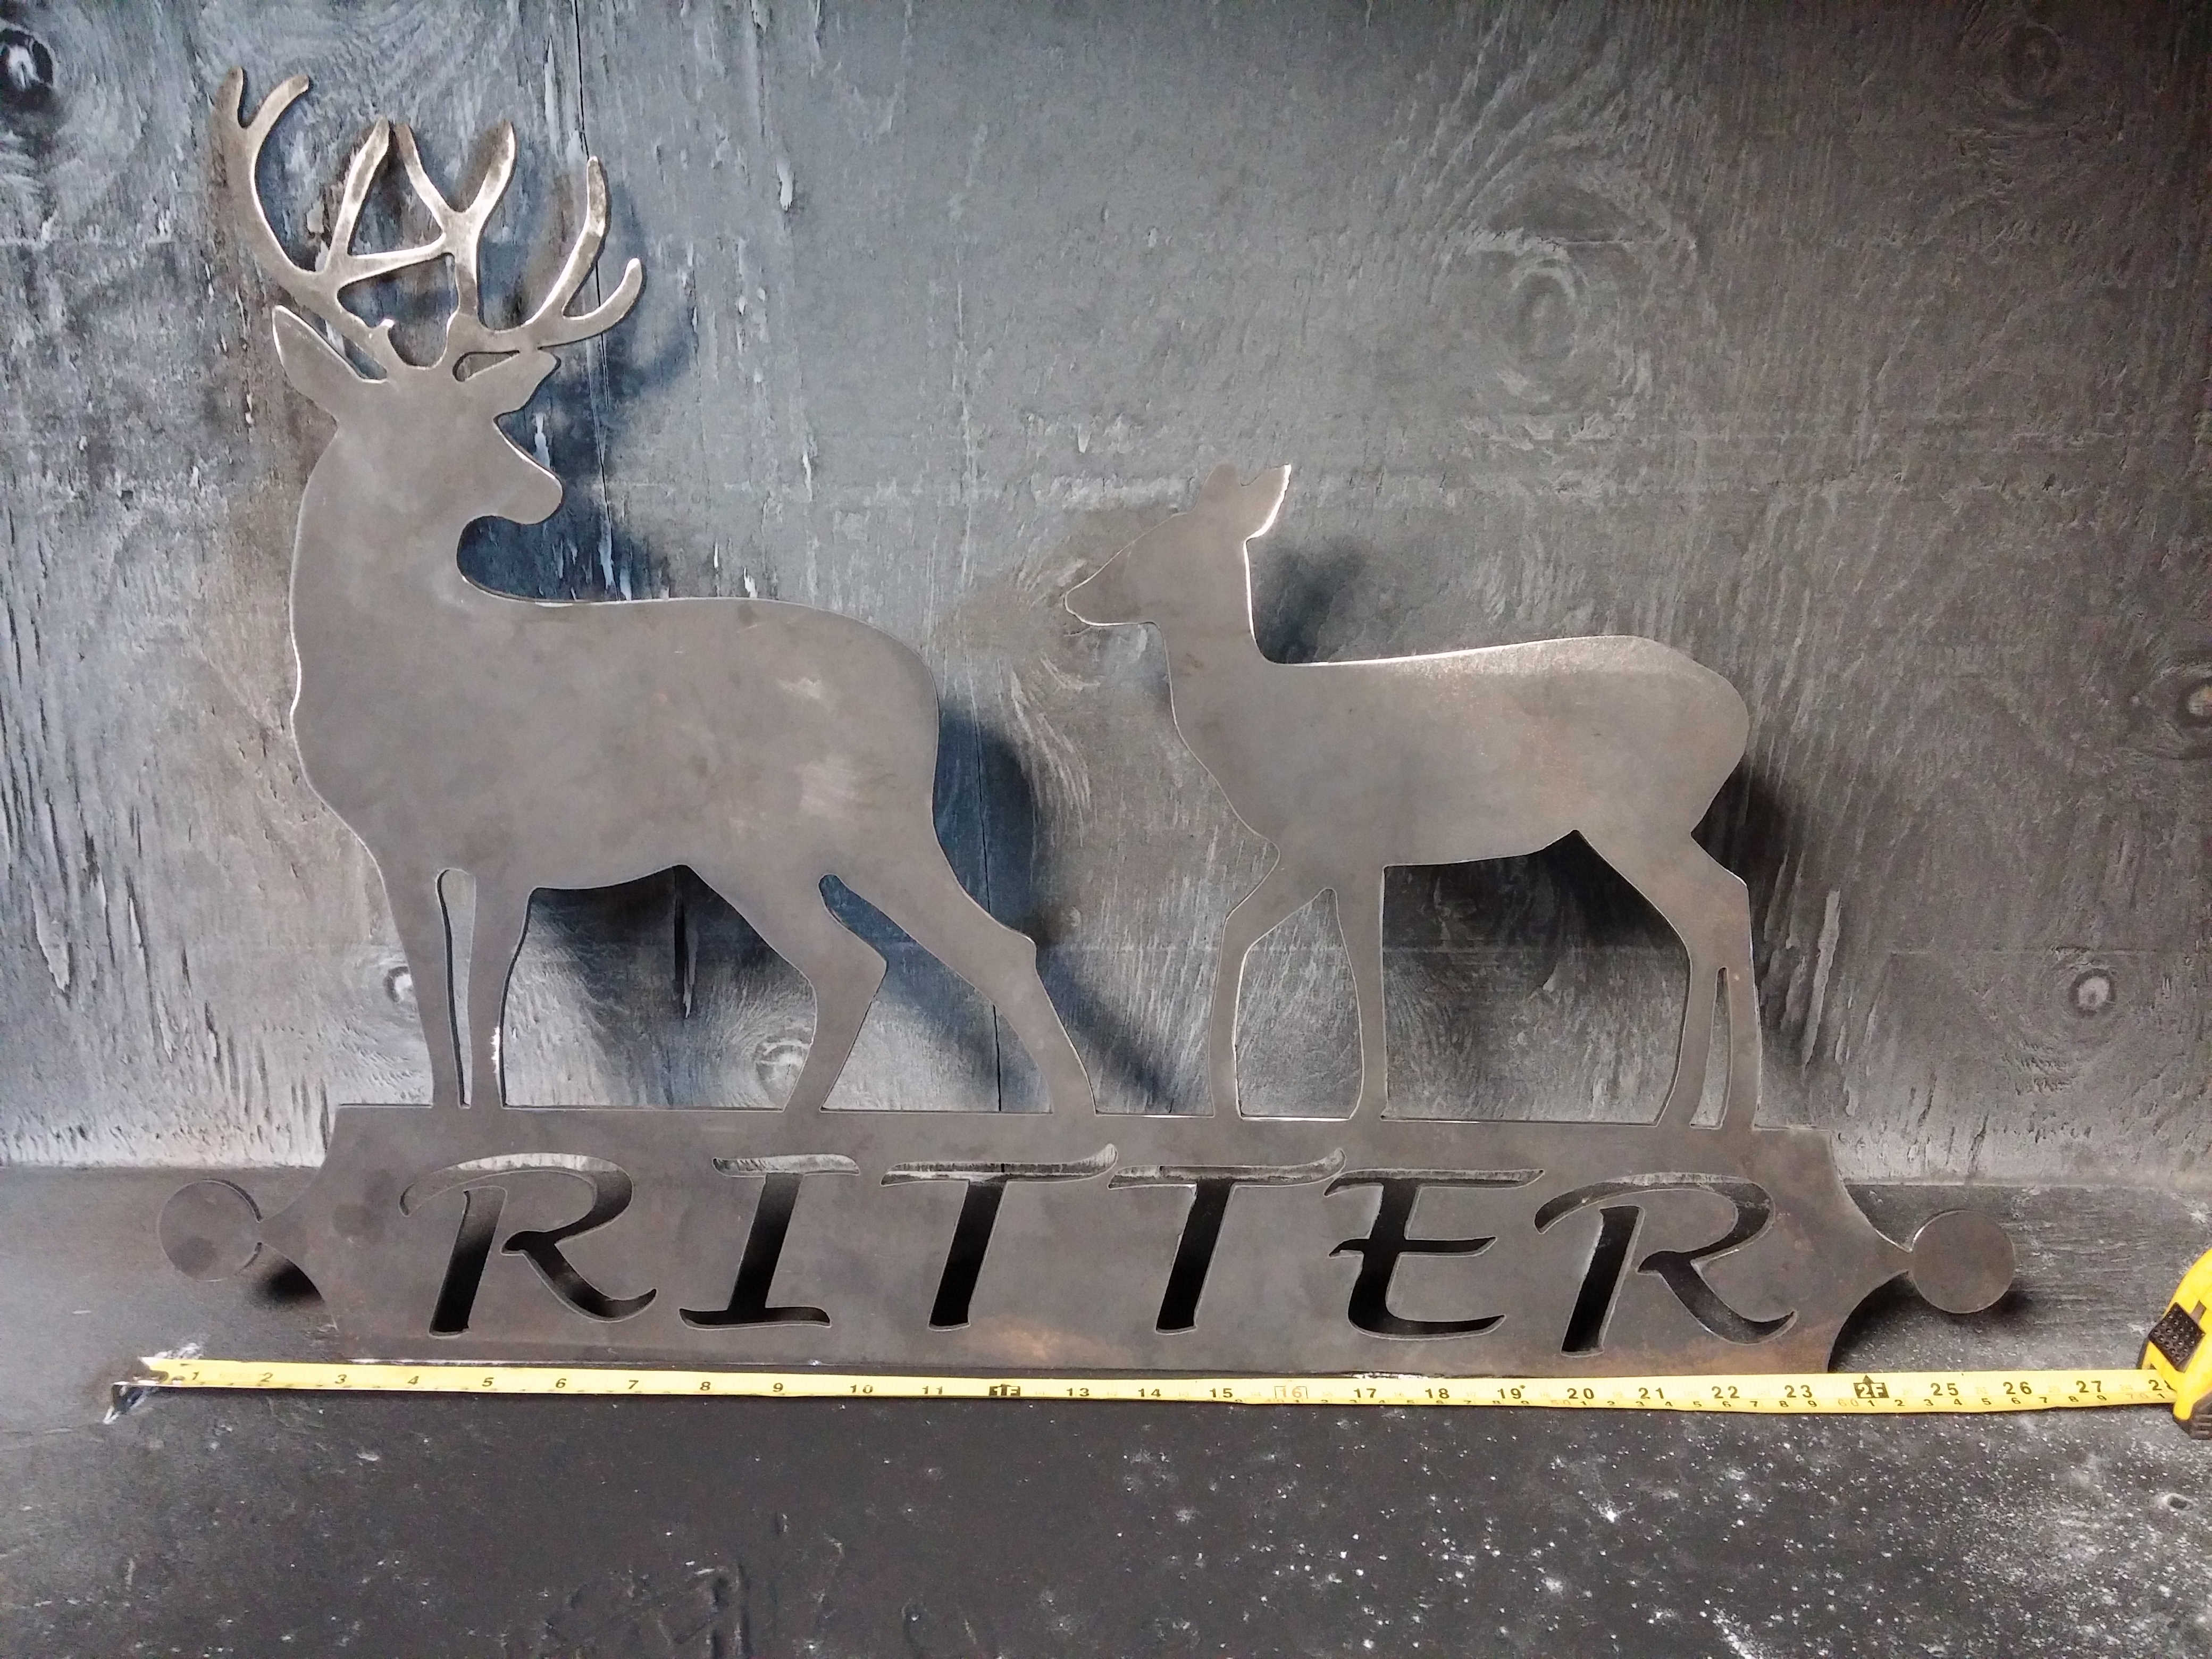
Custom House Numbers
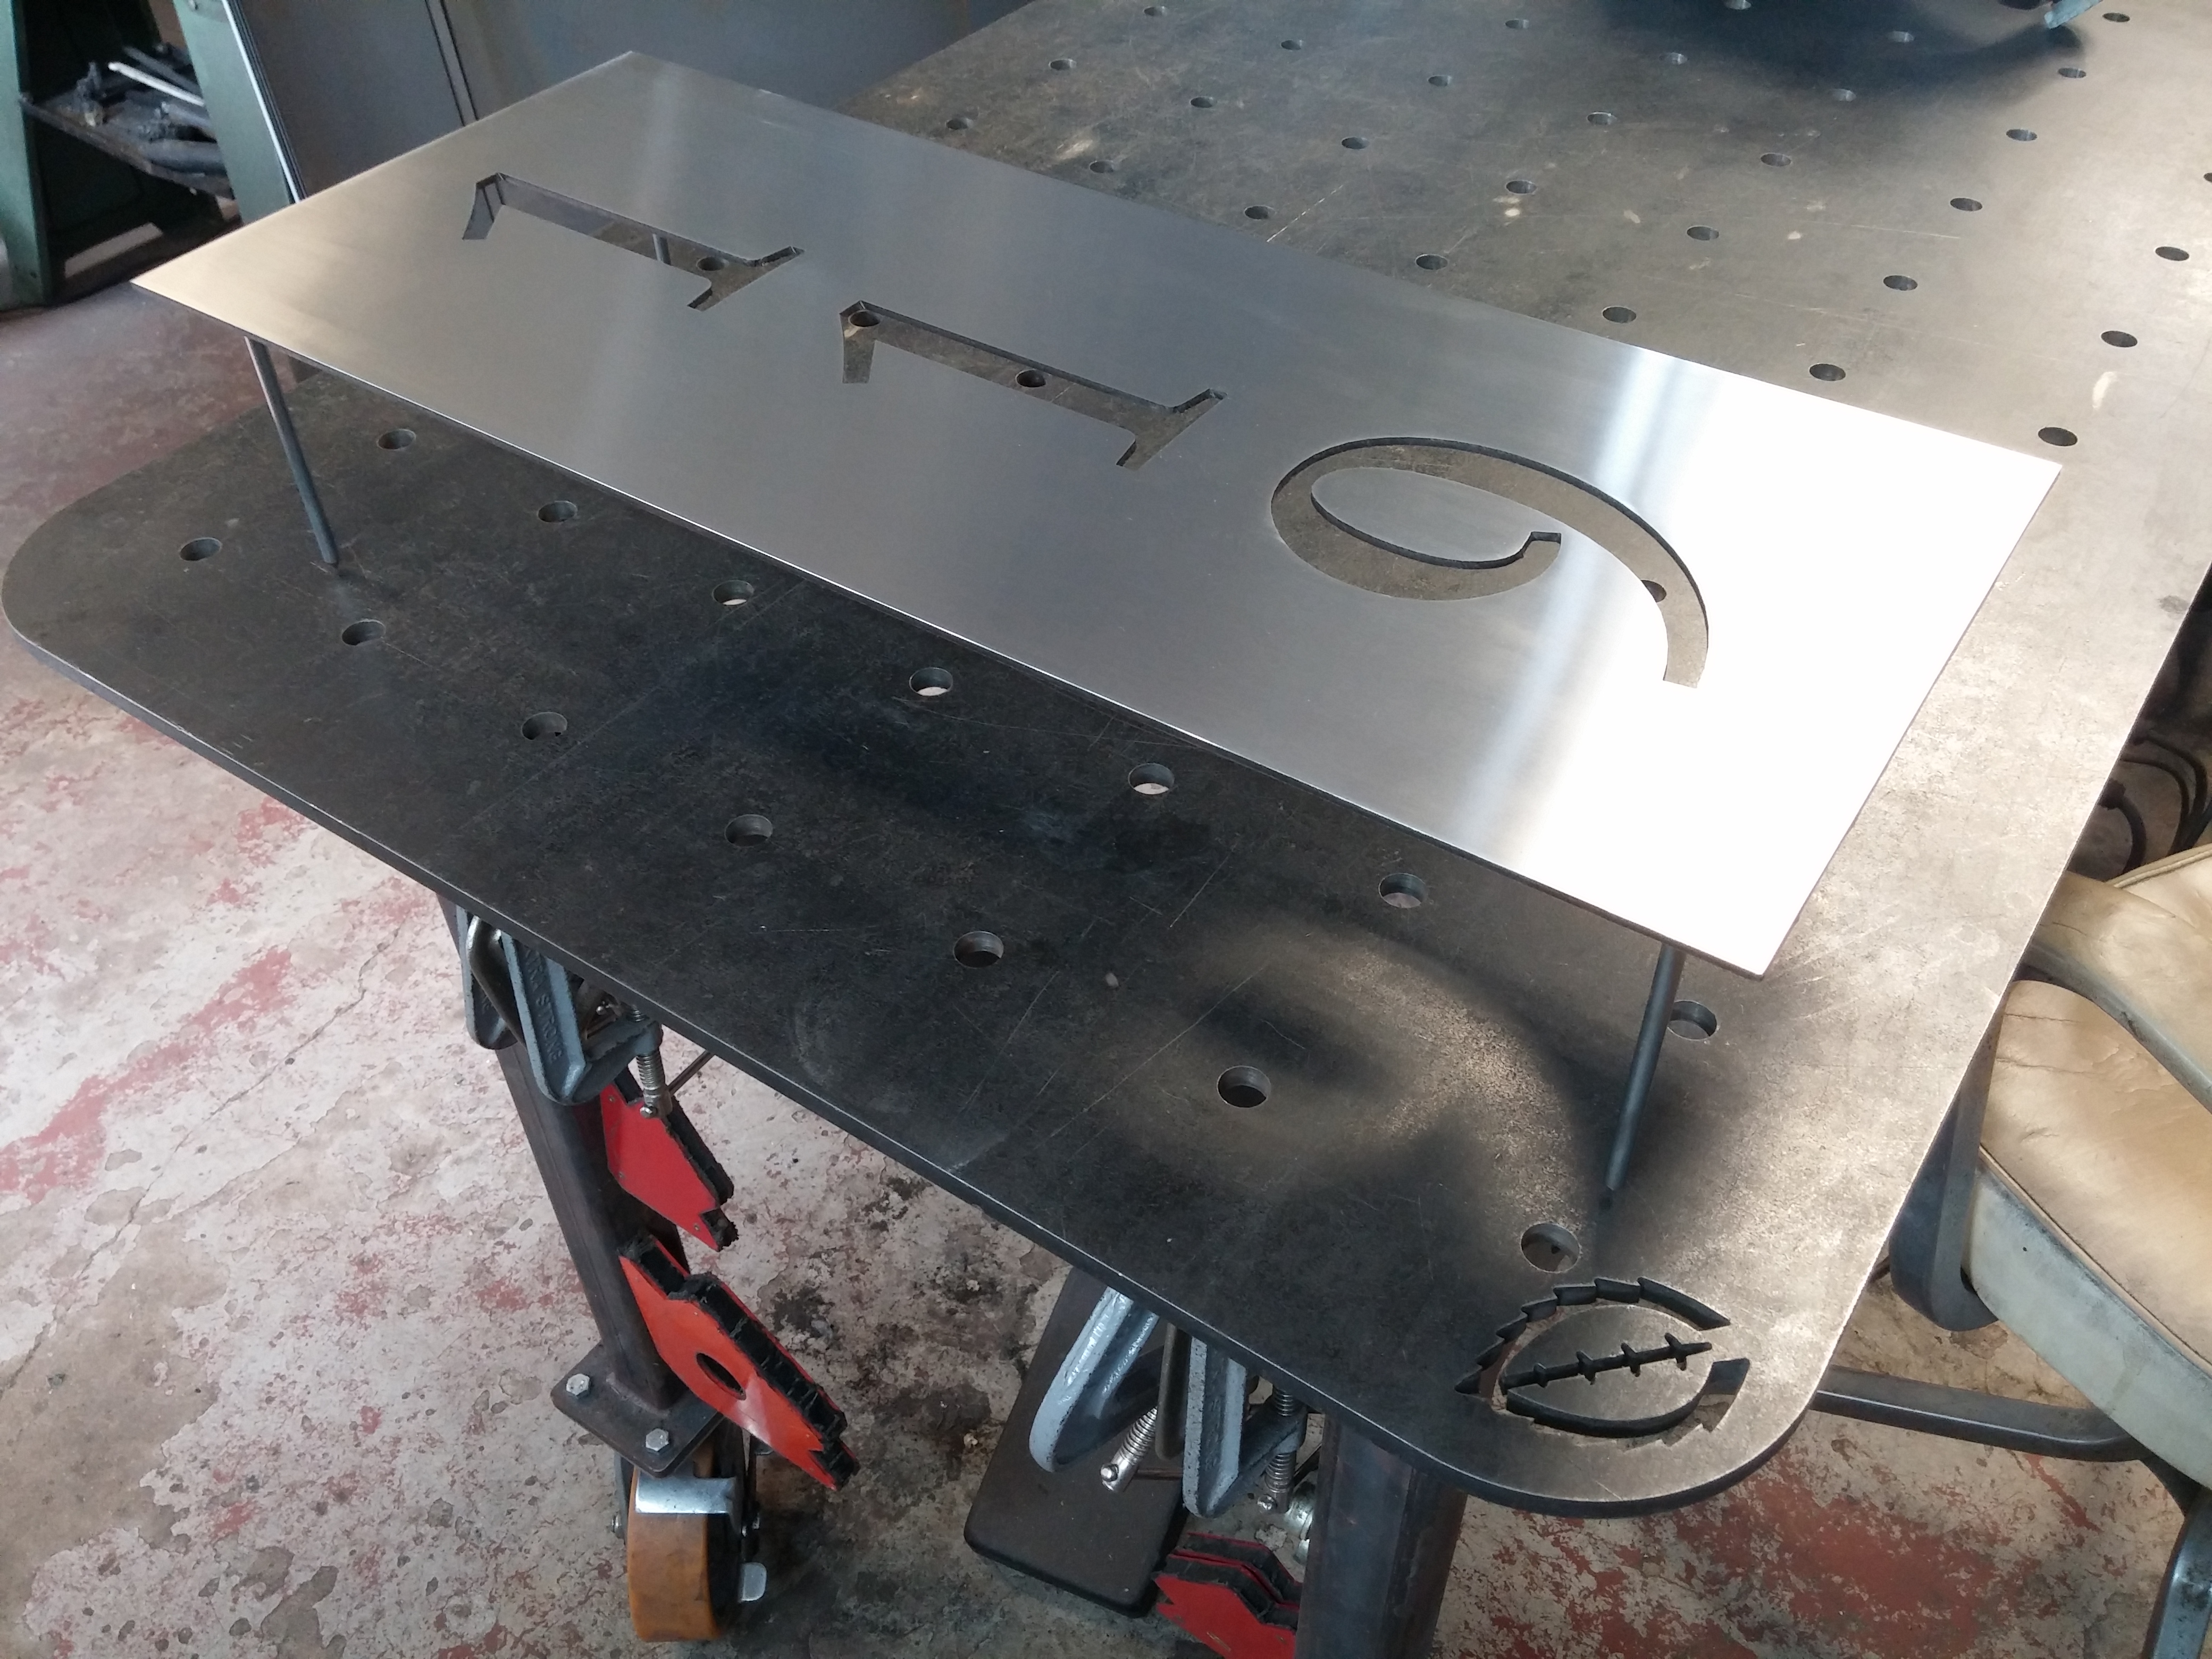
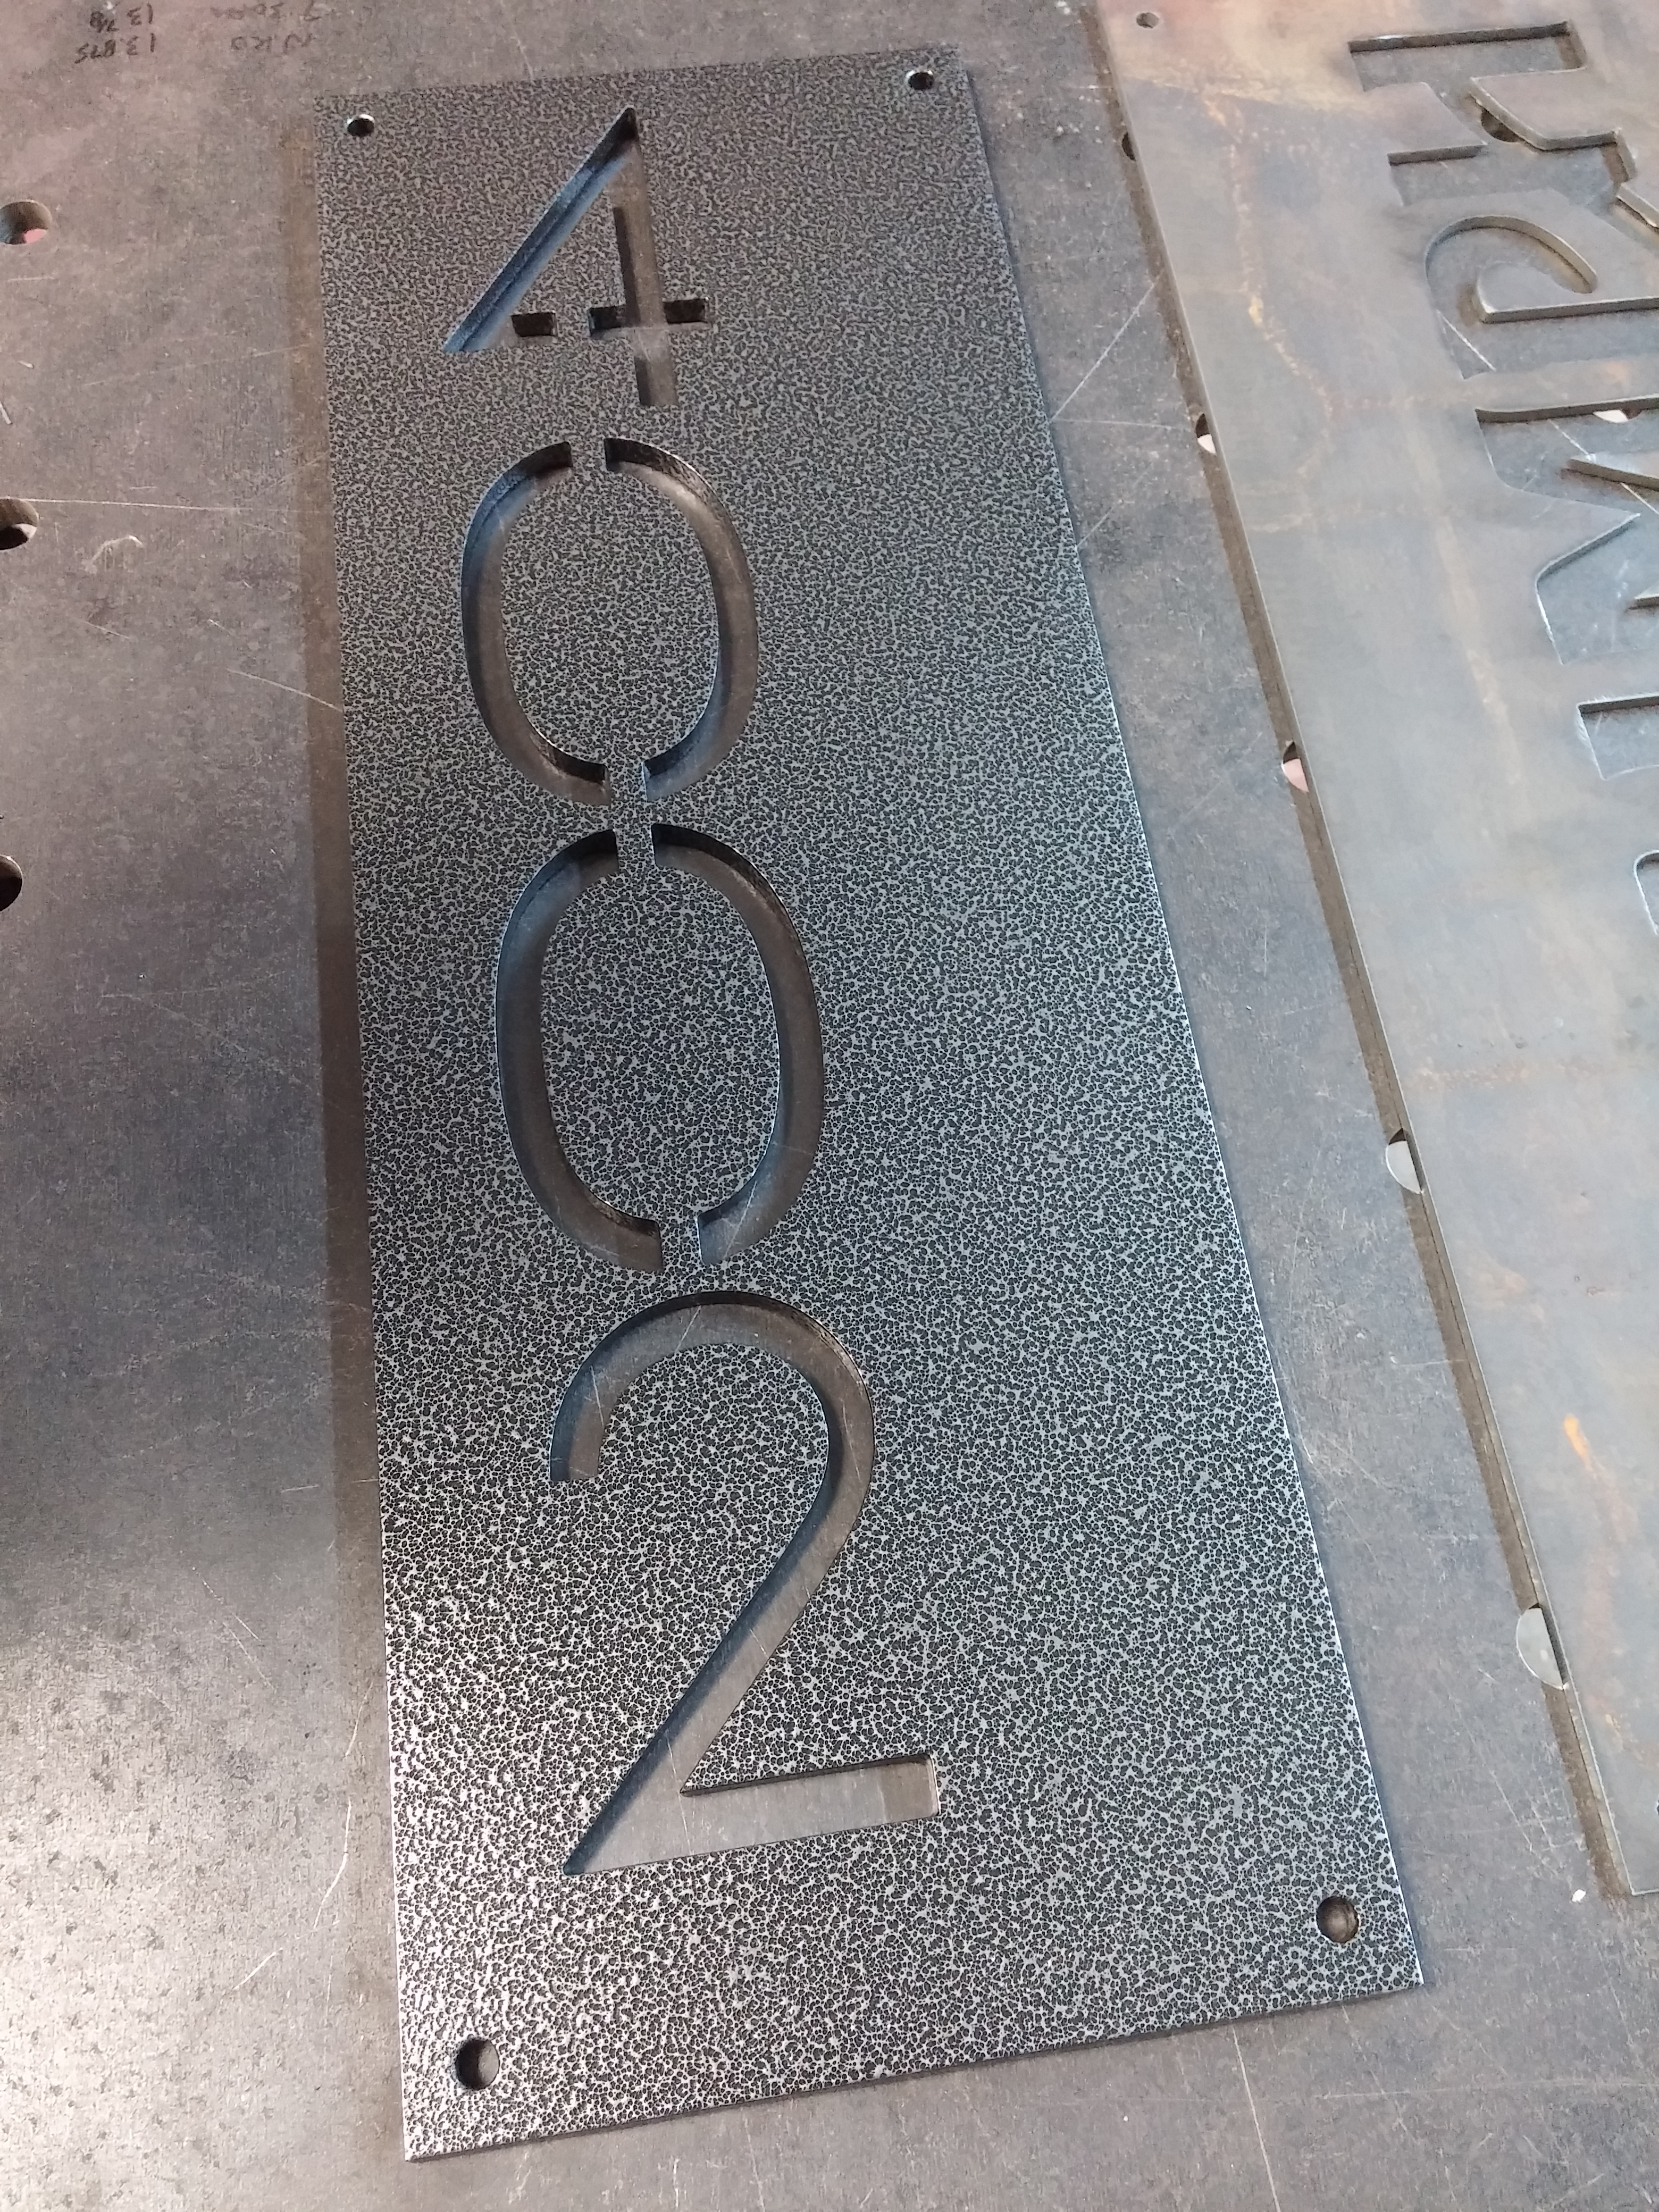
Sometimes we get really cool unique ideas from clients and other times we come up with something unique and our clients catch on and have to have one for themselves too. A typical house number sign has the house # and that’s it, and we’ve made plenty of them! However adding the street name without making things look too busy or forced, took a bit of creativity. This is an idea that we’ve come up with and believe us we’ve looked at hundreds upon hundreds of different house number styles out there. There’s nothing like this out there, till now. The text plays on the use of positive and negative space and just has a really unique look to it.
Here is the first house sign cut on the CNC table with this style, 14ga cold rolled steel. Nothing fancy, just something that will be unique and stand out. The top holes are to hang the sign, the single bottom hole is for securing it to the wall, the hole is accessed via the bottom of the “2”. The three smaller holes are for drainage in case of any standing water, however looking back on it, they most likely won’t be needed.

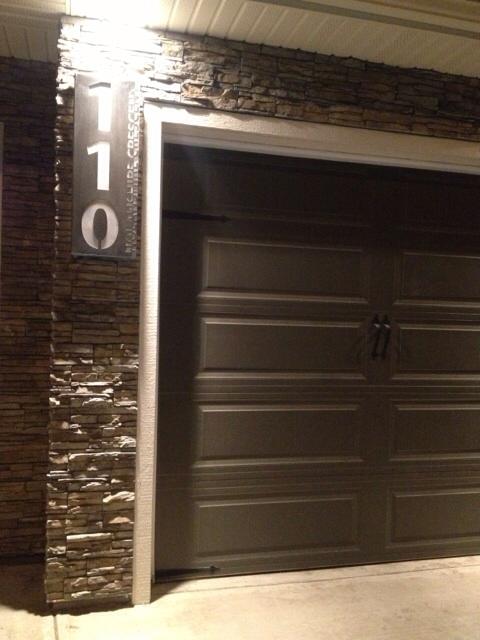
Here’s the sign after it’s been formed in the brake and media blasted (prepped for powder coat). The piece under it is a piece of acrylic (with protective paper still intact) that will be attached to the back of the sign with the use of some high strength 3M tape. Before the acrylic is attached there will be an RGB strip attached to the left side of the sign which will allow for the sign to be edge lit and give a really unique look. The RGB LED’s will be tied to an Arduino and ultimately tied into a home automation system. Imagine the house numbers lighting up as the sun is going down, or dimming down as the sun comes up. Or flashing repeatedly if the alarm system is going off? That’ll sure get some attention! The sign hasn’t been completed yet because…
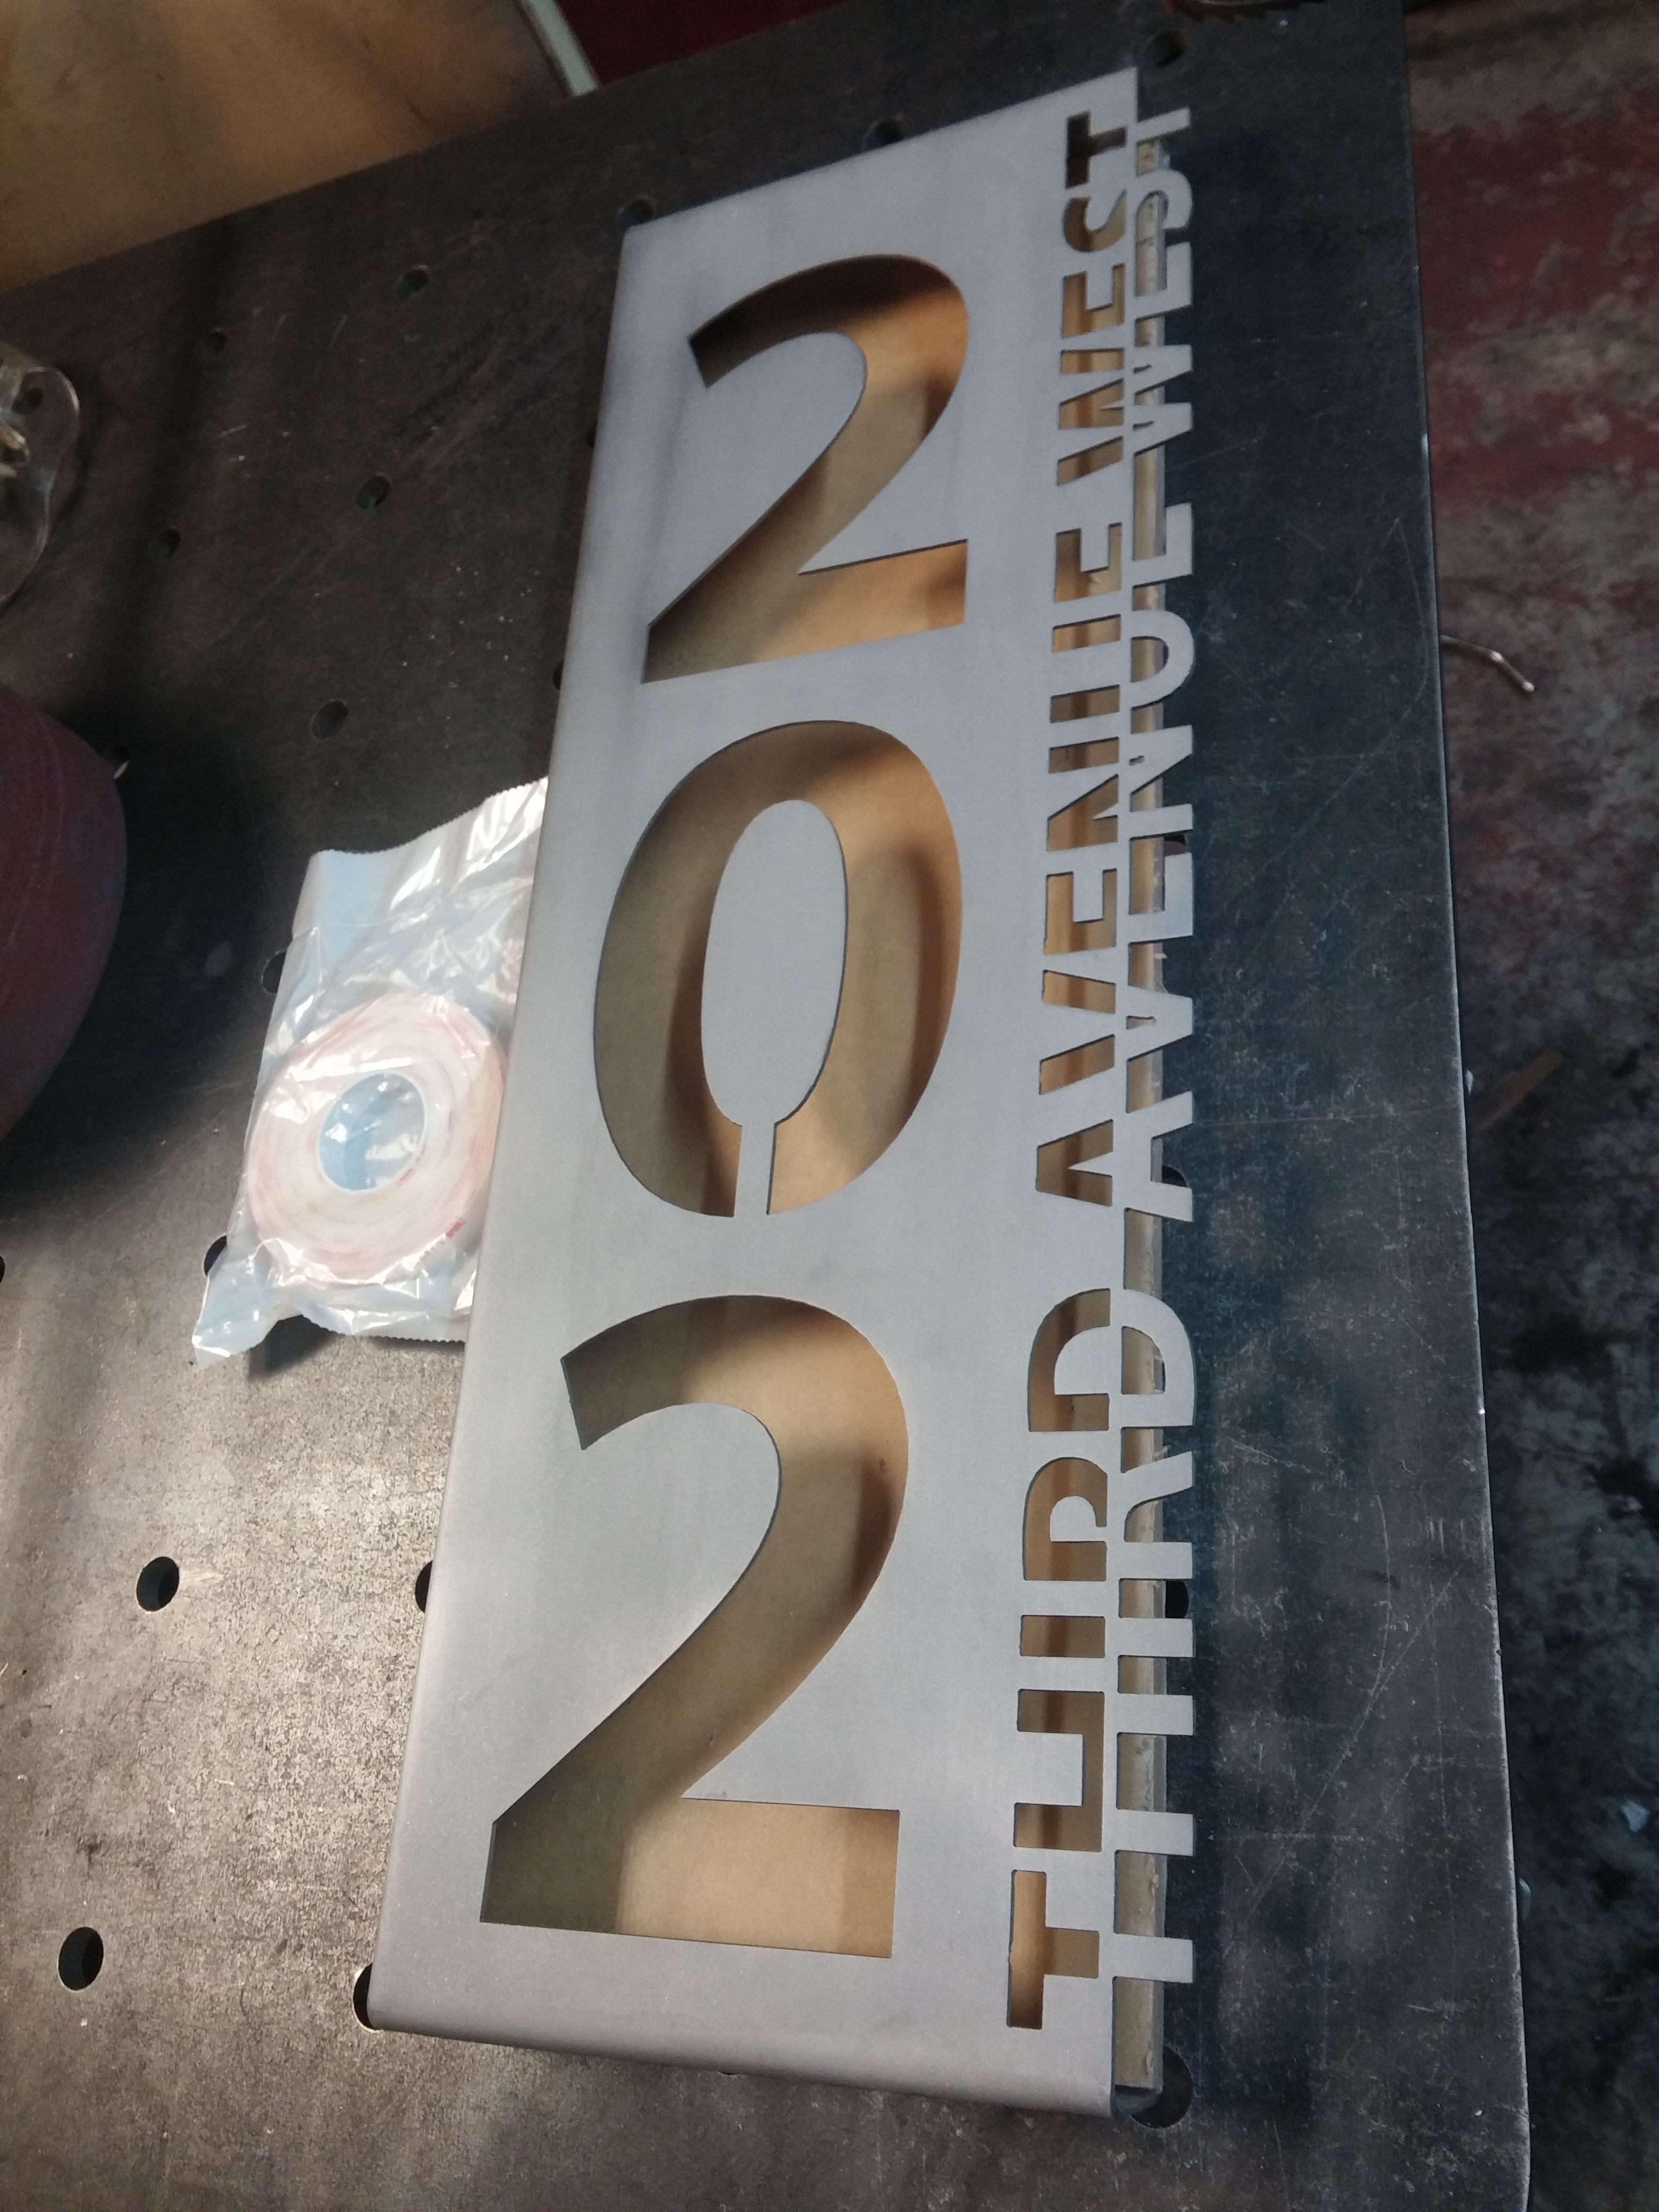
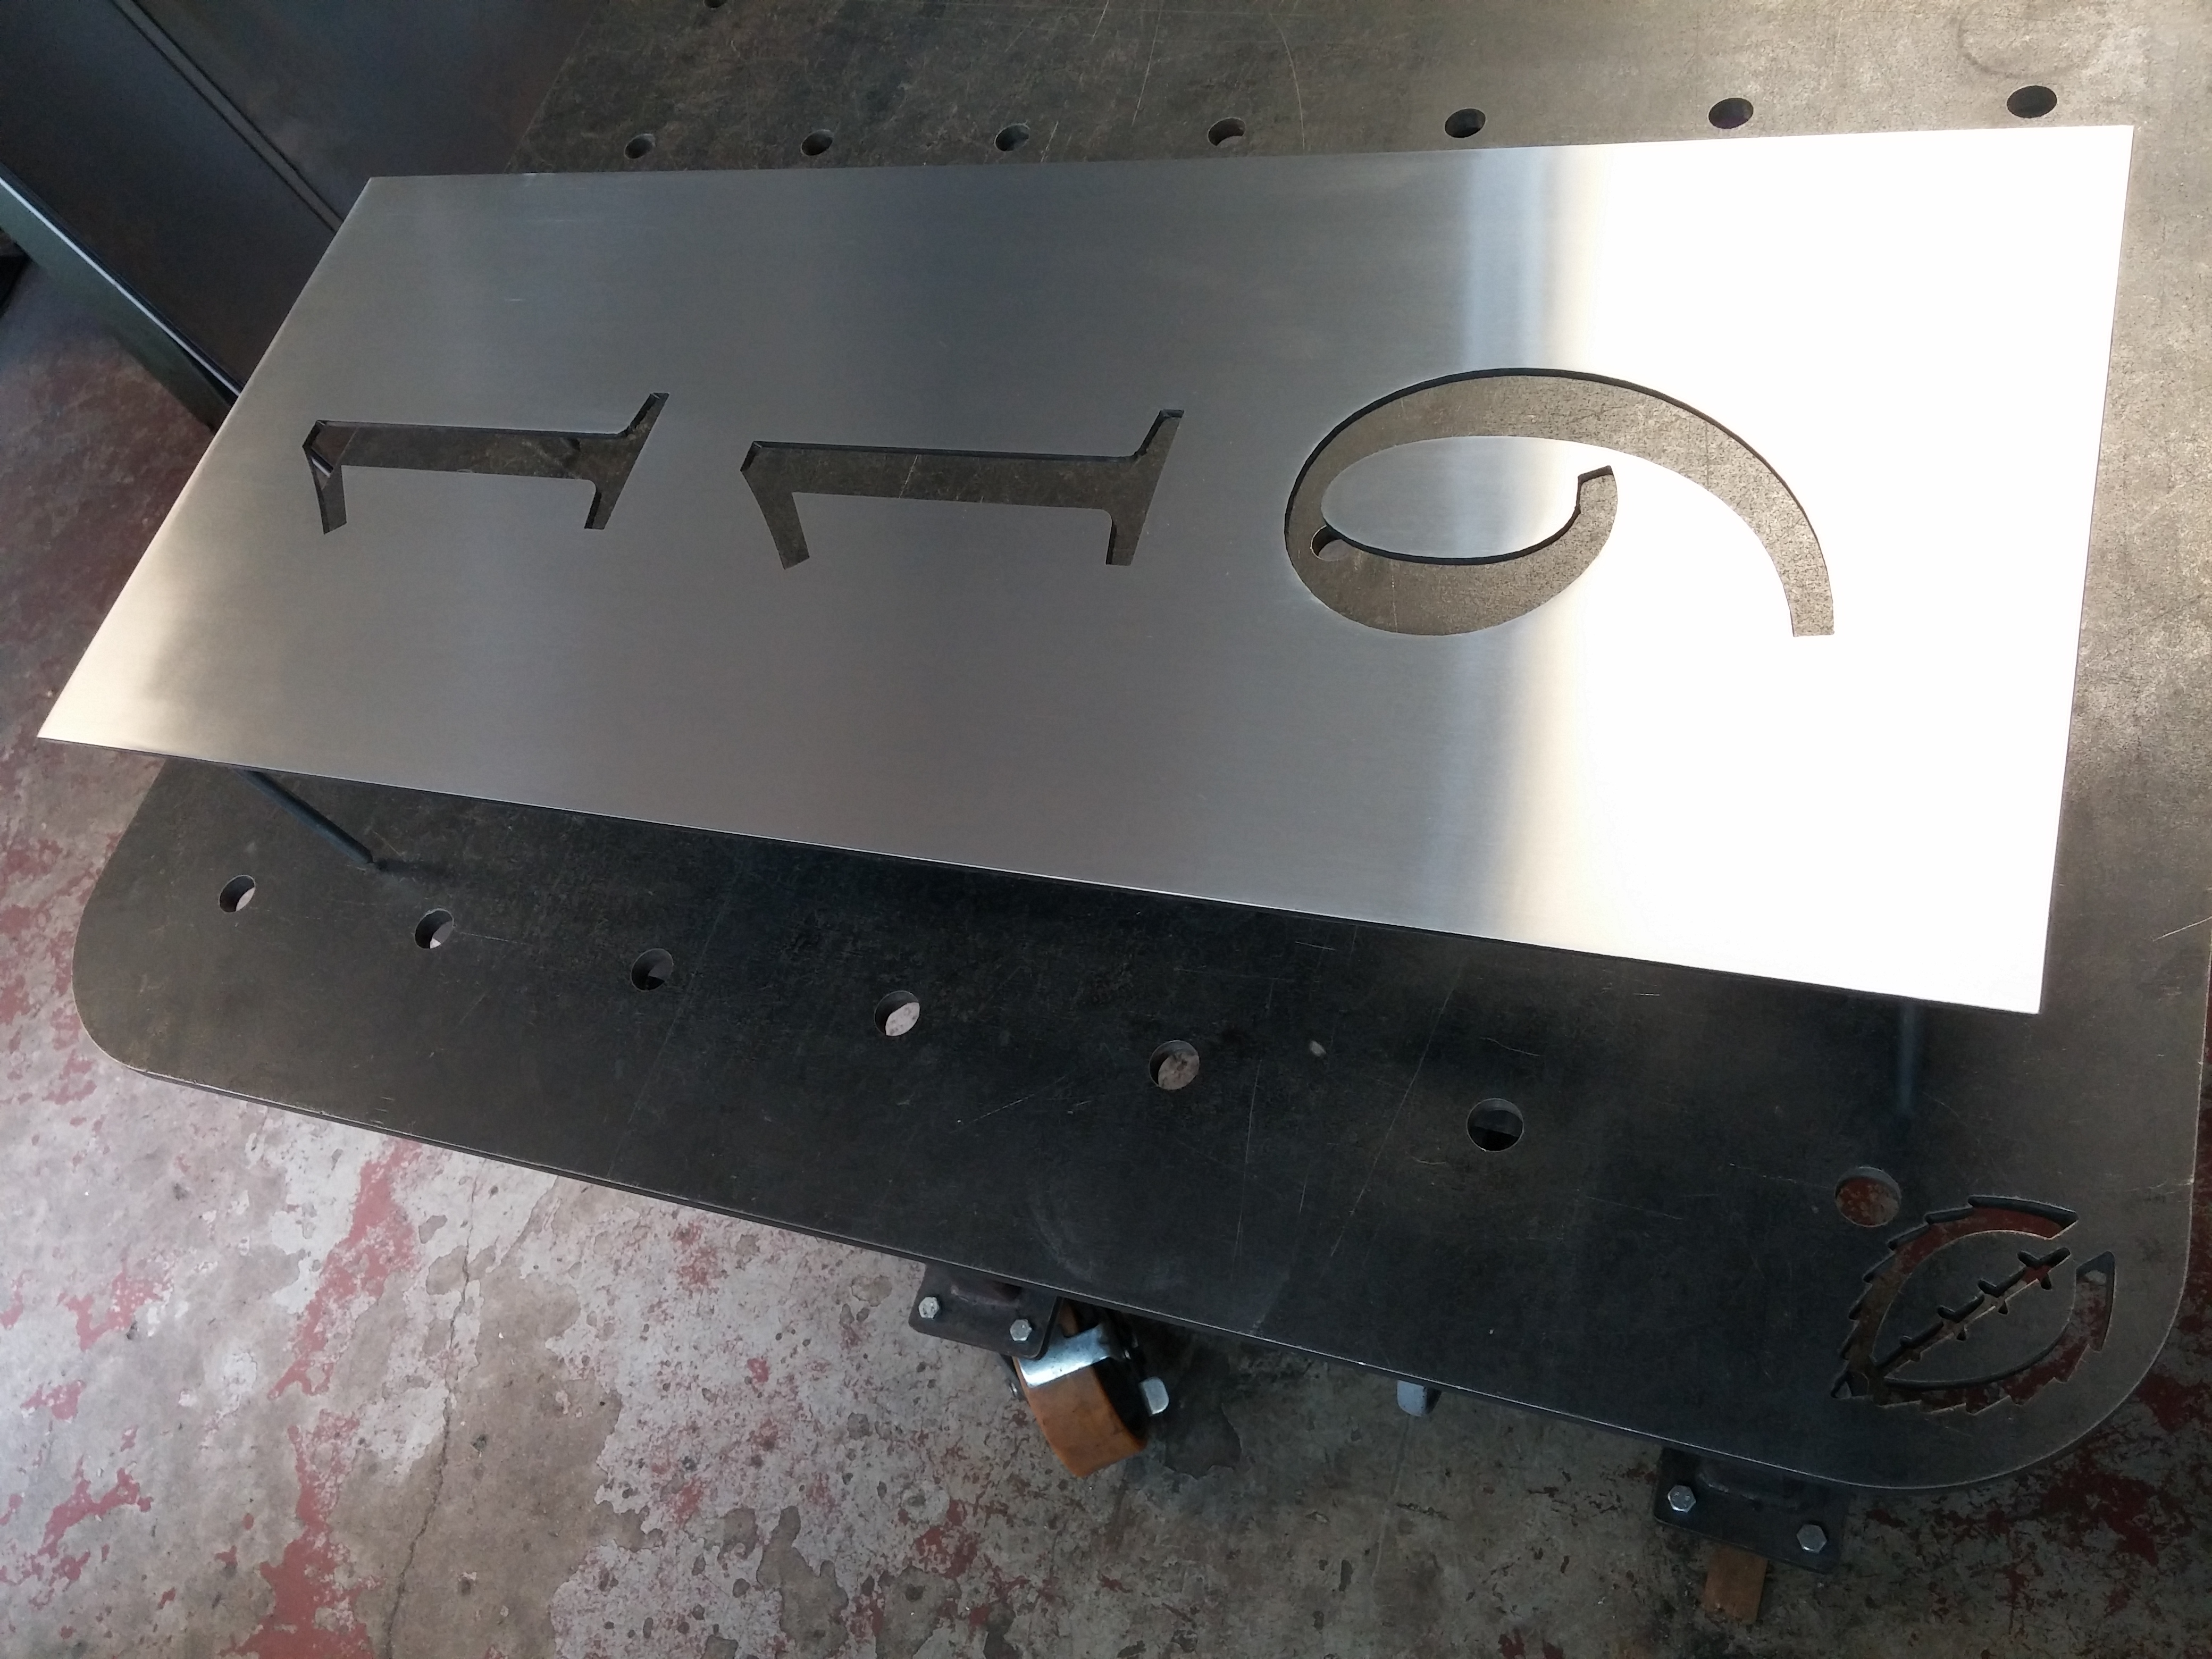
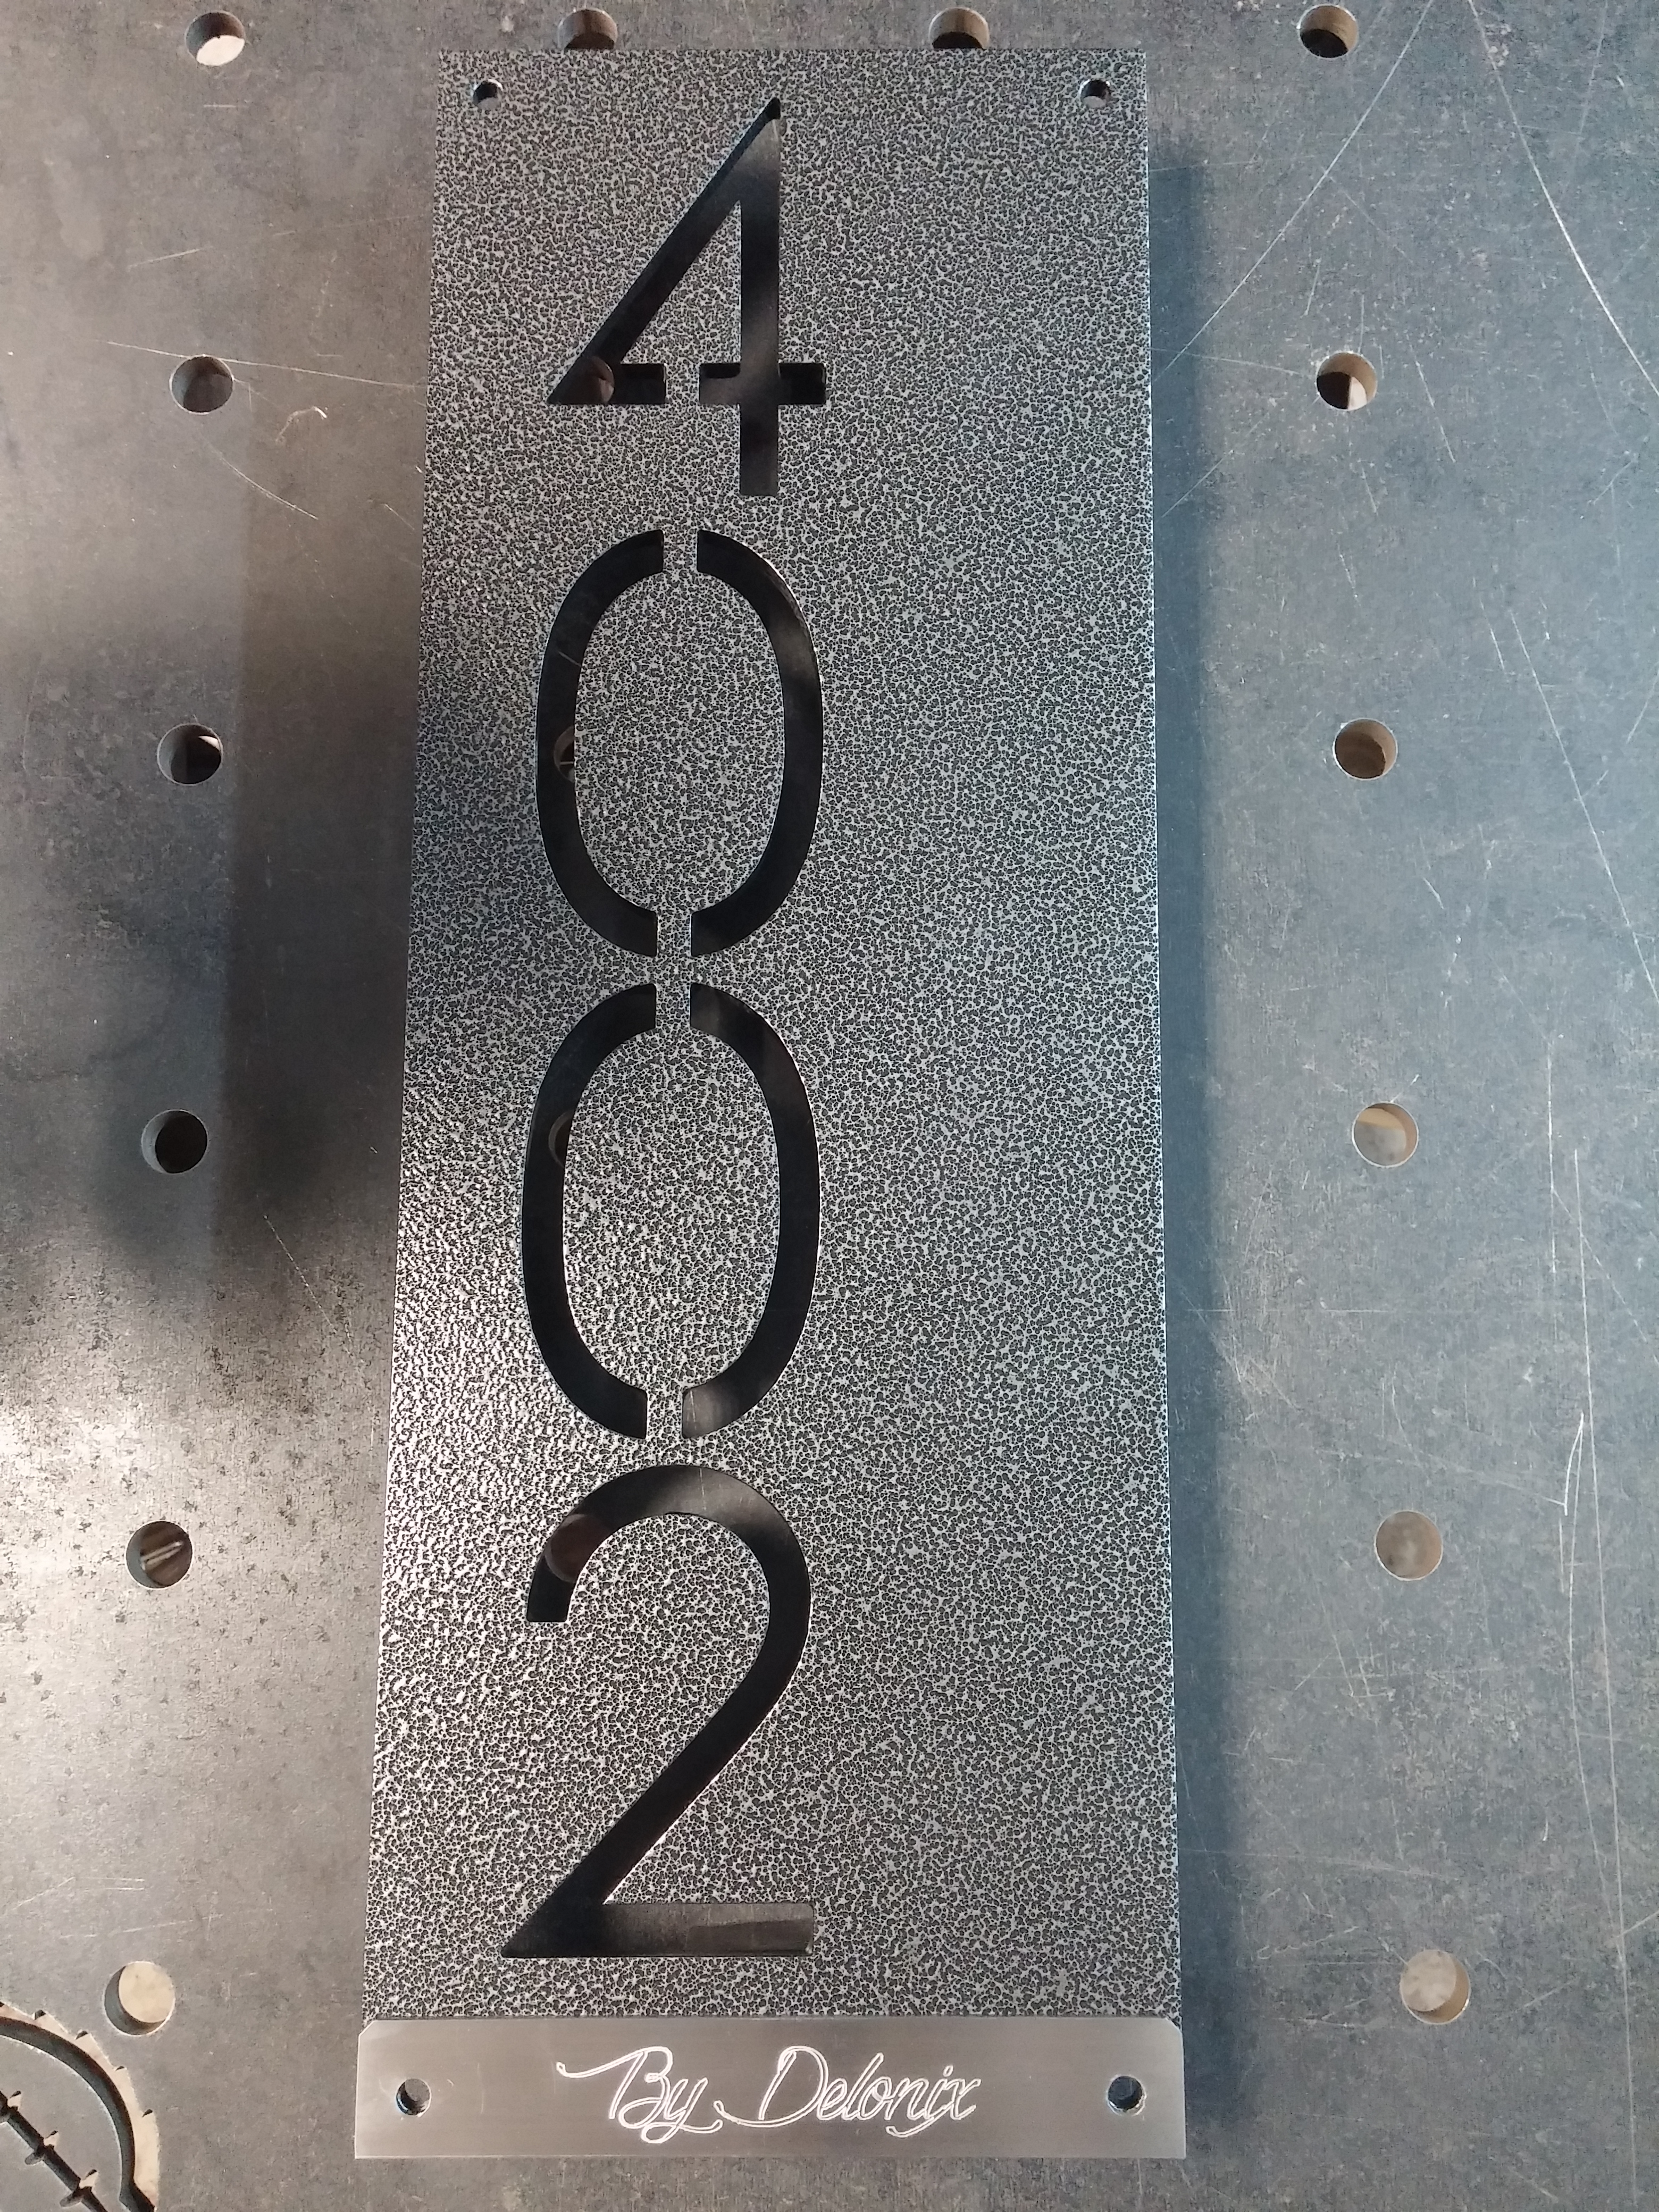
We started another one for a client, this one is considerably bigger and has a bit of a different style to it. It has the unnecessary drain holes omitted, the hanger and mounting screw had to swap ends due to the “0” not allowing a screw to attach it to the wall like the original sign.
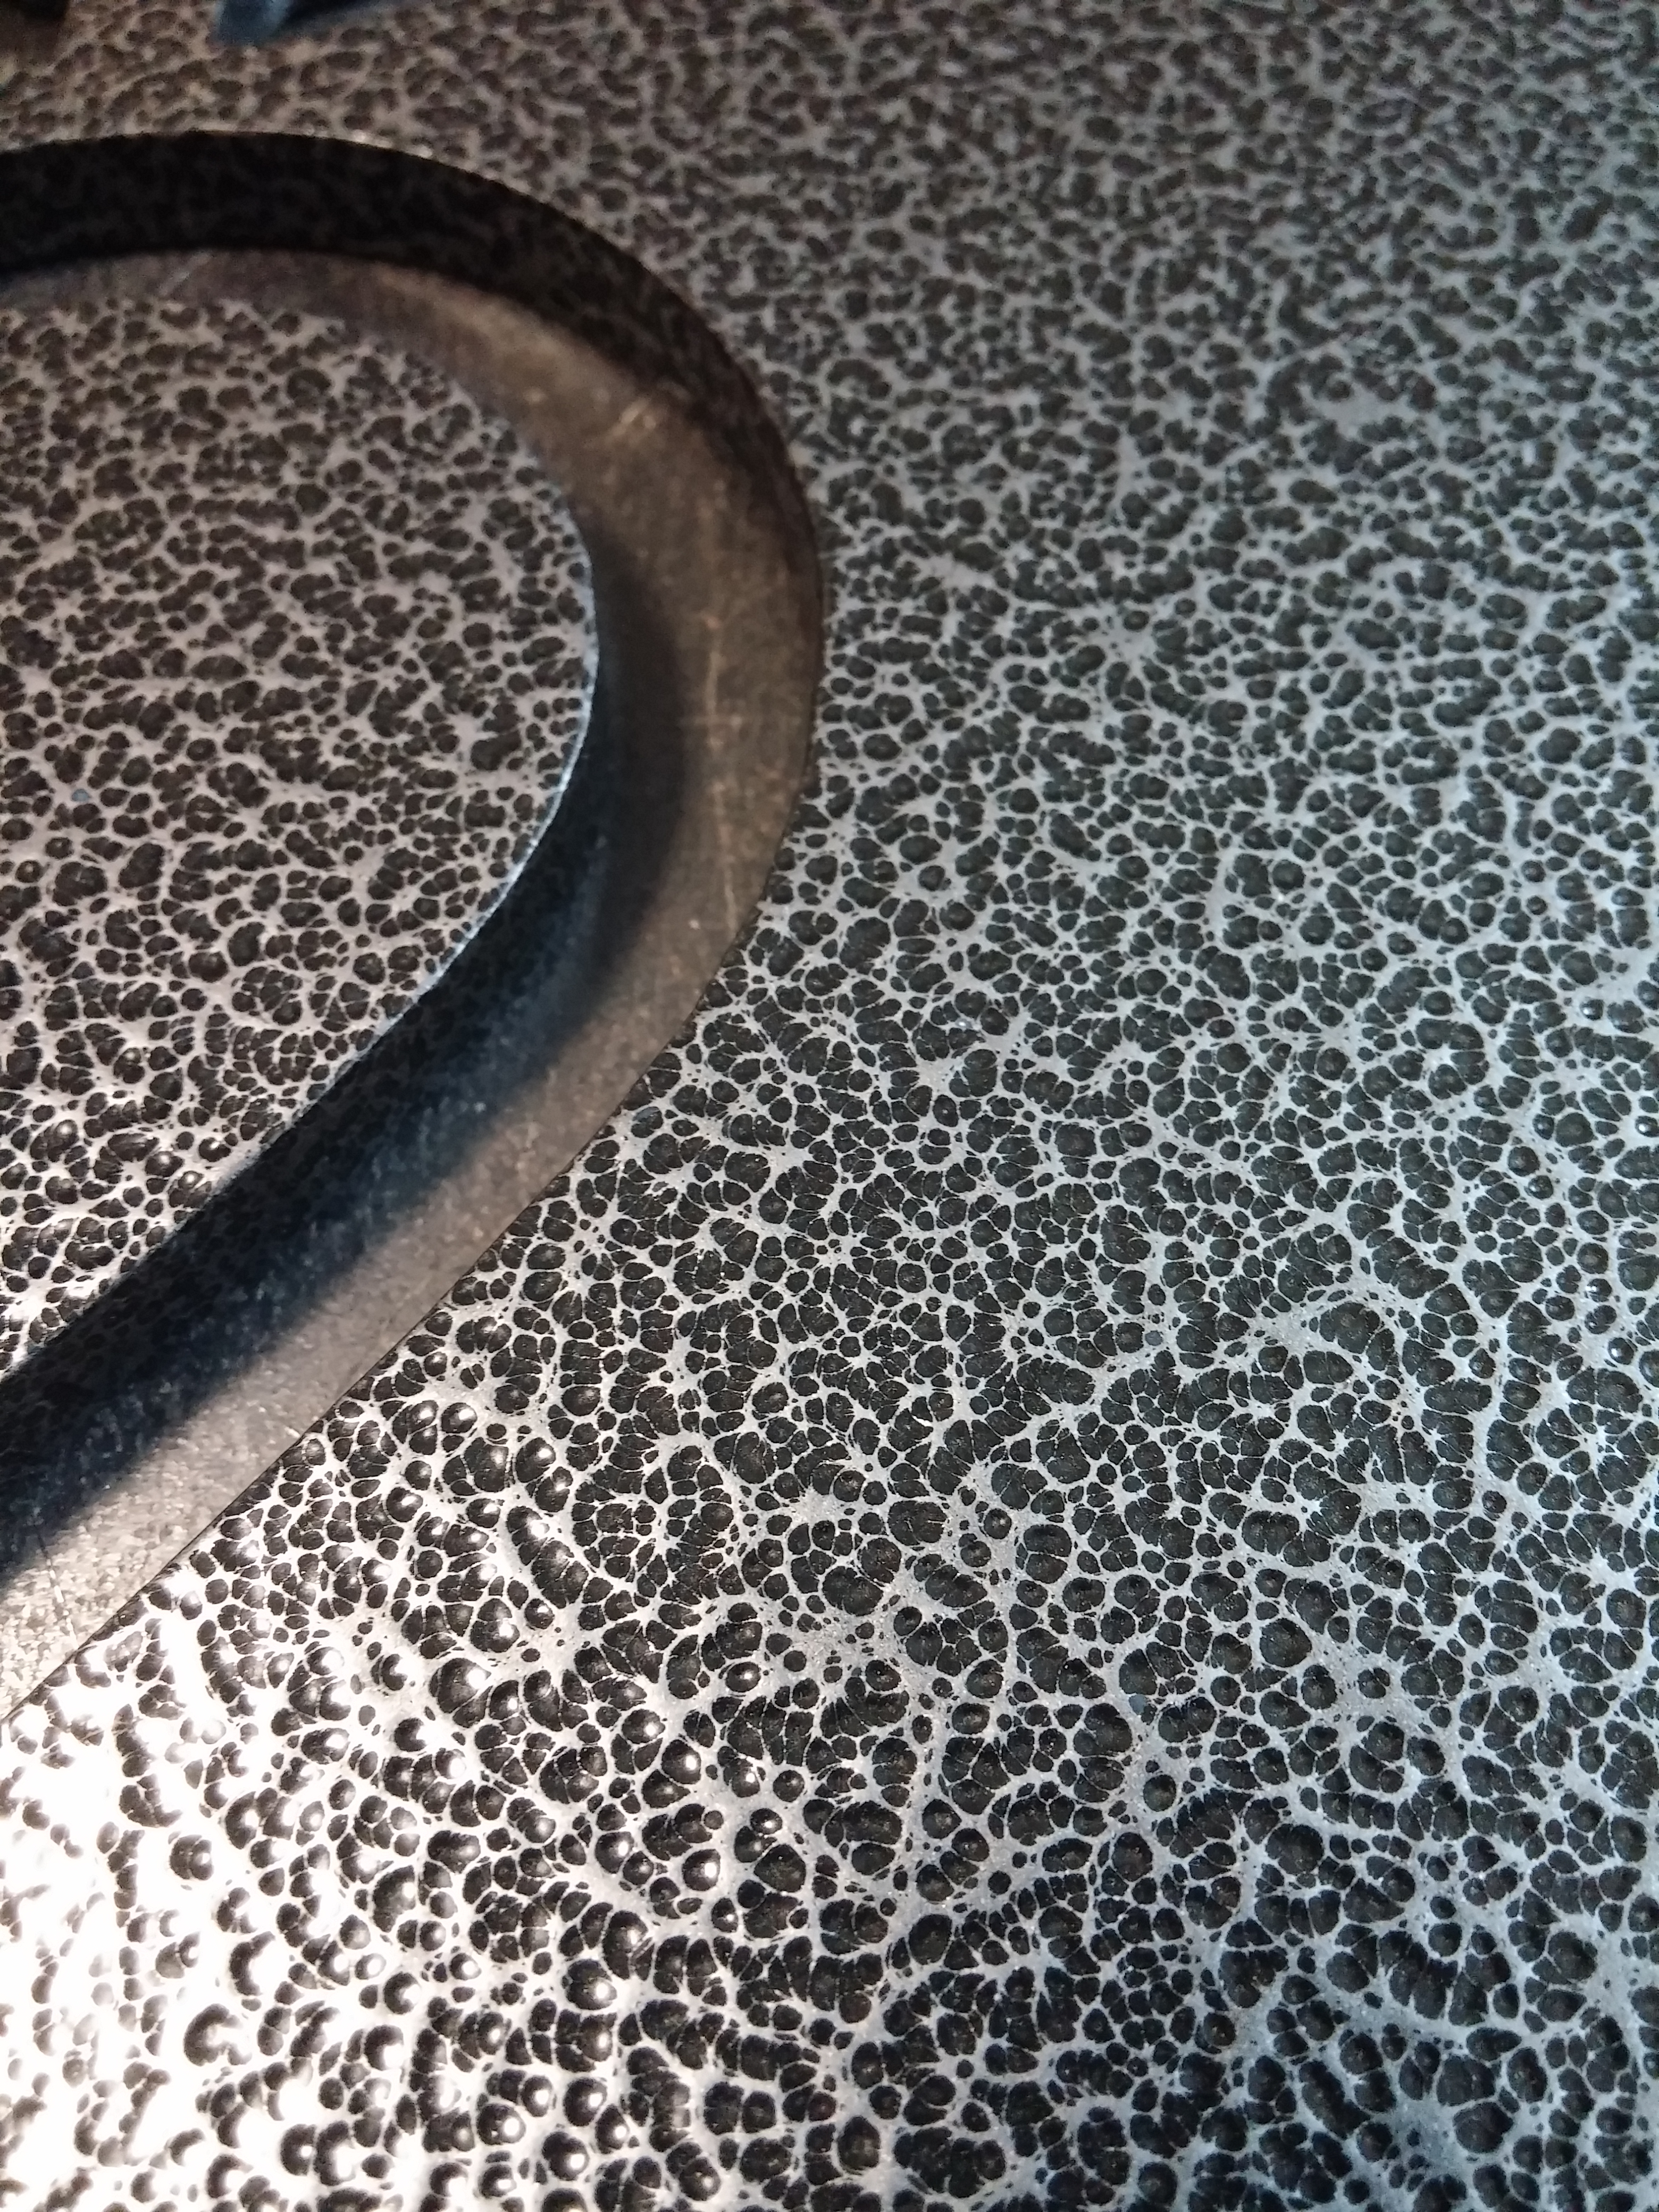
The finish of this part was a bit more time consuming as it is too big for us to powder coat and regular paint would be a bit bland. So instead it has a brushed finish with the help of a belt sander, inline sander with 80-120 grit and the use of a medium grit Scotchbrite pad.

After prepping the steel it was clear coated and given time to dry. Then it was waxed with a high quality carnauba wax and is ready for the customer to pick up and install!
Here’s a time lapse of the metalwork fab portion of this project.
And here it installed (photo courtesy of Amanda H.).

Thanks for looking! Please take some time to look at our available services and if you have any questions don’t hesitate to contact us via our Contact page.
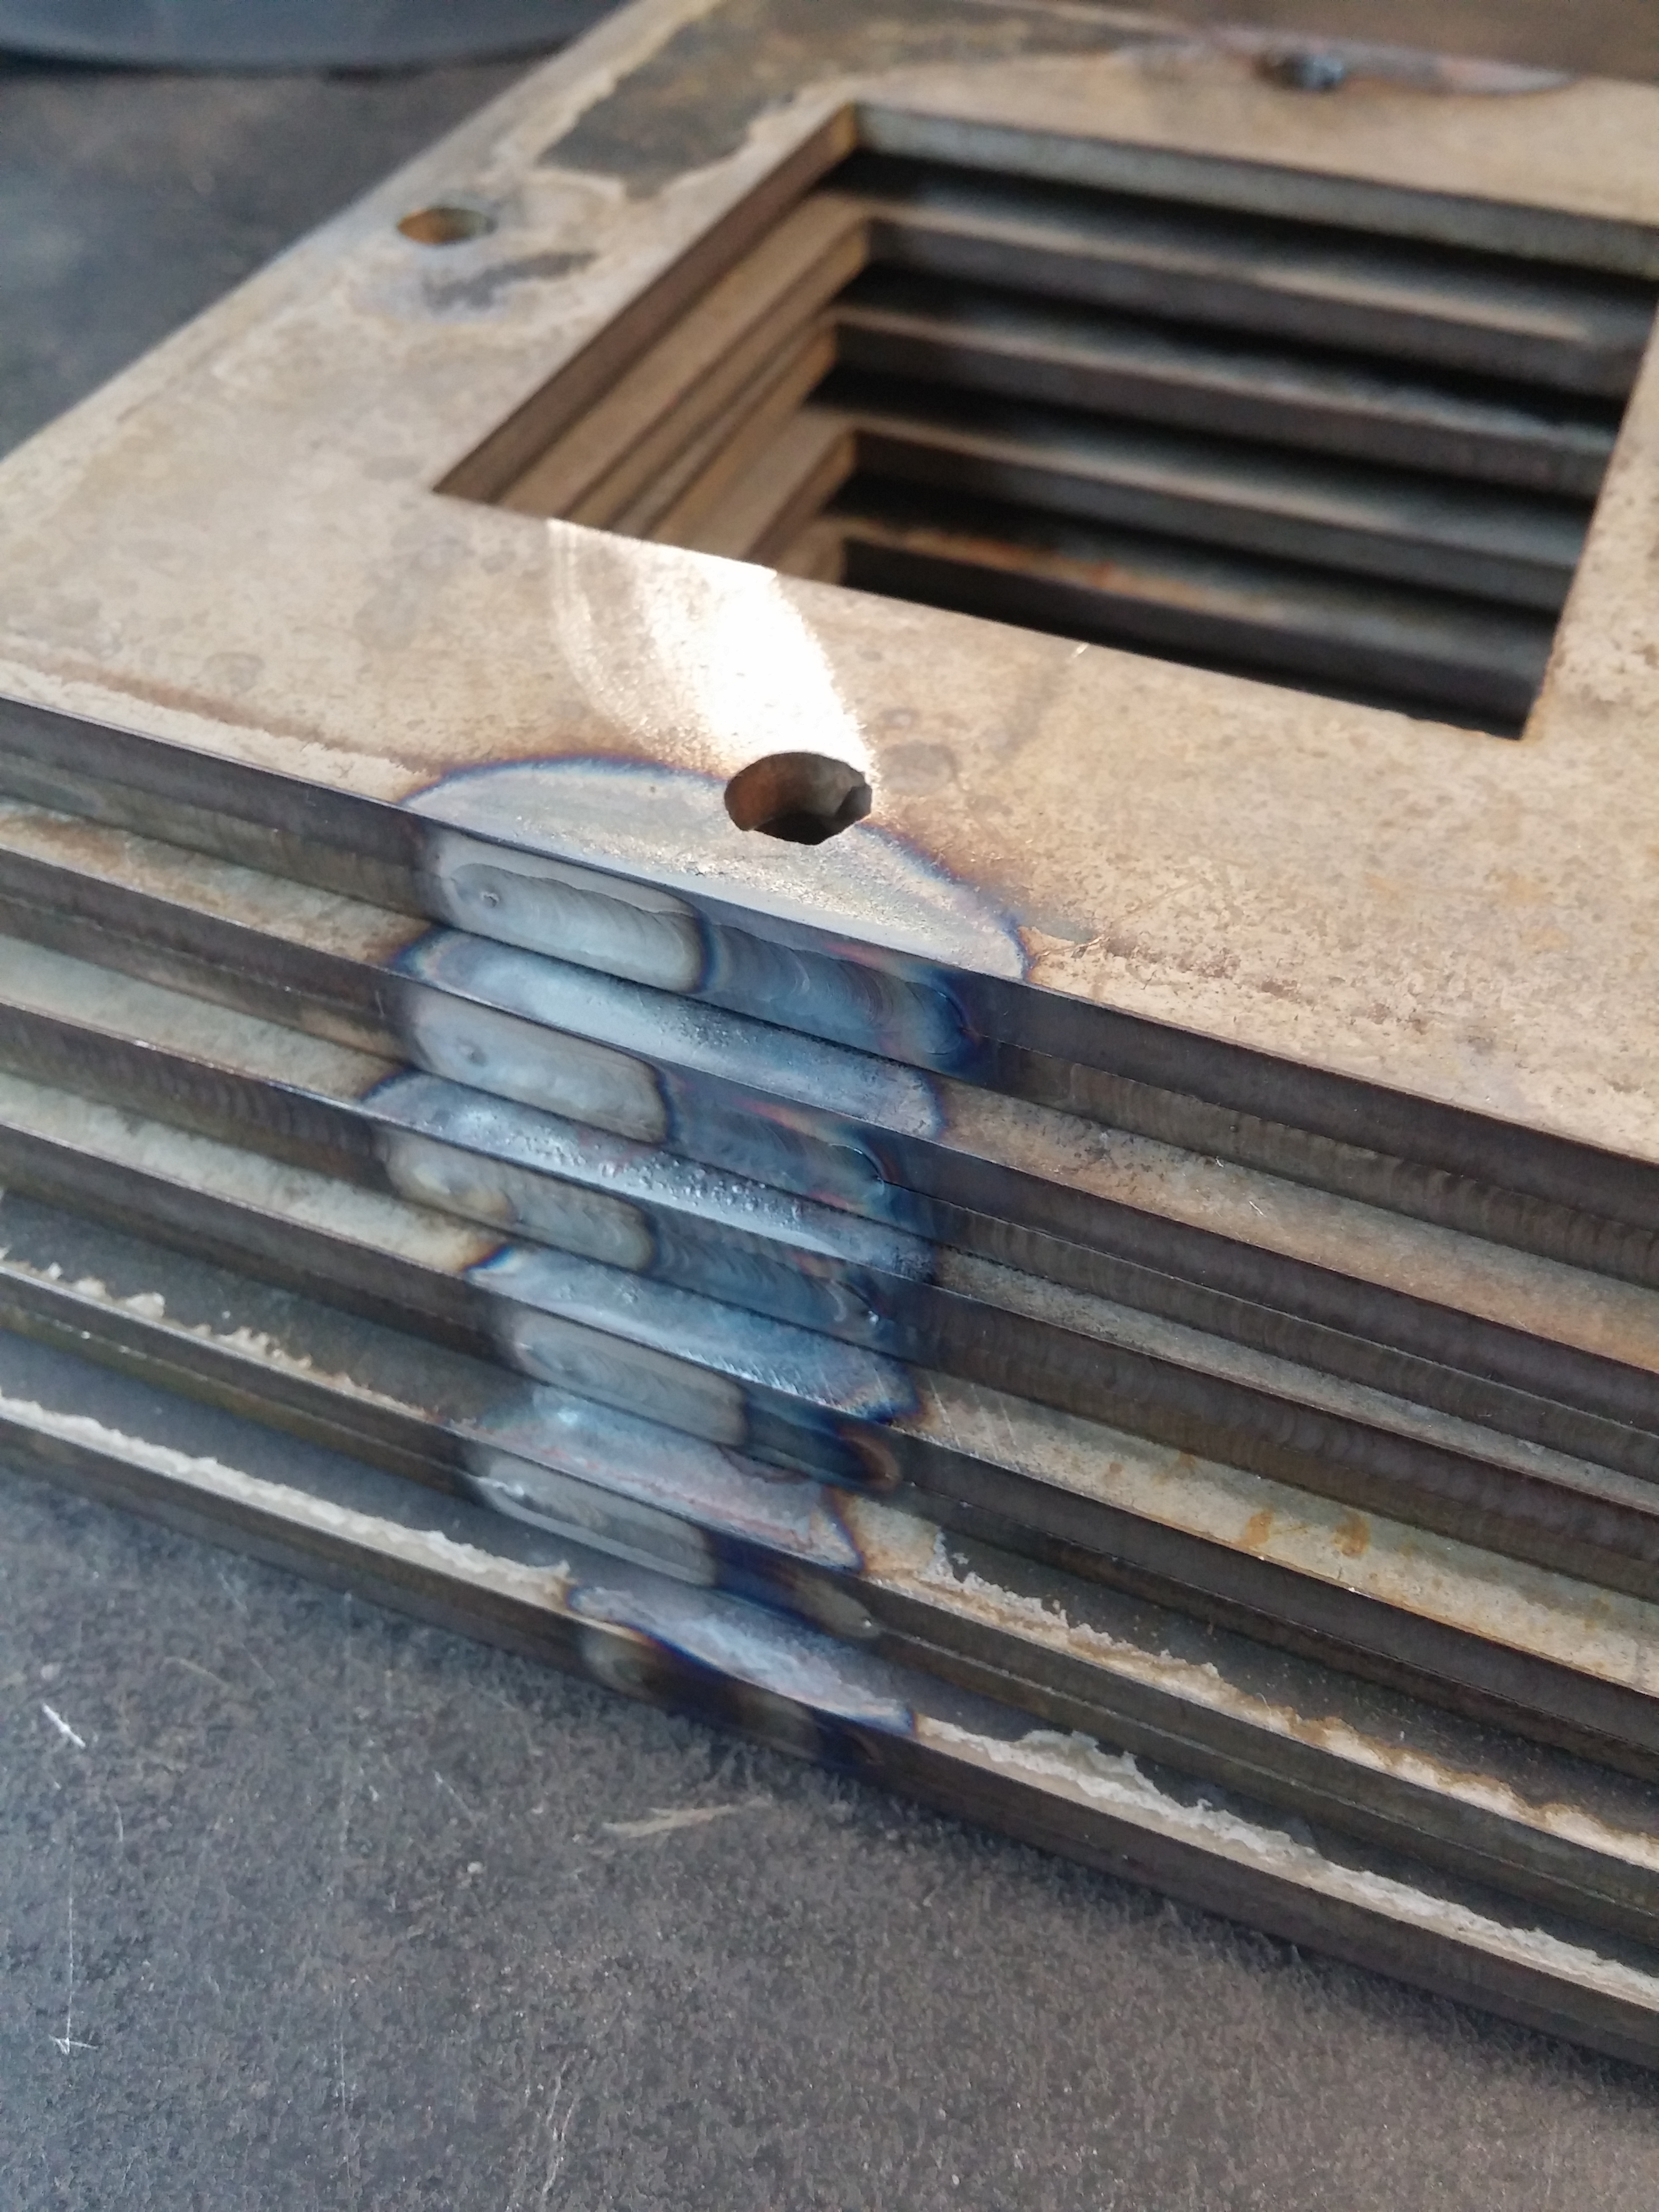
Steel Crate – Industrial Client Part II
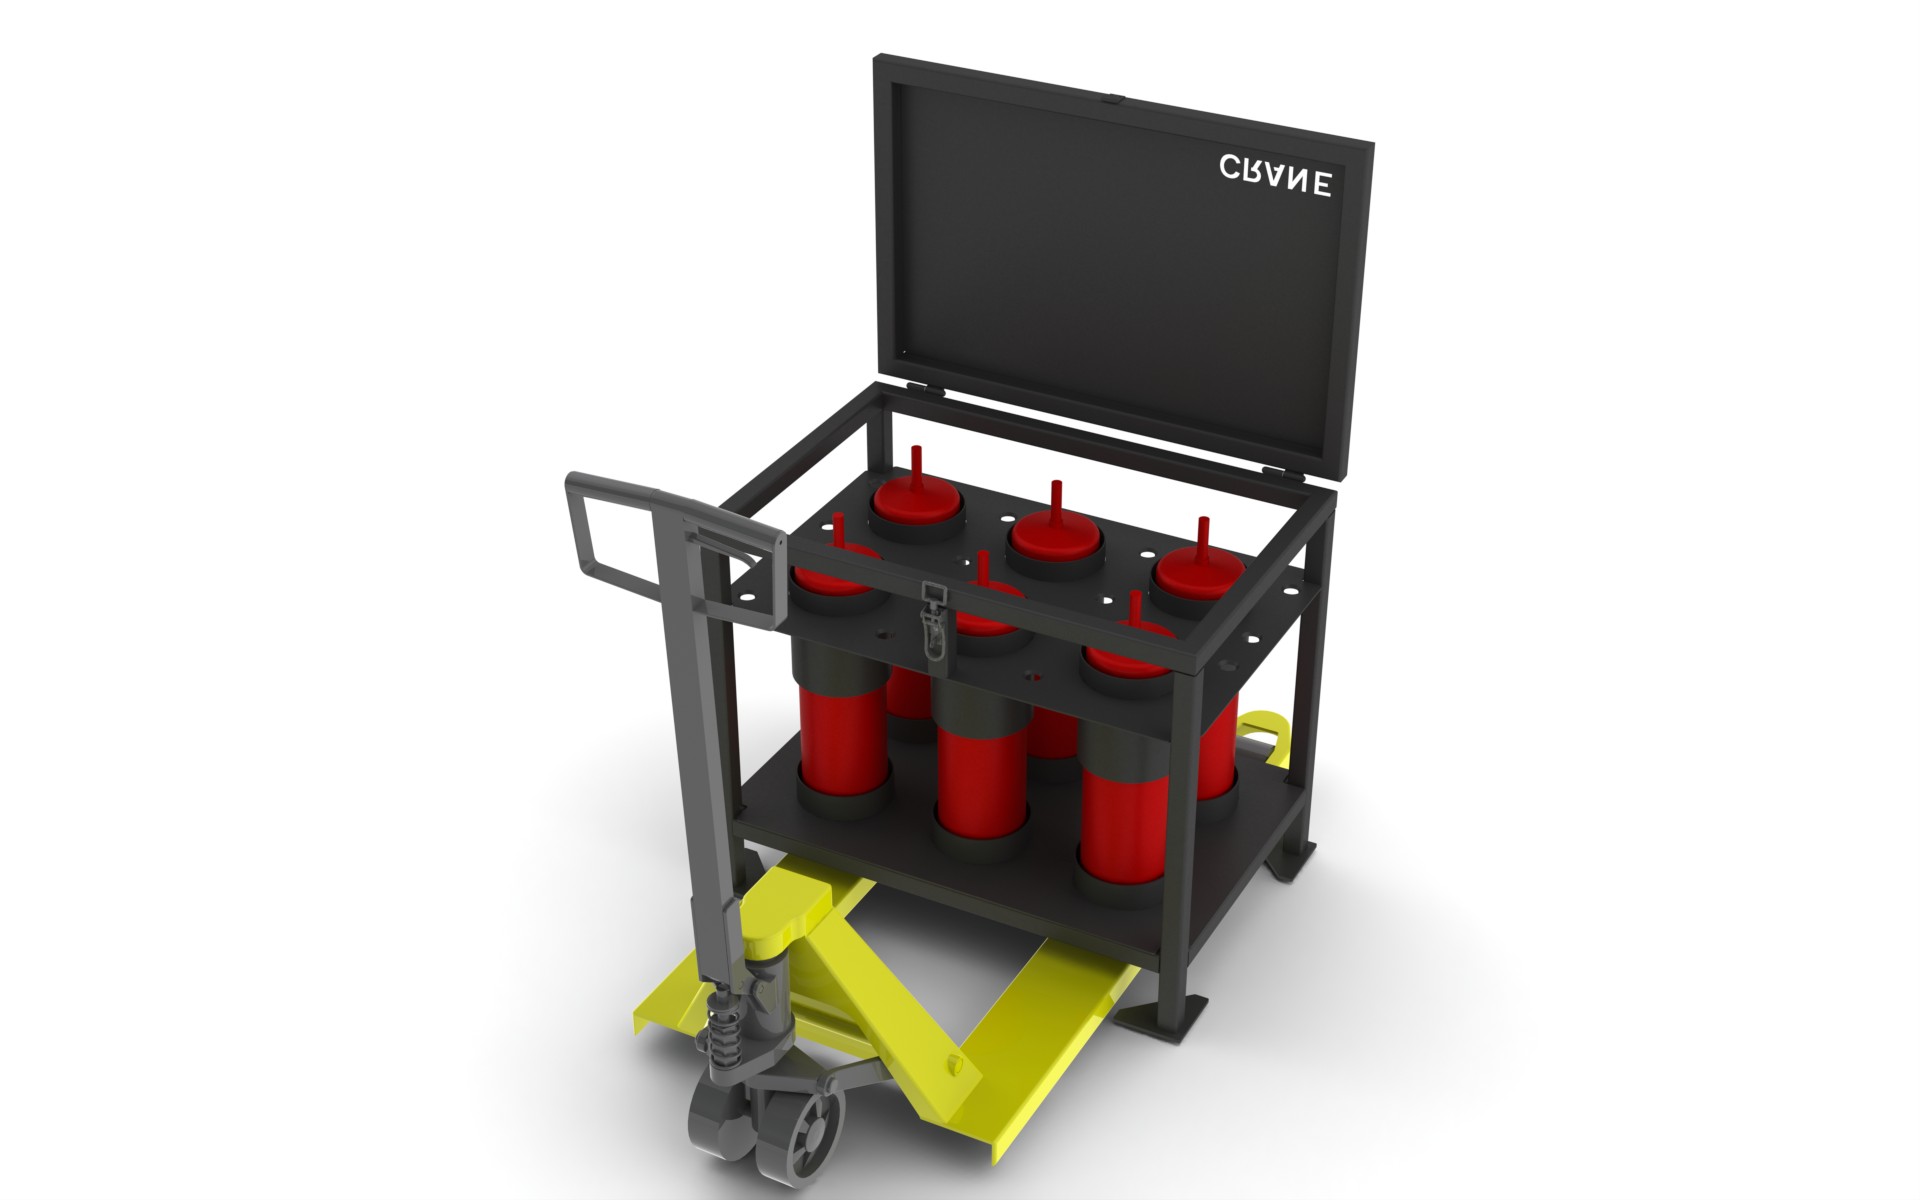
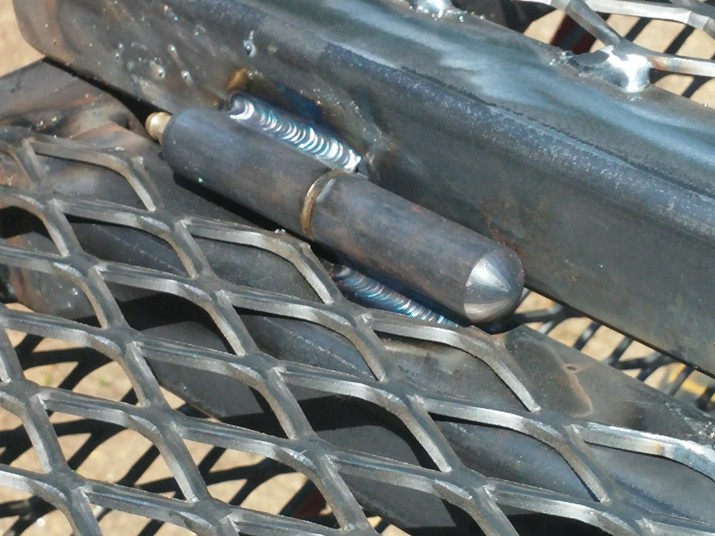
Here’s another project where we’ve built another steel crate used to secure oxygen tanks on the back deck of a truck. It has specific requirements from the customer in terms of loading capacity as well as transportation requirements. It is using 1.5″ steel tubing, has a 14ga steel top, 10ga steel floor and horizontal support as well as flattened expanded mesh side panels. This tank is specifically built to transport oxygen tanks and so there are steel sleeves welded into the horizontal support as well as the floor to keep the tanks steady during transport. This will also allow for easy insertion and removal of the tanks and ensure that no tanks will be loose during transport. This is the approved CAD model (sans mesh, handle and chain limiting strap).
Here you can see the frame being welded up. The use of a square (not shown), 3/8″ steel scraps, ratchet strap and clamps are to ensure that everything is square prior to tacking. This will keep everything nice and square and ensure it won’t need any tweaking before or after welding.
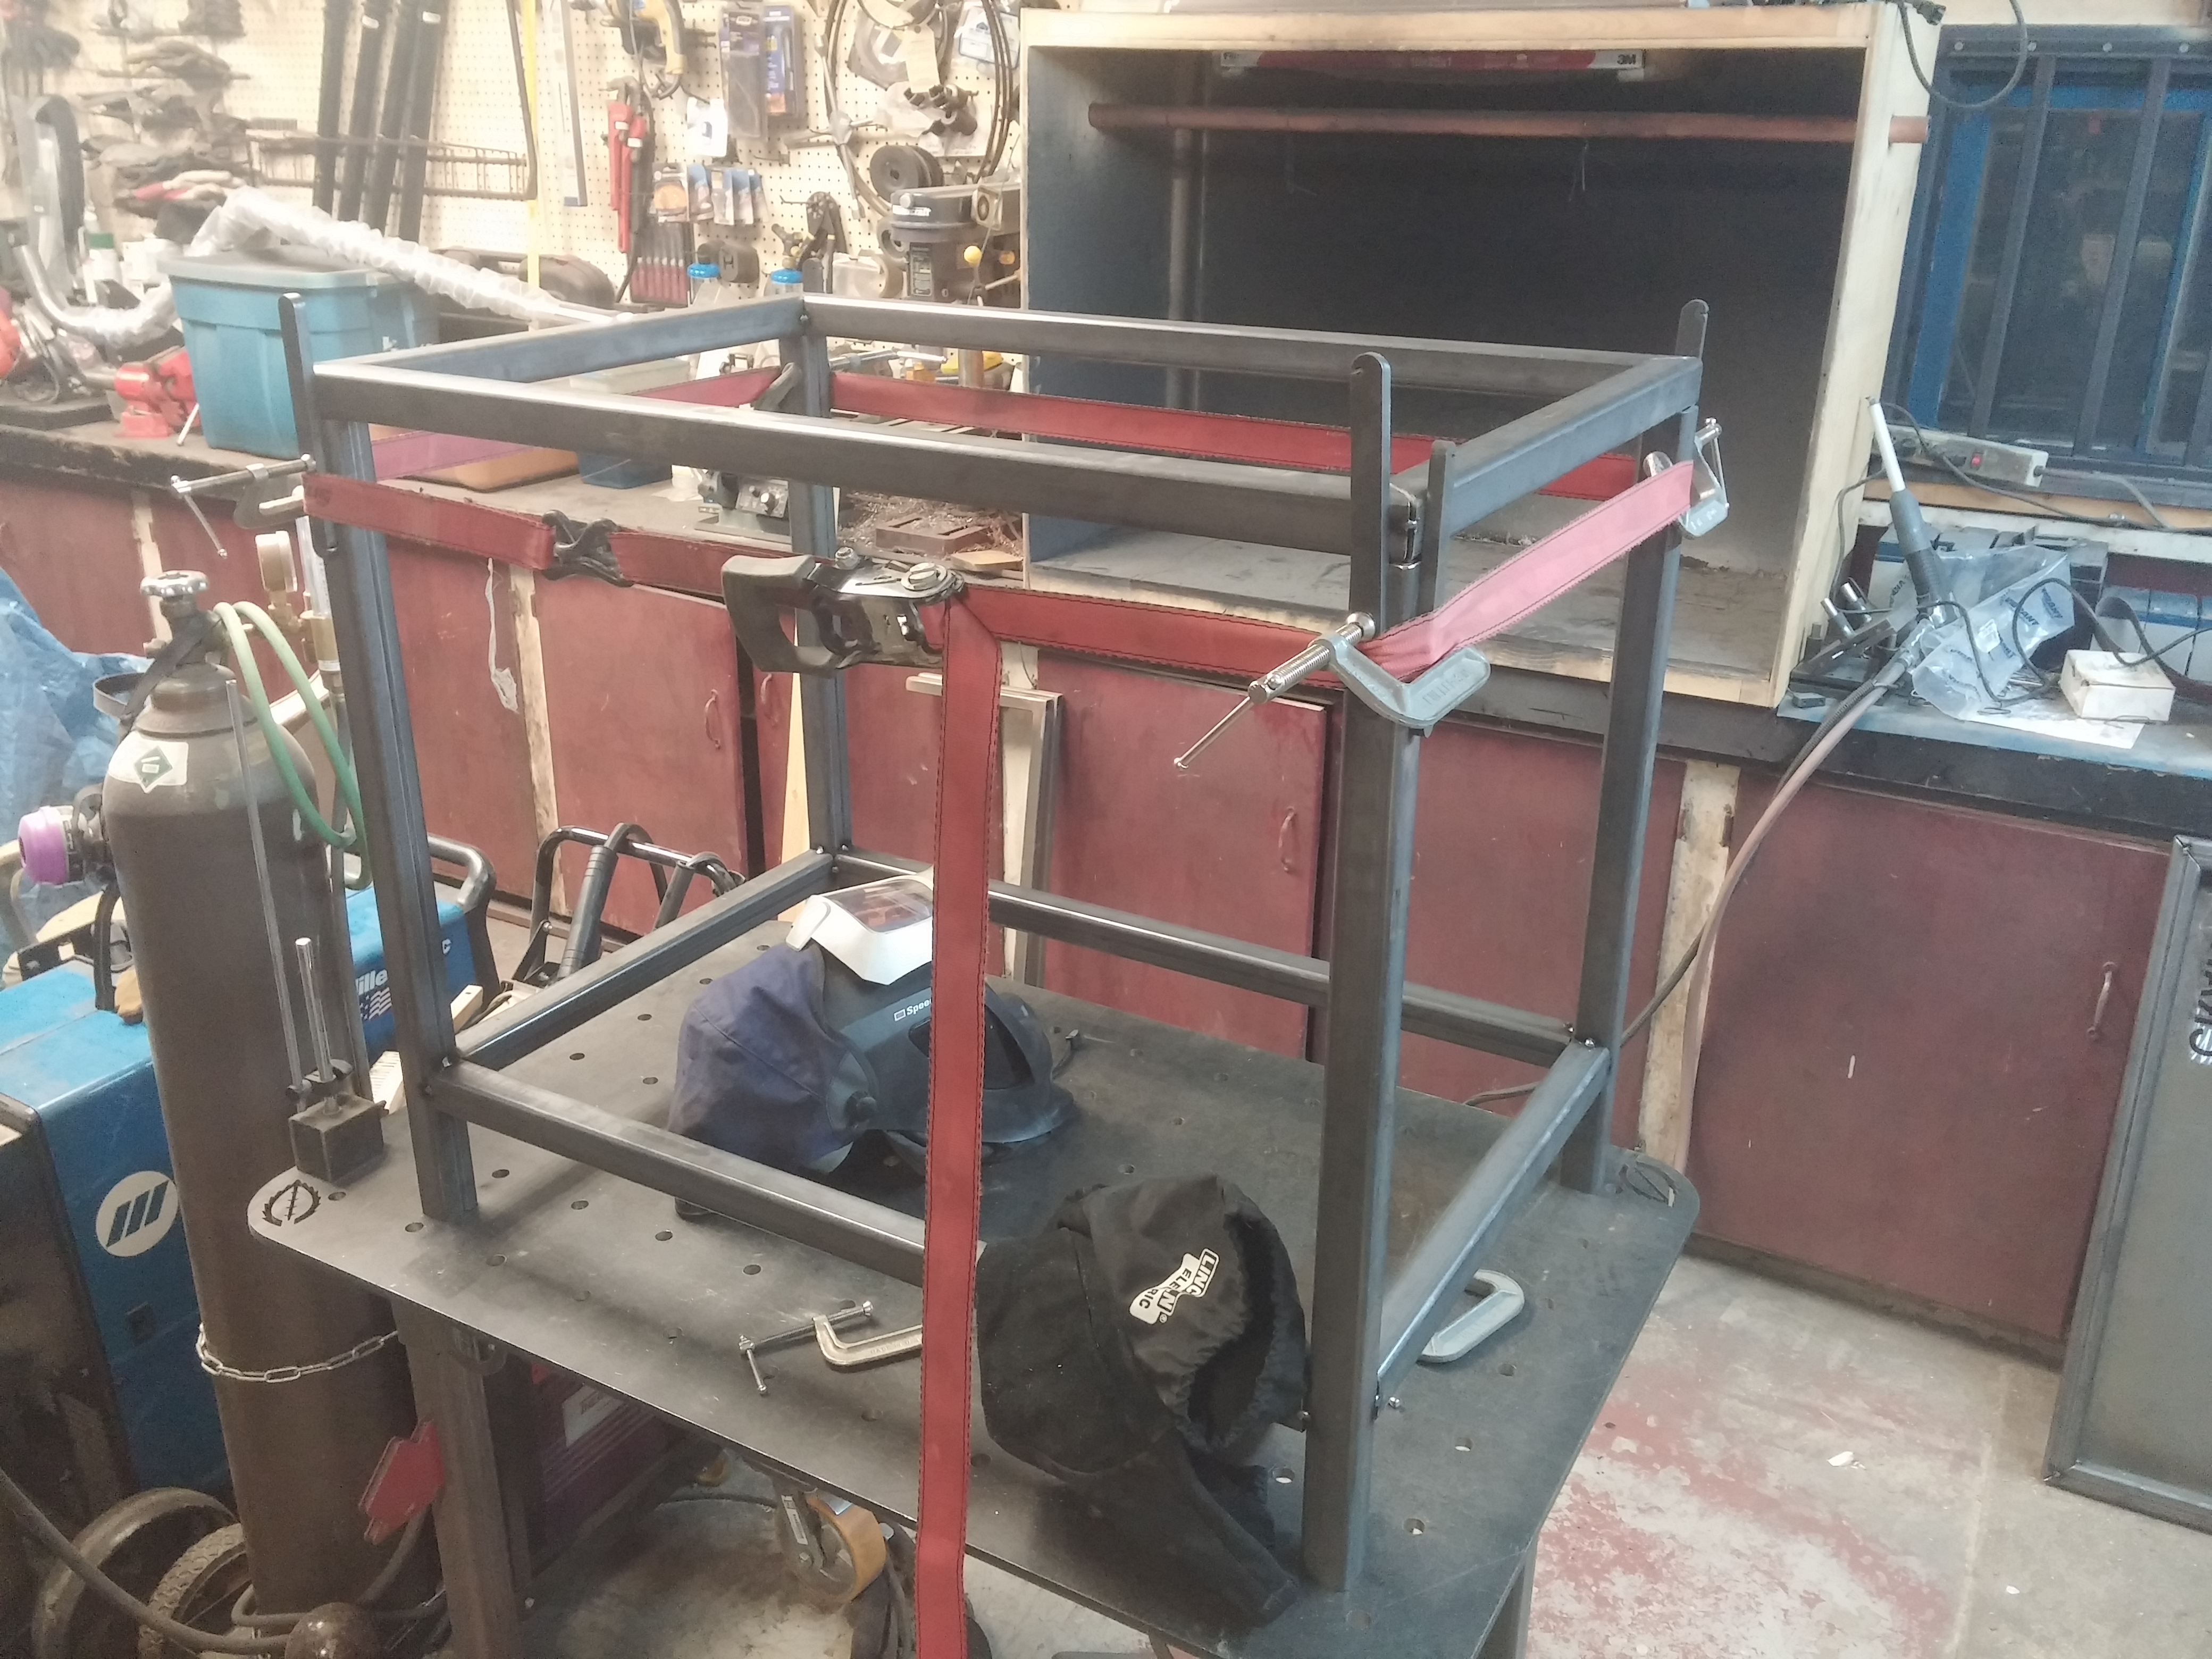
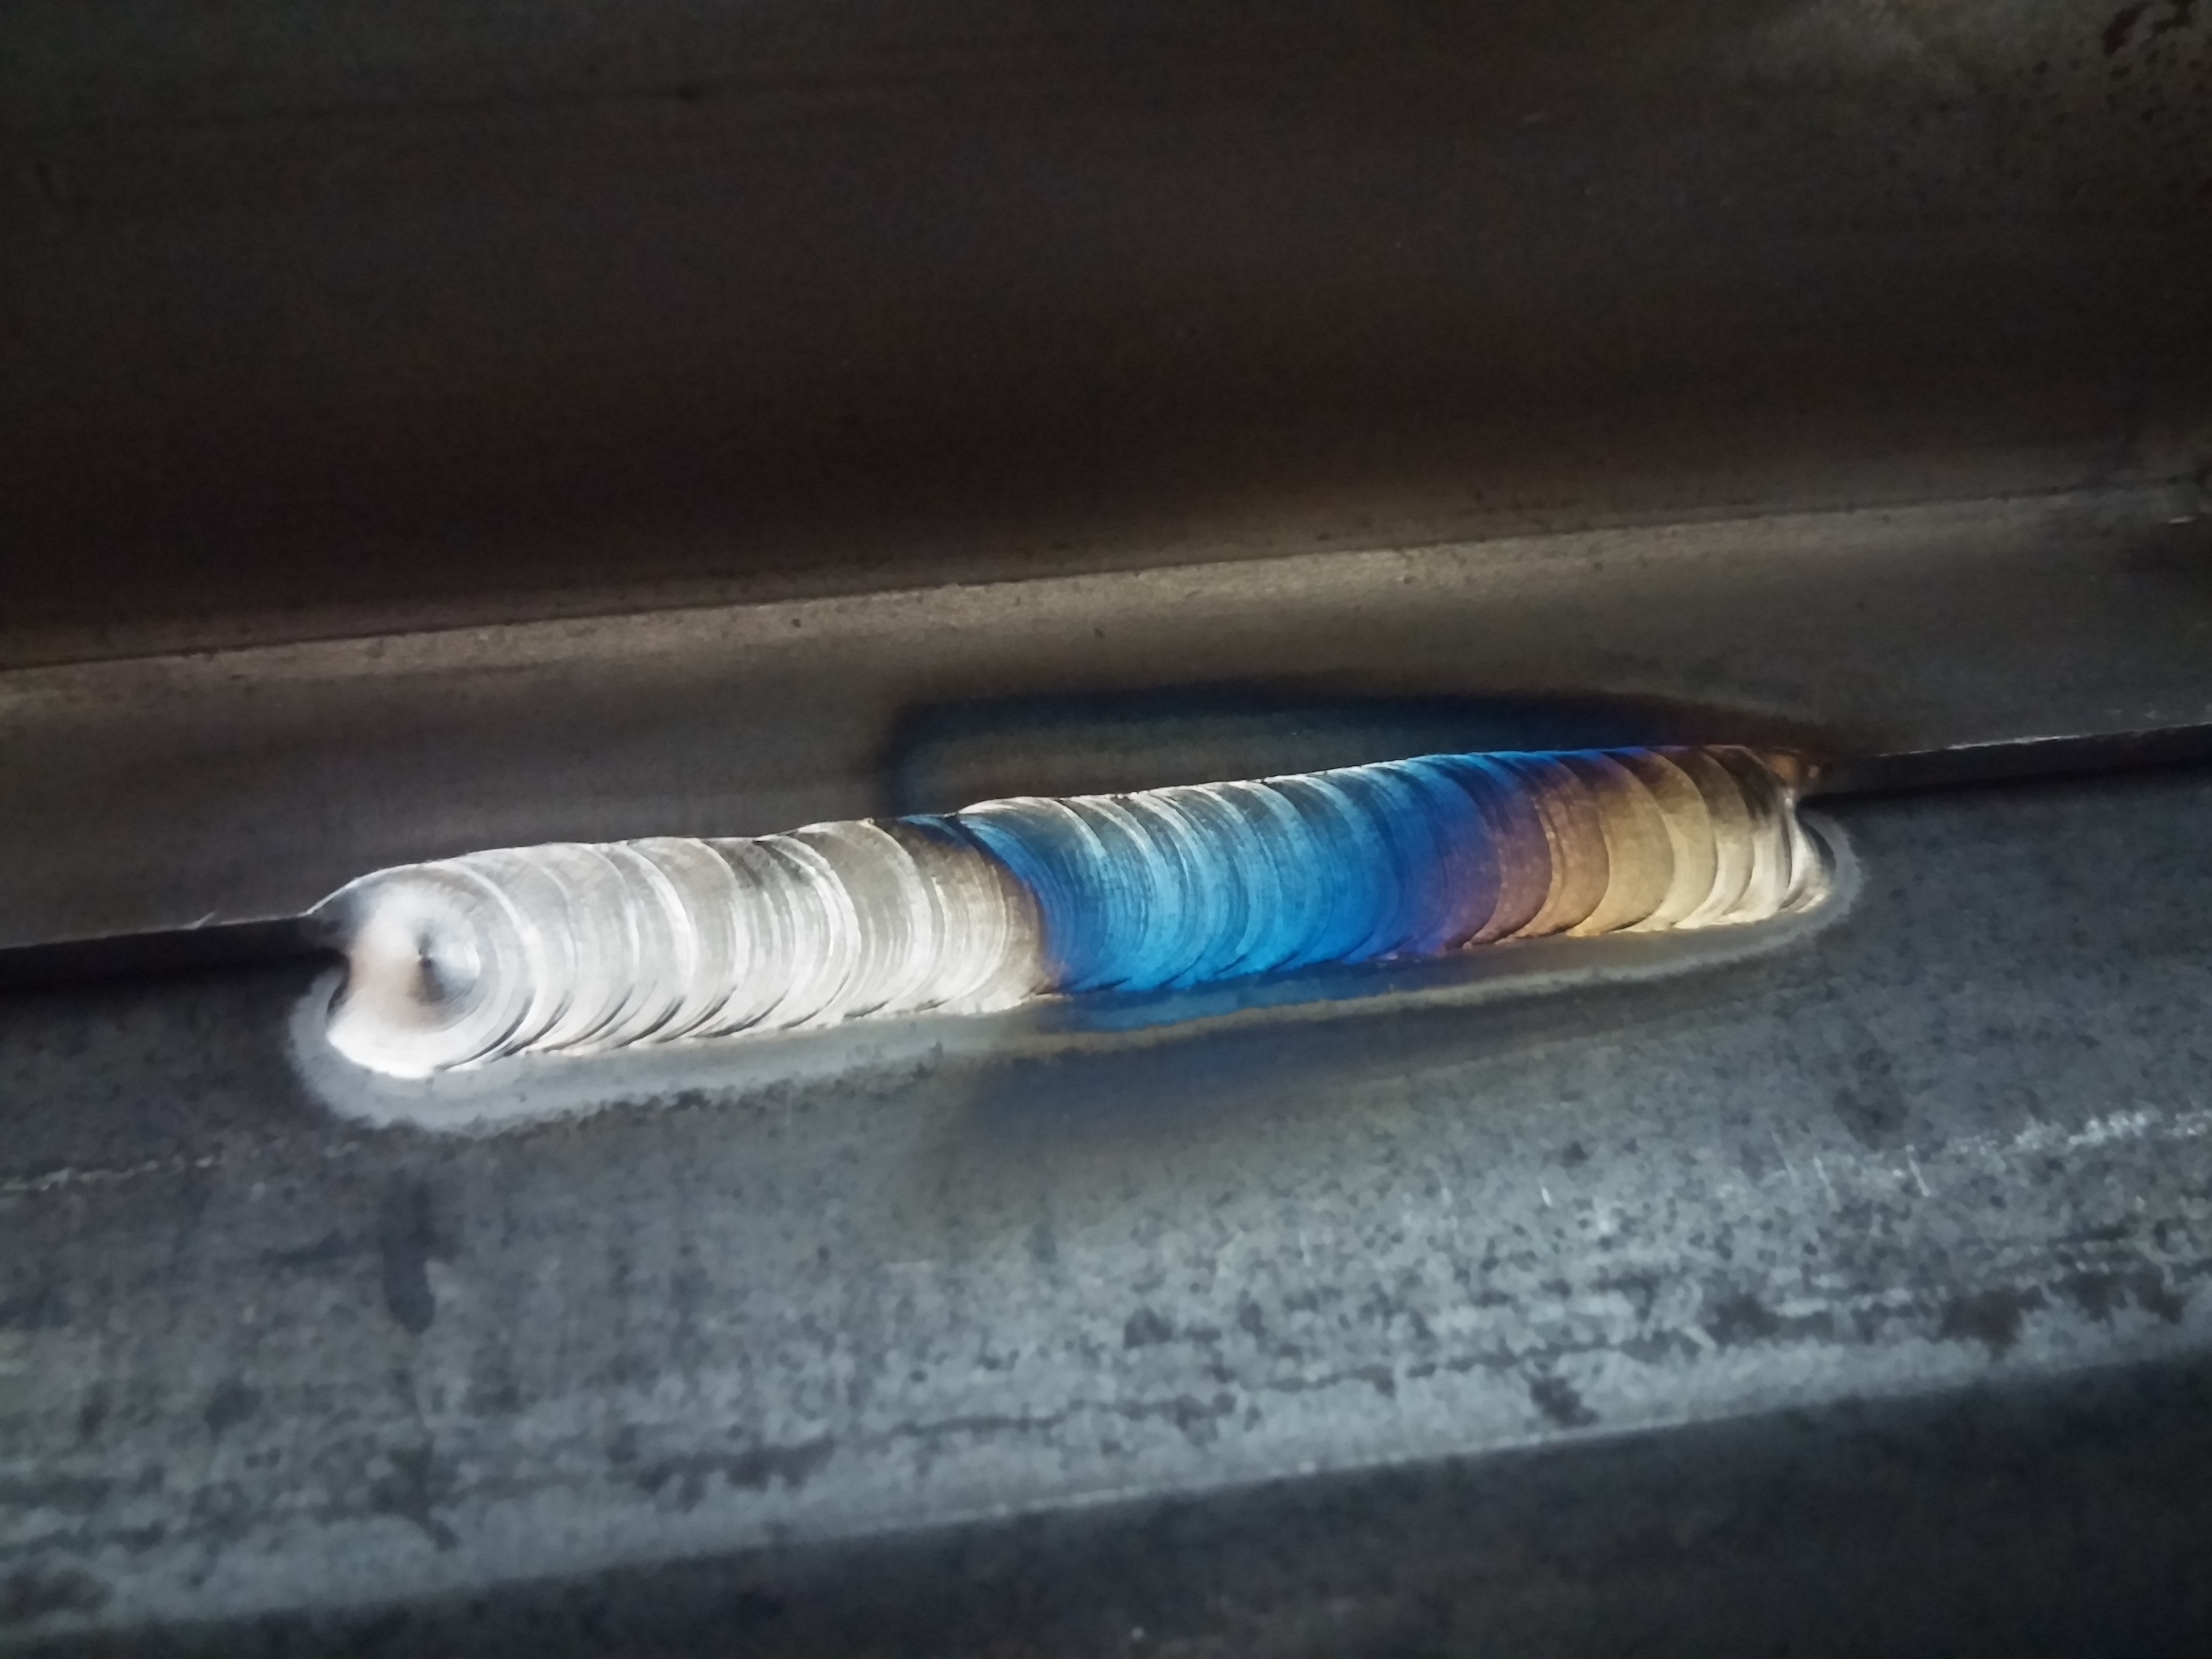
Some portions of the frame are MIG welded for speed, others are TIG welded for cosmetics. Gotta love TIG…
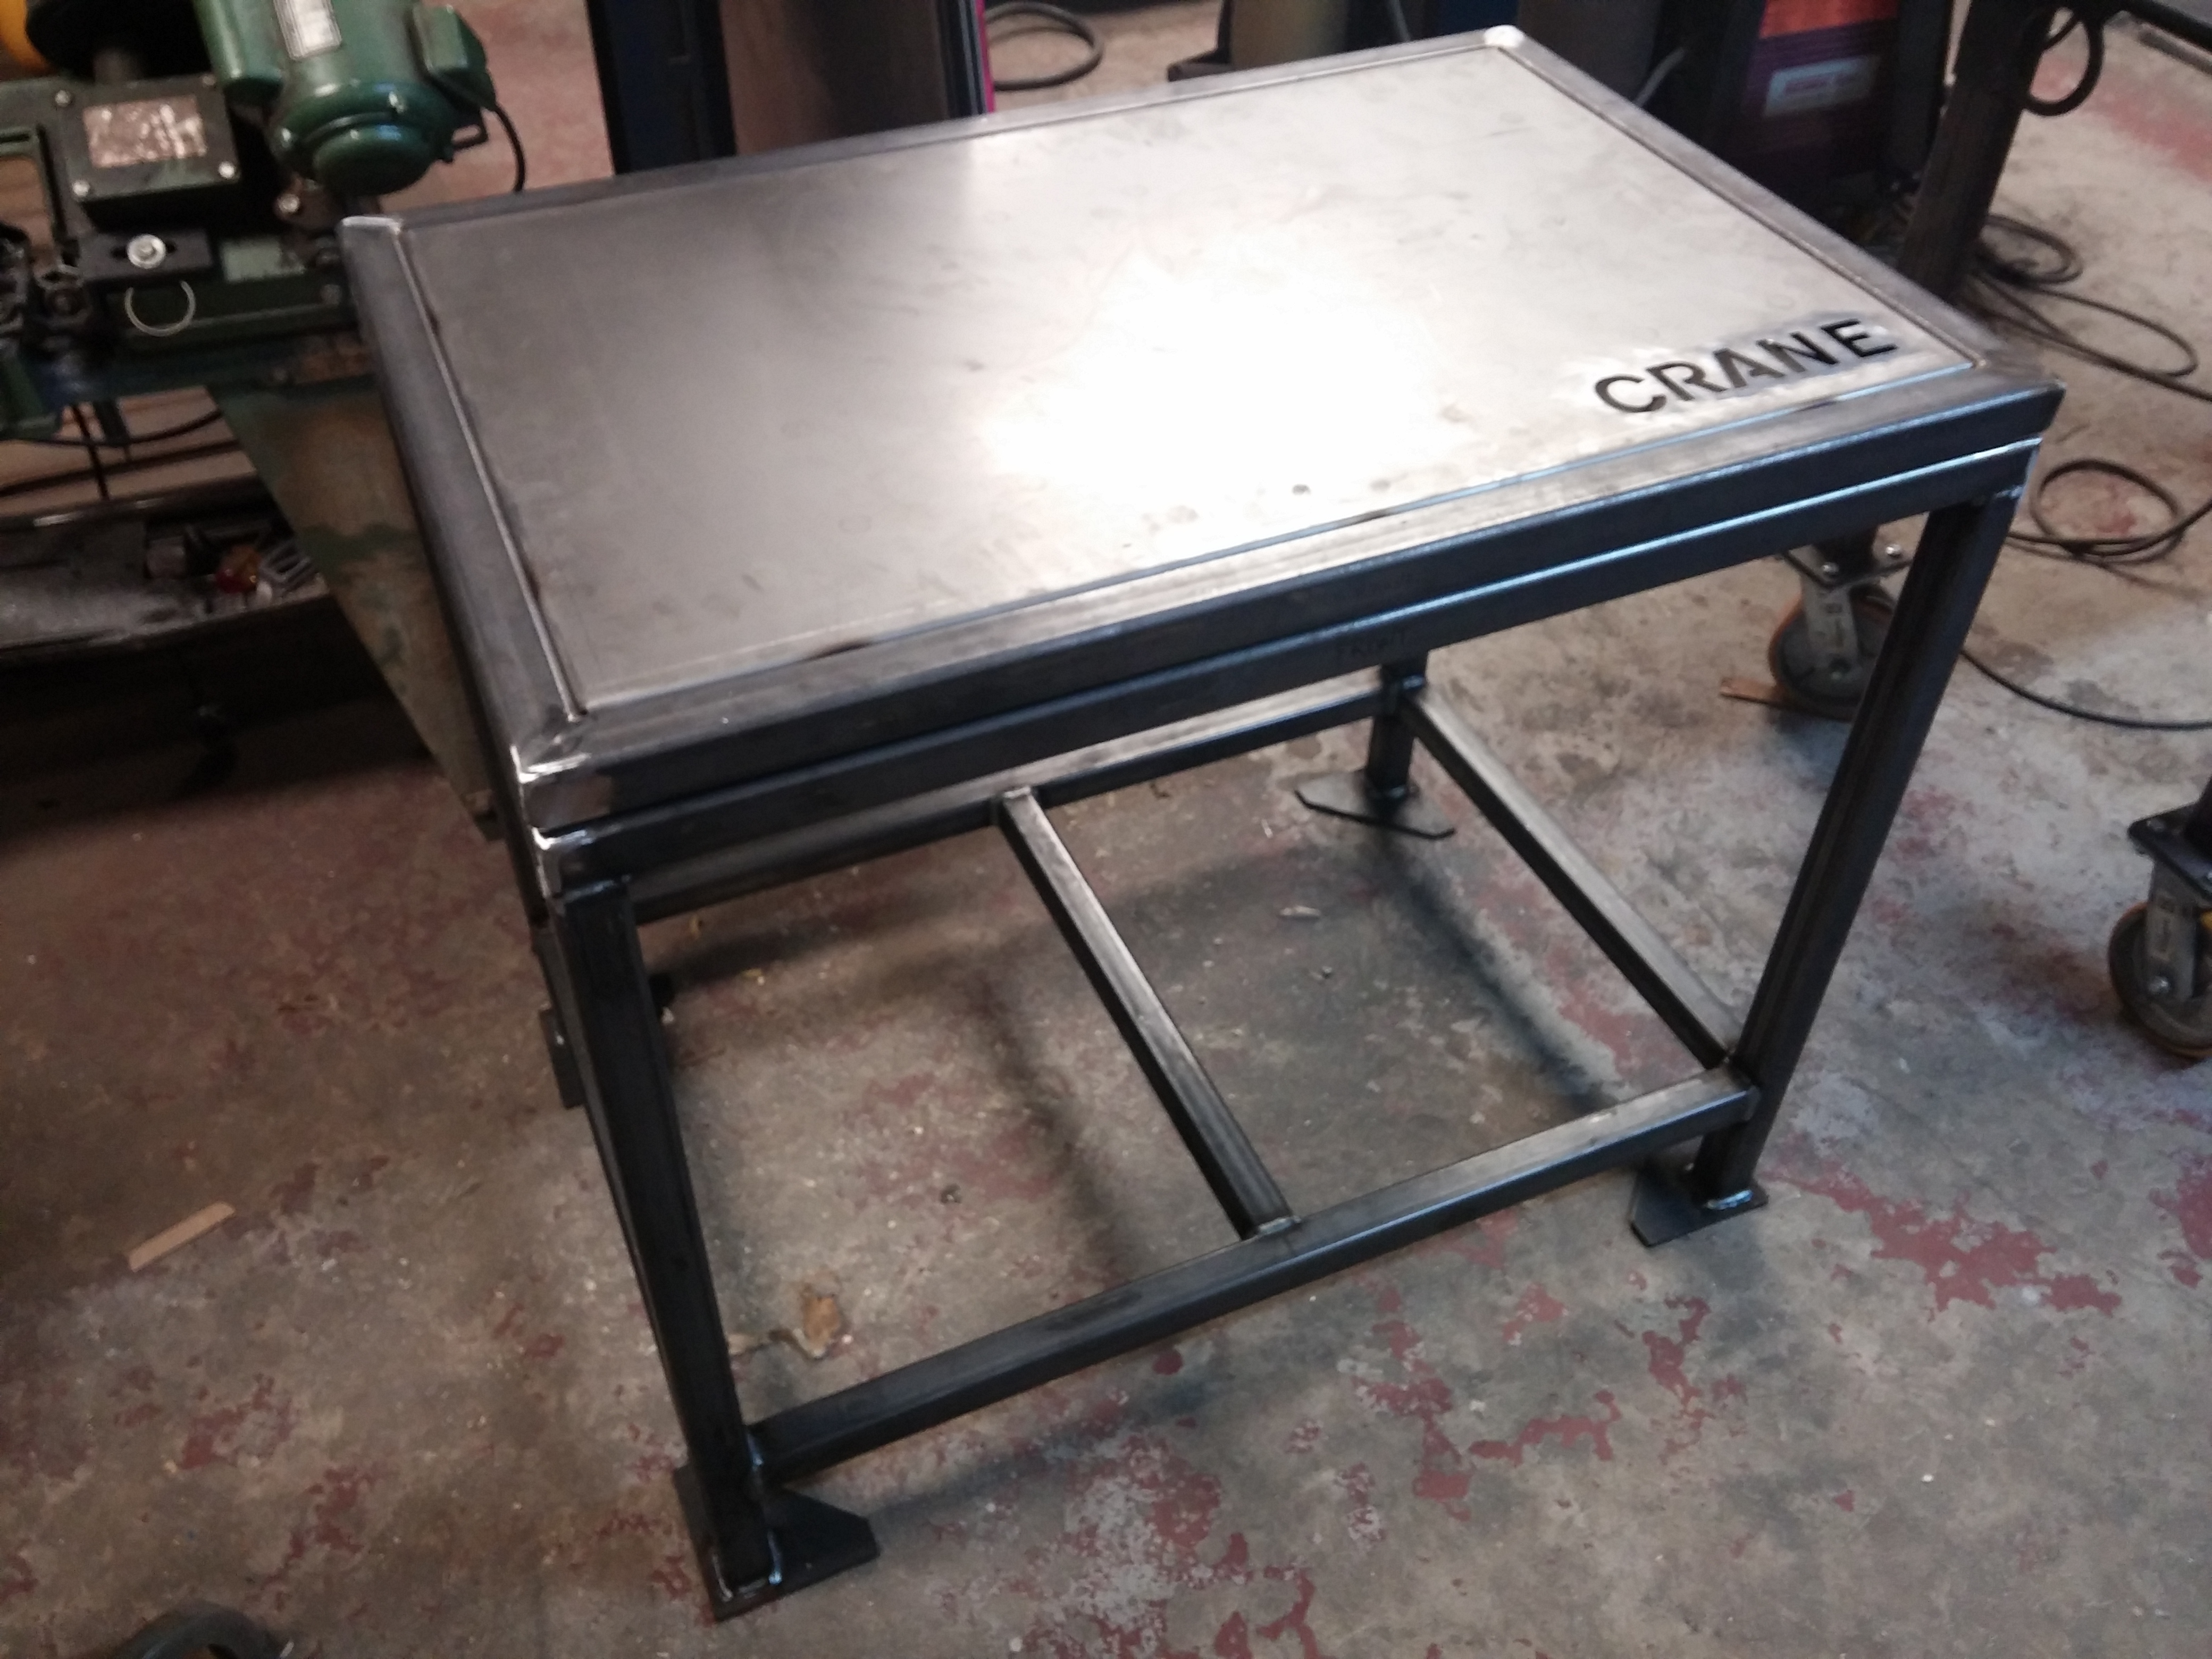
The 14ga cold rolled steel lid welded to the lid frame and mocked up on the crate. The 14ga sheet was cut on the plasma table, then the edges were formed in the box and pan brake to give it a nice radius edge prior to being welded into the lid frame.
Here the floor and horizontal support are cut out from a 4’x4′ sheet of 10ga steel.
Here we have the steel tubes welded in place on the 10ga horizontal support.
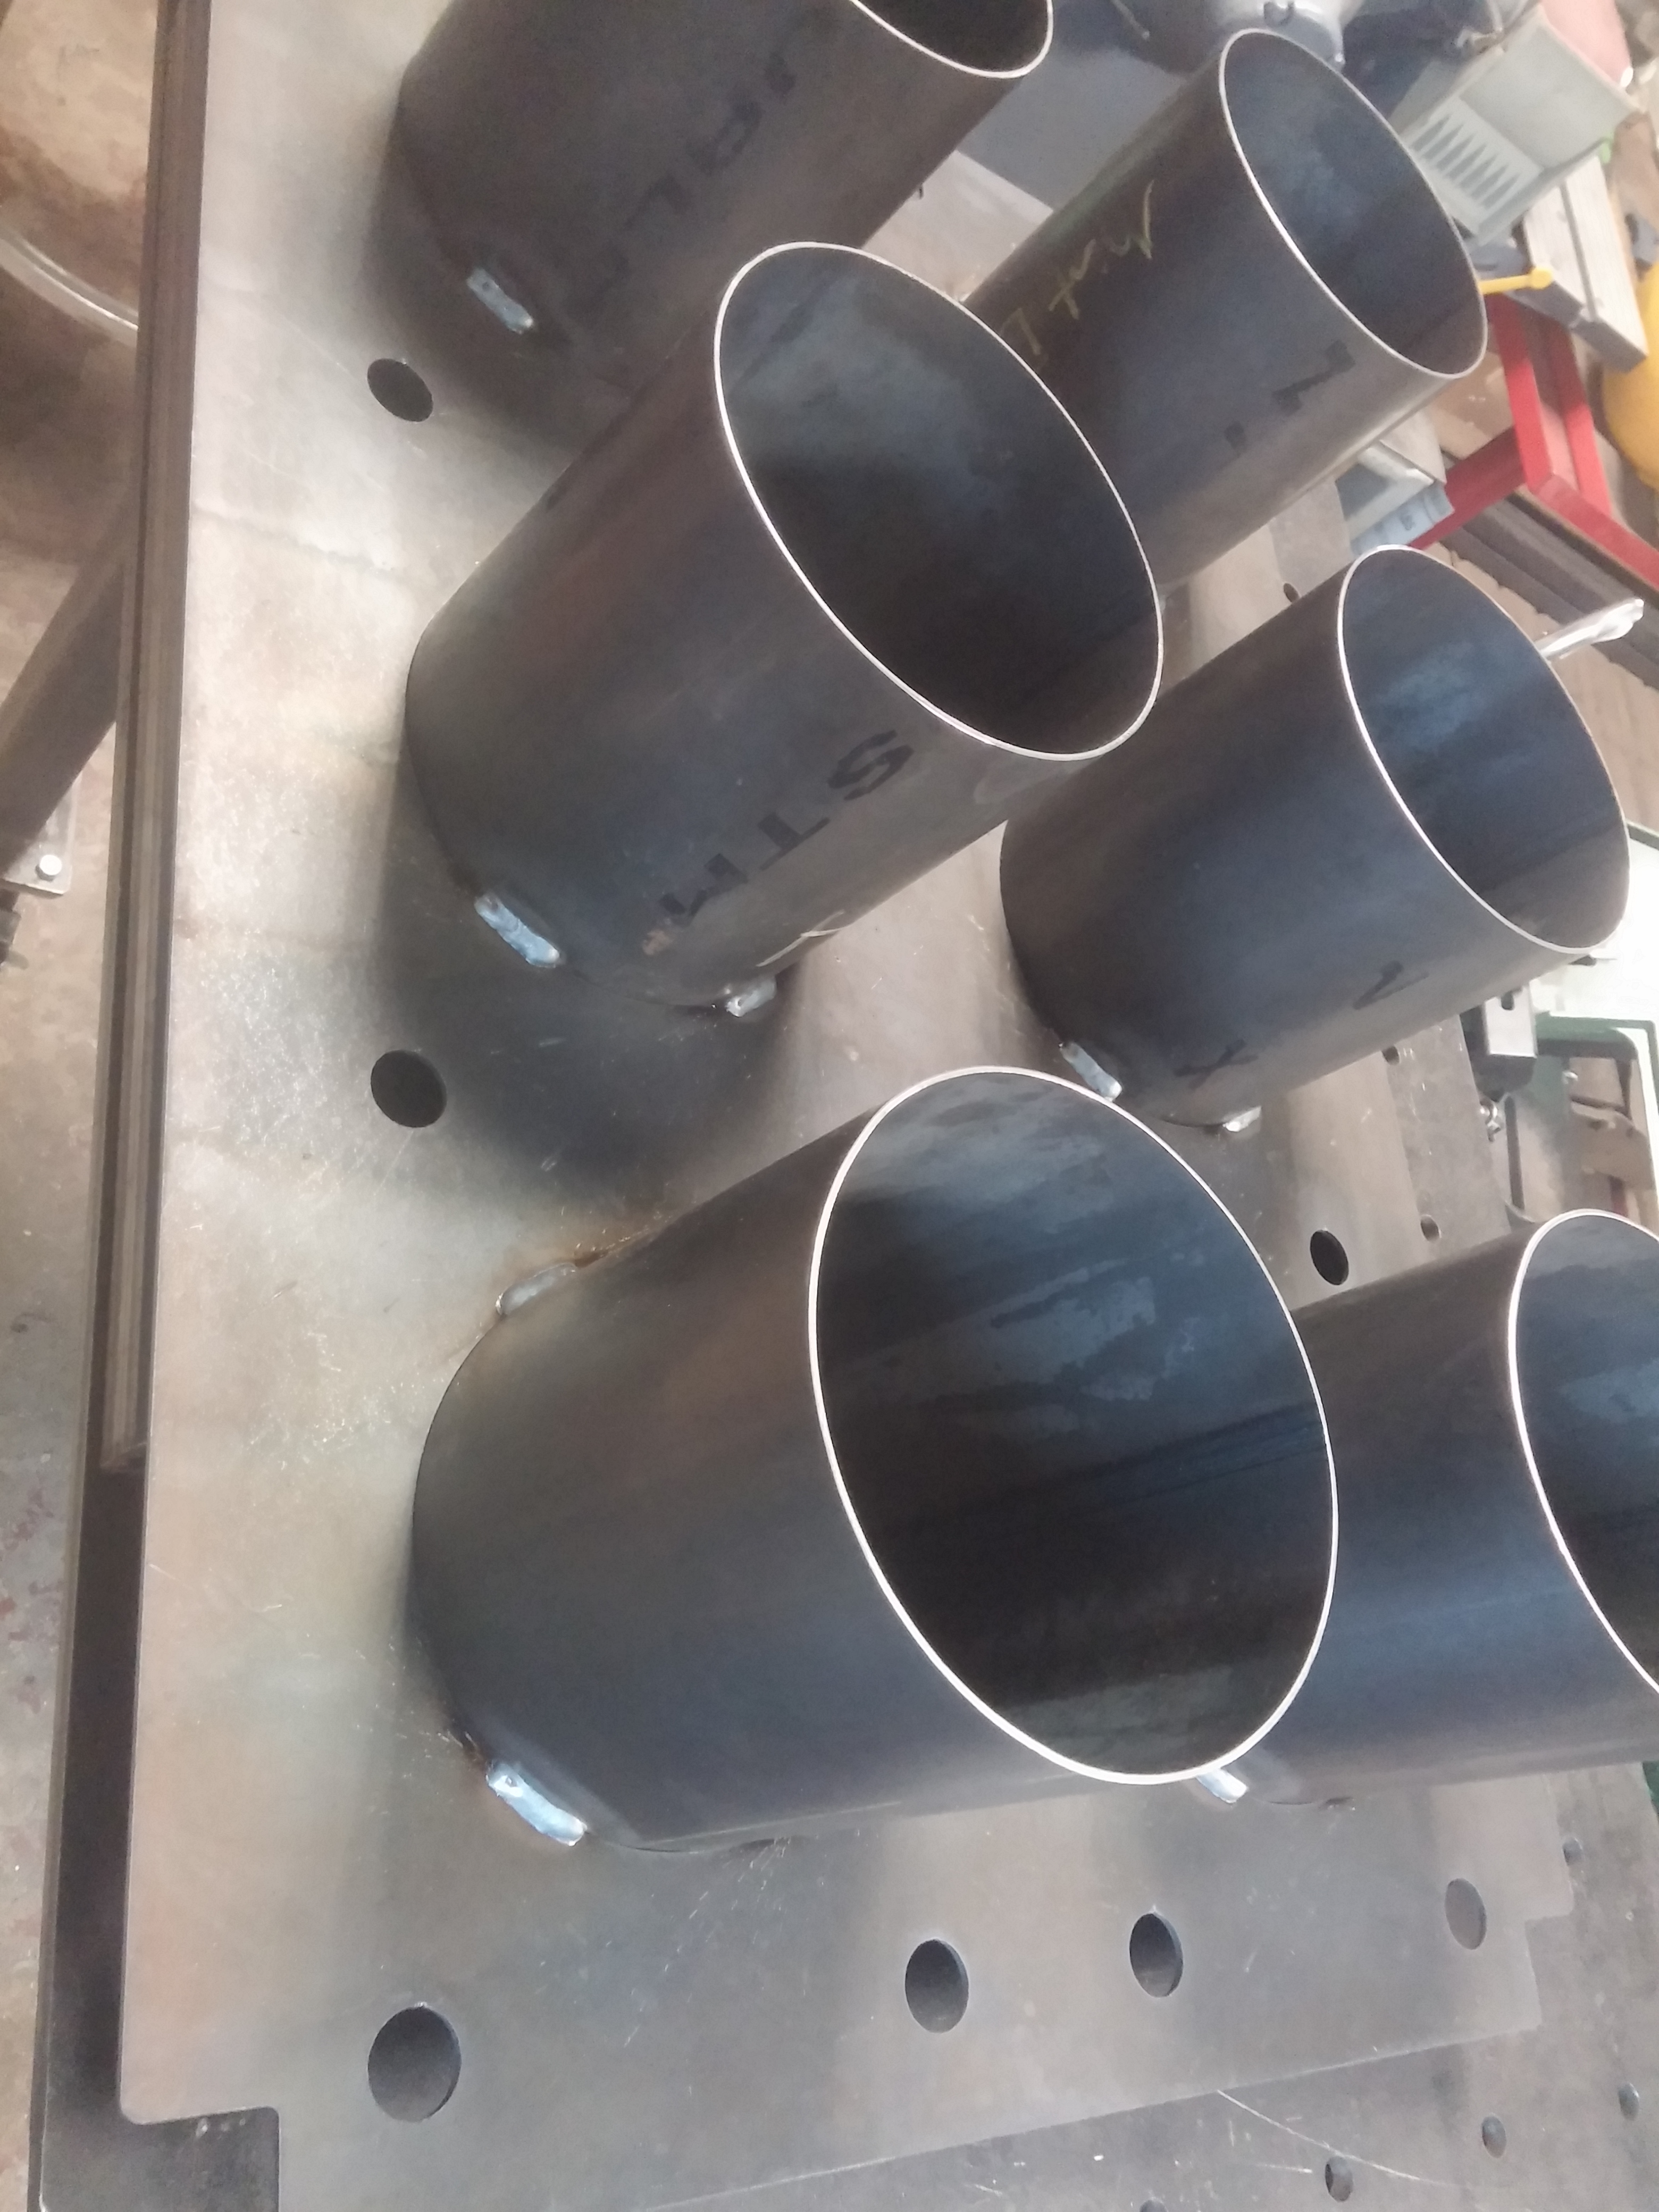
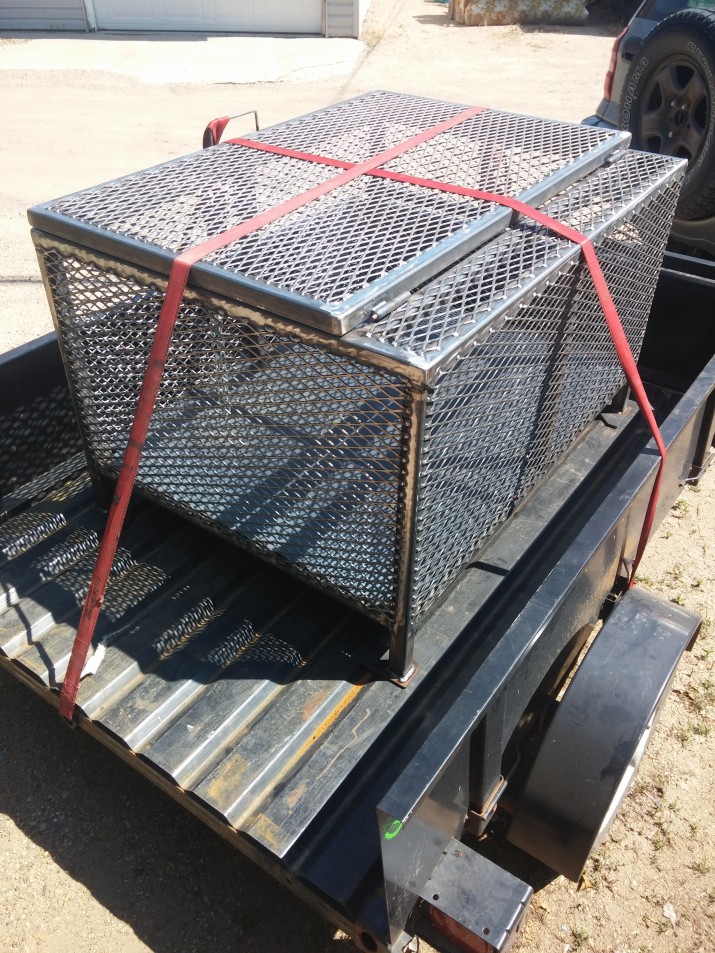
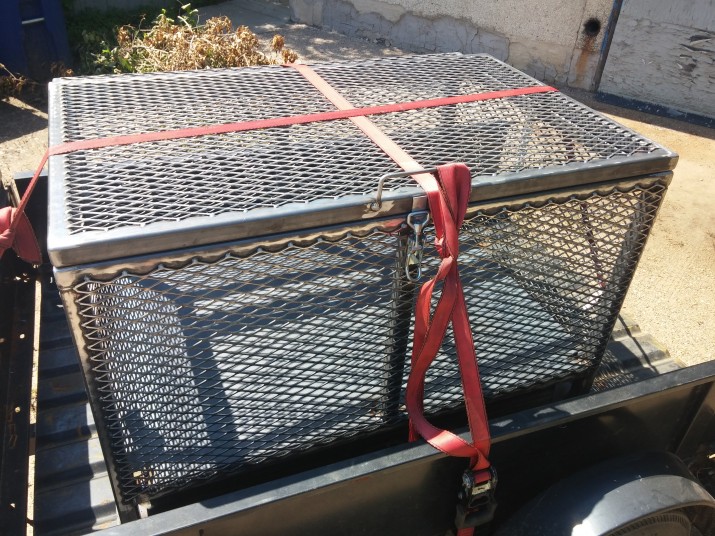
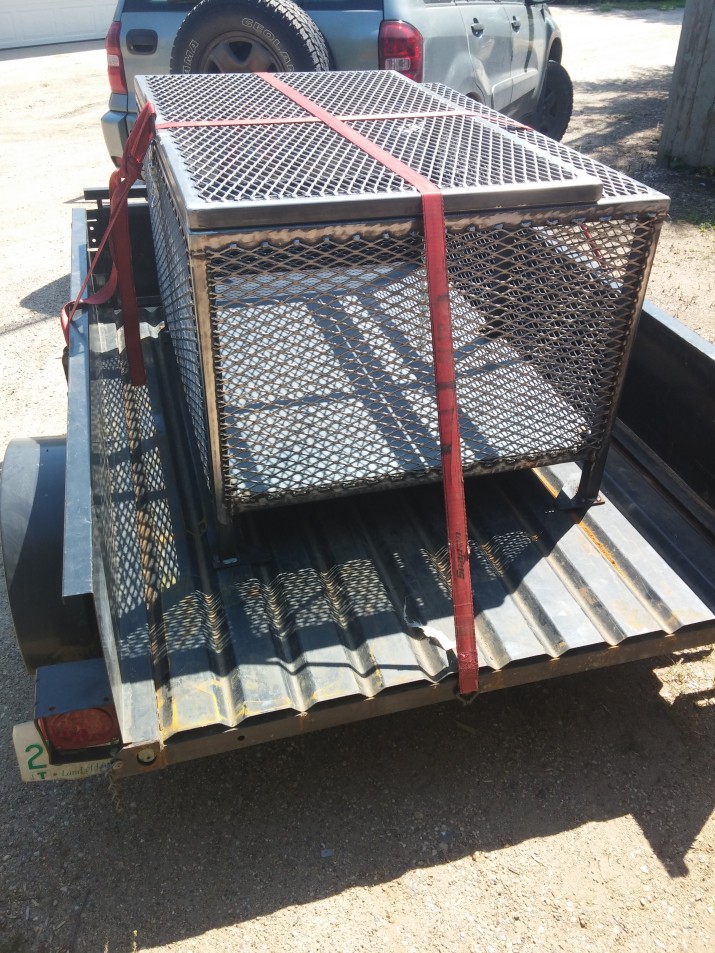
Here it is mocked up sitting on top of the crate. The crate will get flipped upside down and the horizontal support will be blocked the correct distance and then it will be welded into the frame. The smaller holes on the horizontal support are to allow for the optional use of a bungee cord. There is some clearance between the tube and the tank (as seen on the right), and the use of the bungee cord will pull the tank to the side of the tube and eliminate any vibration or noise. Also notice the drain holes in the steel floor, just a small detail, but the last thing we’d want is the tubes on the floor to collect and pool water! The feet were also CNC cut from 1/4″ steel, they’ll distribute the load of the crate as well as the strapping load across a larger surface on the wood deck of the truck, the pounds per square inch were calculated to meet the customer requirement.

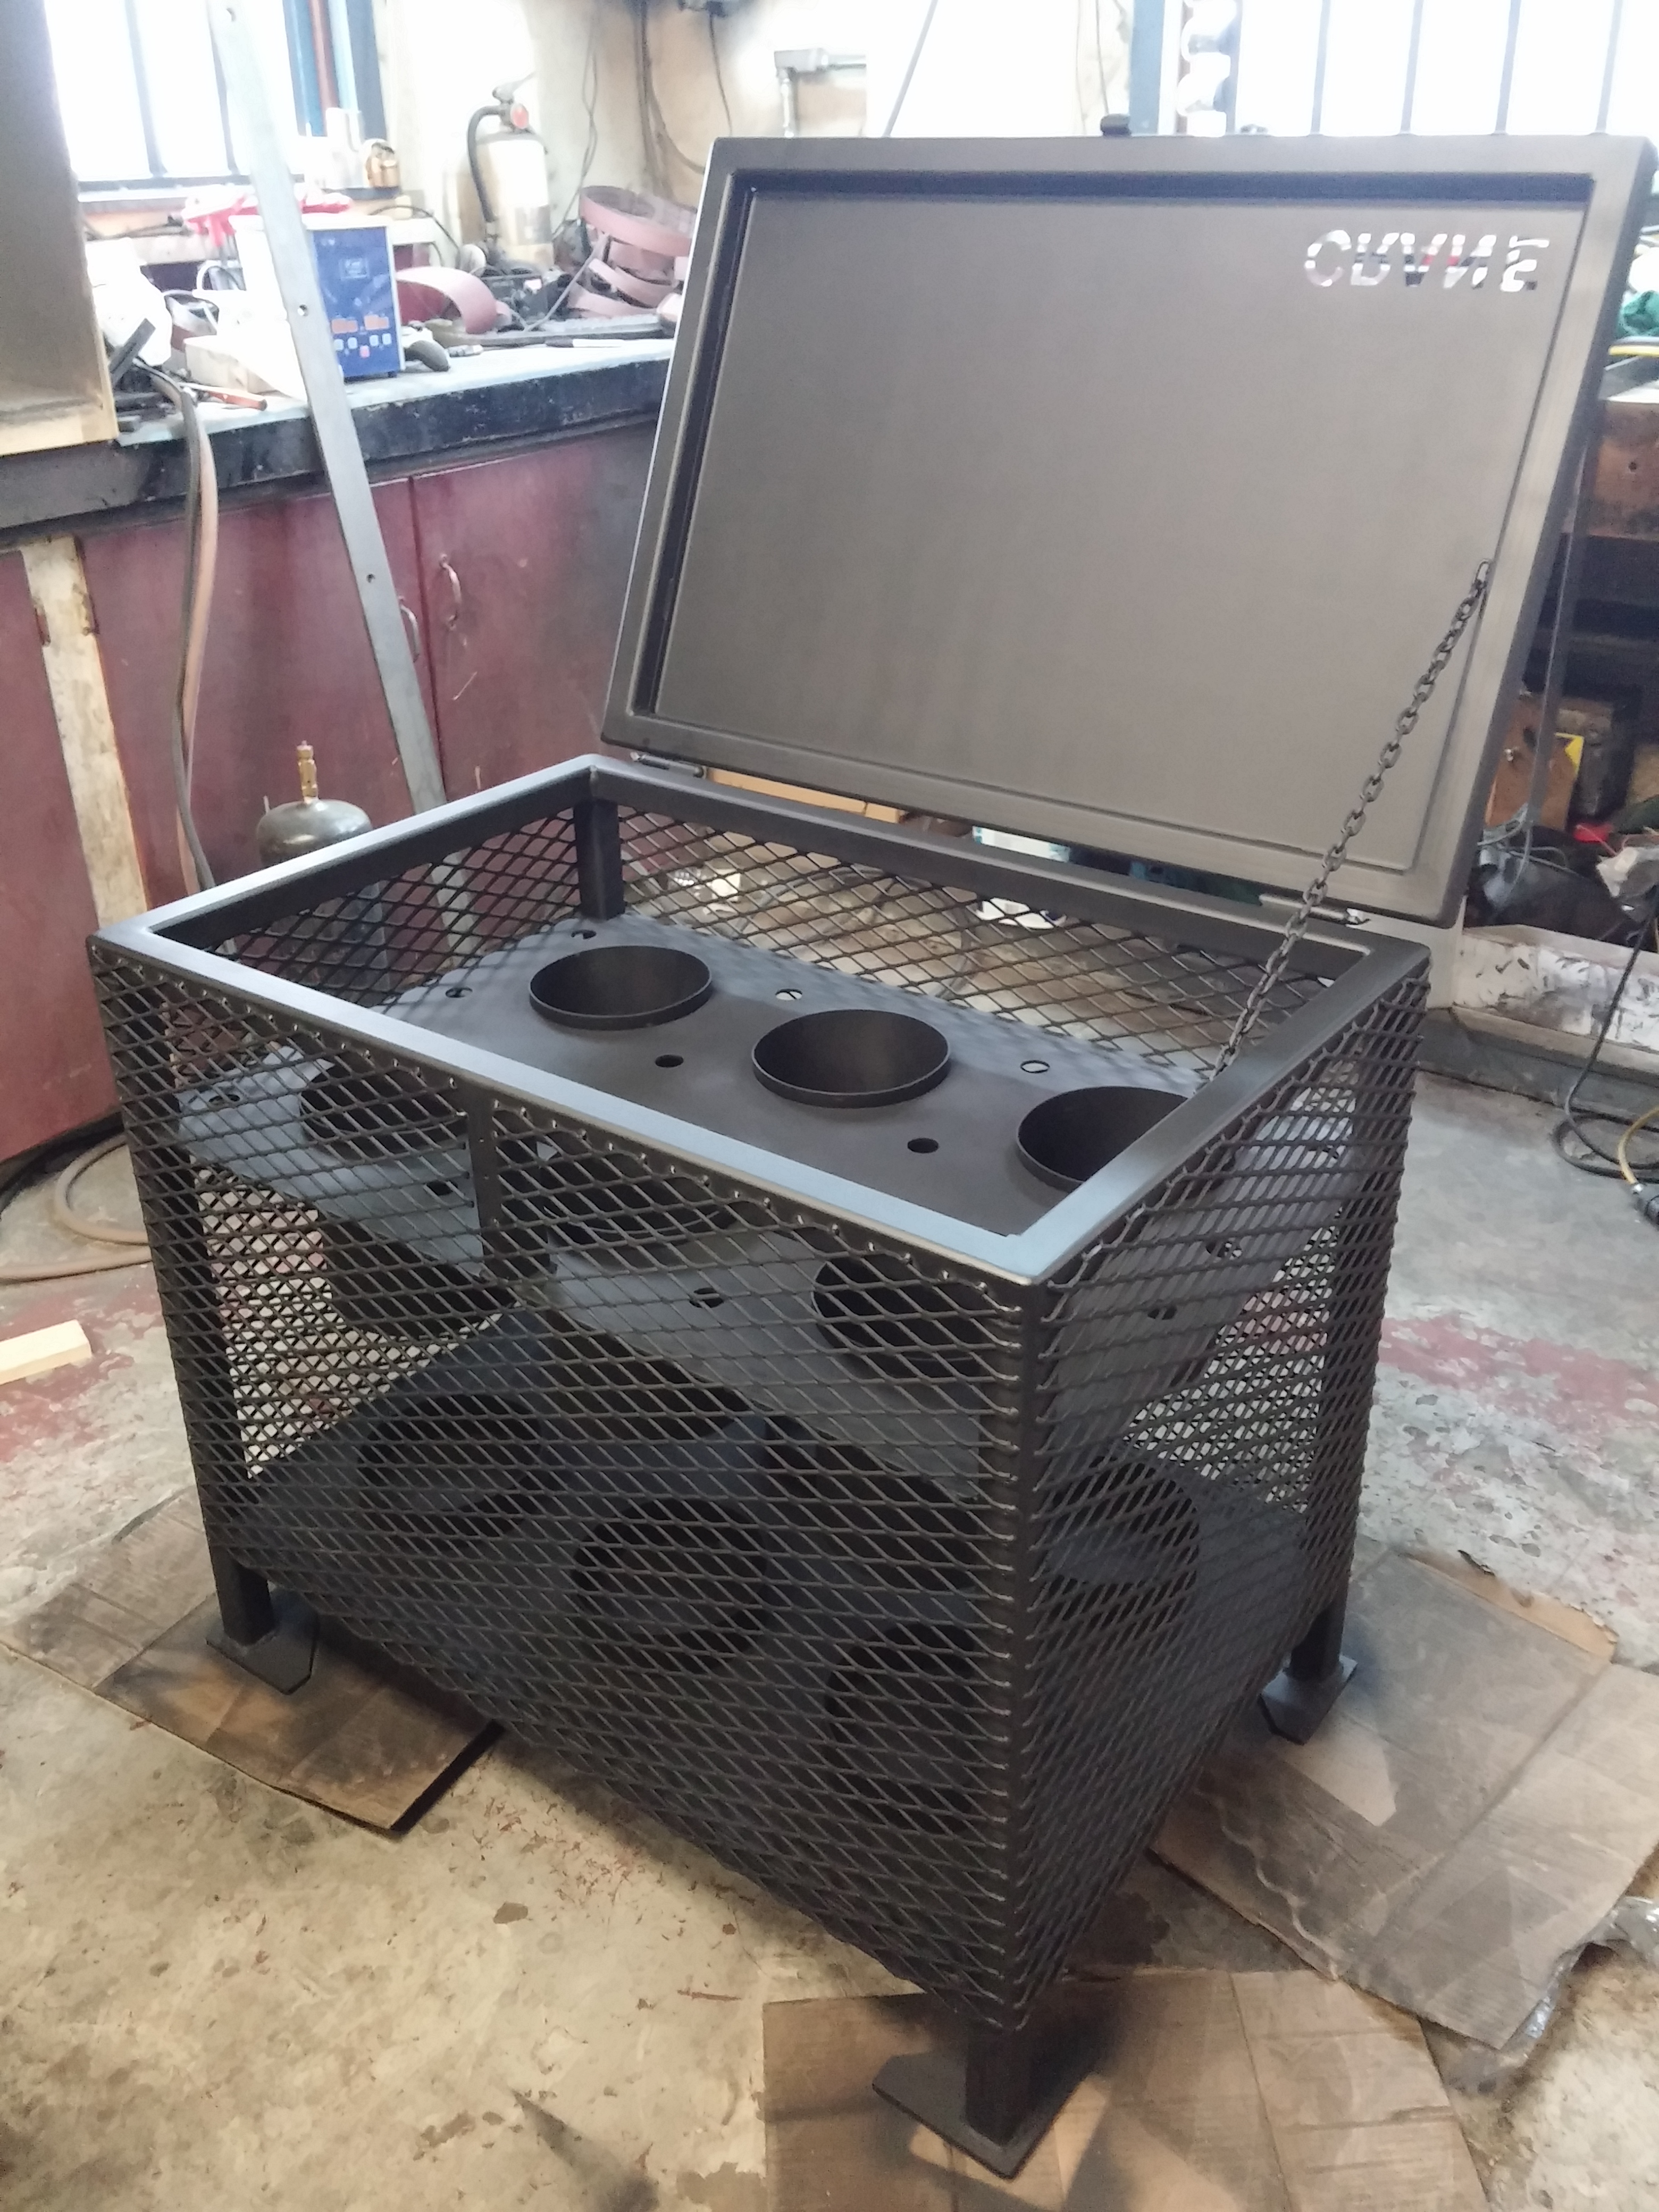
Here’s the crate with it’s first coat of paint. Notice the mesh is missing? That’s because you can’t easily paint the inside once the mesh is in place. So the inside needed to be painted first, then the mesh welded on and then the entire crate gets another final coat of paint before it’s ready to go. The masking tape is to avoid over spray onto the flat surfaces that the mesh will be welded onto.
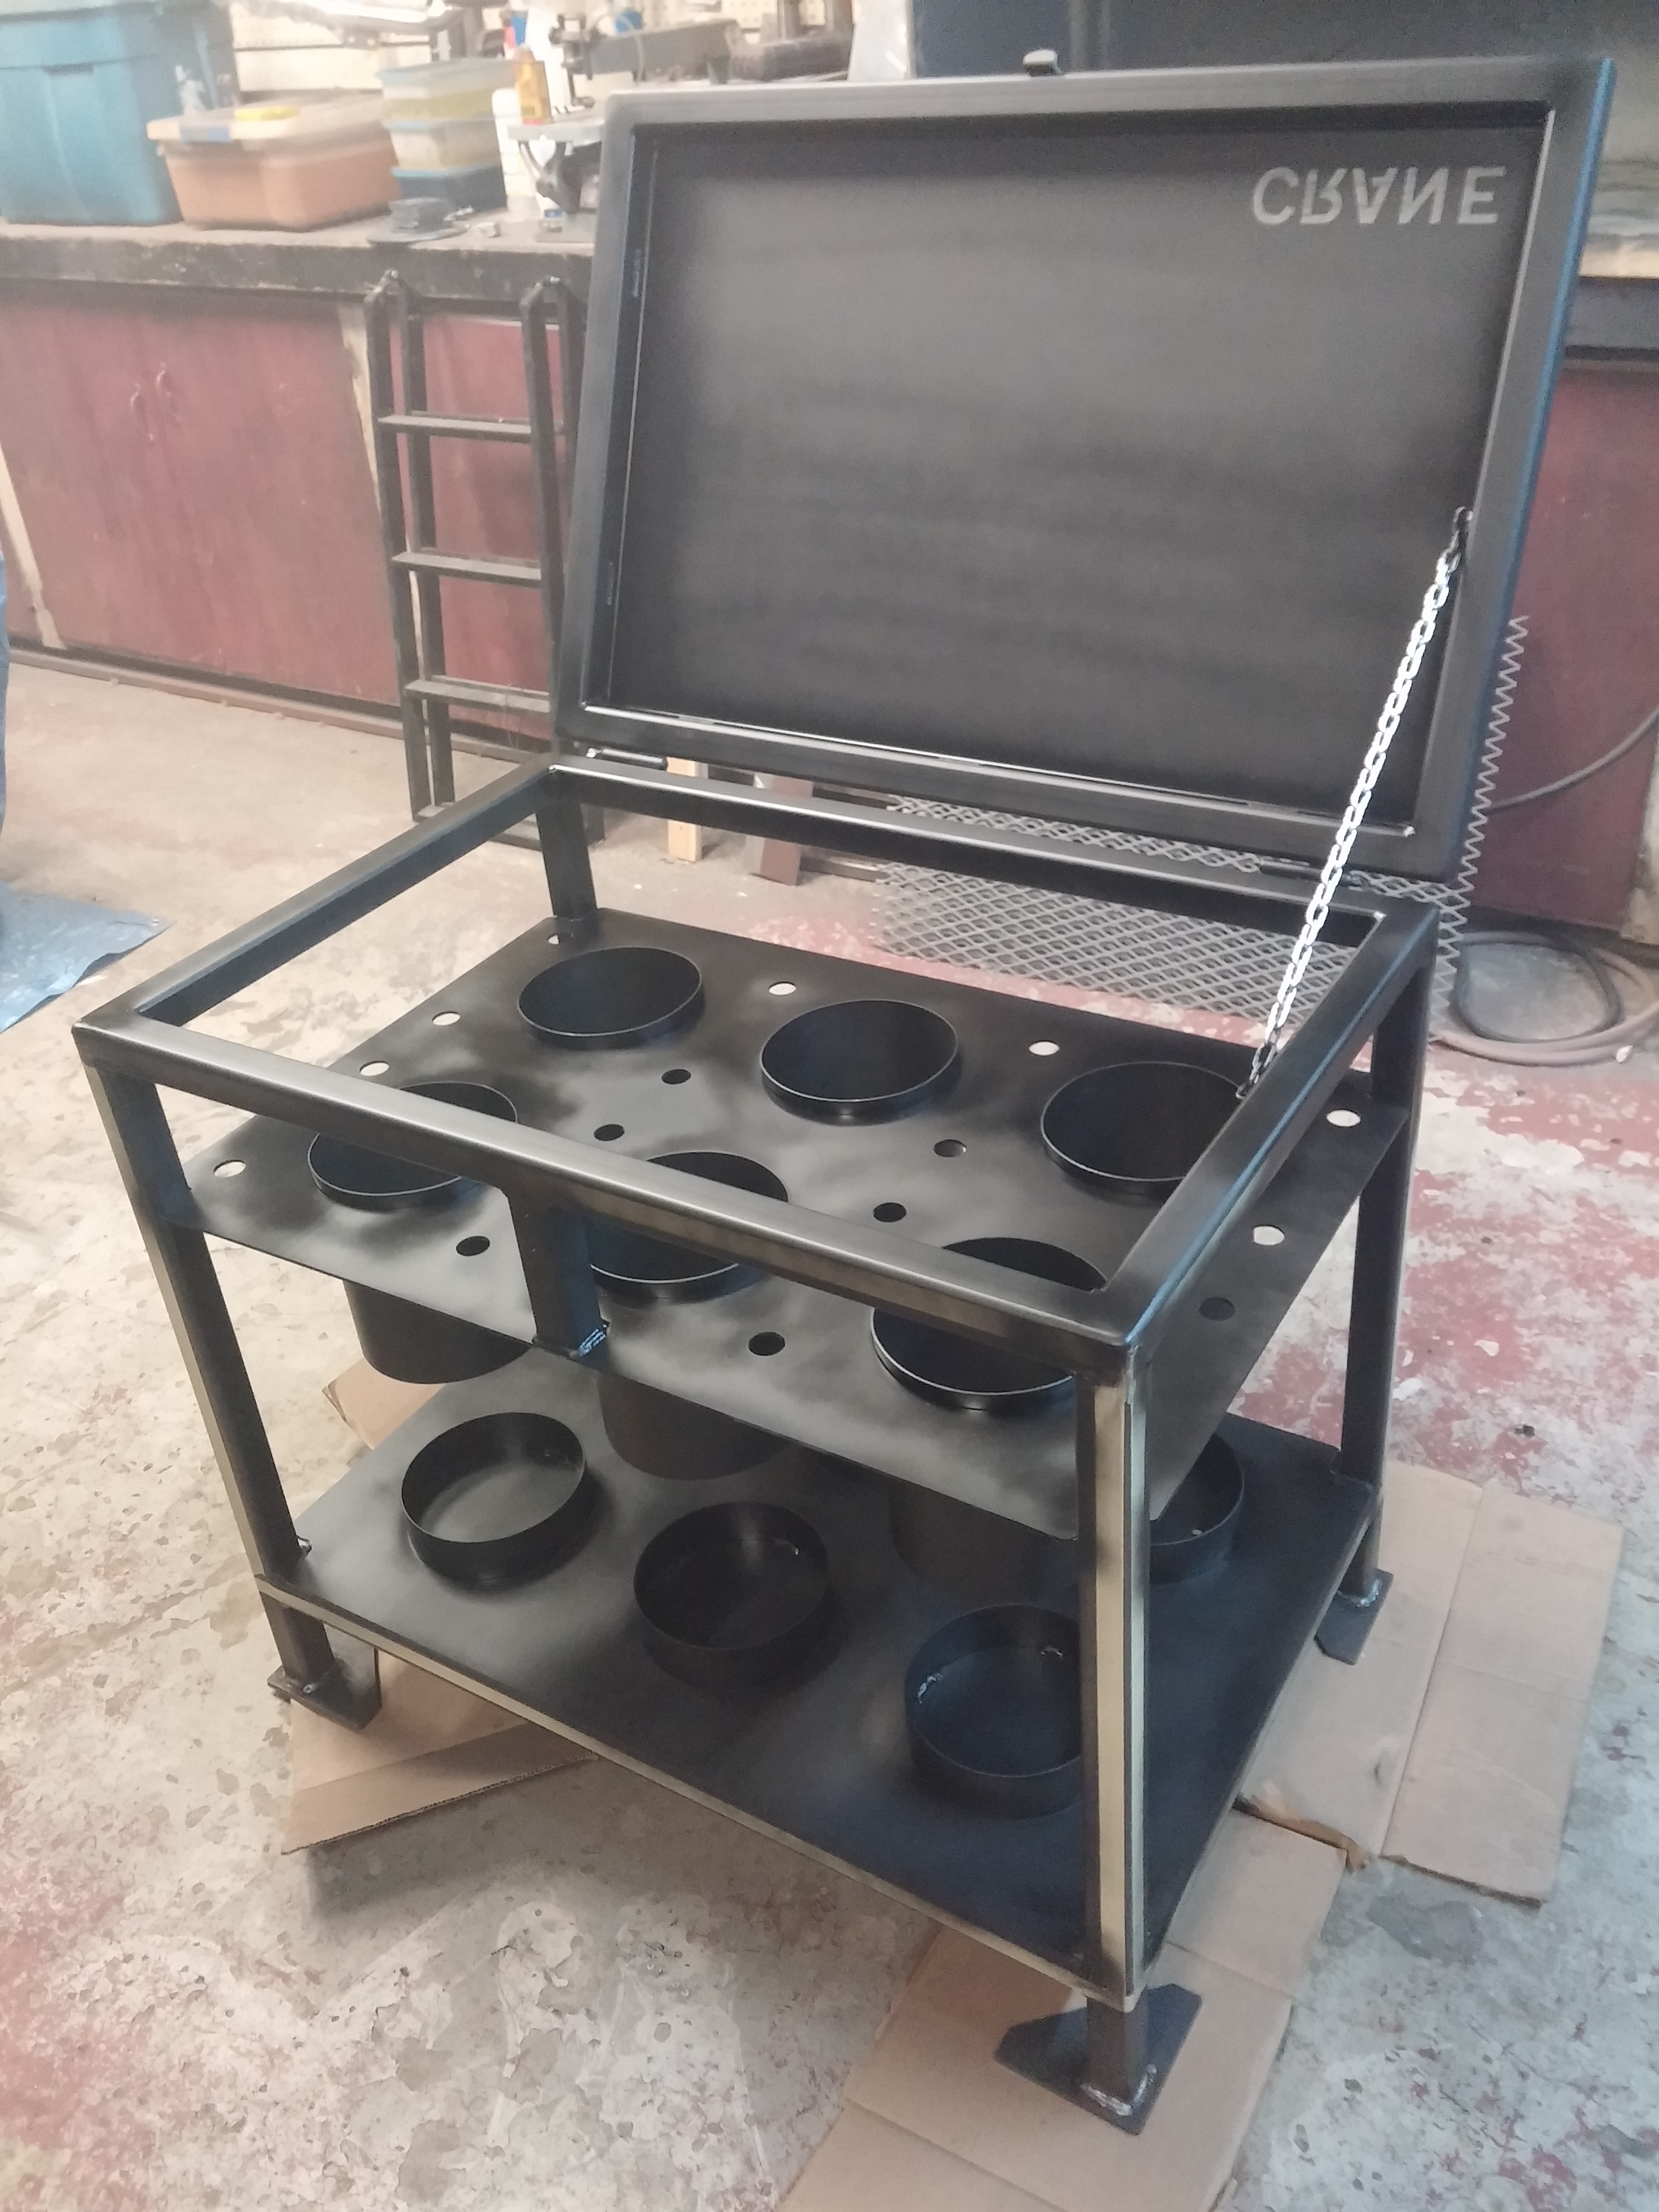
Here’s the completed crate (sans latch) still drying from paint.

Thanks for looking! If you have any questions or a future project you want us to work on, please don’t hesitate to contact us via our Contact page.
AVHC Torch Lockout Update
It’s been a little while since we’ve had a blog post! After a few big transitions and a few more to come we’ve got lots of exciting things in the works to show. So all excuses aside, there will be more blog posts to come about the work that has flowed through Mint over the last while! There have been a few people asking about more detail and video about how the AVHC corner/torch lockout works on our table. So this is a continuation of our AVHC Corner Lockout for Holes blog post.
These two video’s show how well the AVHC lockout performs with having the CAM portion setup correctly and that information being fed to the TM4 software and ultimately controlling the CNC plasma table. Long story short the lockout allows the torch to run at 60% the recommended straight line cut speed. The reason for slowing it down is to allow for a straighter hole with less to no taper. Imagine hanging a bat by holding the end with two fingers, the bat is the plasma arc and your hand is the torch. If you move your hand quickly the bat is going to lag behind the movement of your hand. Now do a quick circular motion. You’ll see that the tip of the bat (furthest from your fingers) will naturally want to point to the center of the arc. Now the stiffness of the arc is like changing the weight of the bat, in most cases we can’t change that, but what we can change is how fast our hand or torch moves. So slowing down the movement keeps the tip of the bat lagging behind your hand less. This is the same principle as with the torch and plasma arc, slower movements in area where there are tight arc’s or heavy directional change features that are critical to the function of the part (bolt holes, slots etc…) warrant slowing things down. This is why high definition plasma, laser and water jet have very good cut quality, it’s due to the stiffness of the arc or water jet, however at an increased cost. Take a look at our videos and enjoy.
Cutting Video
TM4 Controller Video
The holes were lightly chamfered, no drilling or grinding of the ID of the hole was necessary. These are all blasted and ready for powder coating.
Fresh out of the oven after being powder coated wrinkle black and ready for customer pickup! The items on the left will have a glass sheet put inside the part and it will be installed and used as a flame inspection port. The items on the right are a badge to be installed on an old school Toyota truck.
Stay tuned for more blog posts! If you like these posts please subscribe, if you’re interested in a future project, please contact us on our Contact page.
Steel Crate – Industrial Client
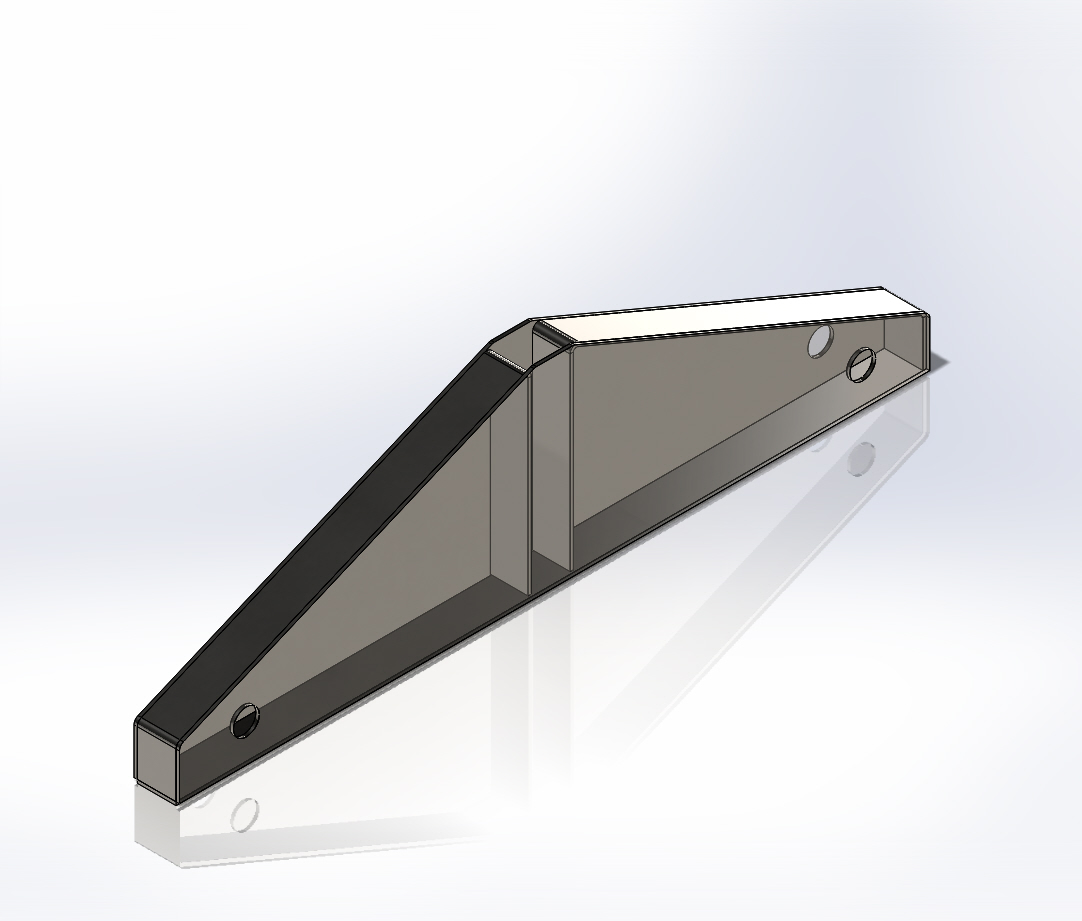
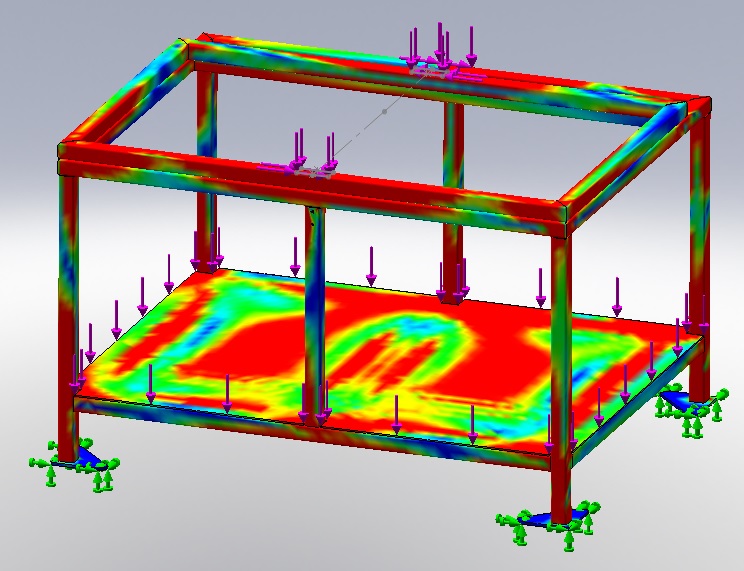
We’ve been a bit a bit behind here with the blog! This was a project completed a little while ago for an industrial client who needed a prototype crate to be custom designed with specific loading criteria and to meet certain Transport Canada requirements. Once we had all the requirements listed from the customer the project was modeled in SolidWorks to present the overall design. It only needed to go through one iteration during FEA (finite element analysis) to meet all the requirements.
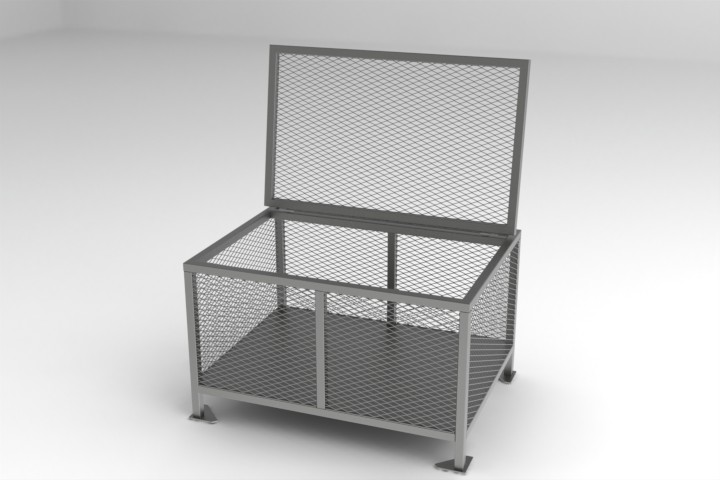
This image shows the loads on the crate when strapped onto the deck of a truck (in the worst case scenario) while the cage is fully loaded. The mesh panels are not intended to be load bearing and would have made the FEA process unnecessarily complex, so the panels were omitted. However they do add some additional strength and rigidity to the design.
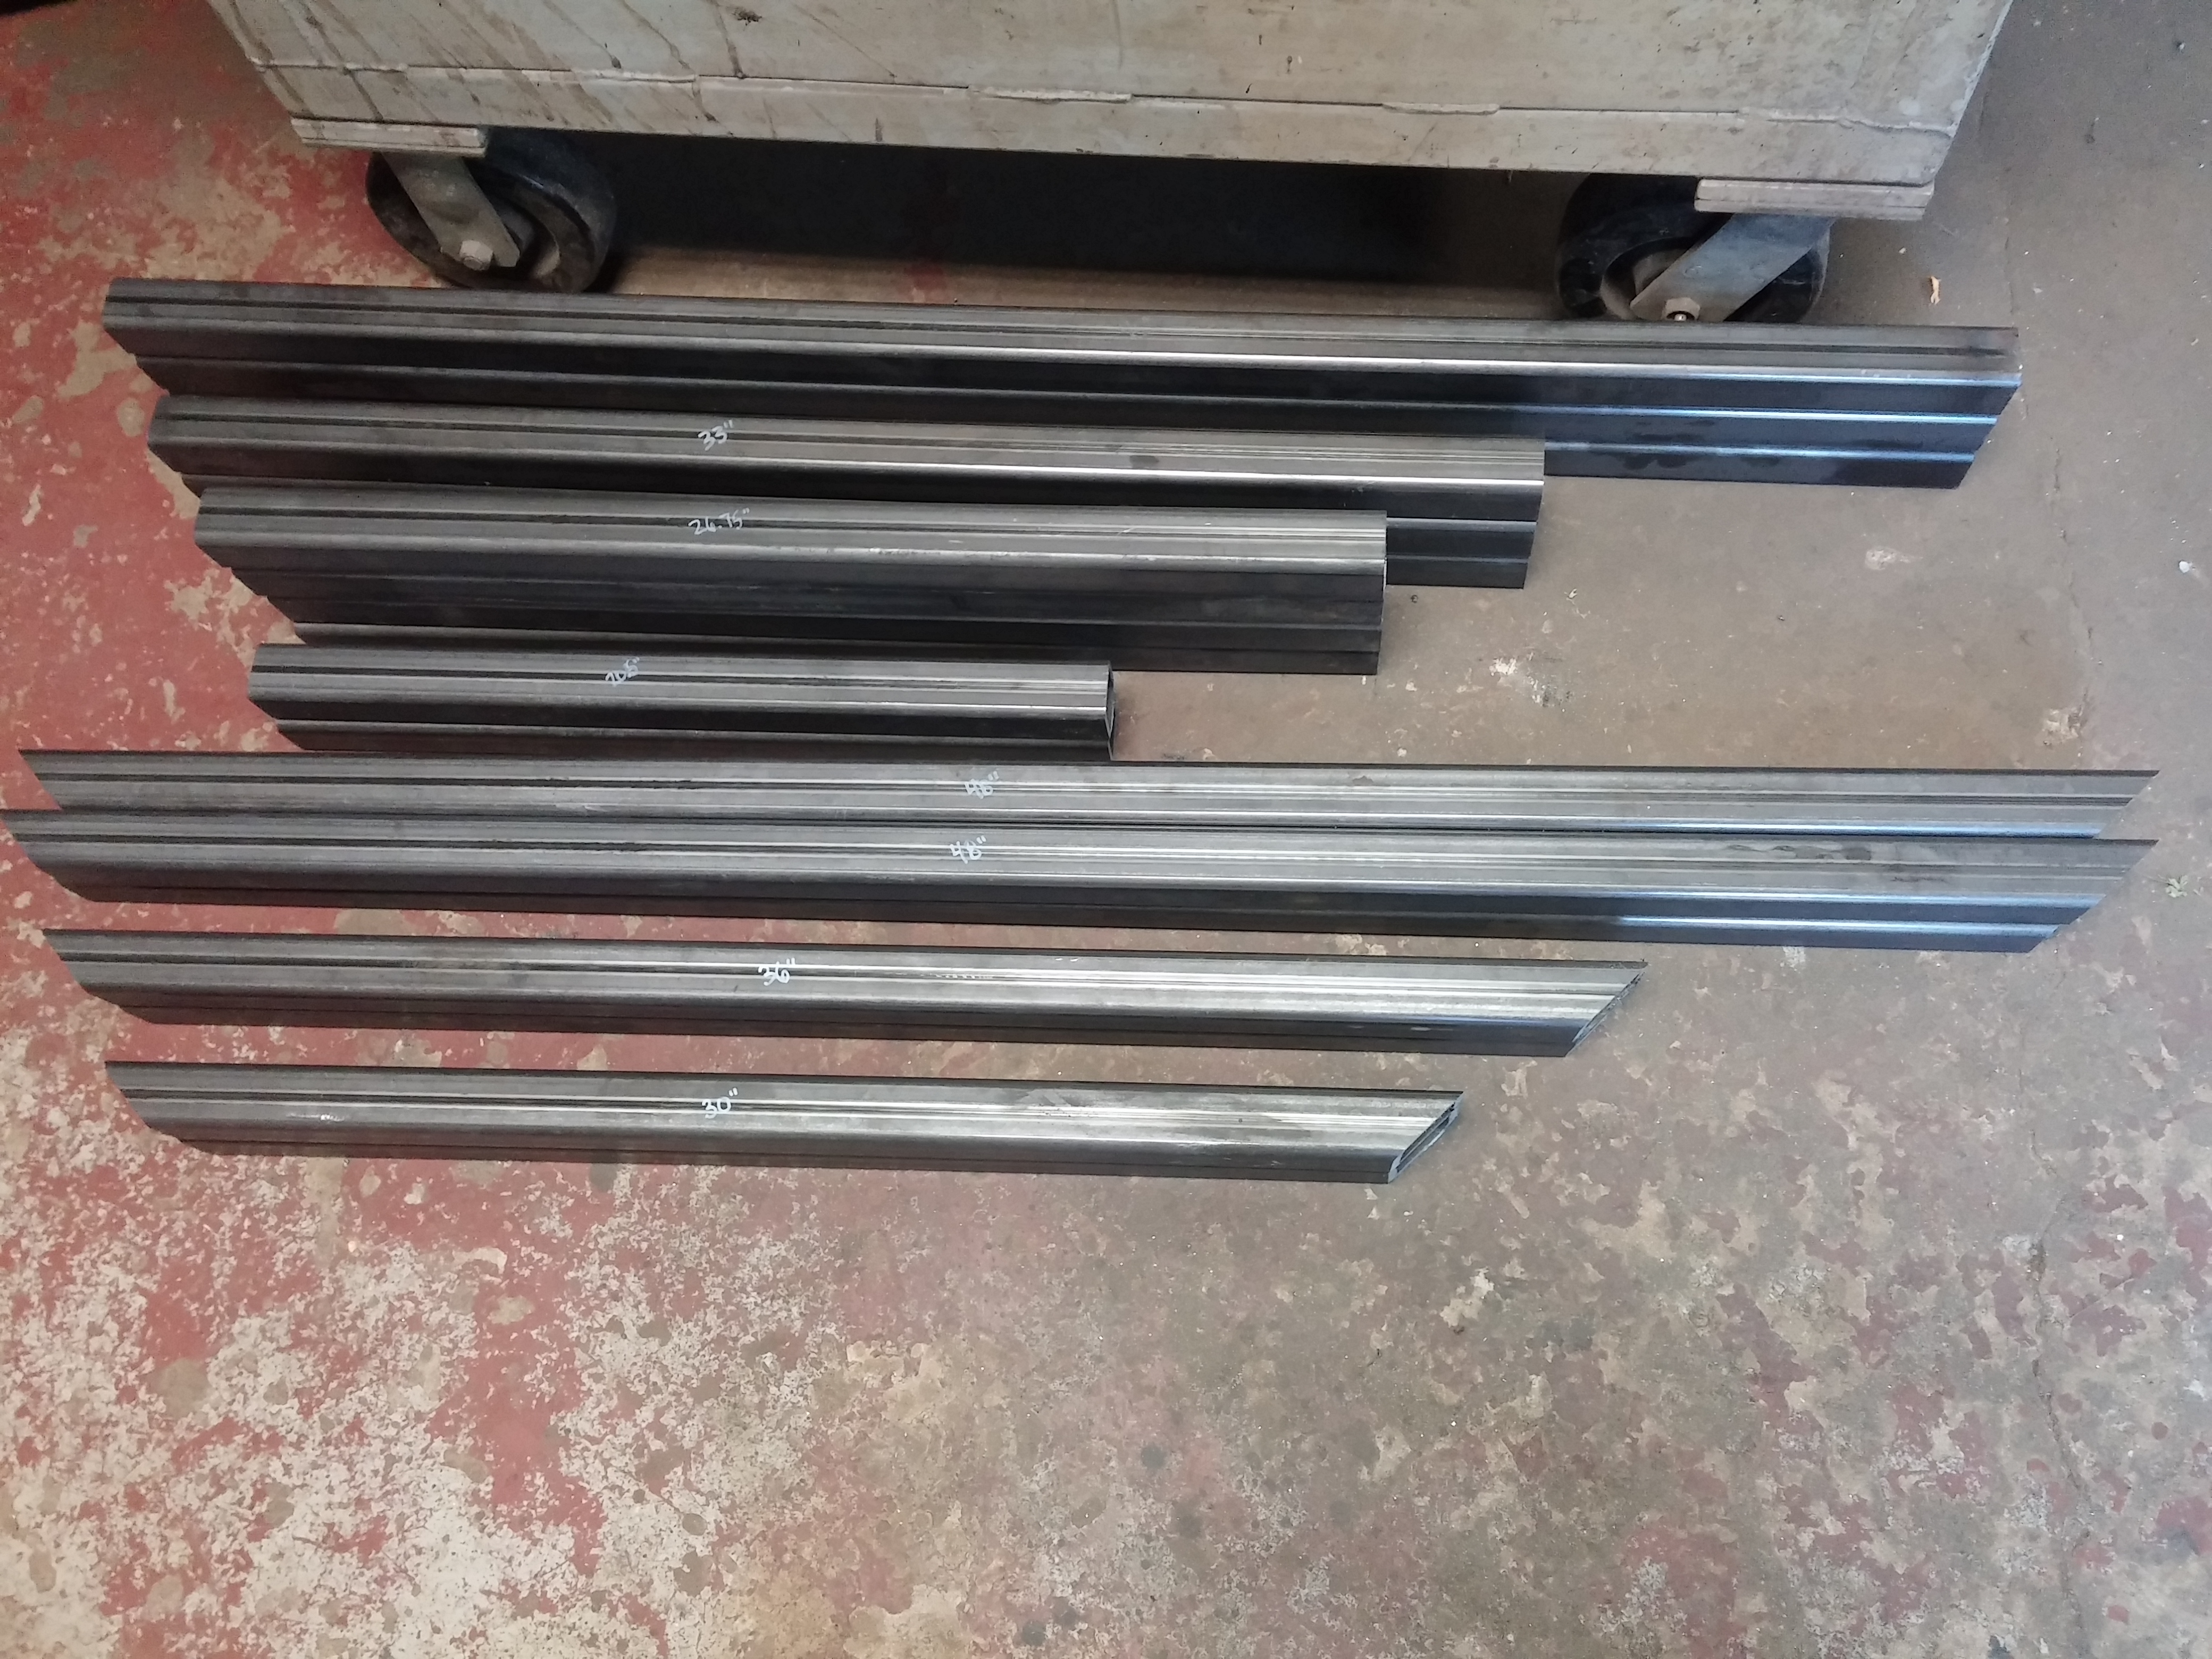
Once the FEA is completed, the tubing is cut to length as per the mechanical drawing, the 1/4″ thick feet and 10ga steel floor are cut on the CNC plasma table.
C-clamps and scrap 3/8″ steel plates from the CNC table make great guides. They are used to align the lid to the top of the crate before the hinges are tacked and welded in place.

Weld on hinges with built in grease zerks may be overkill for a lid, but our customers expect the best and we make sure they get it.
Loaded and ready to deliver to the customer!
Thanks for looking! If you’re interested in following the Mint Design blog, click on the bottom right of your browser on the follow button! We’ve got quite a few more projects that have already been completed or are nearly finished to be posted in the next while. Posting items to the blog have been a bit slow due to us moving! The move has allowed for more room in terms of mechanical and electrical project design, but the fab. shop will stay put for now, but there are future plans in place!
TIG Welding and Powder Coating
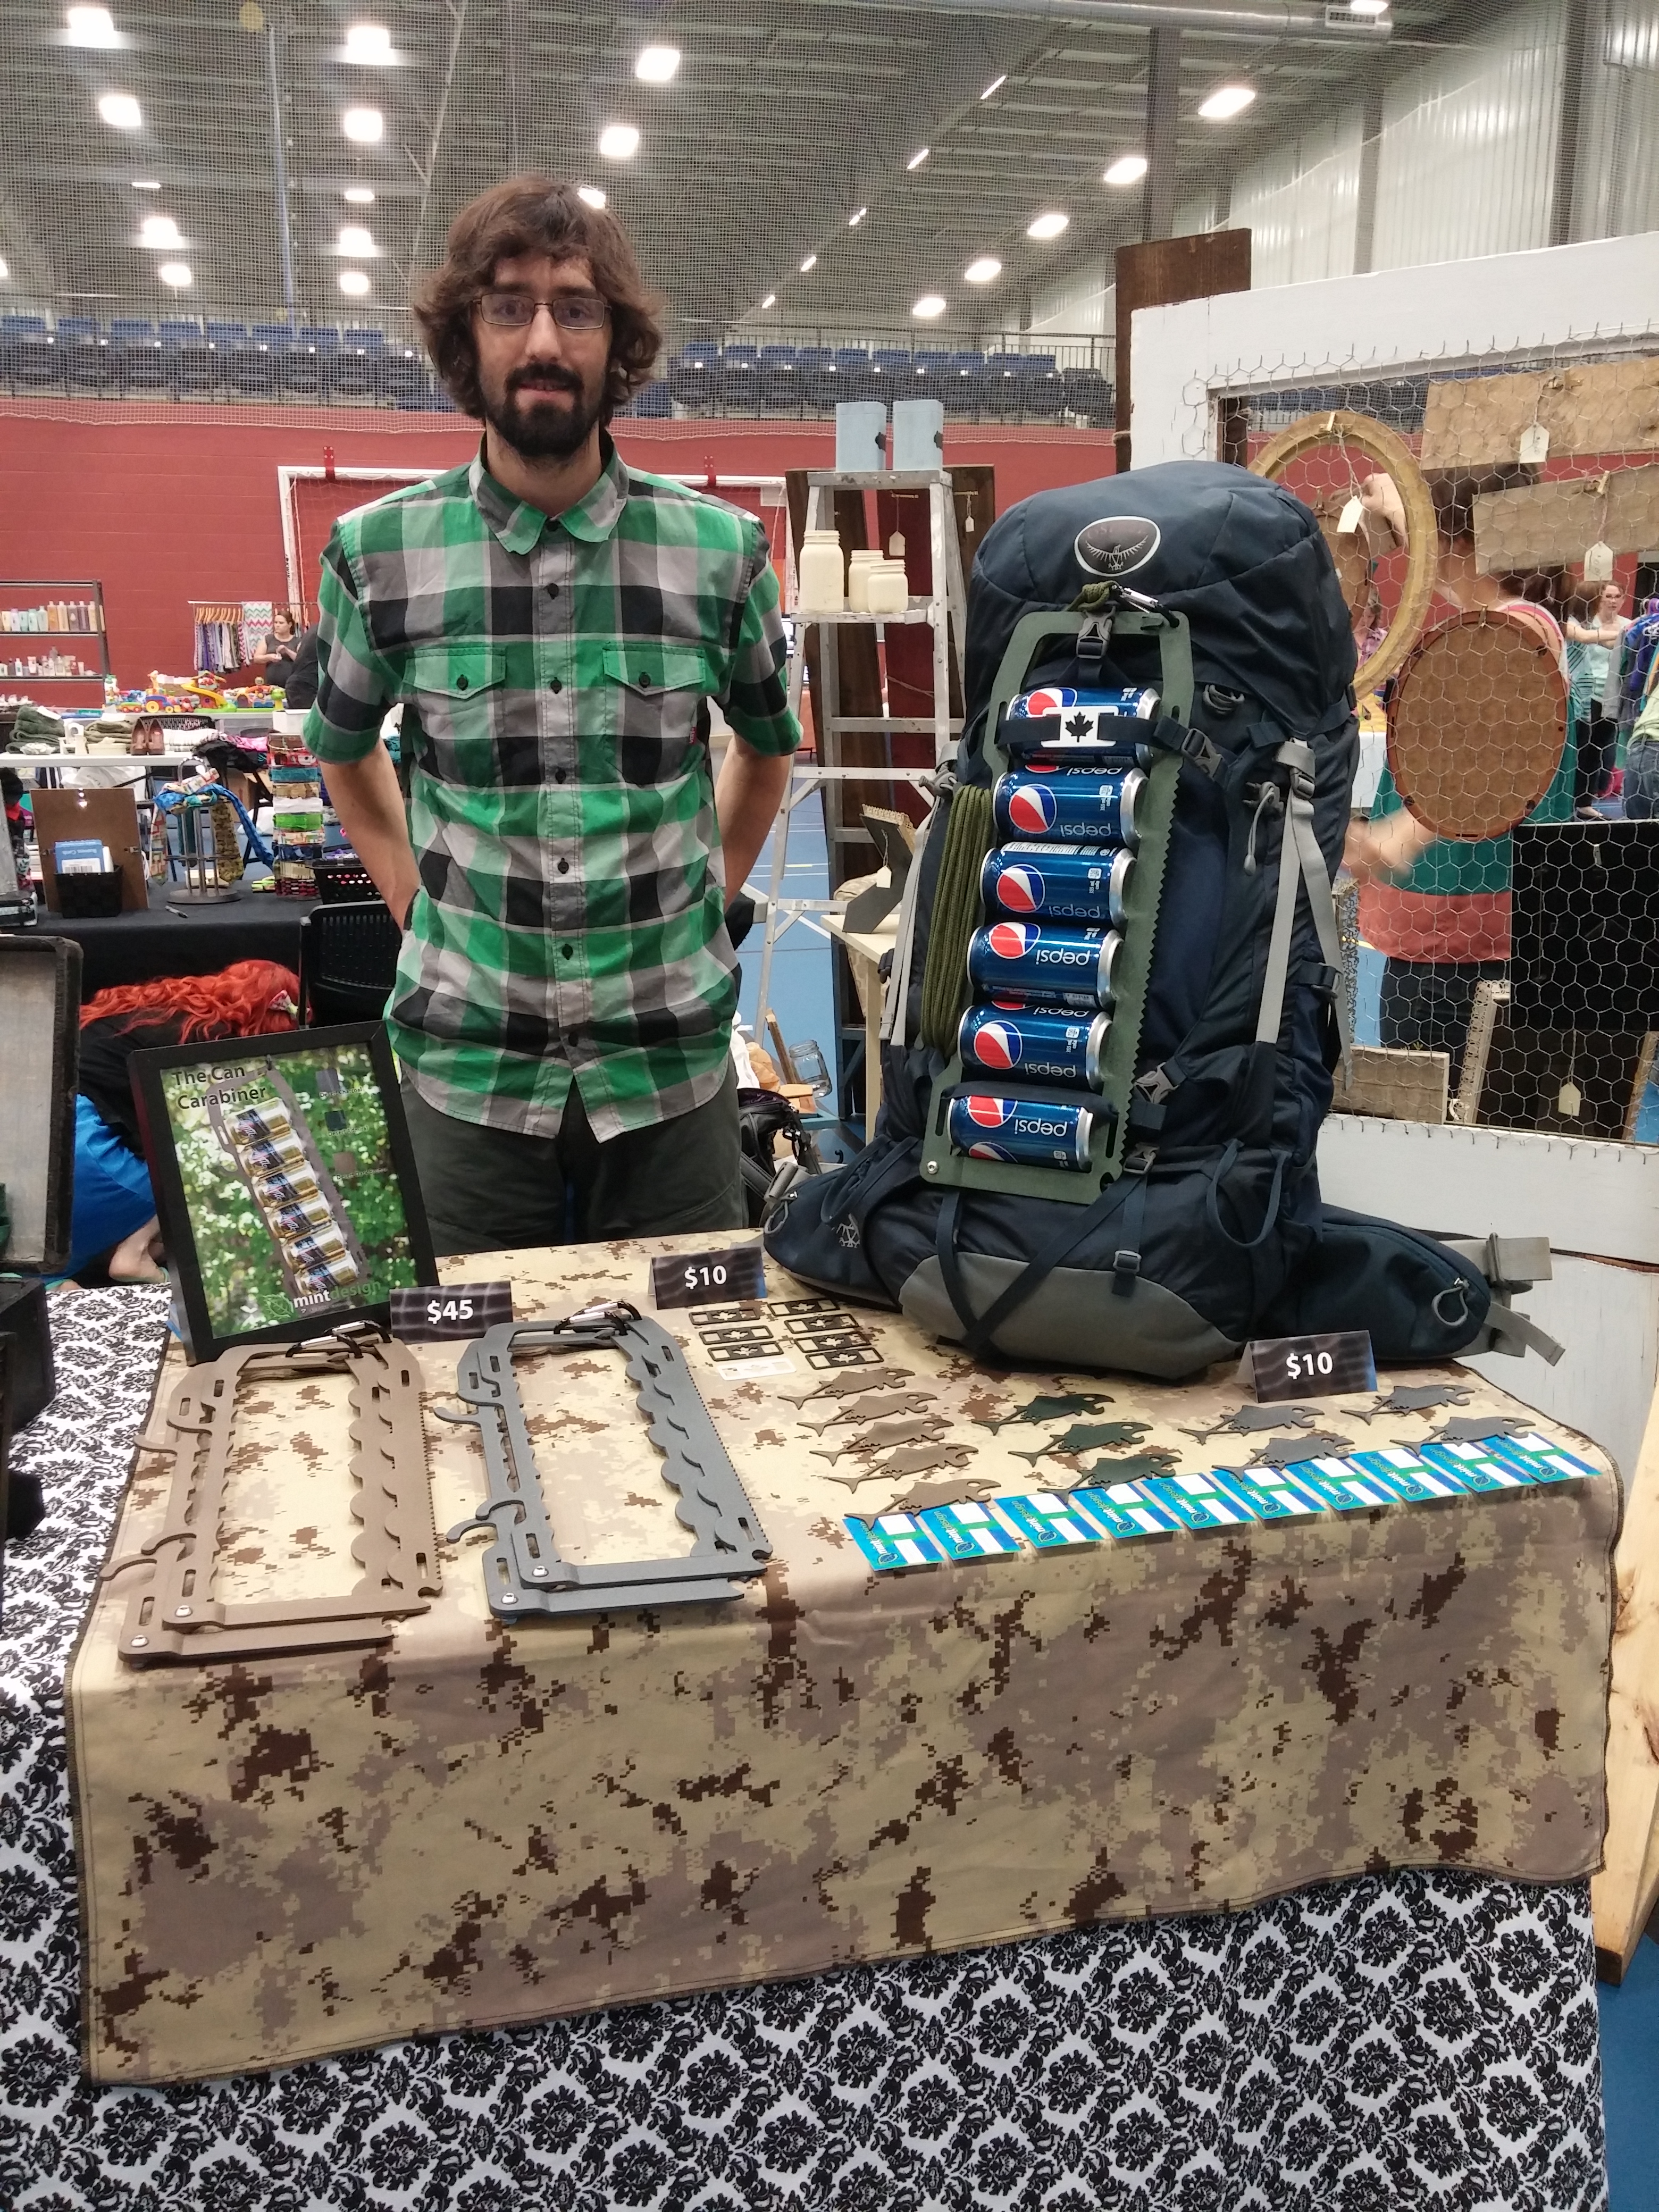
Lots of parts passing through the Mint Design shop in the last few weeks. Lots of TIG welding and powder coating, and even showing off The Can Carabiner at a trade show! We sold quite a few and had a lot of interest in it. There were also a few “What the heck is that?” and after explaining it we got a lot of, “Whoa that is awesome!”. After some field testing and feedback from our customers we’ve got some very minor tweaks in store for future units and the presentation down the road.
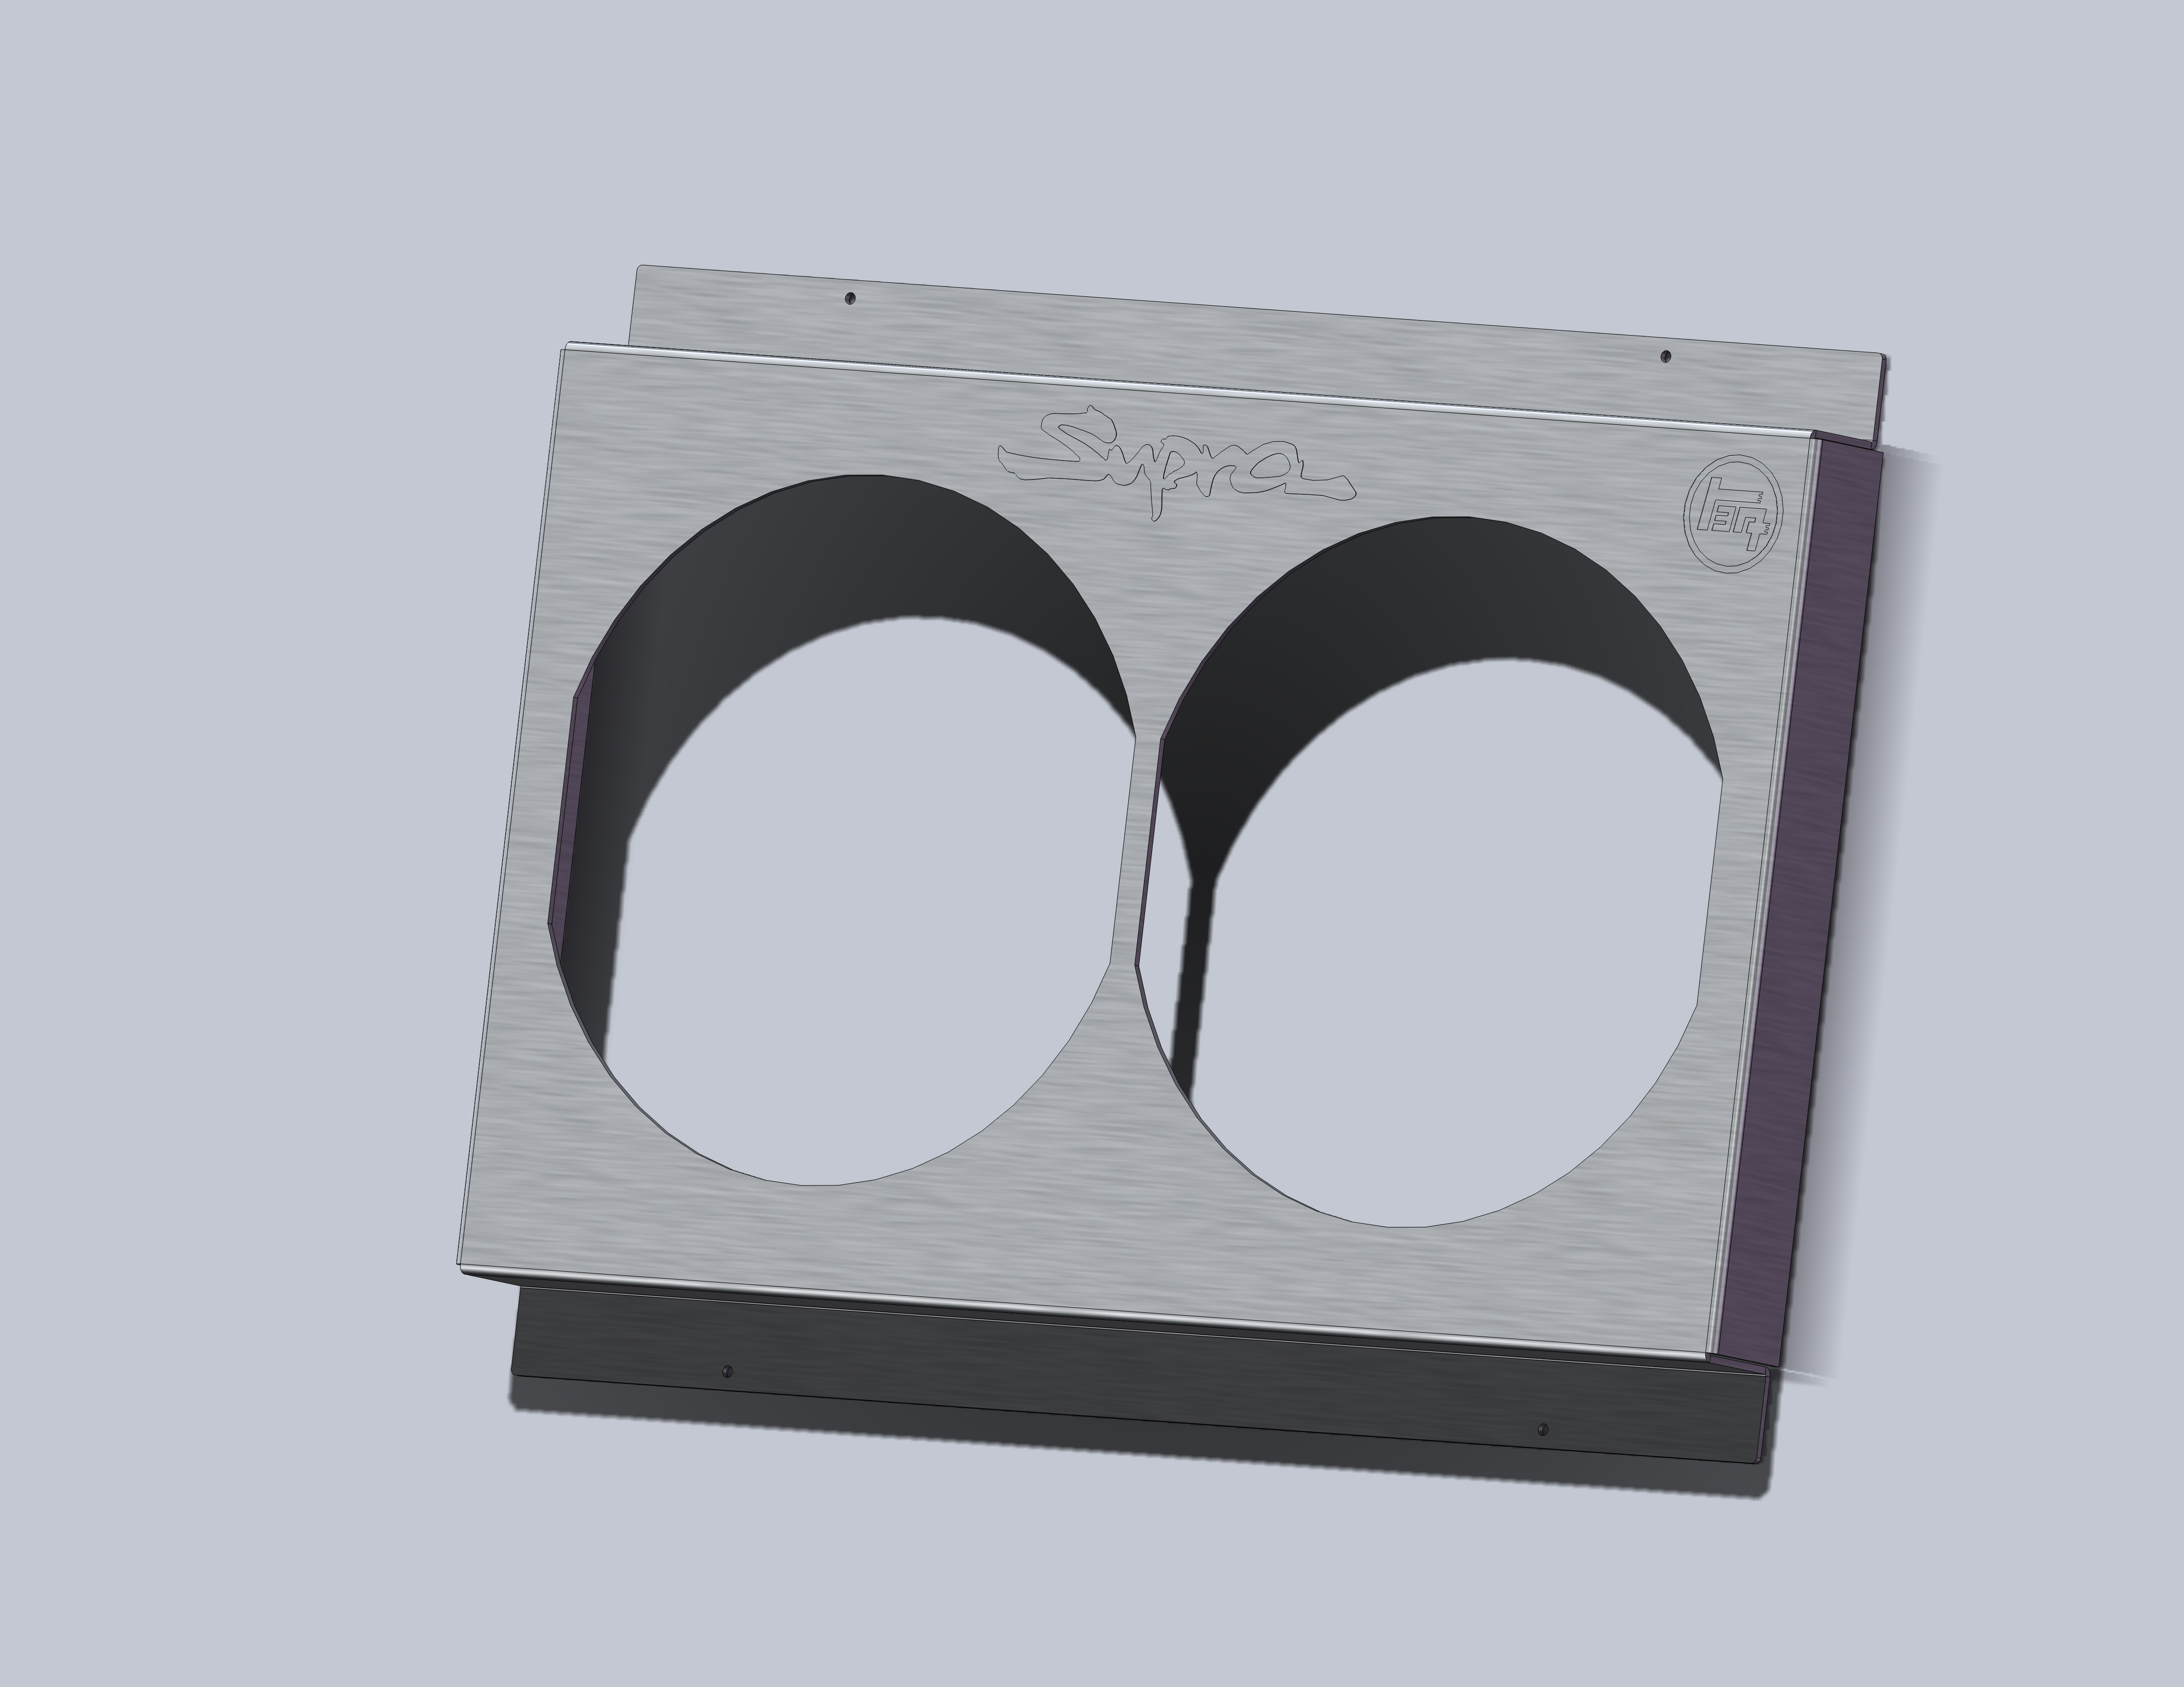
Now back into the shop! We have a custom 1/8″ 5052-H32 radiator shroud for a custom 2JZ Toyota truck project. The fabricator/client provided the dimensions and the requirement for the “Teq” and “Supra” logo to be engraved into the metalwork. It was easy enough to do and model in Solidworks and then create the flat pattern. The CNC cut part was provided to the customer to form, weld and finish. Note: you can even see the 1/2″ tick marks to indicate the bend line location.
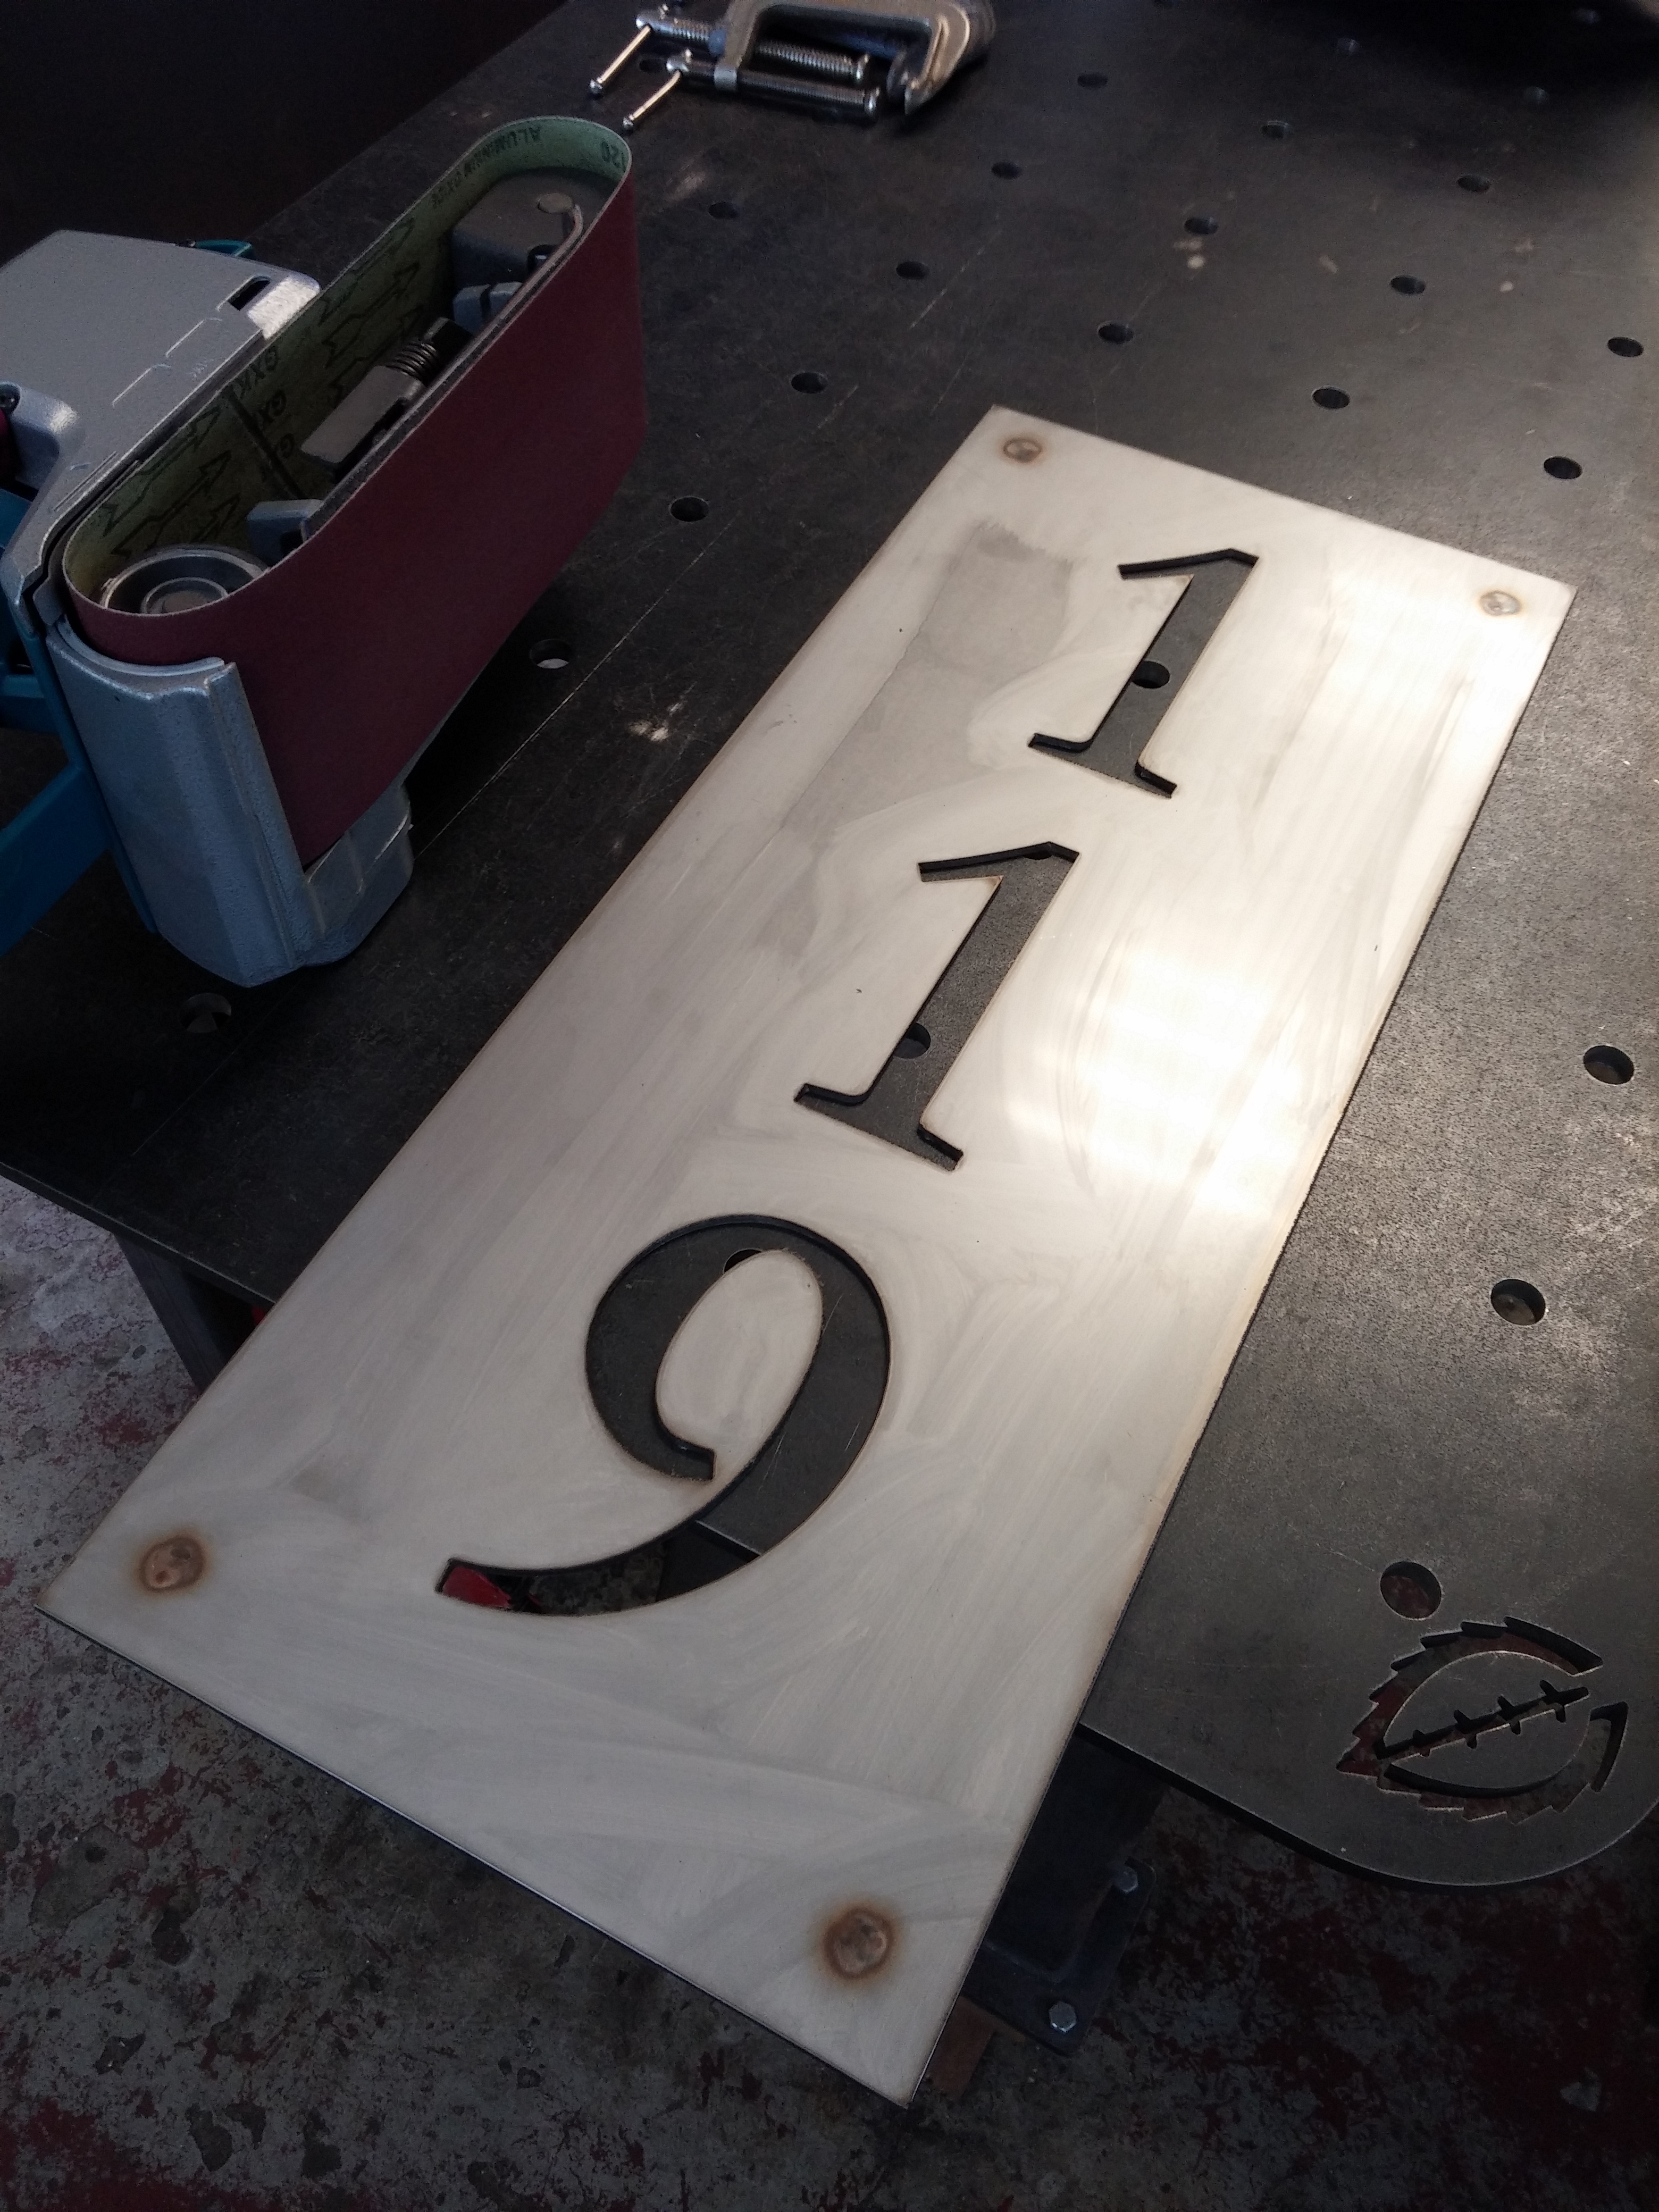
Here we have a house sign being fabricated out of some 1/8″ 304 stainless steel sheet. The customer chose the custom font and determined the overall size. First the part is cut out on the CNC table, then the backside was lightly brushed and the corner areas were prepped for welding the 5″ stainless steel rods. The rods will be slid into the wall and secured with construction adhesive, ultimately allowing the sign to float from the wall 1-2″. Clamping here may seem overkill, but the more work spent now means less work sanding the front. Reason being is that stainless steel warps very easily and with having a perfectly brushed front surface, any uncontrolled warpage from the backside will make that much more work sanding the front. The polyimide tape is heat resistant tape and also protects the backside from unnecessary scratches.
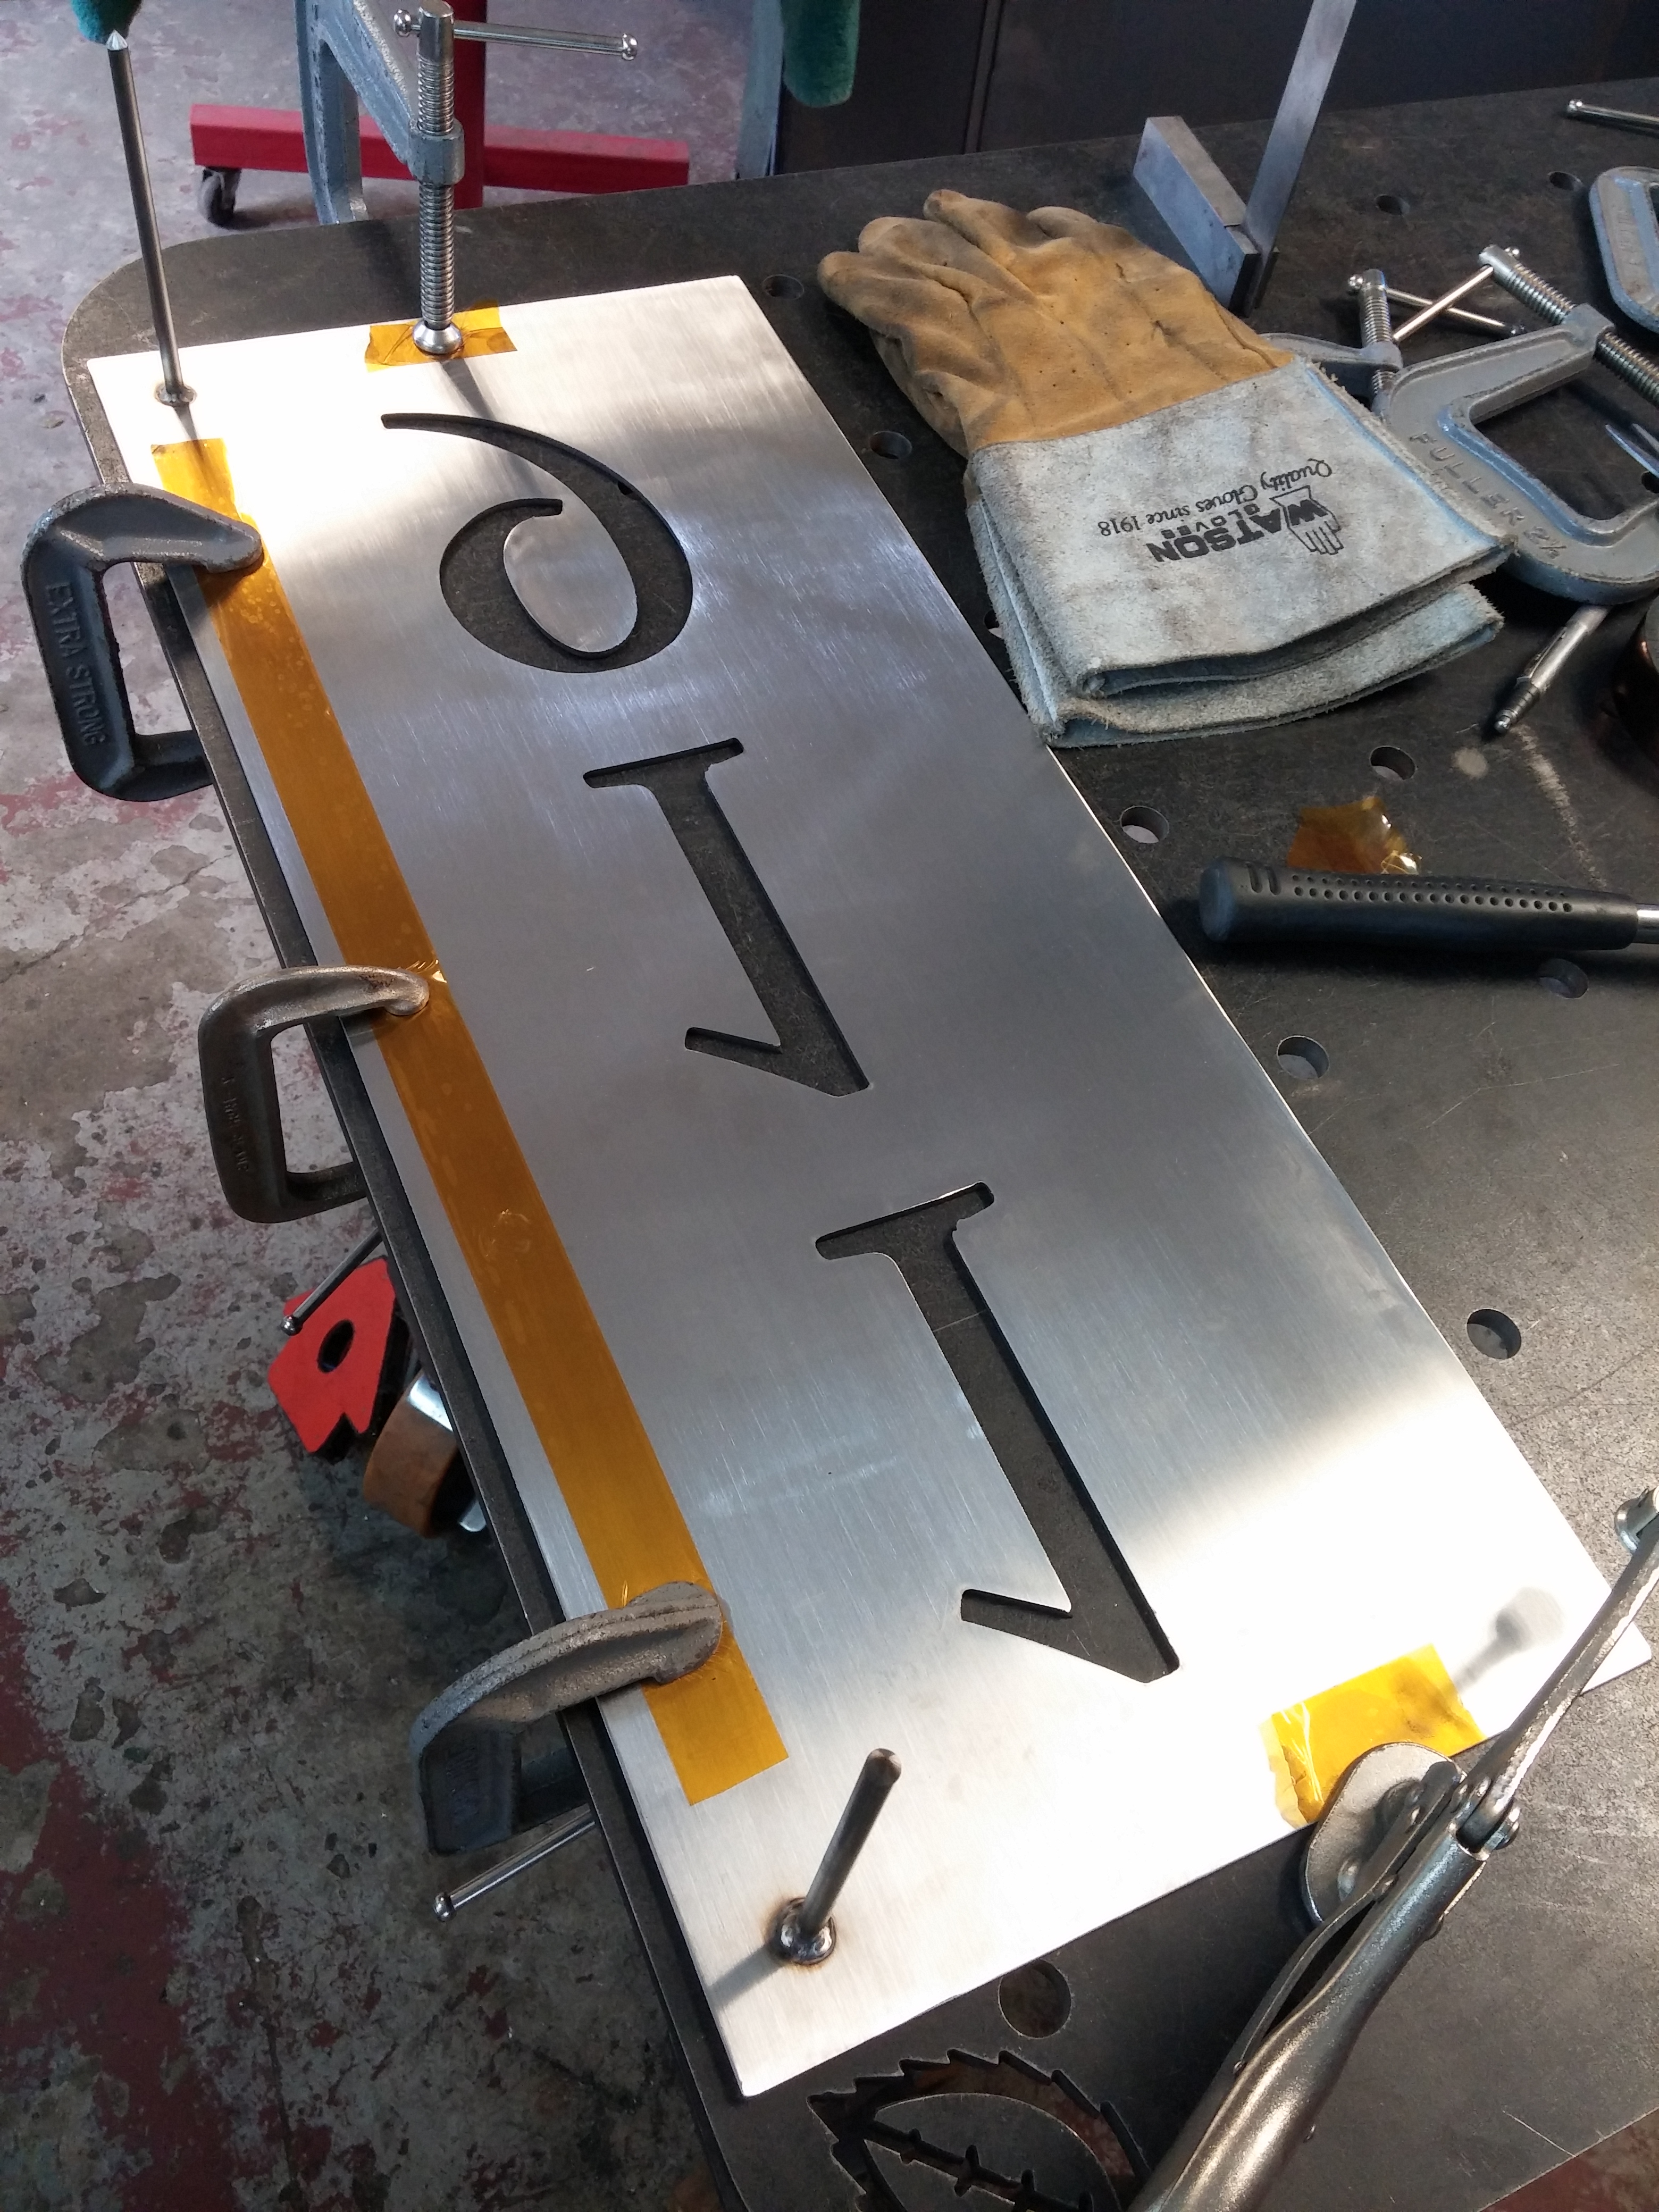
Here’s the front side, the HAZ (heat affected zone) is very minor and will brush out quite easily. The stainless is wiped with isopropyl alcohol to avoid any oils or contaminants to come into contact with the sanding belt. The belt also never touches or sits on anything, unless it’s clean stainless. No need to grind in contamination which will only show up over time when the sign is exposed to the elements. Also by “coincidence” the dowels have the perfect spacing that it can drop into the fixturing holes of the table. Which makes sanding that much easier as no clamping is needed and there is 100% access to the entire top surface of the part.
And this is what it looks like when it’s done. No signs of welded dowels and they are spaced wide enough to make the sign sturdy, but also narrow enough that they’ll be fairly hidden when the sign is floating a few inches from the wall.
These projects make me sad, however I do get joy and satisfaction when it’s done and I can see how happy it makes people feel. This was CNC engraved, plasma cut out of 1/4″ 304 SS plate and the use of some 1/2″ stainless steel rod. The rod is TIG welded and allows the cross to be buried in the ground and secured in place with concrete and lightly covered with dirt. It is not blank after “Baby” and “October”, it blurred out for privacy.

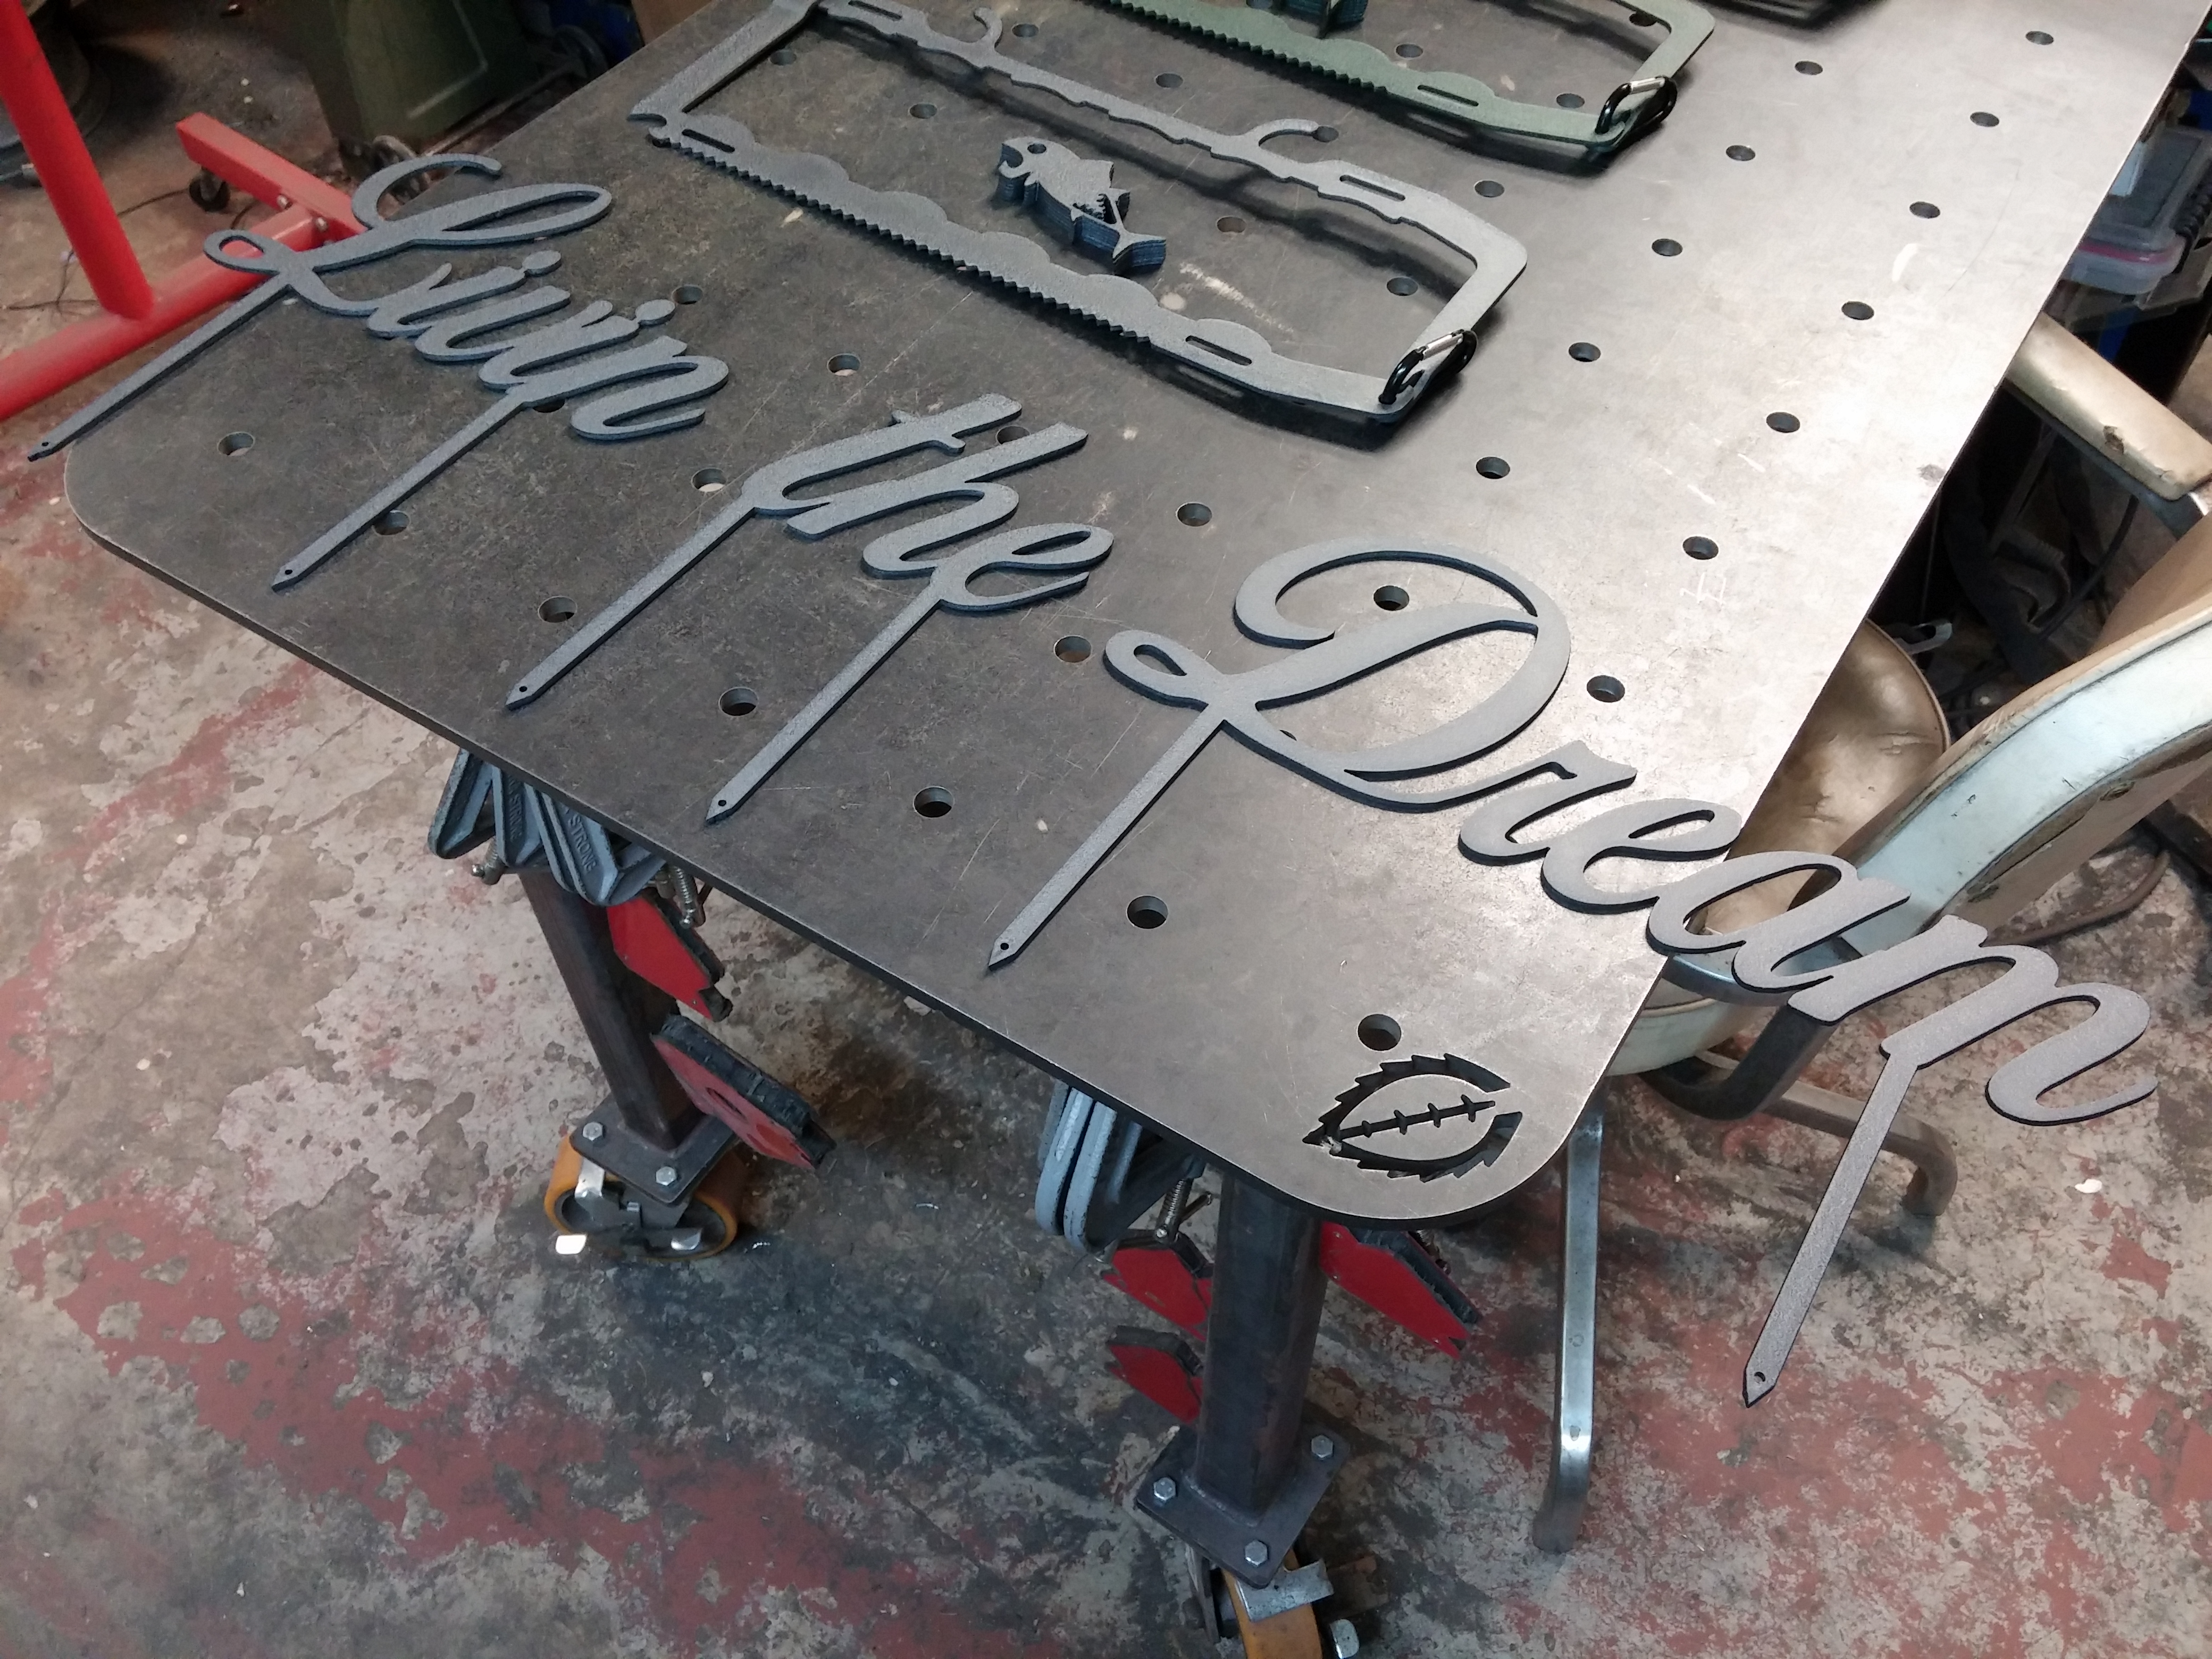
Powder coating…where do we begin! Did some really cool script font lawn ornament in 10ga steel which was powder coated in Desert Charcoal (same as The Can Carabiner).
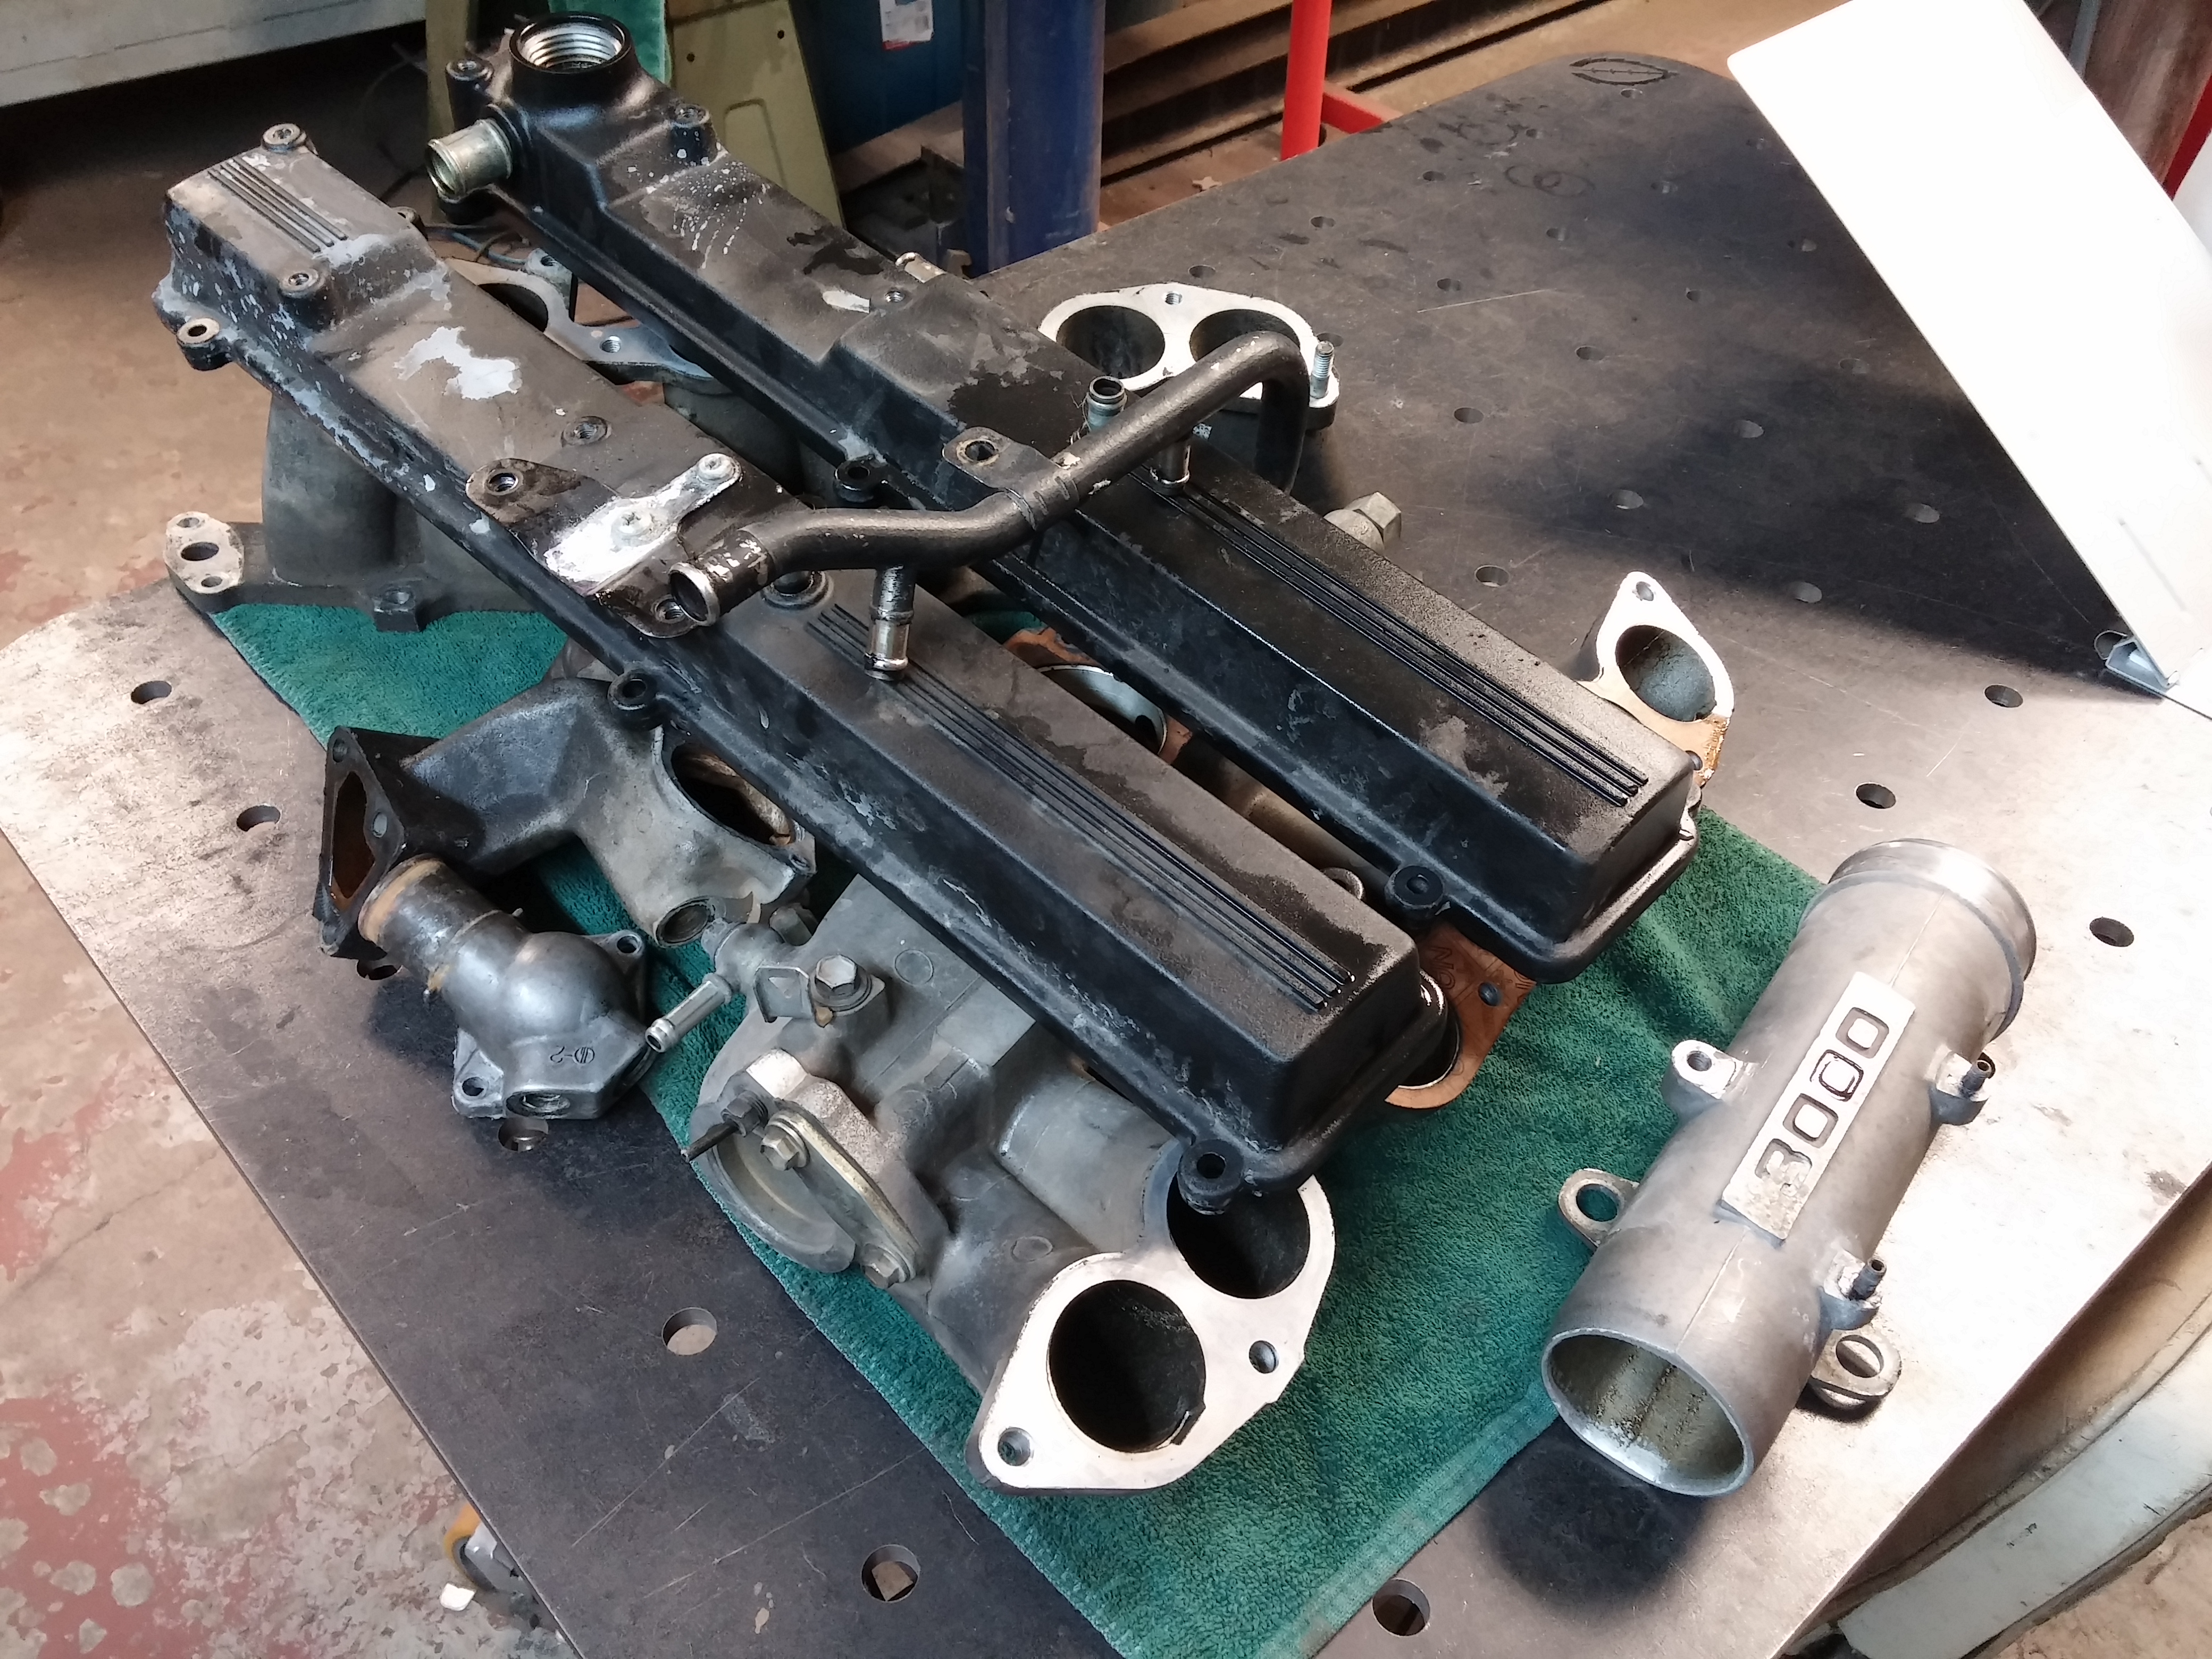
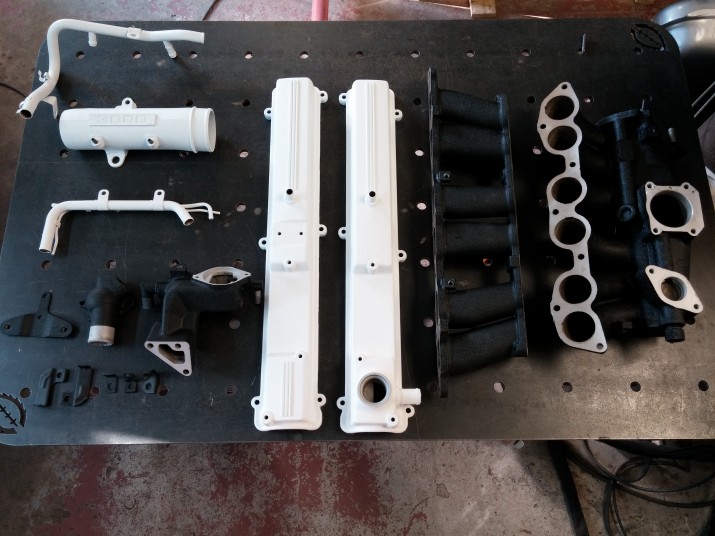
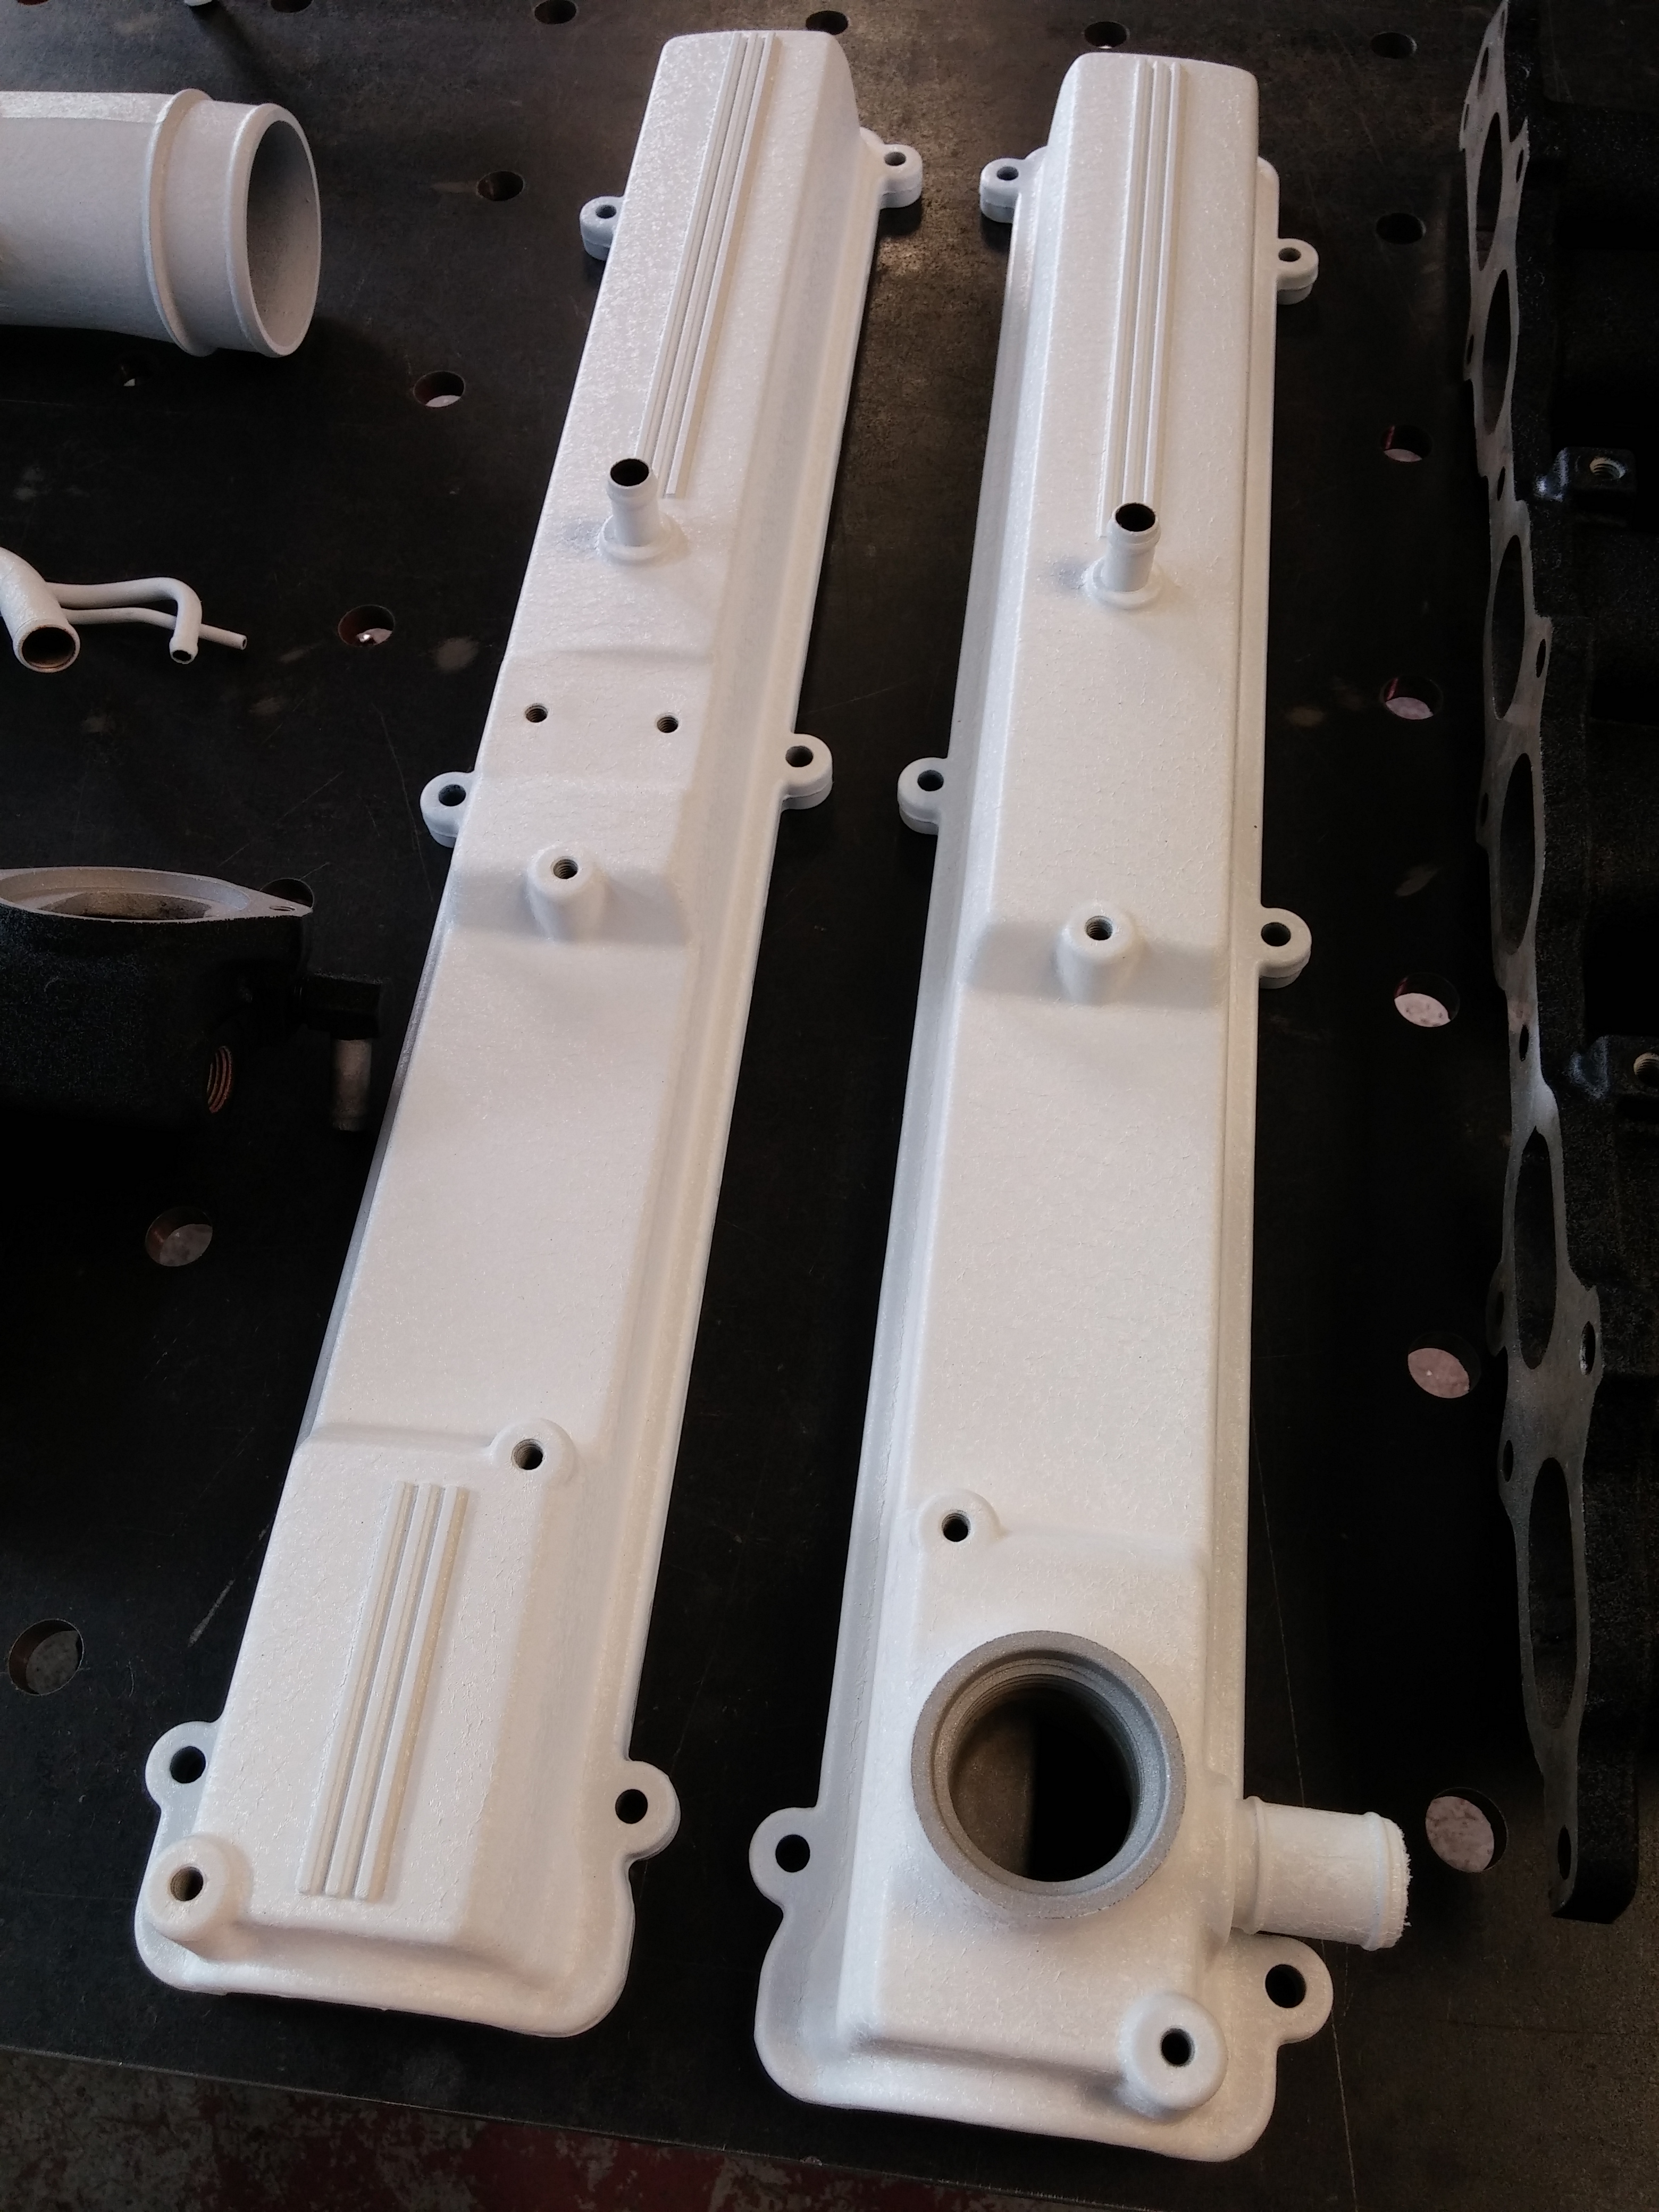
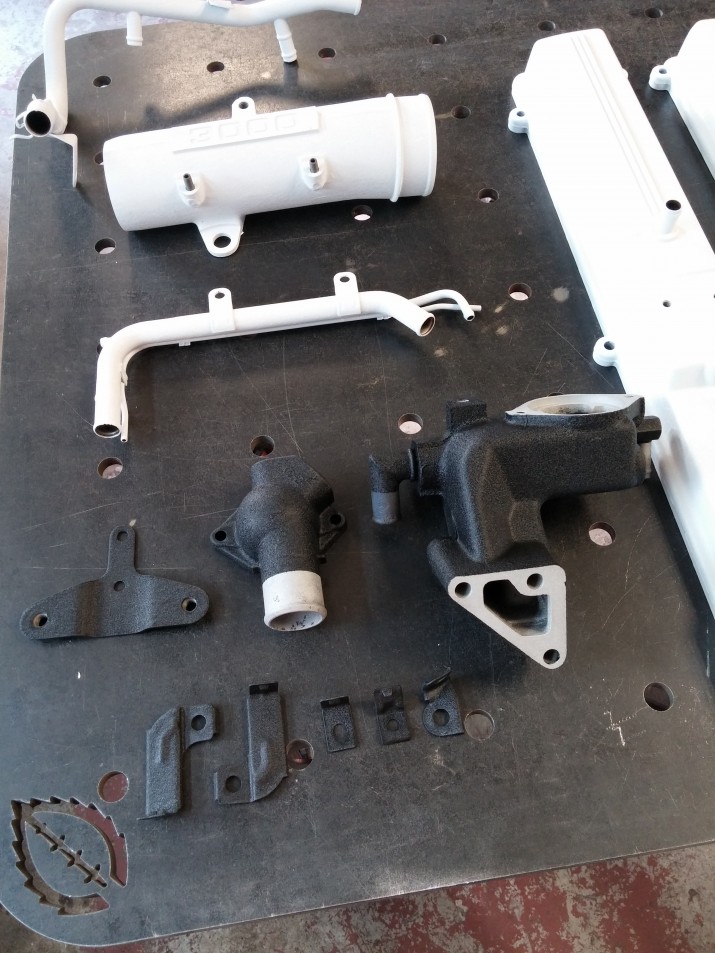
Then we got these 7M-GTE parts in needing to be degreased, blasted, baked, blasted and then powder coated. There is quite a bit of prep work required as anything that is cast and has been around oil just requires that much more work to ensure a quality finish. Powder coating is the easy part, it’s all the work prior that takes the time.
Once again our favorite tape around the shop. Polyimide tape, heat resistant and leaves no residue. Super useful as we use for everything from powder coating to welding. And it kind of makes everything look like it’s meant for NASA. These parts are all masked, trimmed, plugged and ready to go.

Notice the pin holes in the masking, this prevents plugs from popping out in the oven and just allows the part to “breathe”. This intake manifold is ready for the powder to be applied.
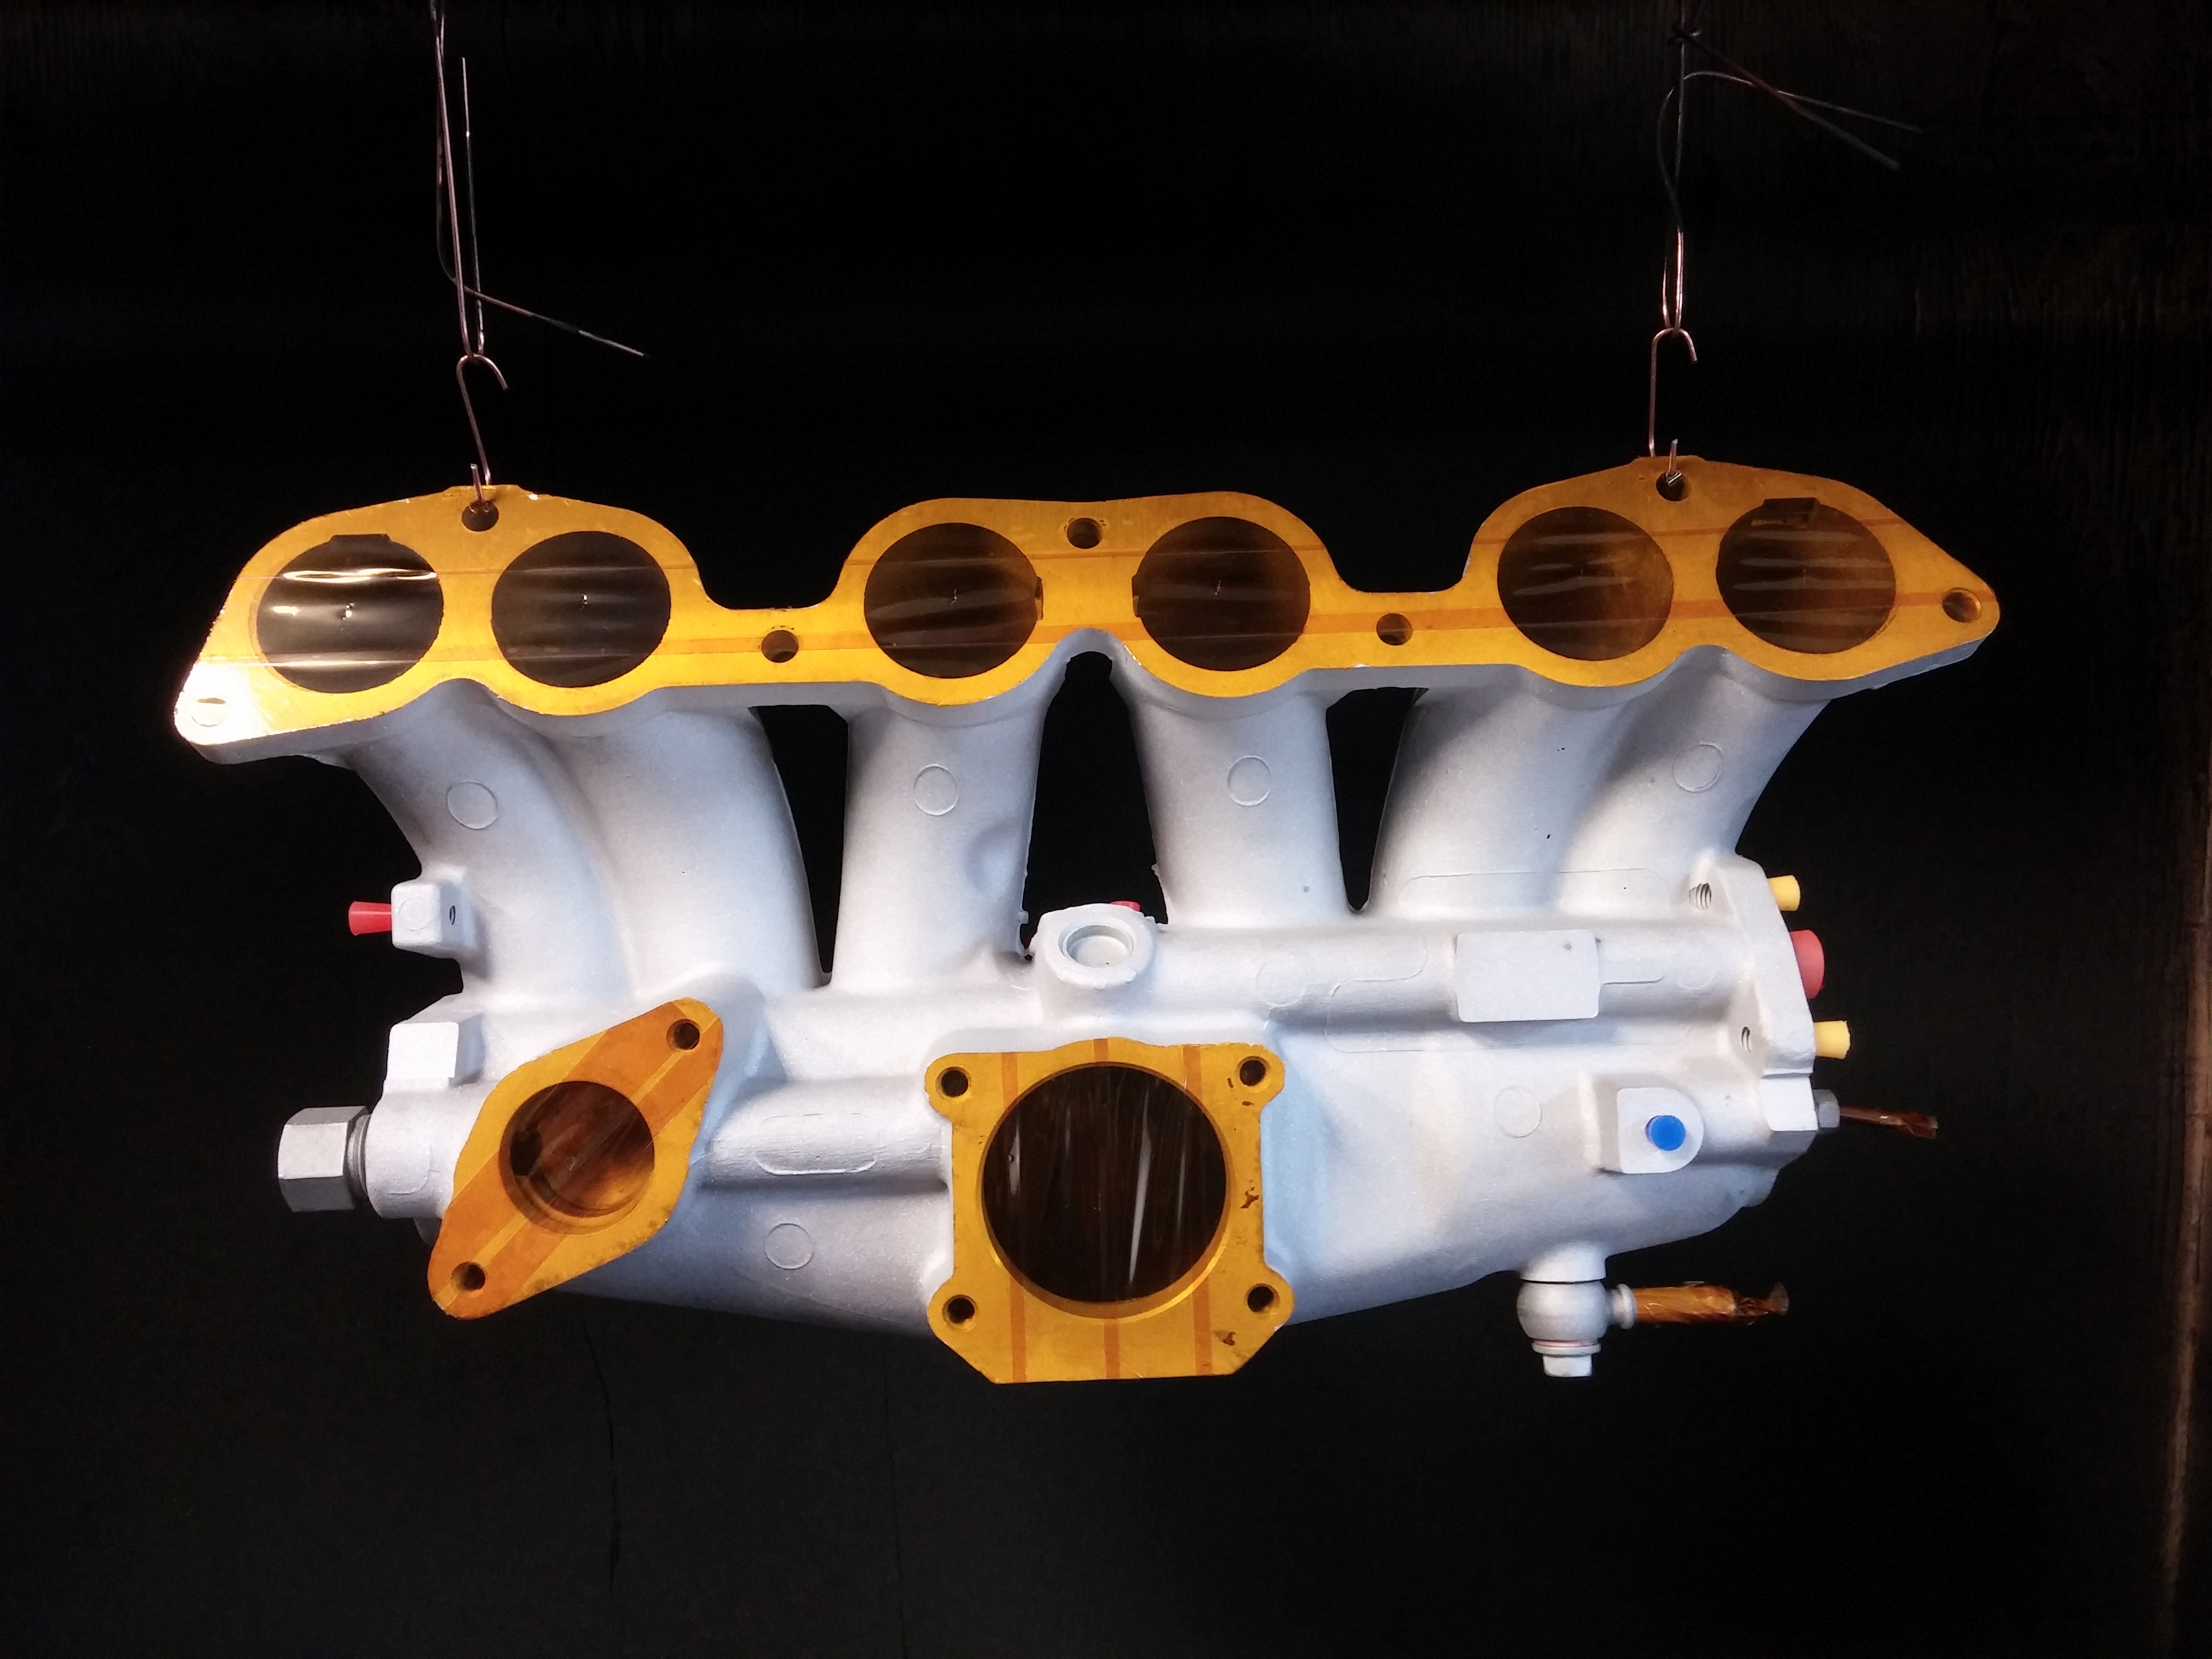
All the finished parts. The wrinkle black and desert wrinkle white turned out awesome!
Coming soon…Cadillac 304SS exhaust system, our Arduino project powered by Newark Electronics, some custom steel crates and much much more! If you like what you see please subscribe to our mailing list and you will be able to get up to the date content in your mailbox, just click on the “Follow” tab at the bottom right of your browser. If you are interested in any of our services please take a minute to browse our site and contact us if you have any questions or would like to discuss a future project.
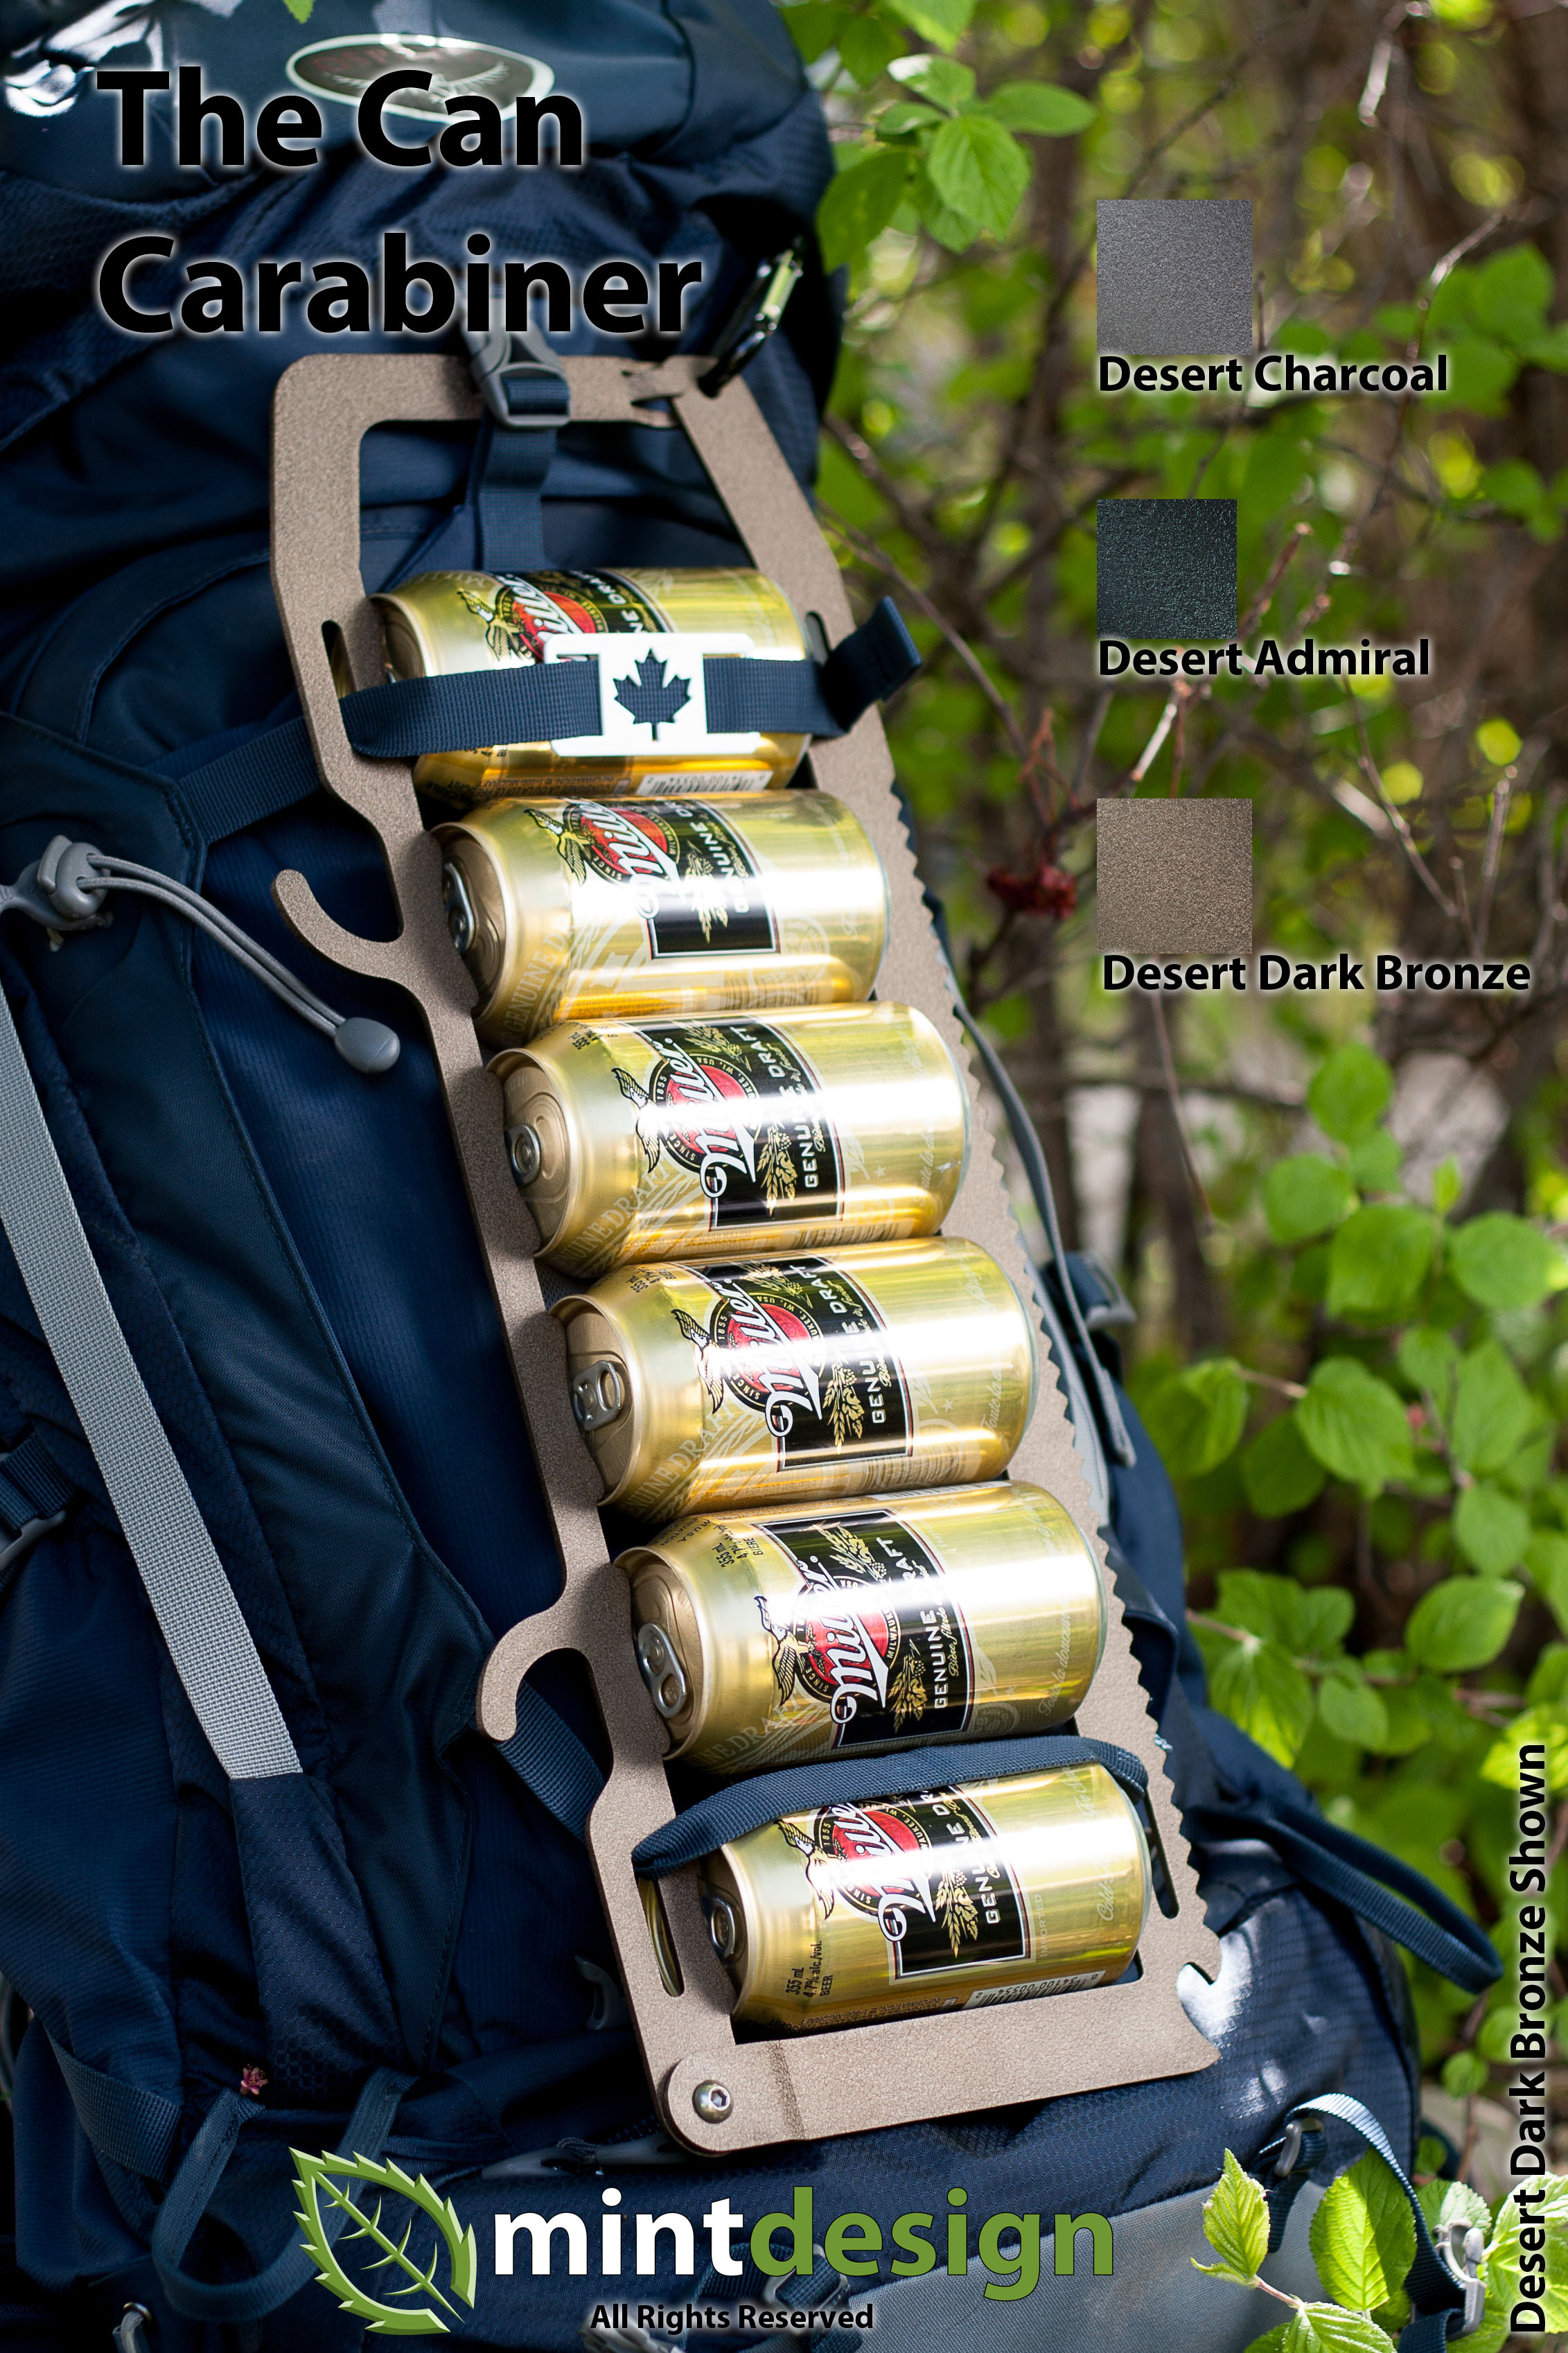
The Can Carabiner
Clients sometimes bring us interesting projects to work on, or we come up with interesting ideas as well. The Can Carabiner idea came about the need for cooling canned beverages while fishing or near a beach. It won’t bring your drink to ice cold temperatures, but at least it’ll cool it down enough it will be cooler than the ambient air temperature. After a few evenings of modeling in SolidWorks, a few prototypes later we have a final design. A can retainment system that also has an integrated bottle opener, utility saw and a loop section to allow for wrapping of some paracord (which would be attached to the carabiner). This allows up to six cans to be secured and attached to a paracord rope which can then be tied off while you’re fishing or swimming.


We have done everything from the mechanical design, CNC cutting, pickling, bead blasting and packaging in house. Also even production of the tooling to form offset bends in the metalwork. All 100% designed in Solidworks prior to any steel being cut or welded. Admittedly this tooling would be easier to produce if it was CNC machined as opposed to plasma cut and then having the plates laminated together by welding, however that would take away our ability to do everything in house. Also the dies use regular 44W steel, which will wear over time, replacements can be easily cut out and re-tacked into place. Or we can source some tool steel to cut and weld in place, which will offer a longer life. This versatility allows us to make changes quick if something were to arise.

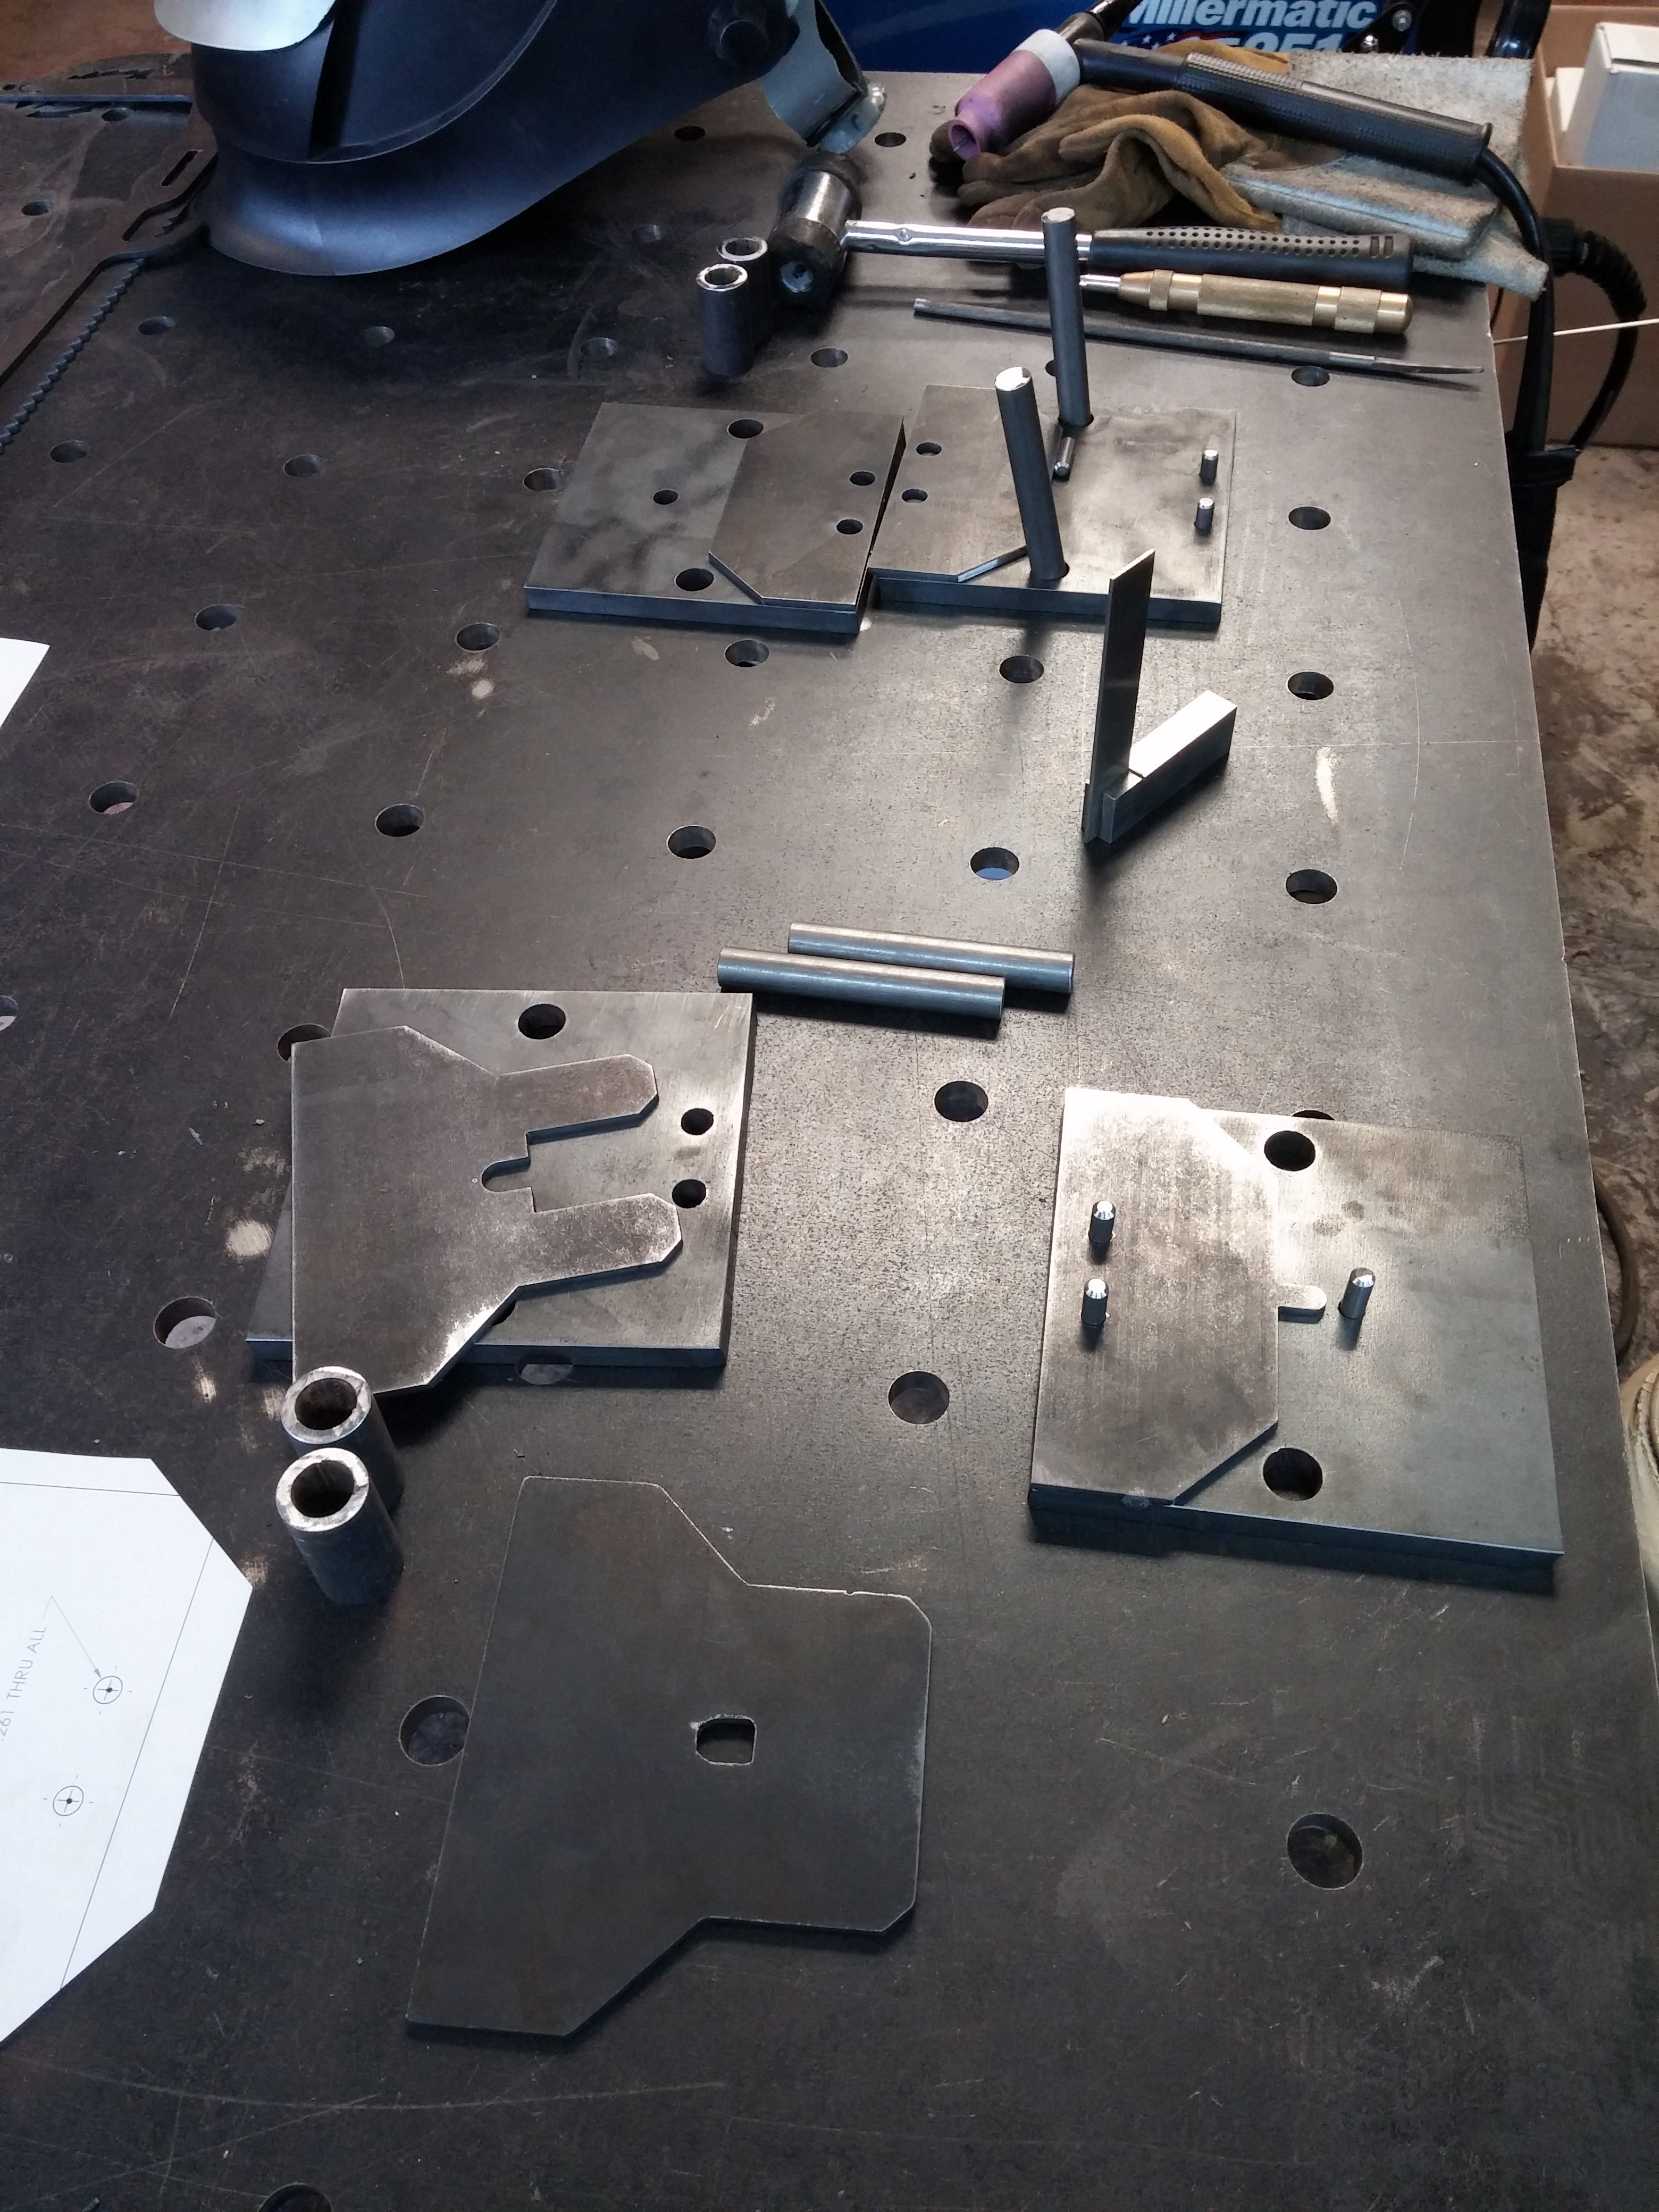
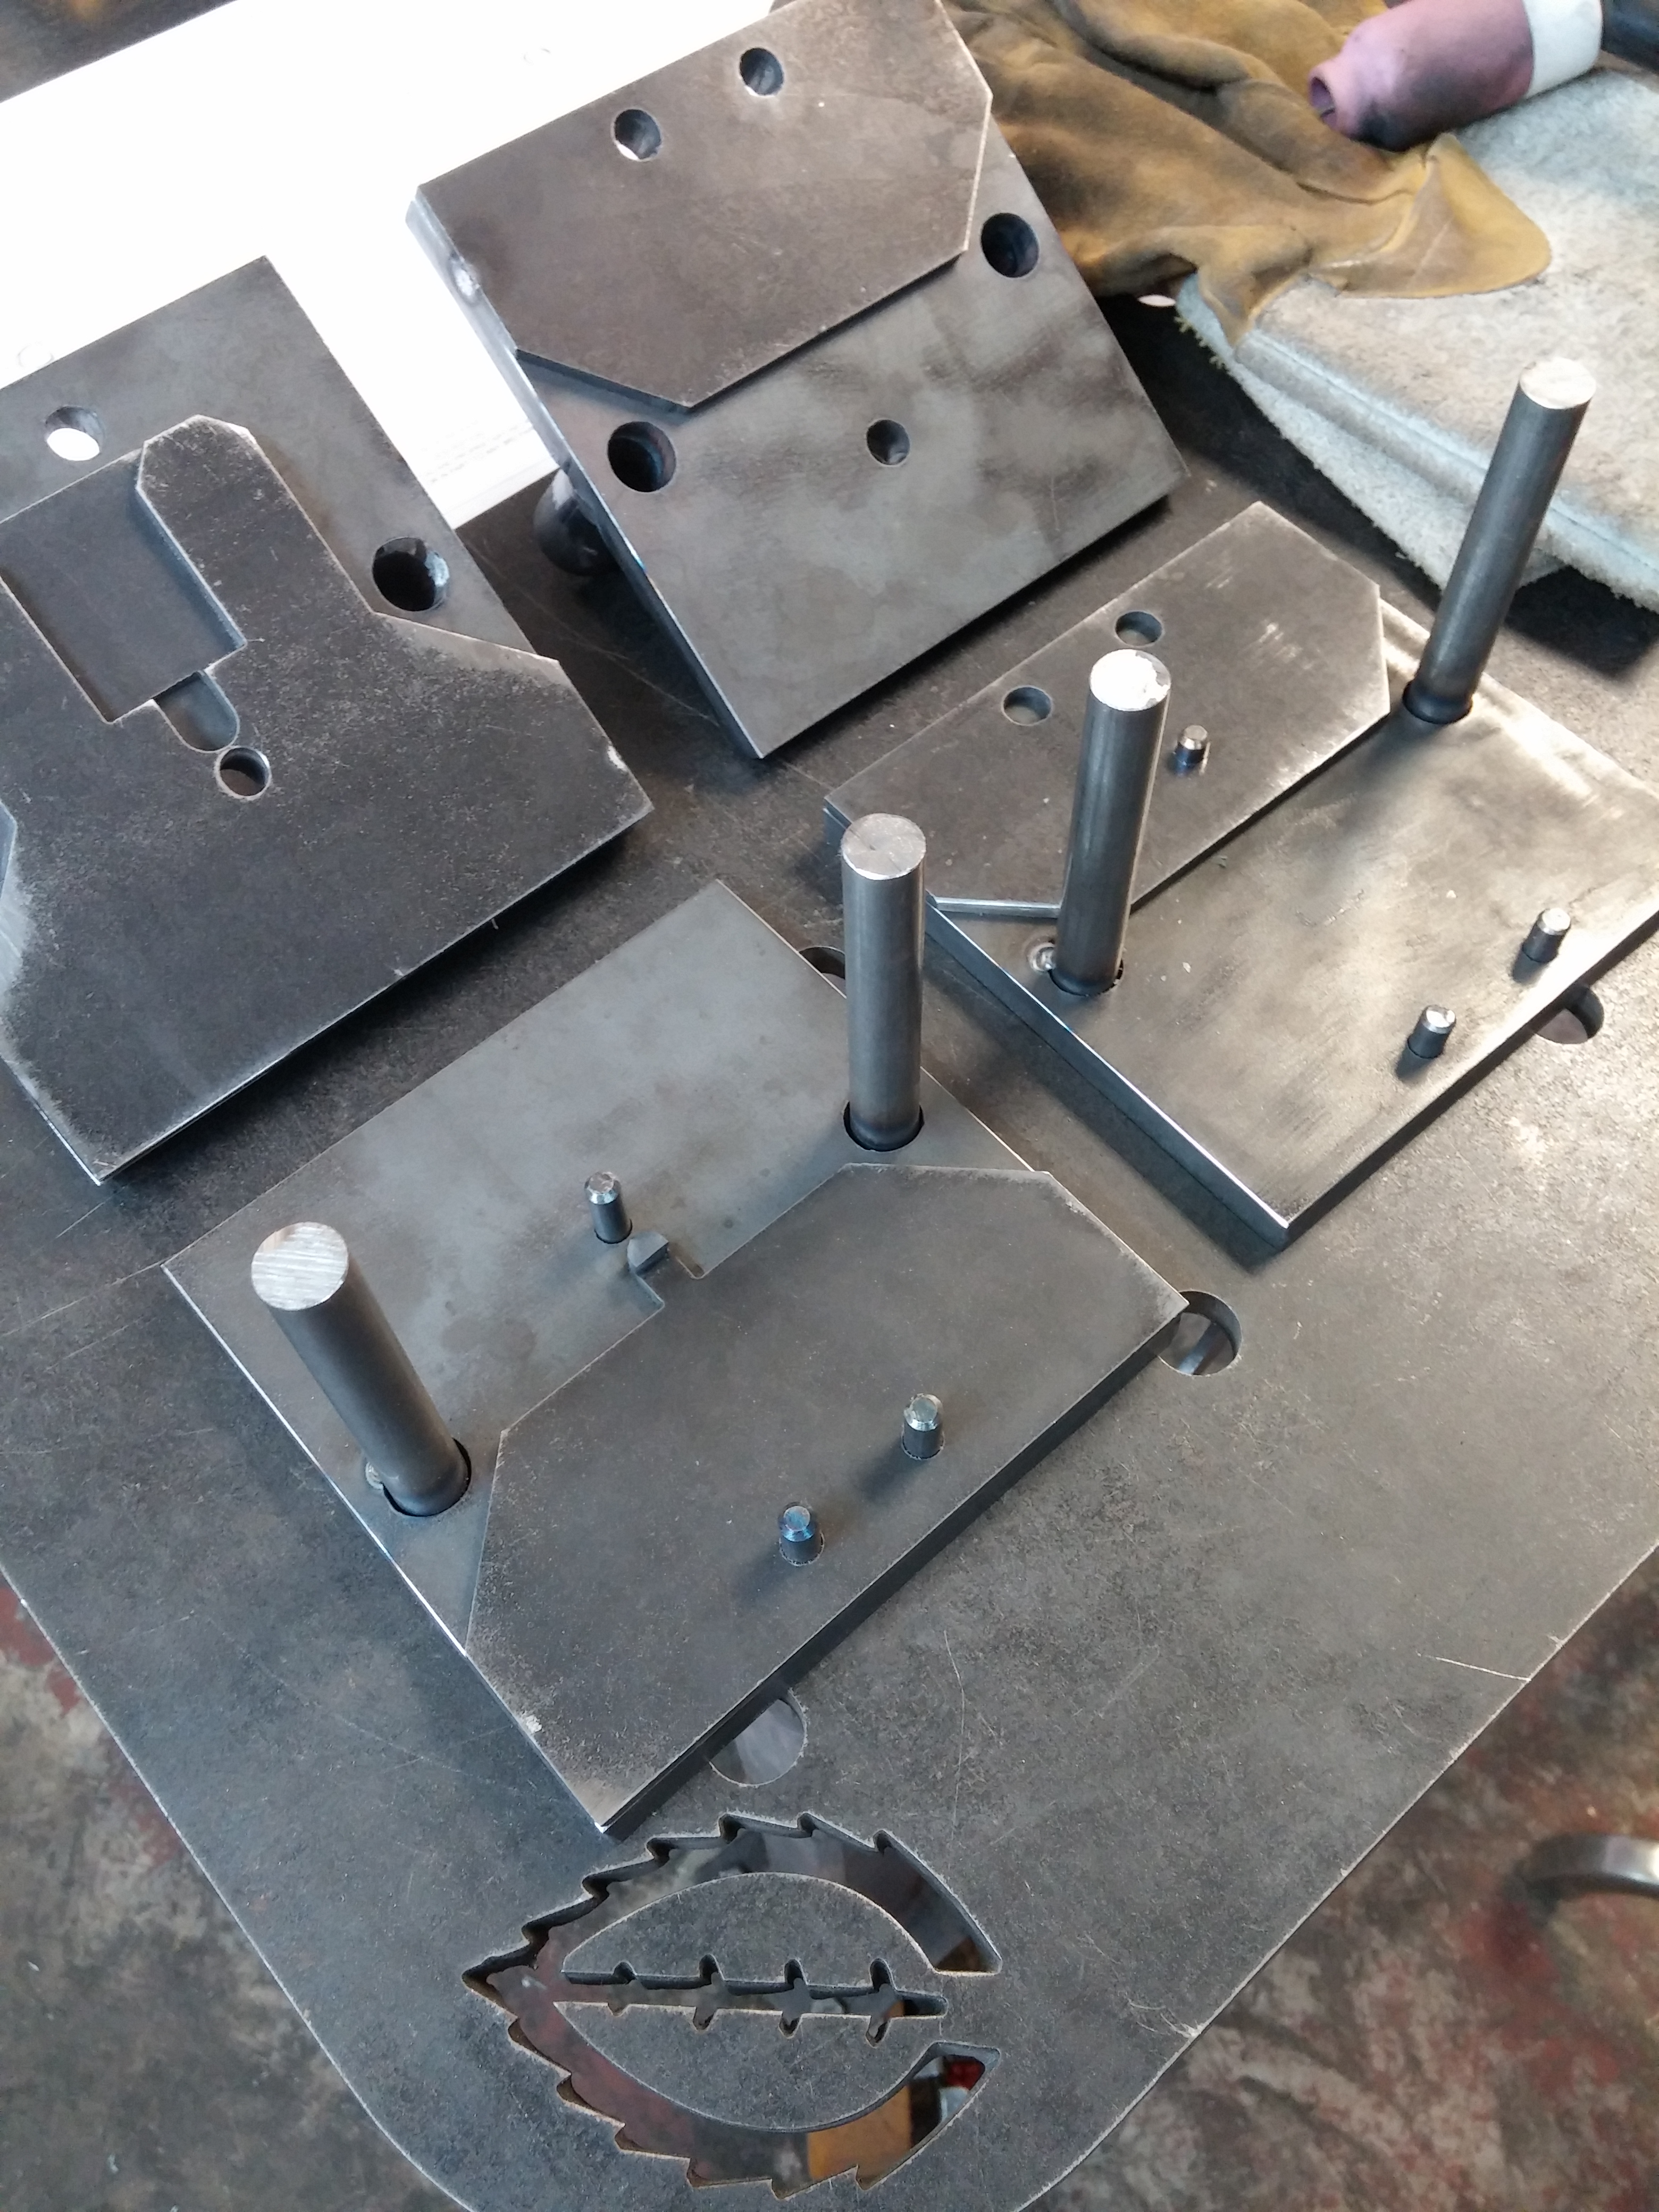
Here’s one of our small production runs. Tightly nested, 100% cut in house with our CNC plasma table.
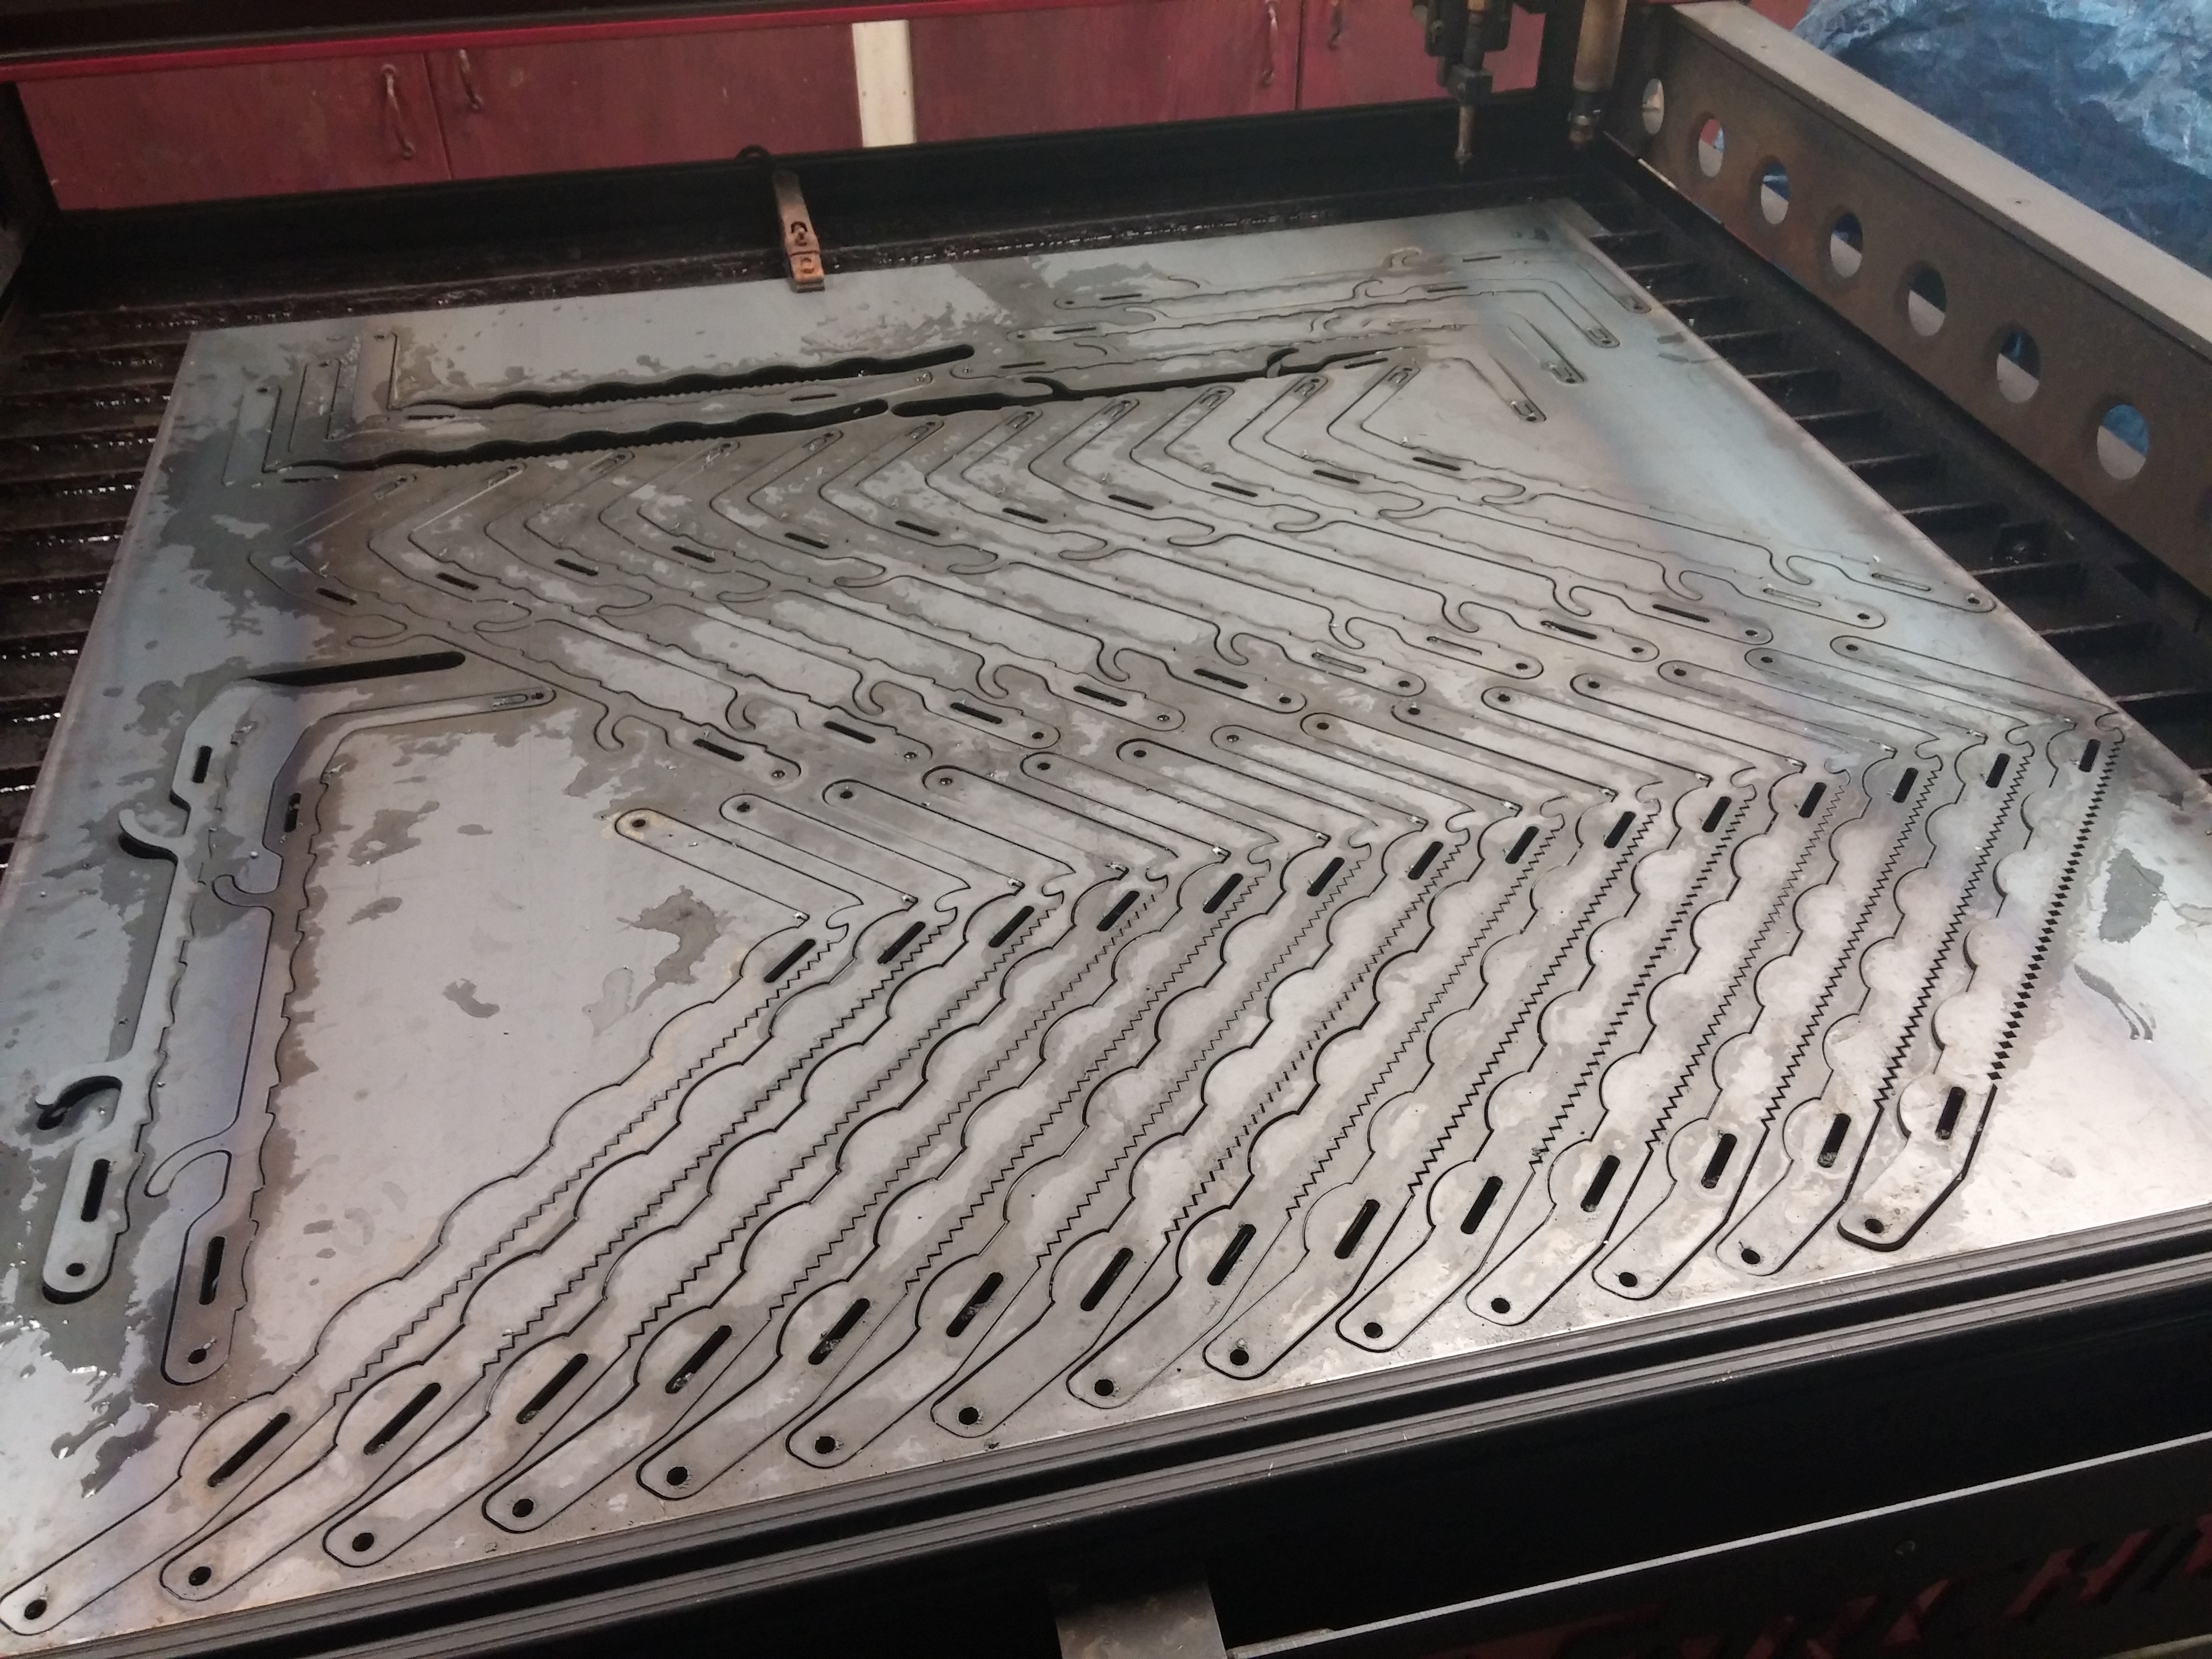
These parts have very minimal dross, but it can be easily removed via the pickling process. During this process the mill scale is removed as well. This happens prior to blasting which speeds up the blasting process dramatically, and allows for a clean textured surface for the powder to bond to. In the future we will be automating the surface prep process after pickling. This will reduce labor costs and ultimately improve throughput.
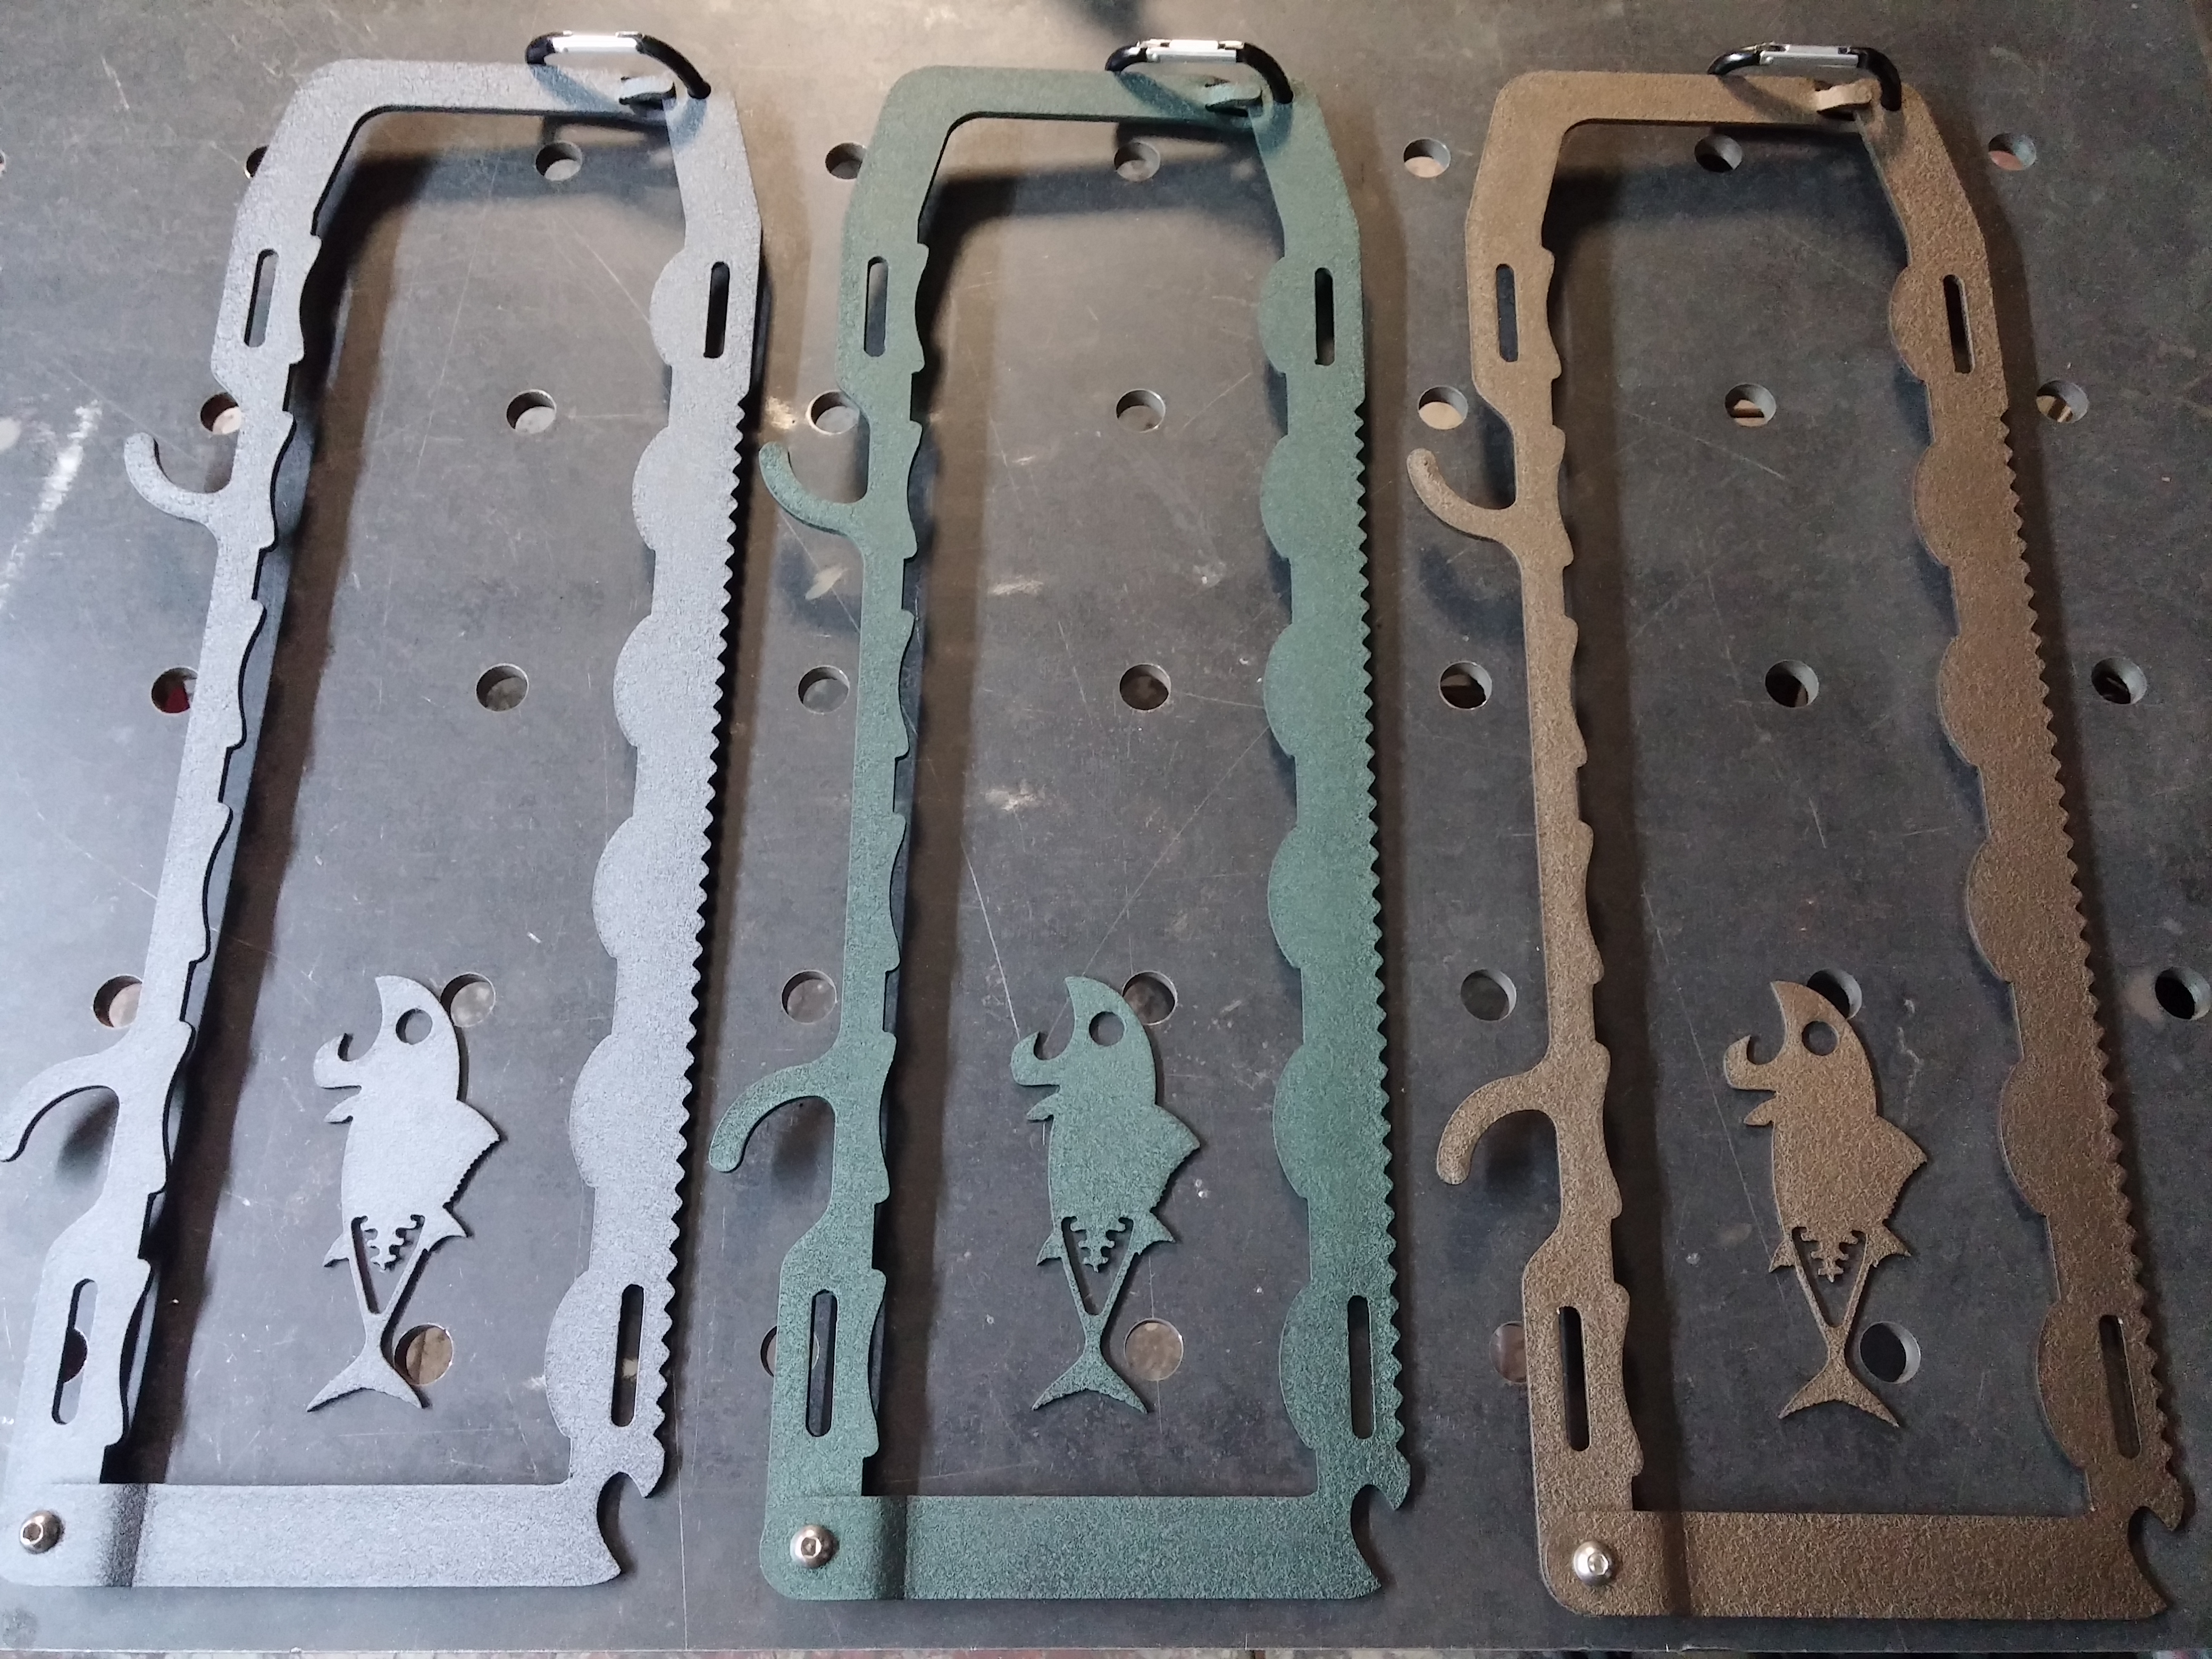
Here are the three colors available. We also sell the bottle cap opener fish as well.
There has been a huge amount of interest in this product, to the point we’ve been doing small batch runs and taking in customer feedback. This feedback and initial small scale production runs will allow us to achieve our even bigger plans in the fall! This product is open to wholesale clients, so please inquire if you’re interested in carrying this product in your store(s). We don’t have an online store yet, but if you’re interested these are going to be selling for an introductory price of $45 CAD so send us an email through our Contact page if you would like to purchase one. Shipping is generally $15-30 depending if you live in Canada or the US as well as how many you plan on ordering.
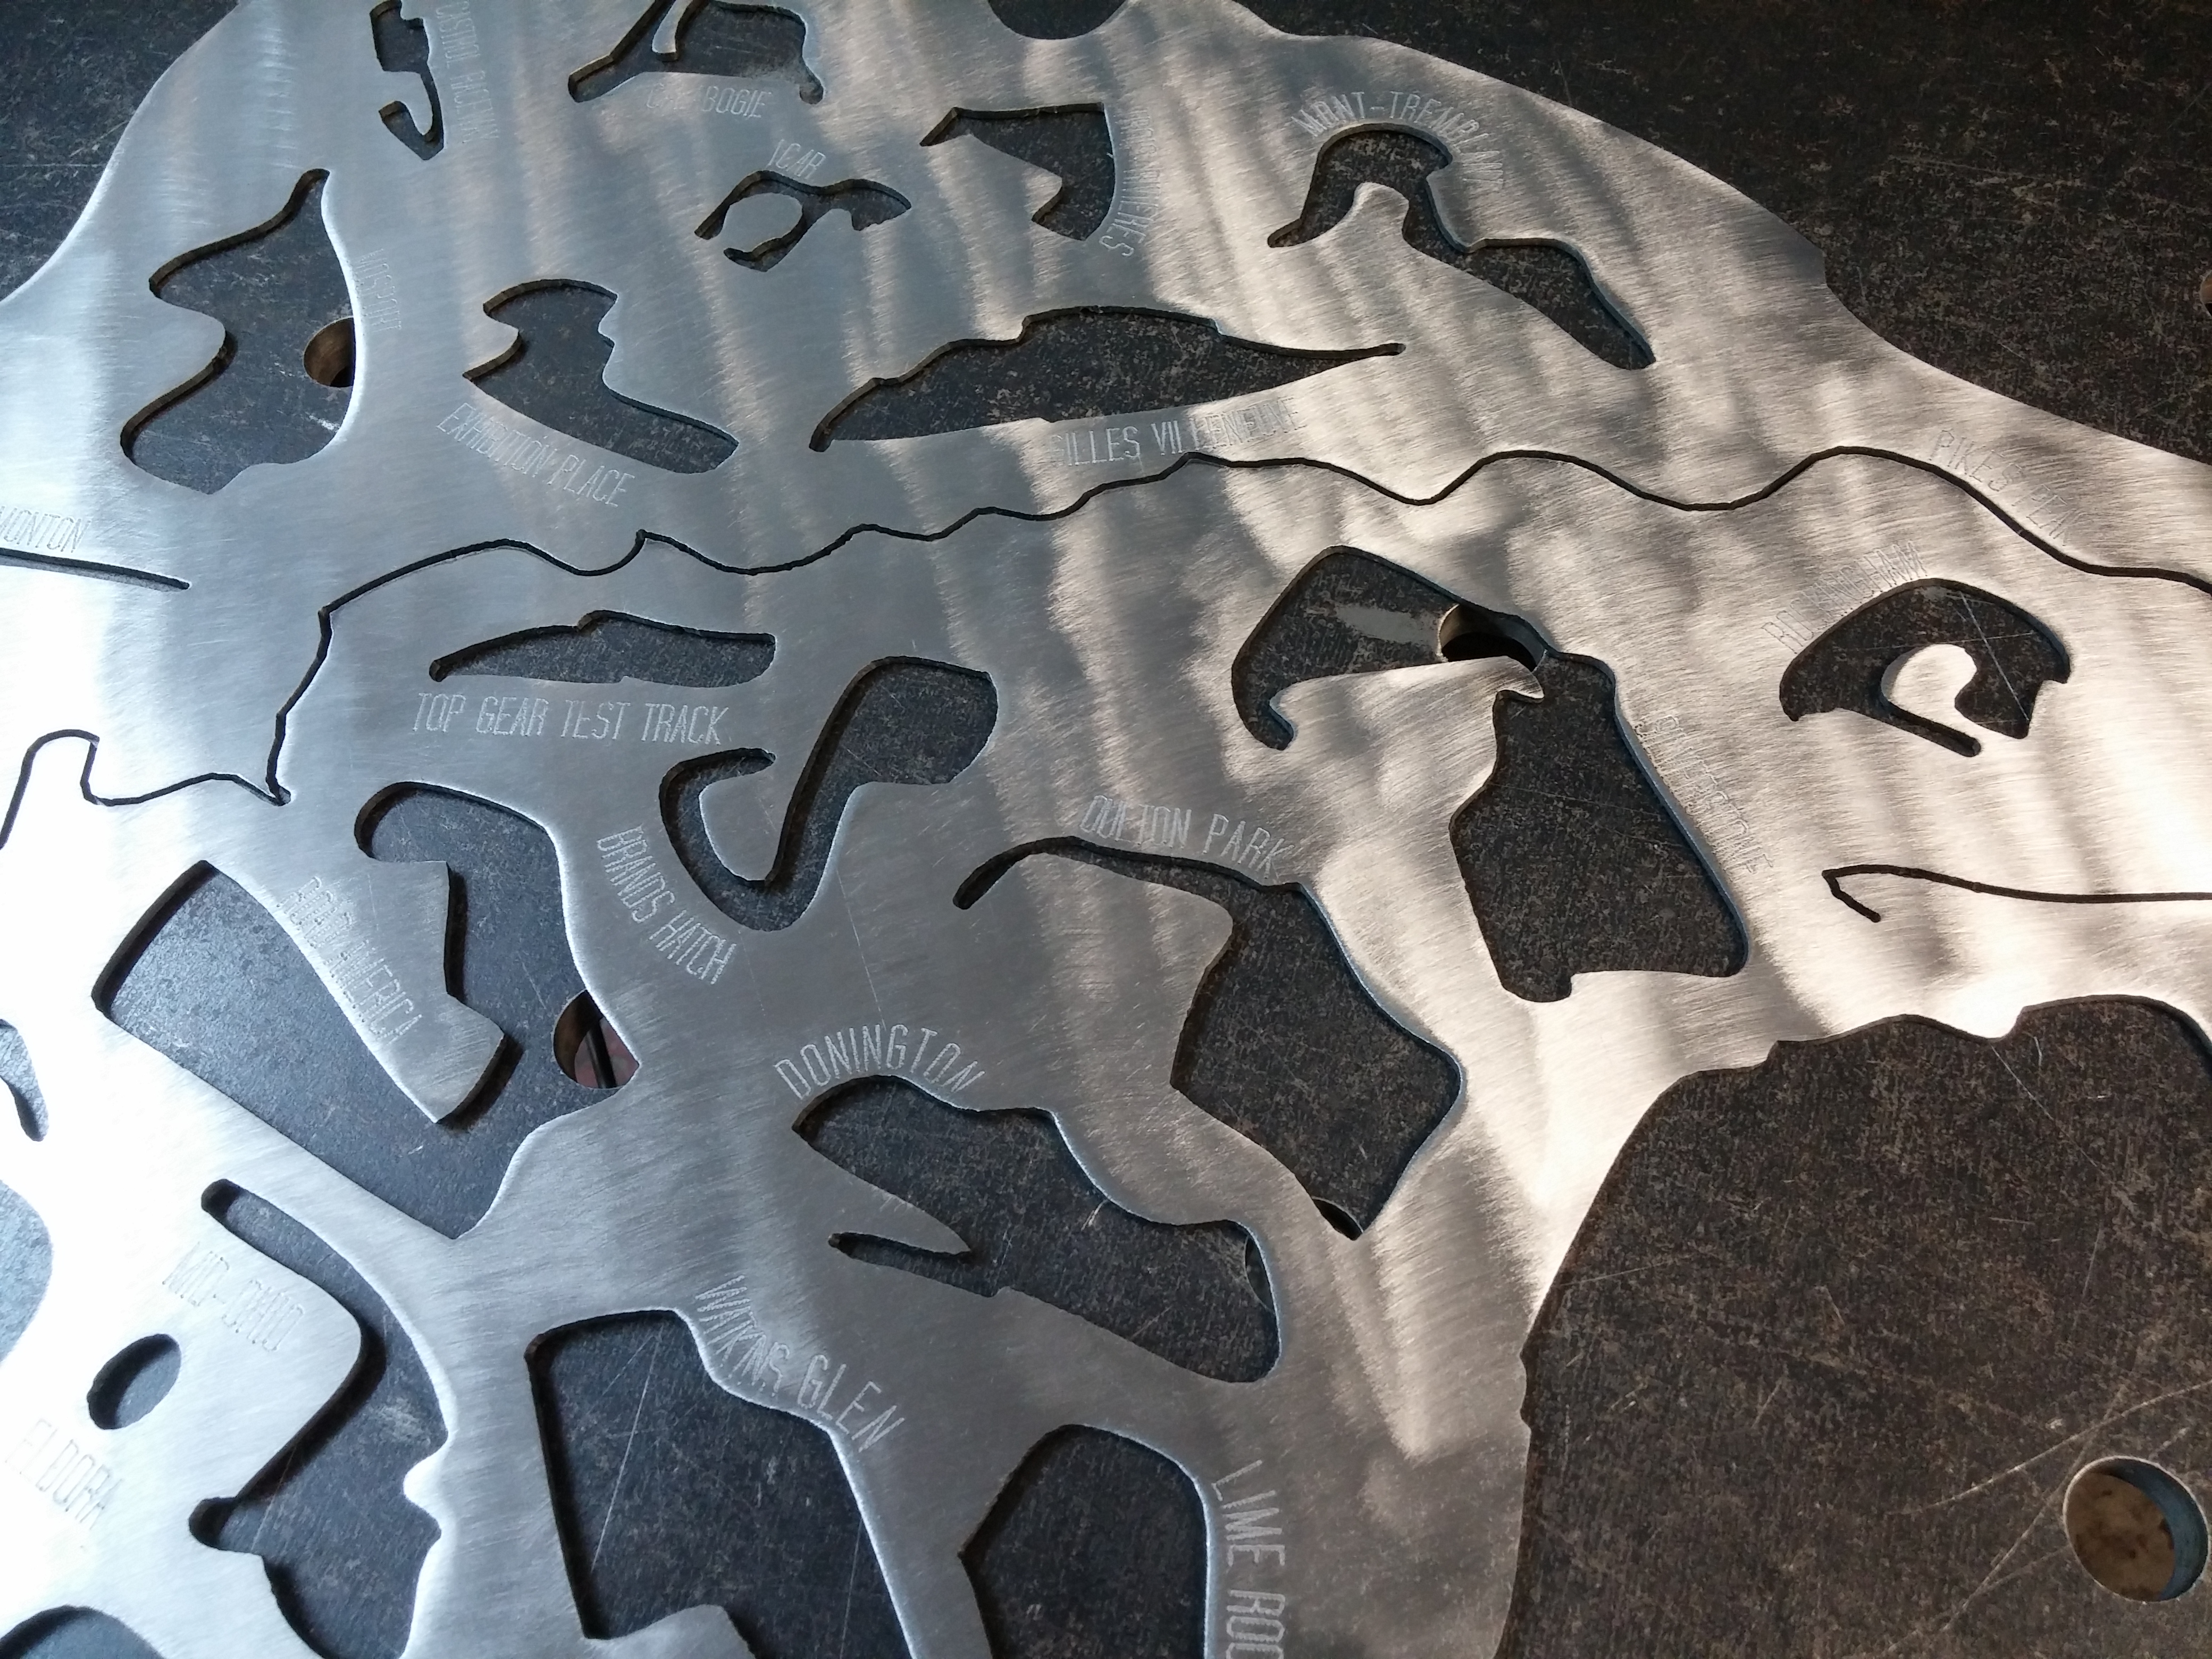
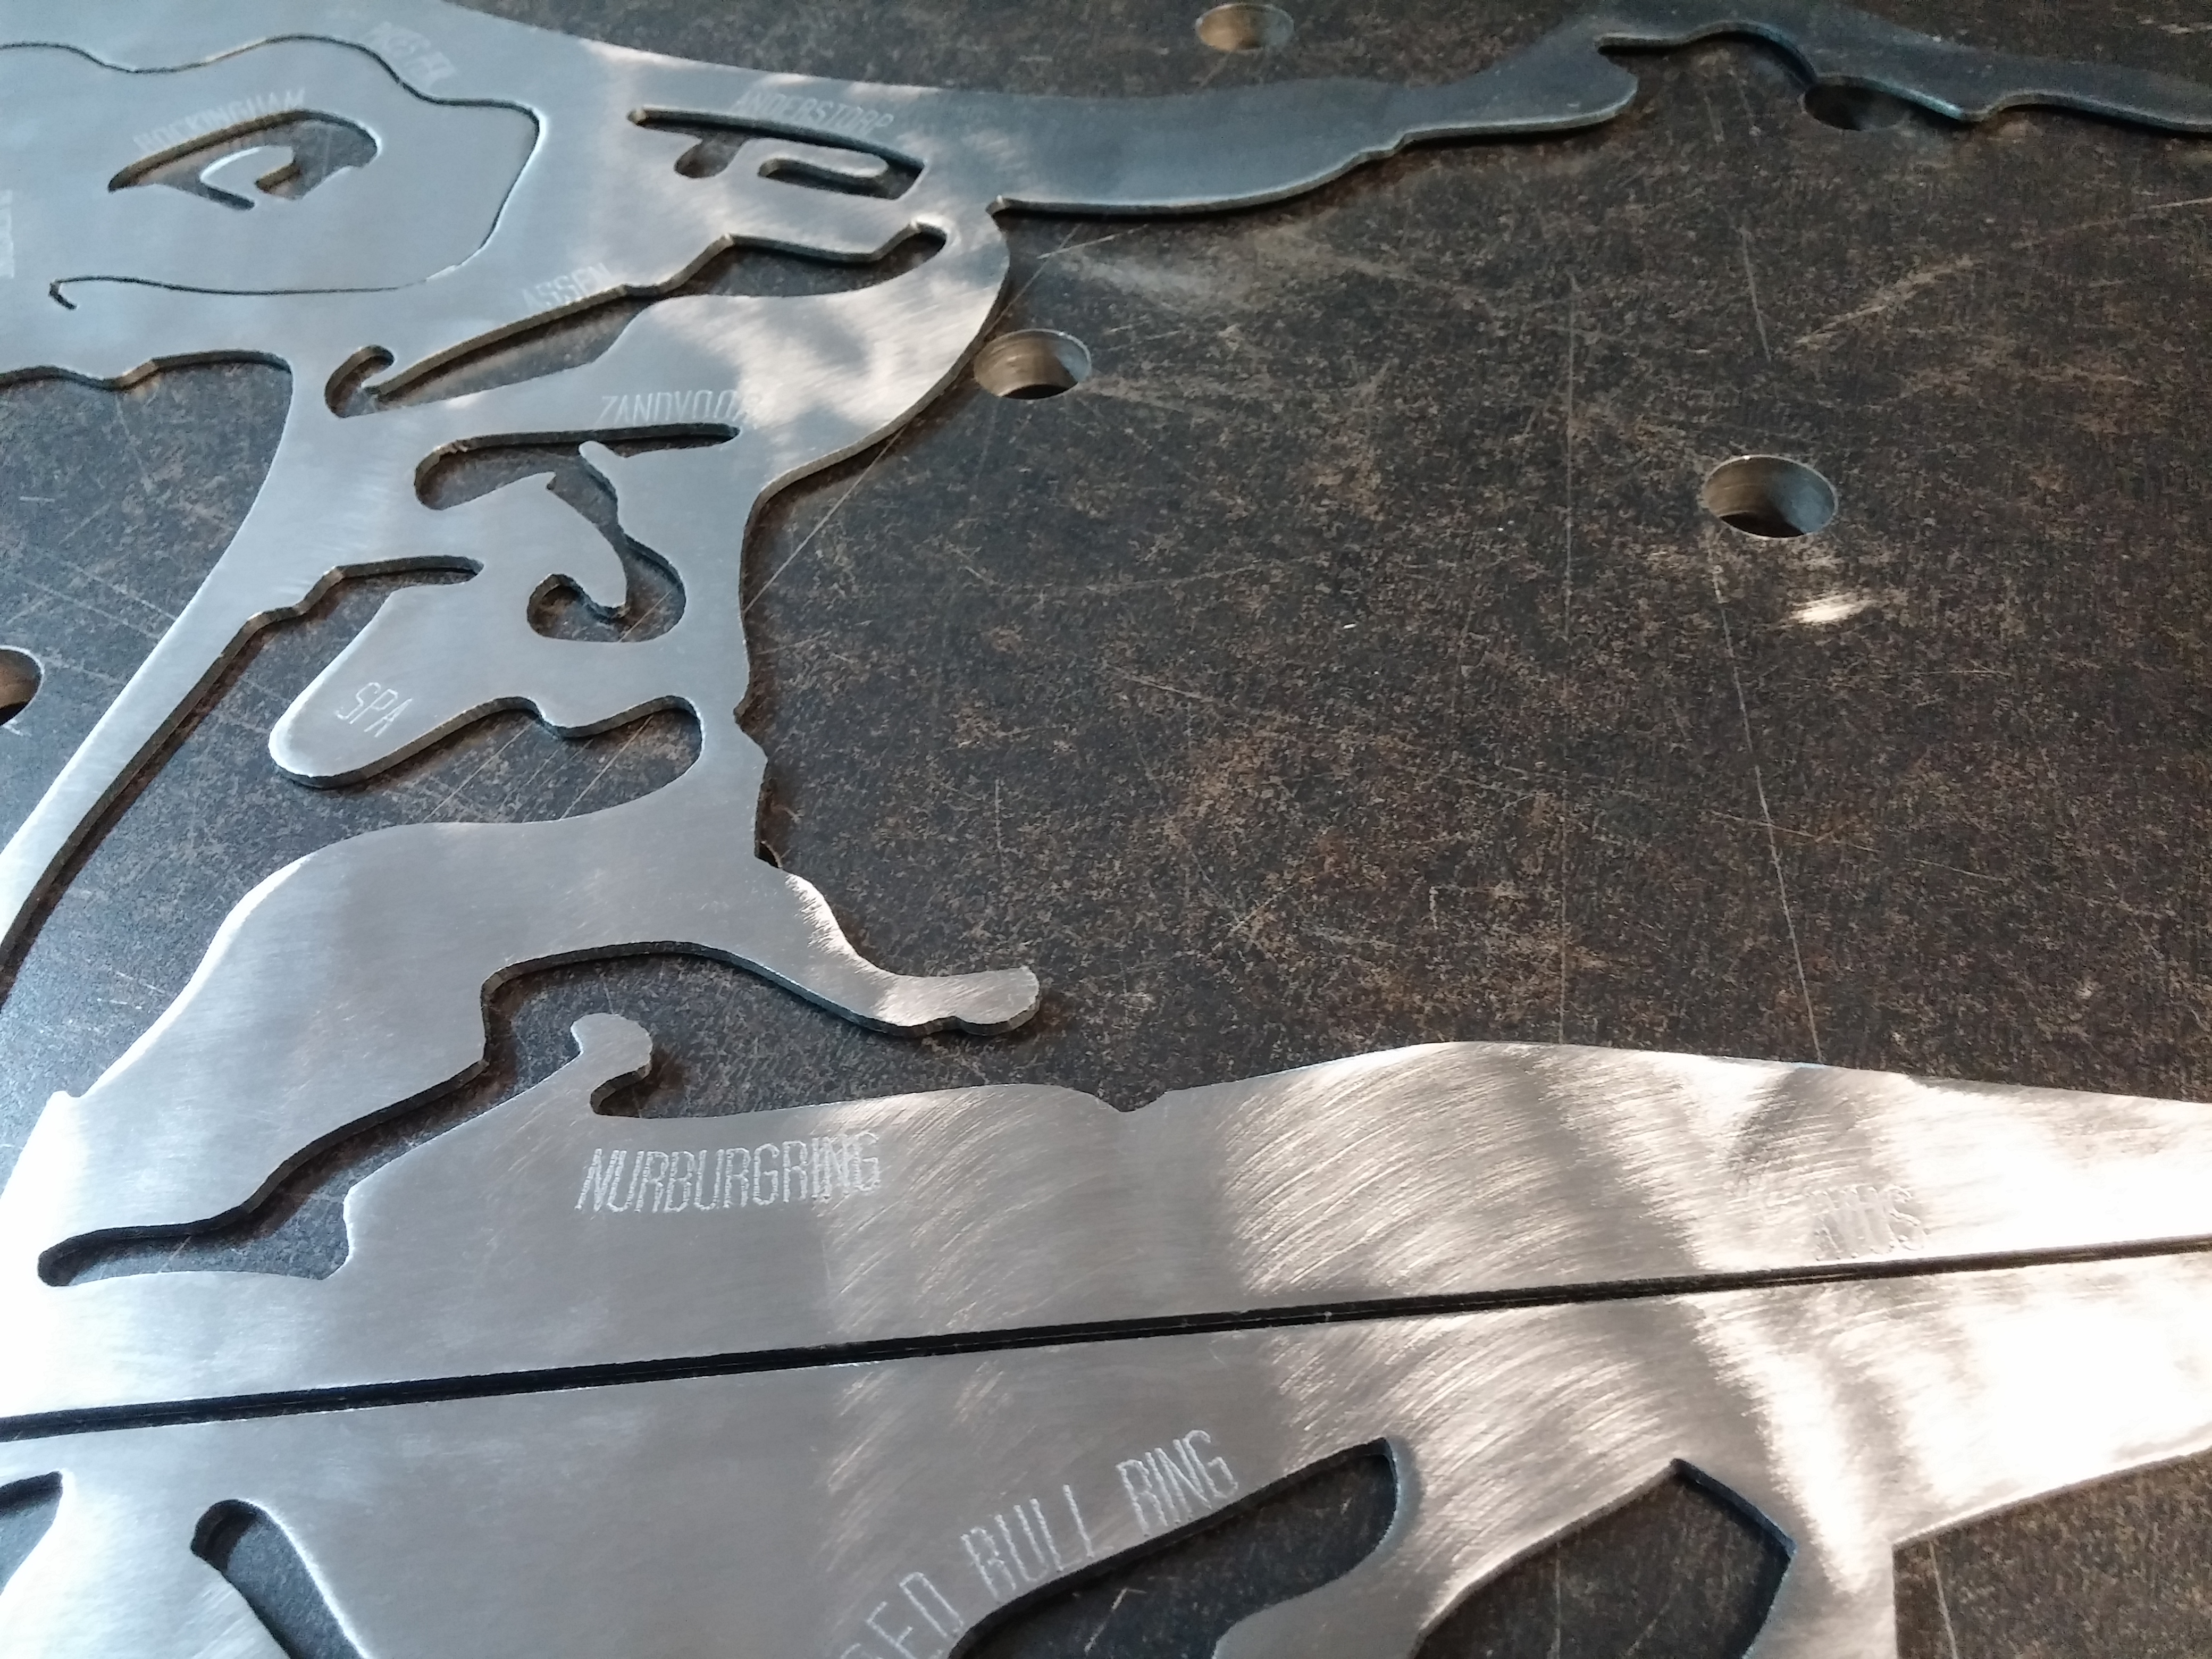
CNC cut race tracks out of steel
This CNC cut race tracks project started as a simple request from a picture posted on a local car forum. After converting the tracks into vector format and entering in all the track names a group buy began. These are cut out of 14ga cold rolled steel. Normally hot rolled is used in our shop, but in this case the final part will have a sanded finish and having to remove mill scale from hot rolled is a time consuming process on a large part like this. Small parts aren’t a problem when they can be stripped in an acid bath.
Here is the CNC cut race tracks as modeled in SolidWorks , just the plasma cutting portion.

Then the names were added next to their respective tracks. All the text will be engraved prior to plasma cutting.

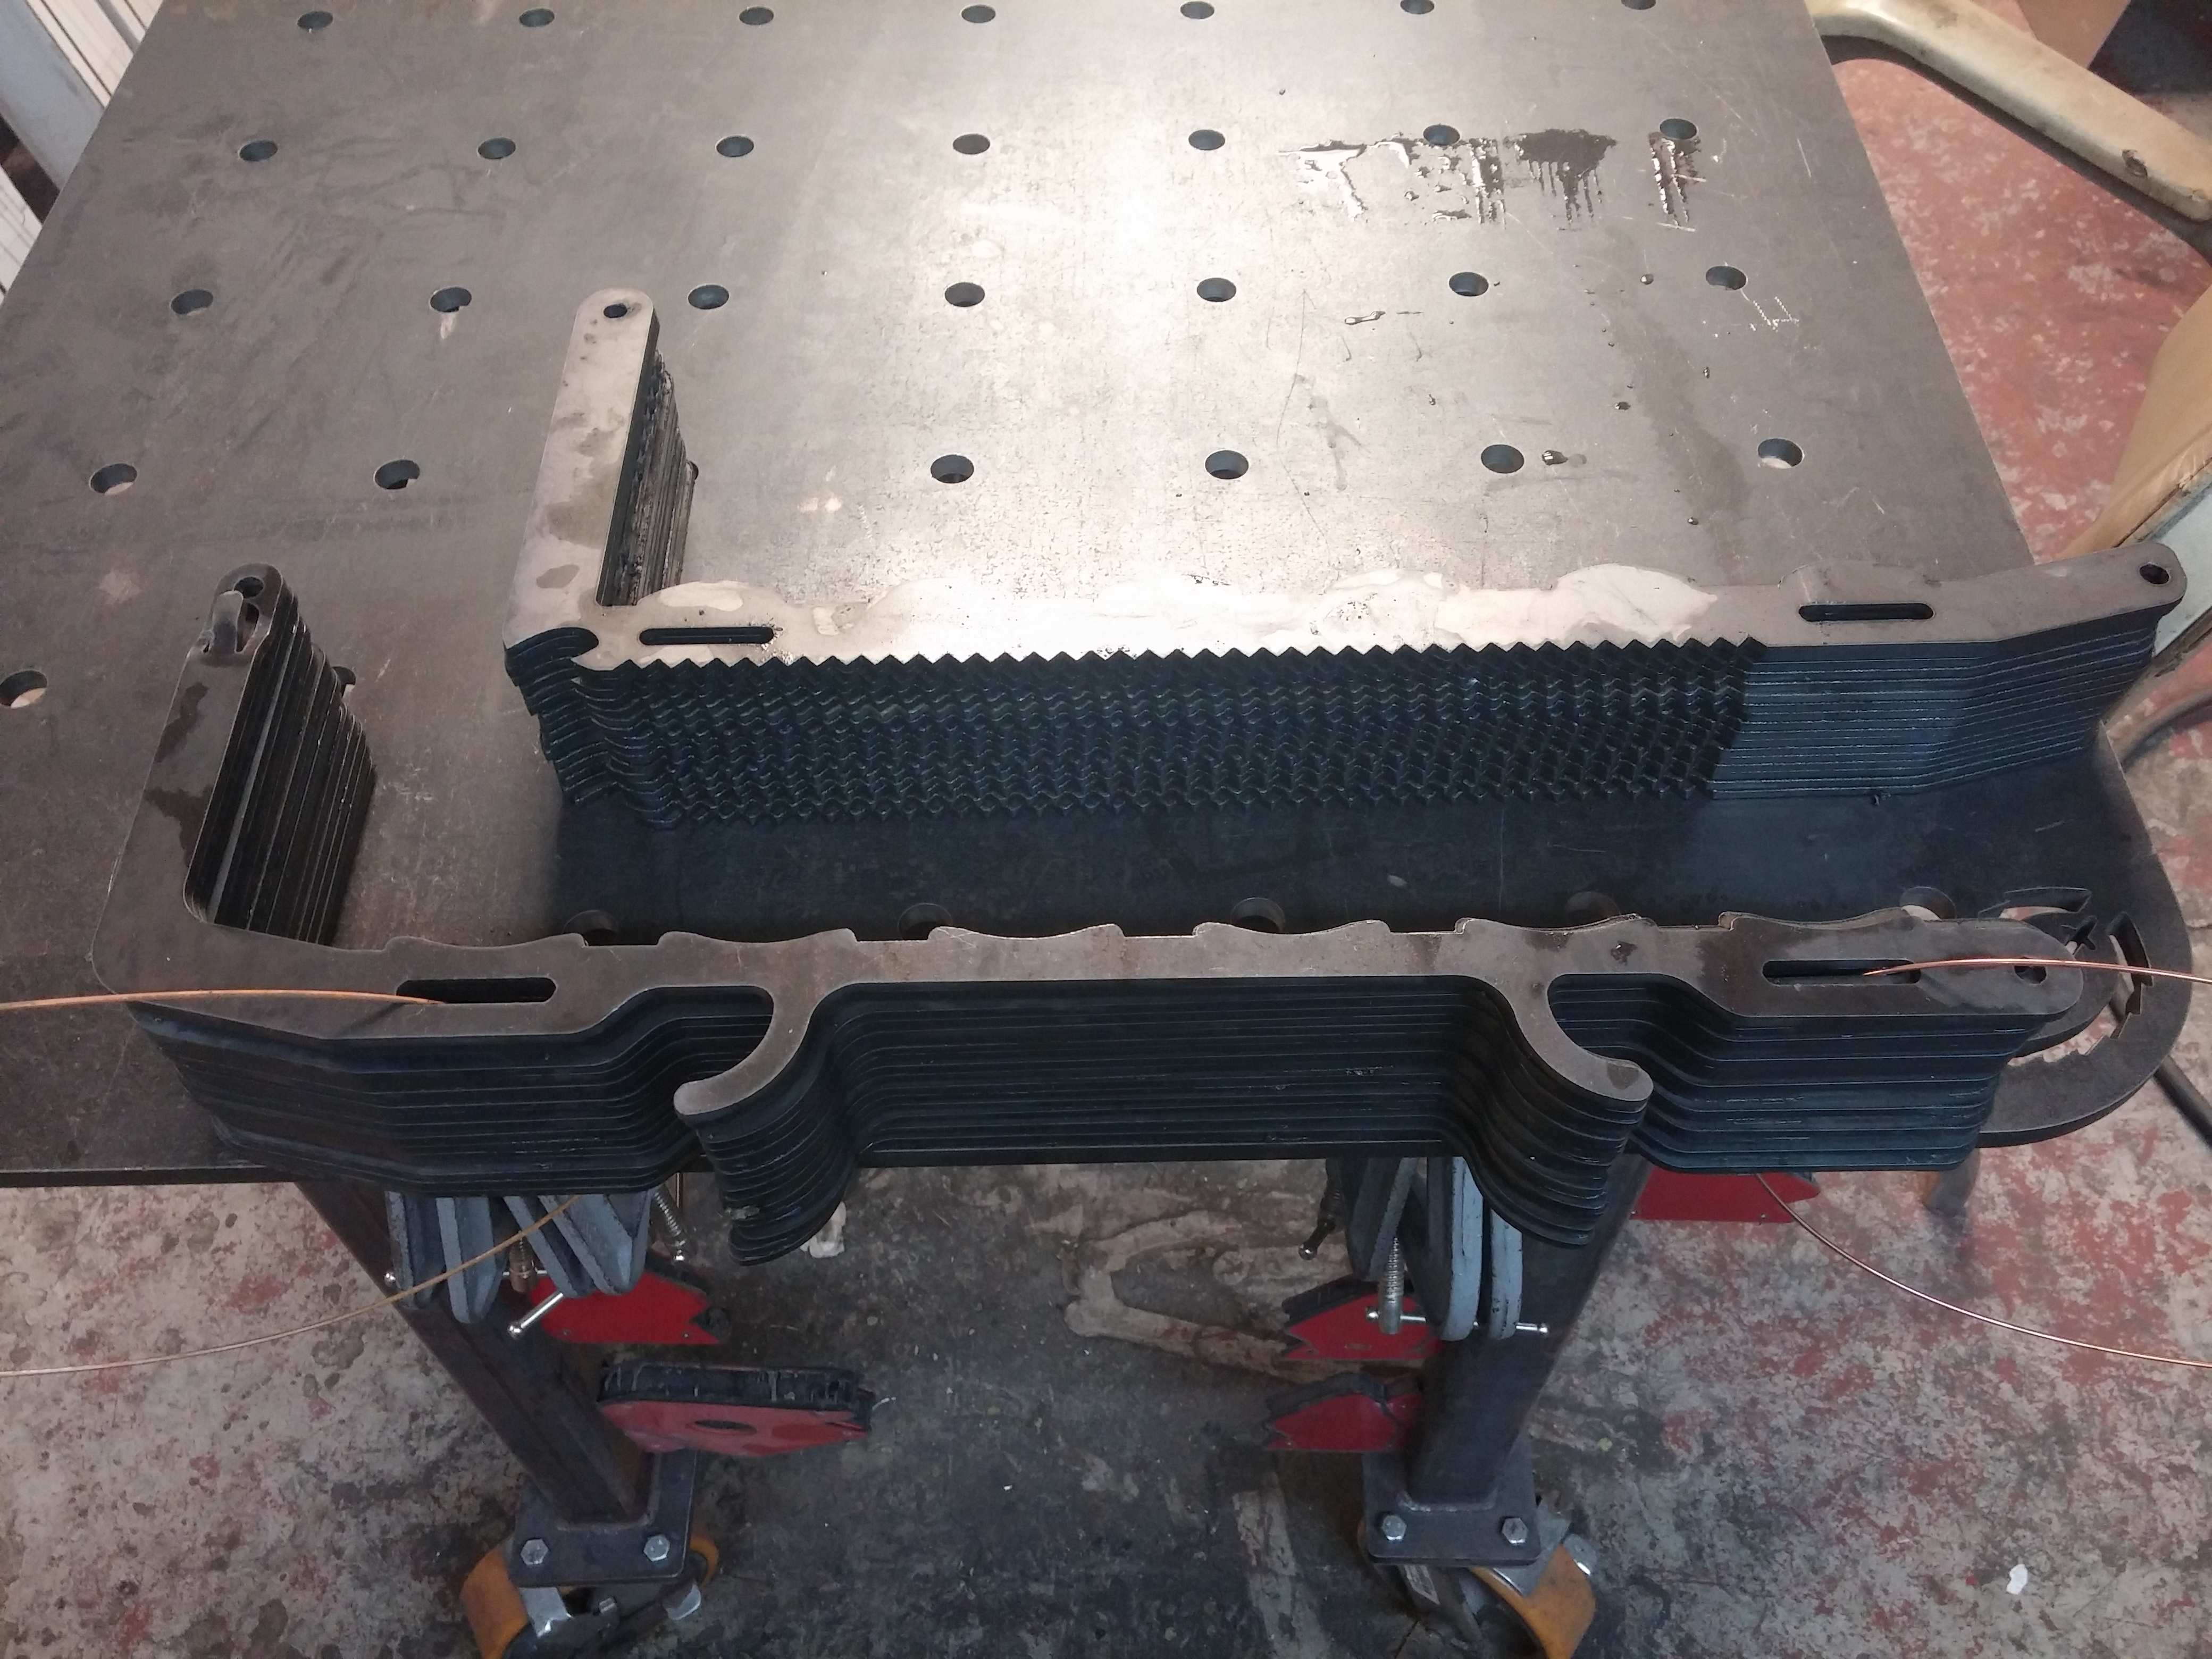
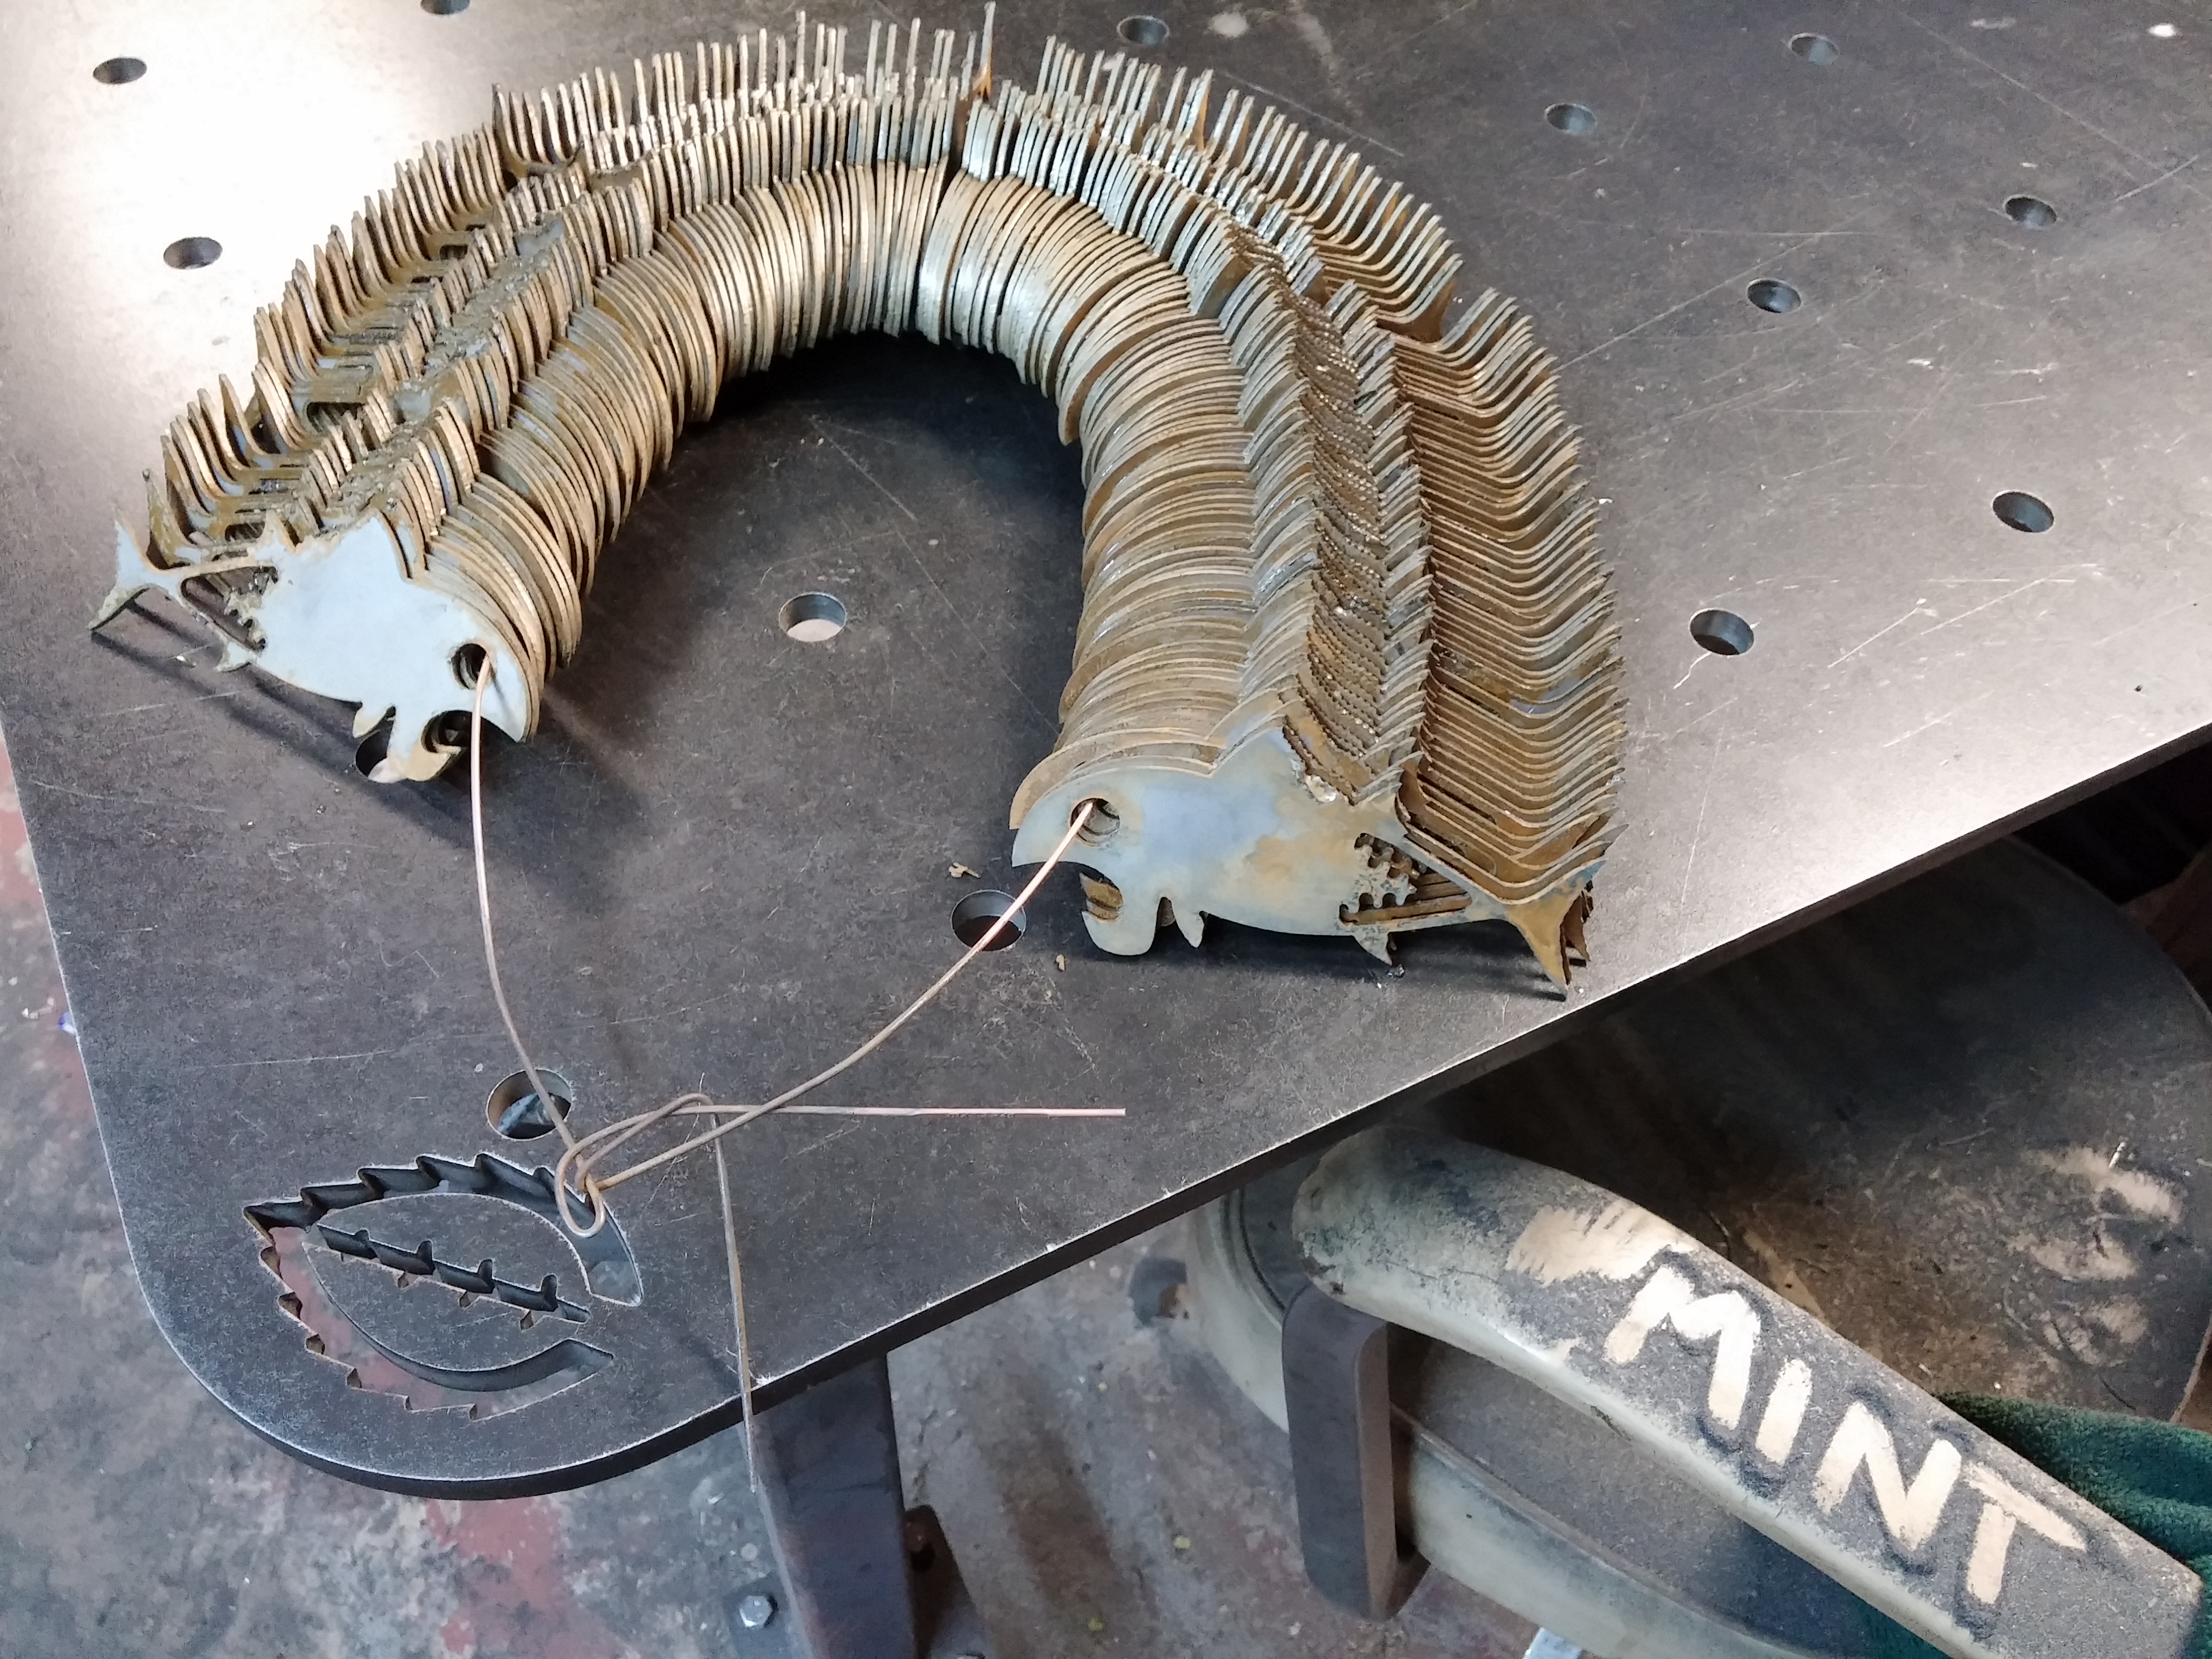
Here’s some of the engraving going on, the fish are actually bottle cap openers that are nested into the voids of the sheet. Some are even nested in the Nürburgring and in the Circuit De La Sarthe. Every square inch of material is utilized when cutting. The scuffed up metal below the rectangle is just an area for test engraving and seeing how the sanded finish would look with the engraving. The anvil and 1/2″ thick steel plates are used to keep the plate solid during engraving. We’ve never had issue with a sheet of this size moving from vibration. However with around 1/2hr of engraving time it’d be foolish not to be overly cautious.

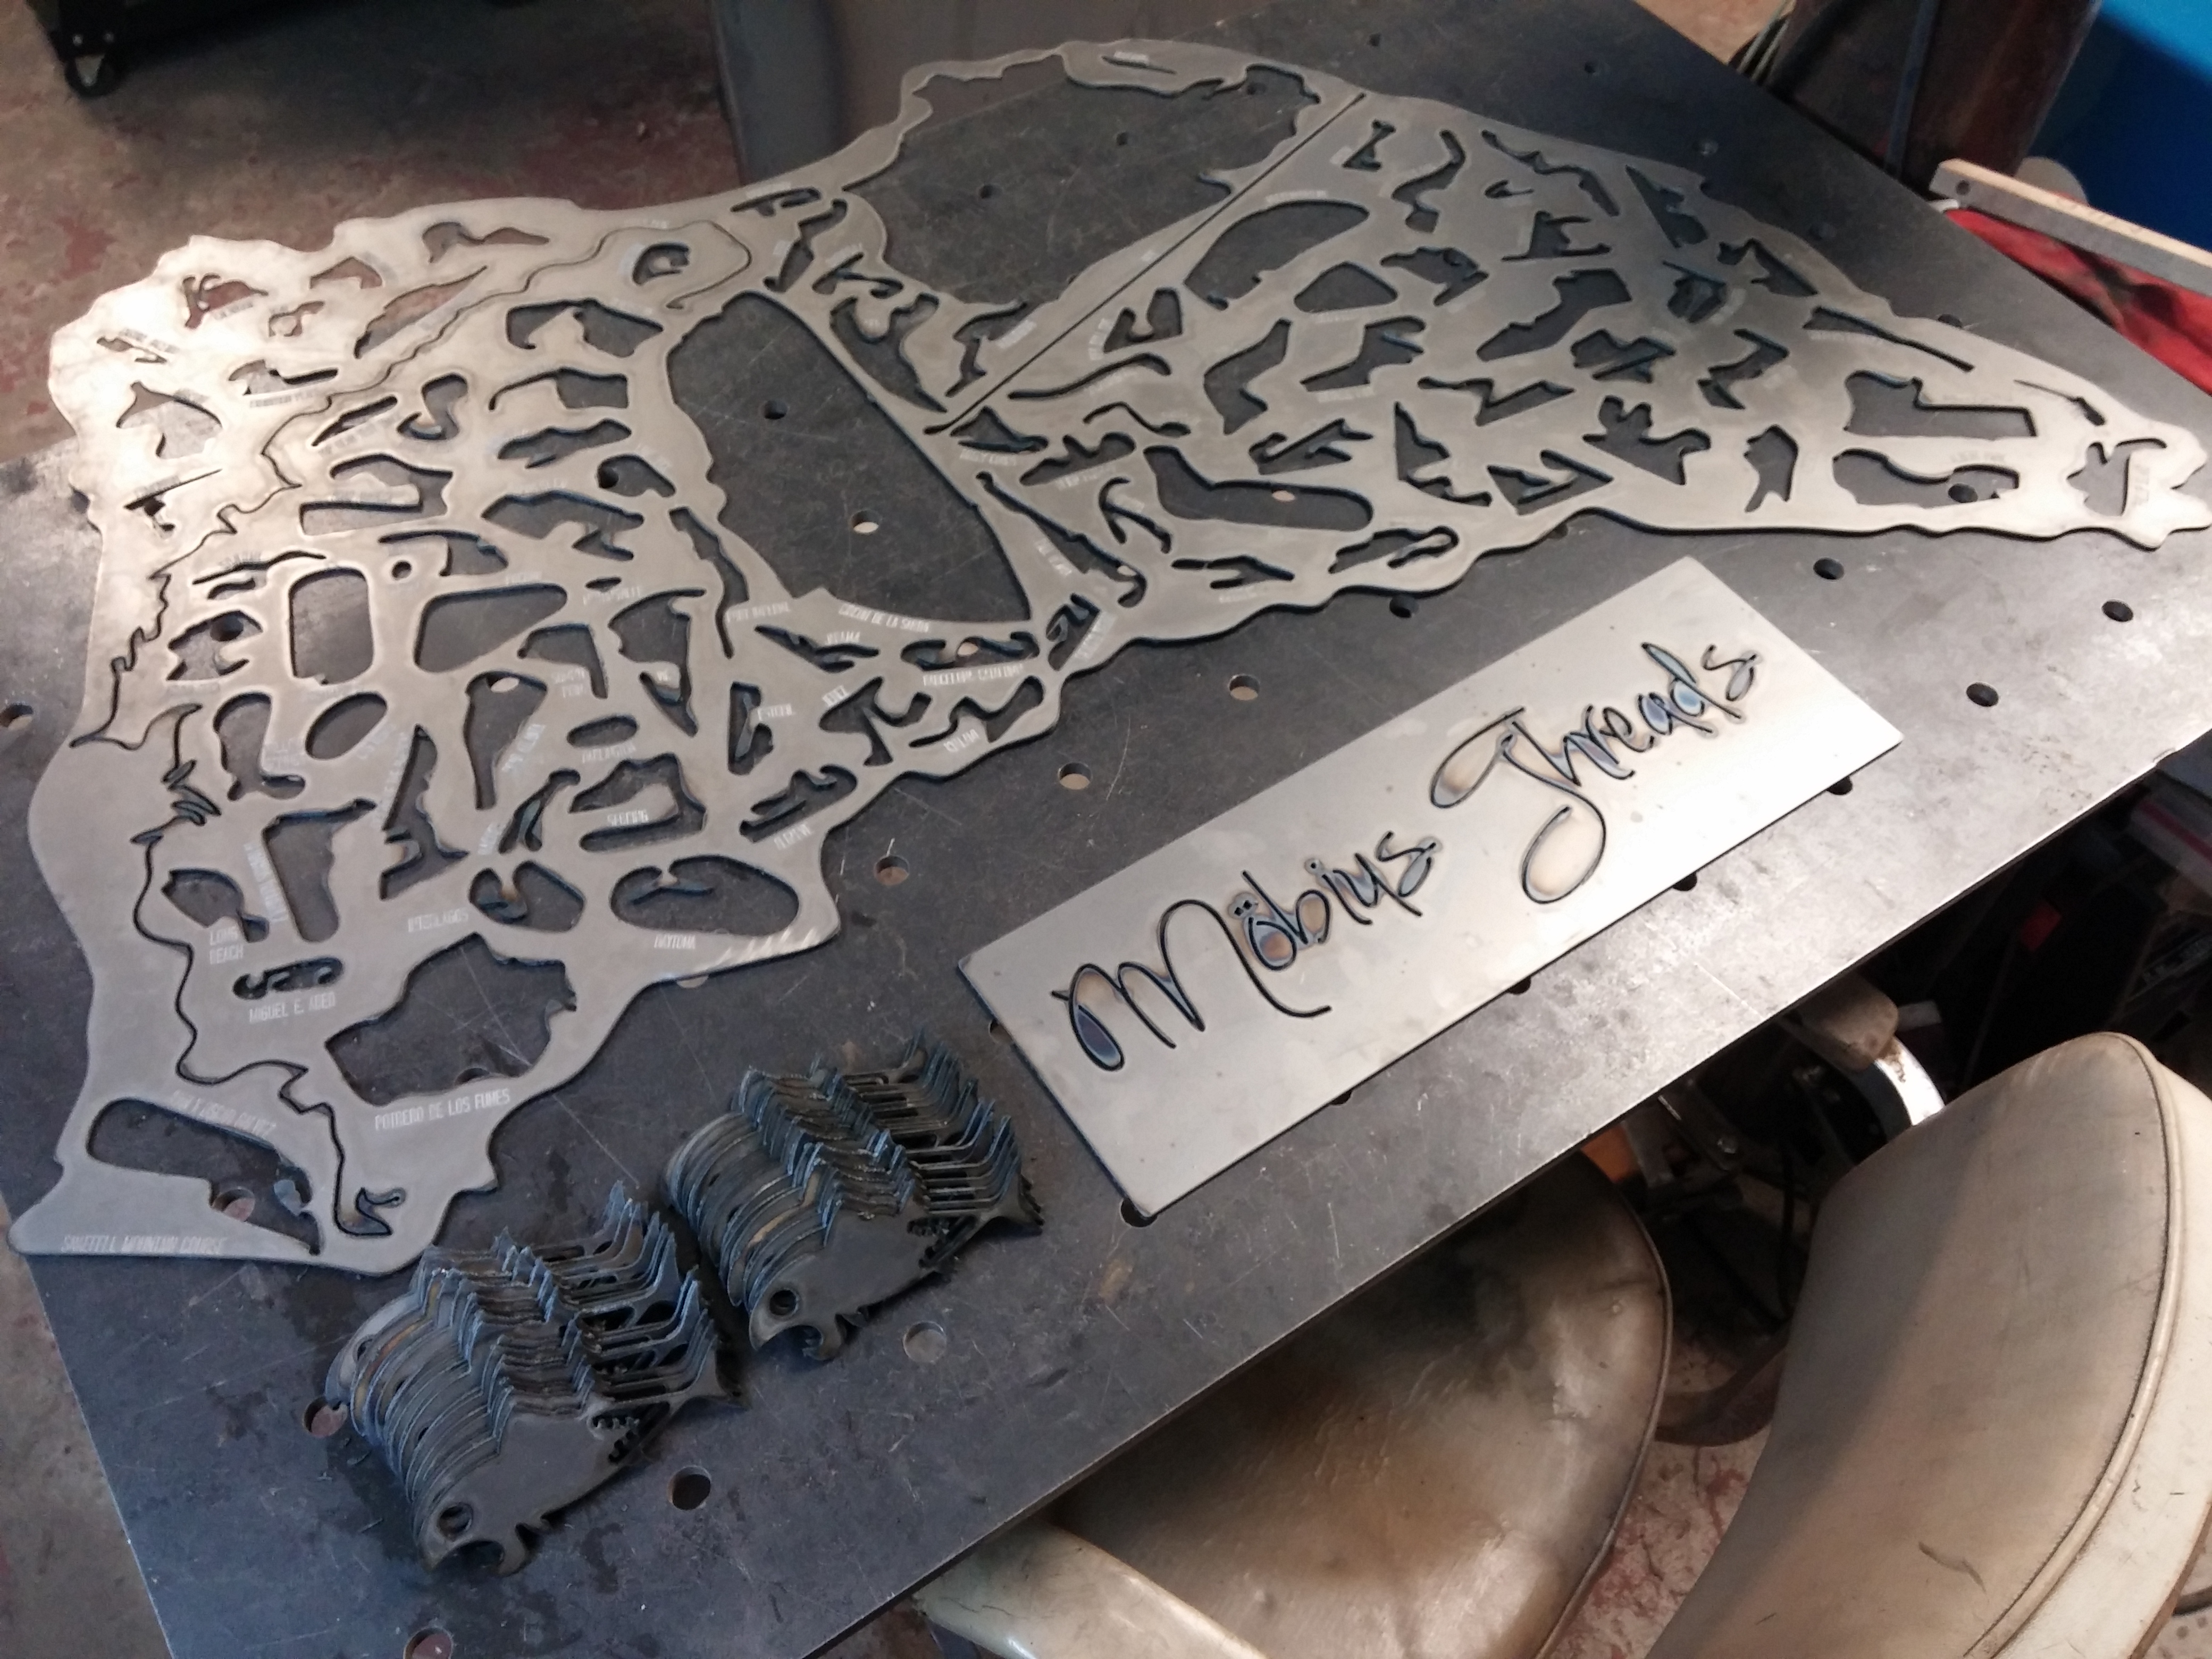
Here’s all the parts fresh off the table. The race track and Möbius Threads sign will have a sanded/brushed finish and the fish will be going in for an acid bath to strip any oils and to easily remove any dross. The fish will be used as powder coat sample tiles. For every new powder we apply a few of these fish will be coated so we can allow customers in the future to choose a finished powder by seeing an actual sample. We have these bottle cap openers for sale. They will be limited run colors and there will be a lot of variations! This is the first batch of four to come out of one steel sheet.
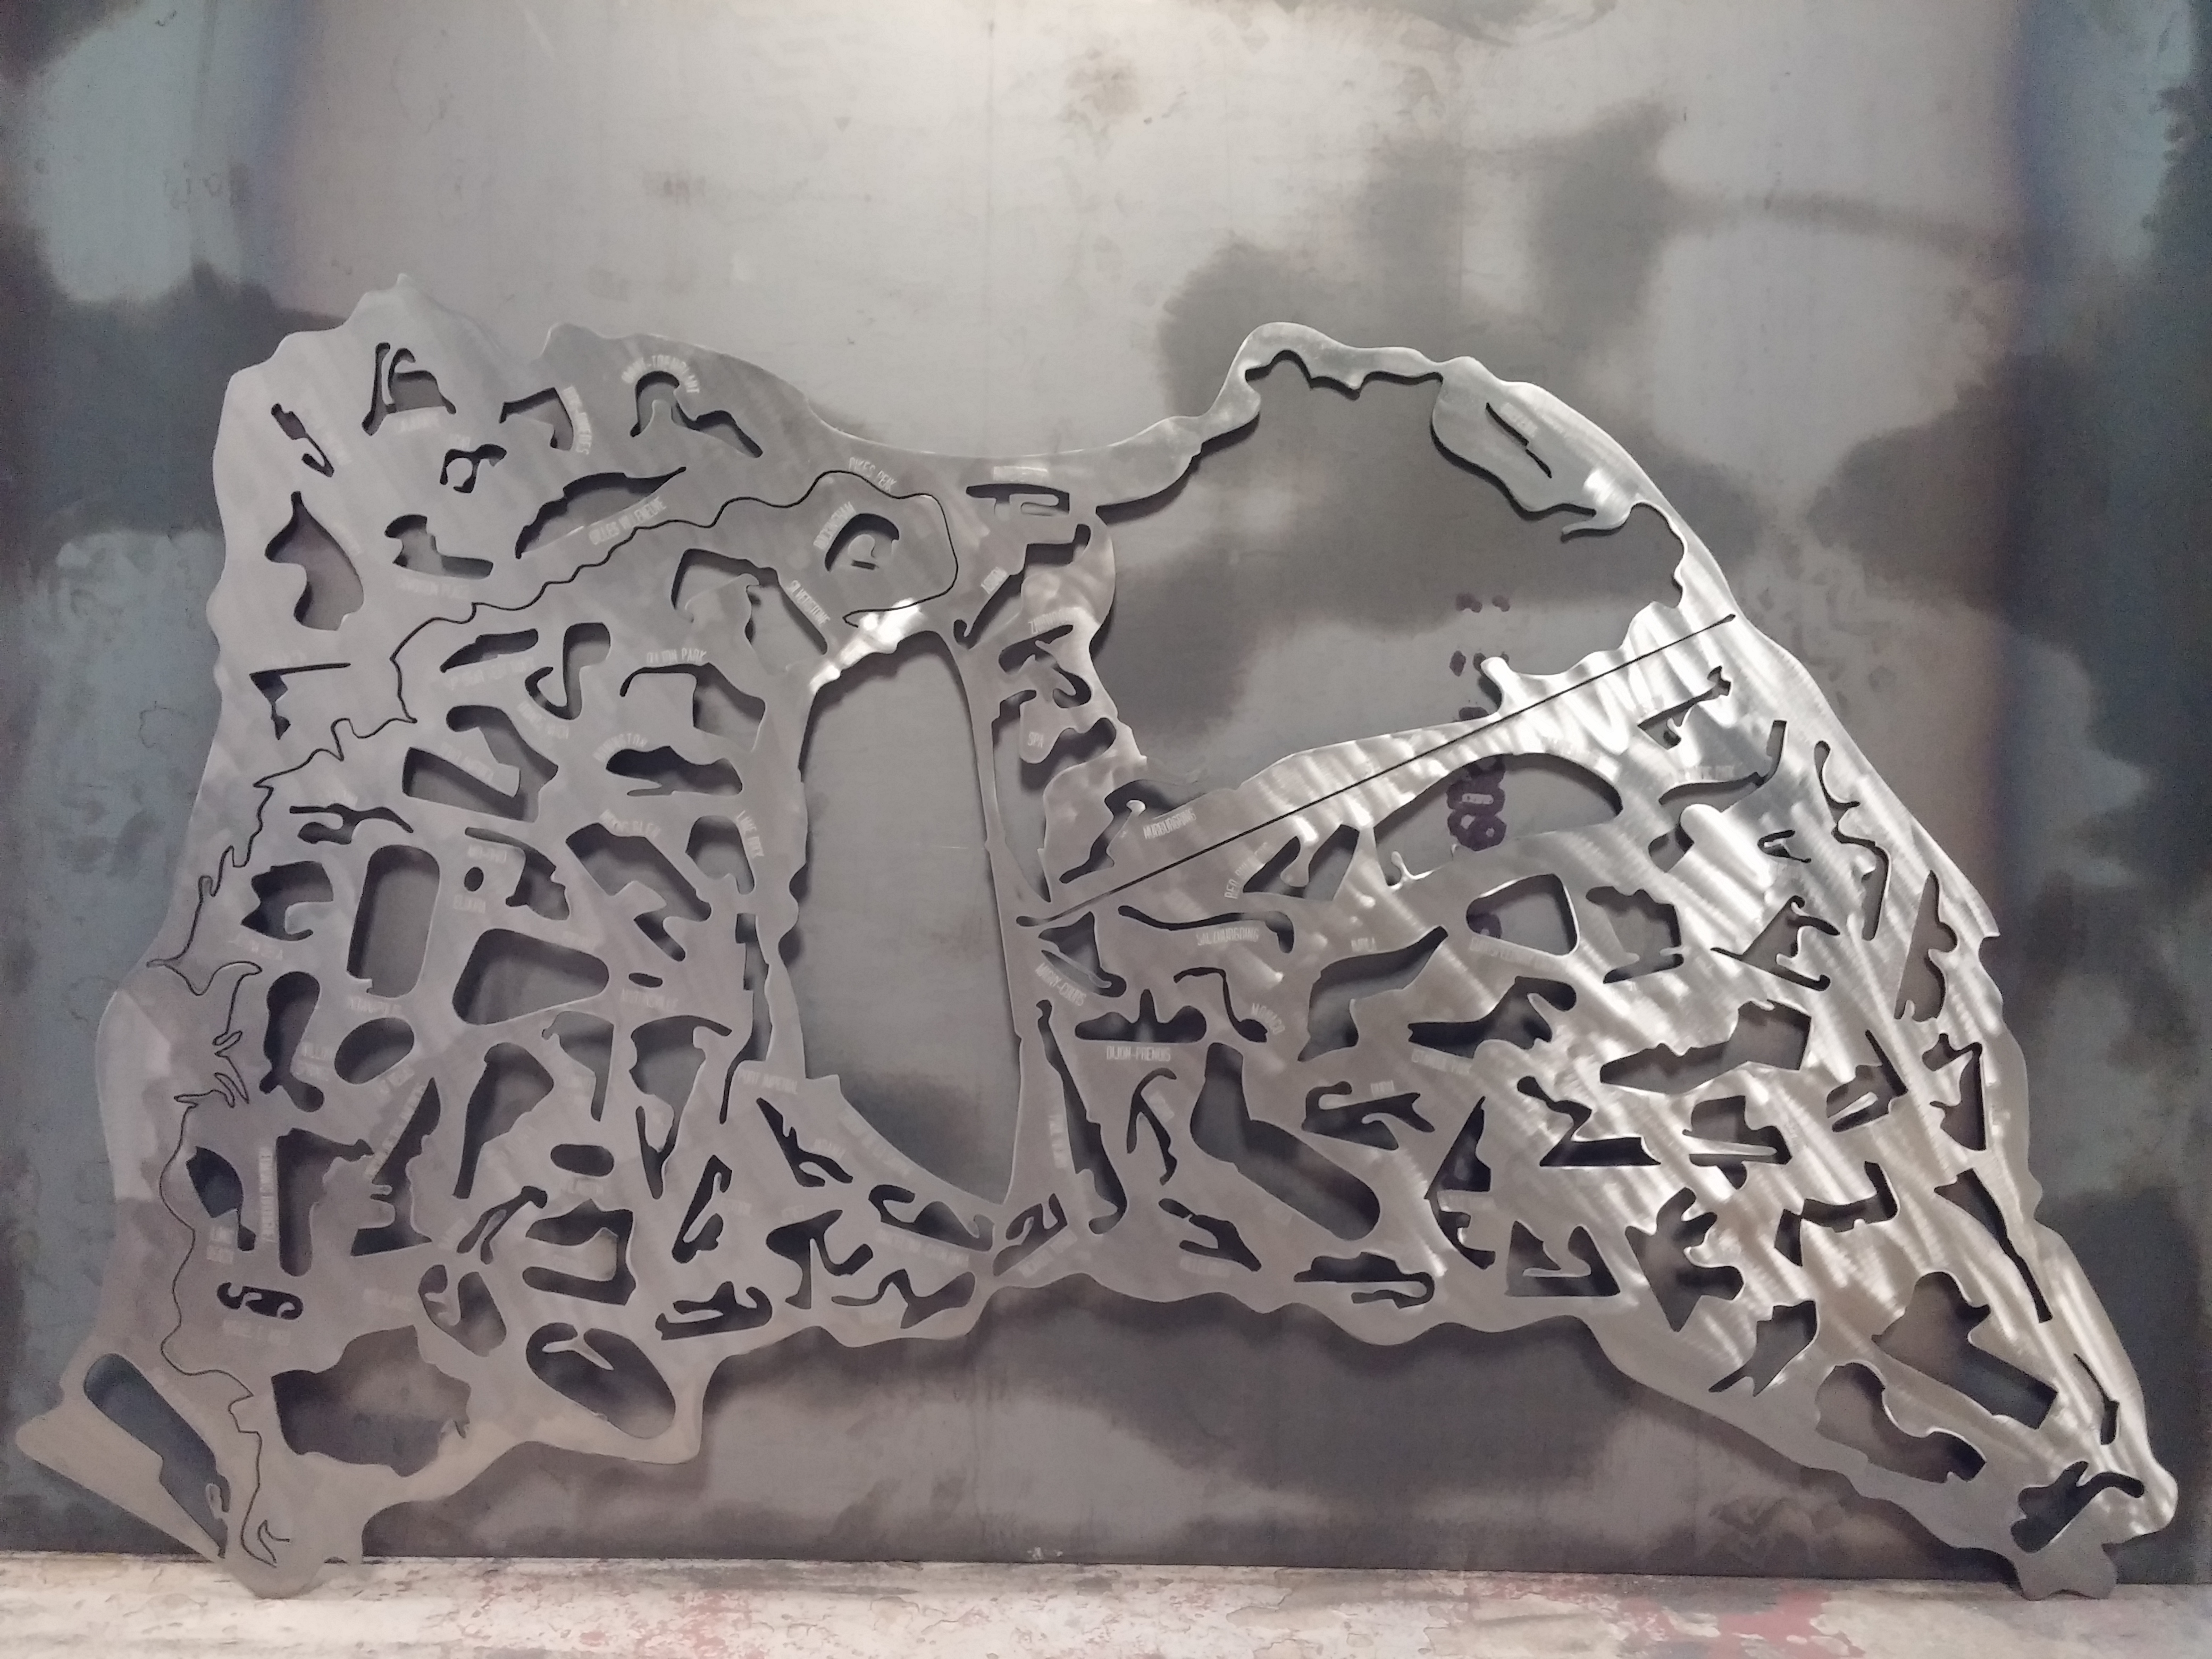
Here it is the track after the sanding process and sealed with boiled linseed oil.
And a whole bunch of fish ready for a final bath in the acid before they are ready for powder coating!
Keep posted for some busy blog posts coming up! Custom electronics, sheet metal fabrication, TIG welding, polishing, powder coating and more! Be sure to follow Mint Design by clicking the “follow” at the bottom right of your browser!
Welding table top, new projects and equipment
Well it’s been a very busy couple weeks in the shop as we’ve just been busy preparing for a lot of future projects and just finishing up a few. We also have some new equipment being brought in and a really interesting project based on Arduino Uno from Newark Electronics coming up too. Here’s some of the things being worked on and a few previews of what’s coming down the pipe.
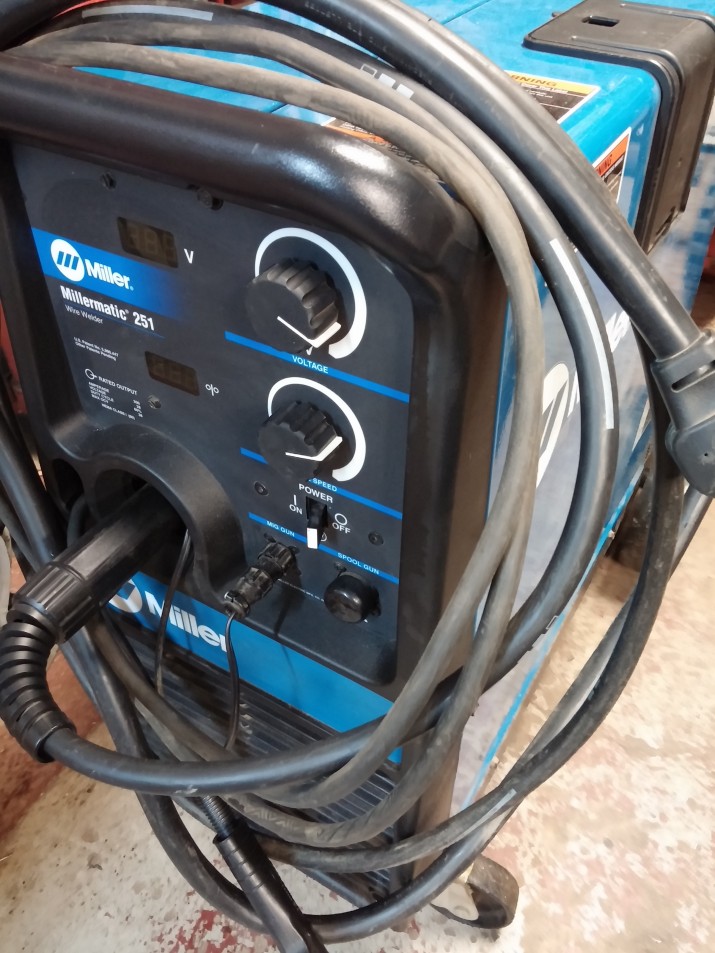
The majority of the welding done at Mint is done via TIG welding process. However we have had an increasing amount of work in the industrial sector which doesn’t require the costly TIG welding process, so we managed to pick up a MIG to speed up fabrication work. We try to buy equipment that gives us the best value and in this case it was a very lightly used Millermatic 251, it can do up to 1/2″ thick steel in a single pass and also work with a spool gun for mass production aluminum work. We don’t have any need for a spool gun just yet, but it’s always nice to have the option to easily add it on. The voltage output is not stepped so it can be infinitely adjusted and recorded if doing the same type of work over and over again. The wire feed value can also be recorded to if doing the similar type of welding, or at least the settings will get us in the ballpark quicker. This is replacing a 110v Lincoln welder, which worked great for thin sheet metal, but anything beyond that it just couldn’t cut it. Keep posted for some future projects relying heavily on this Miller welder.
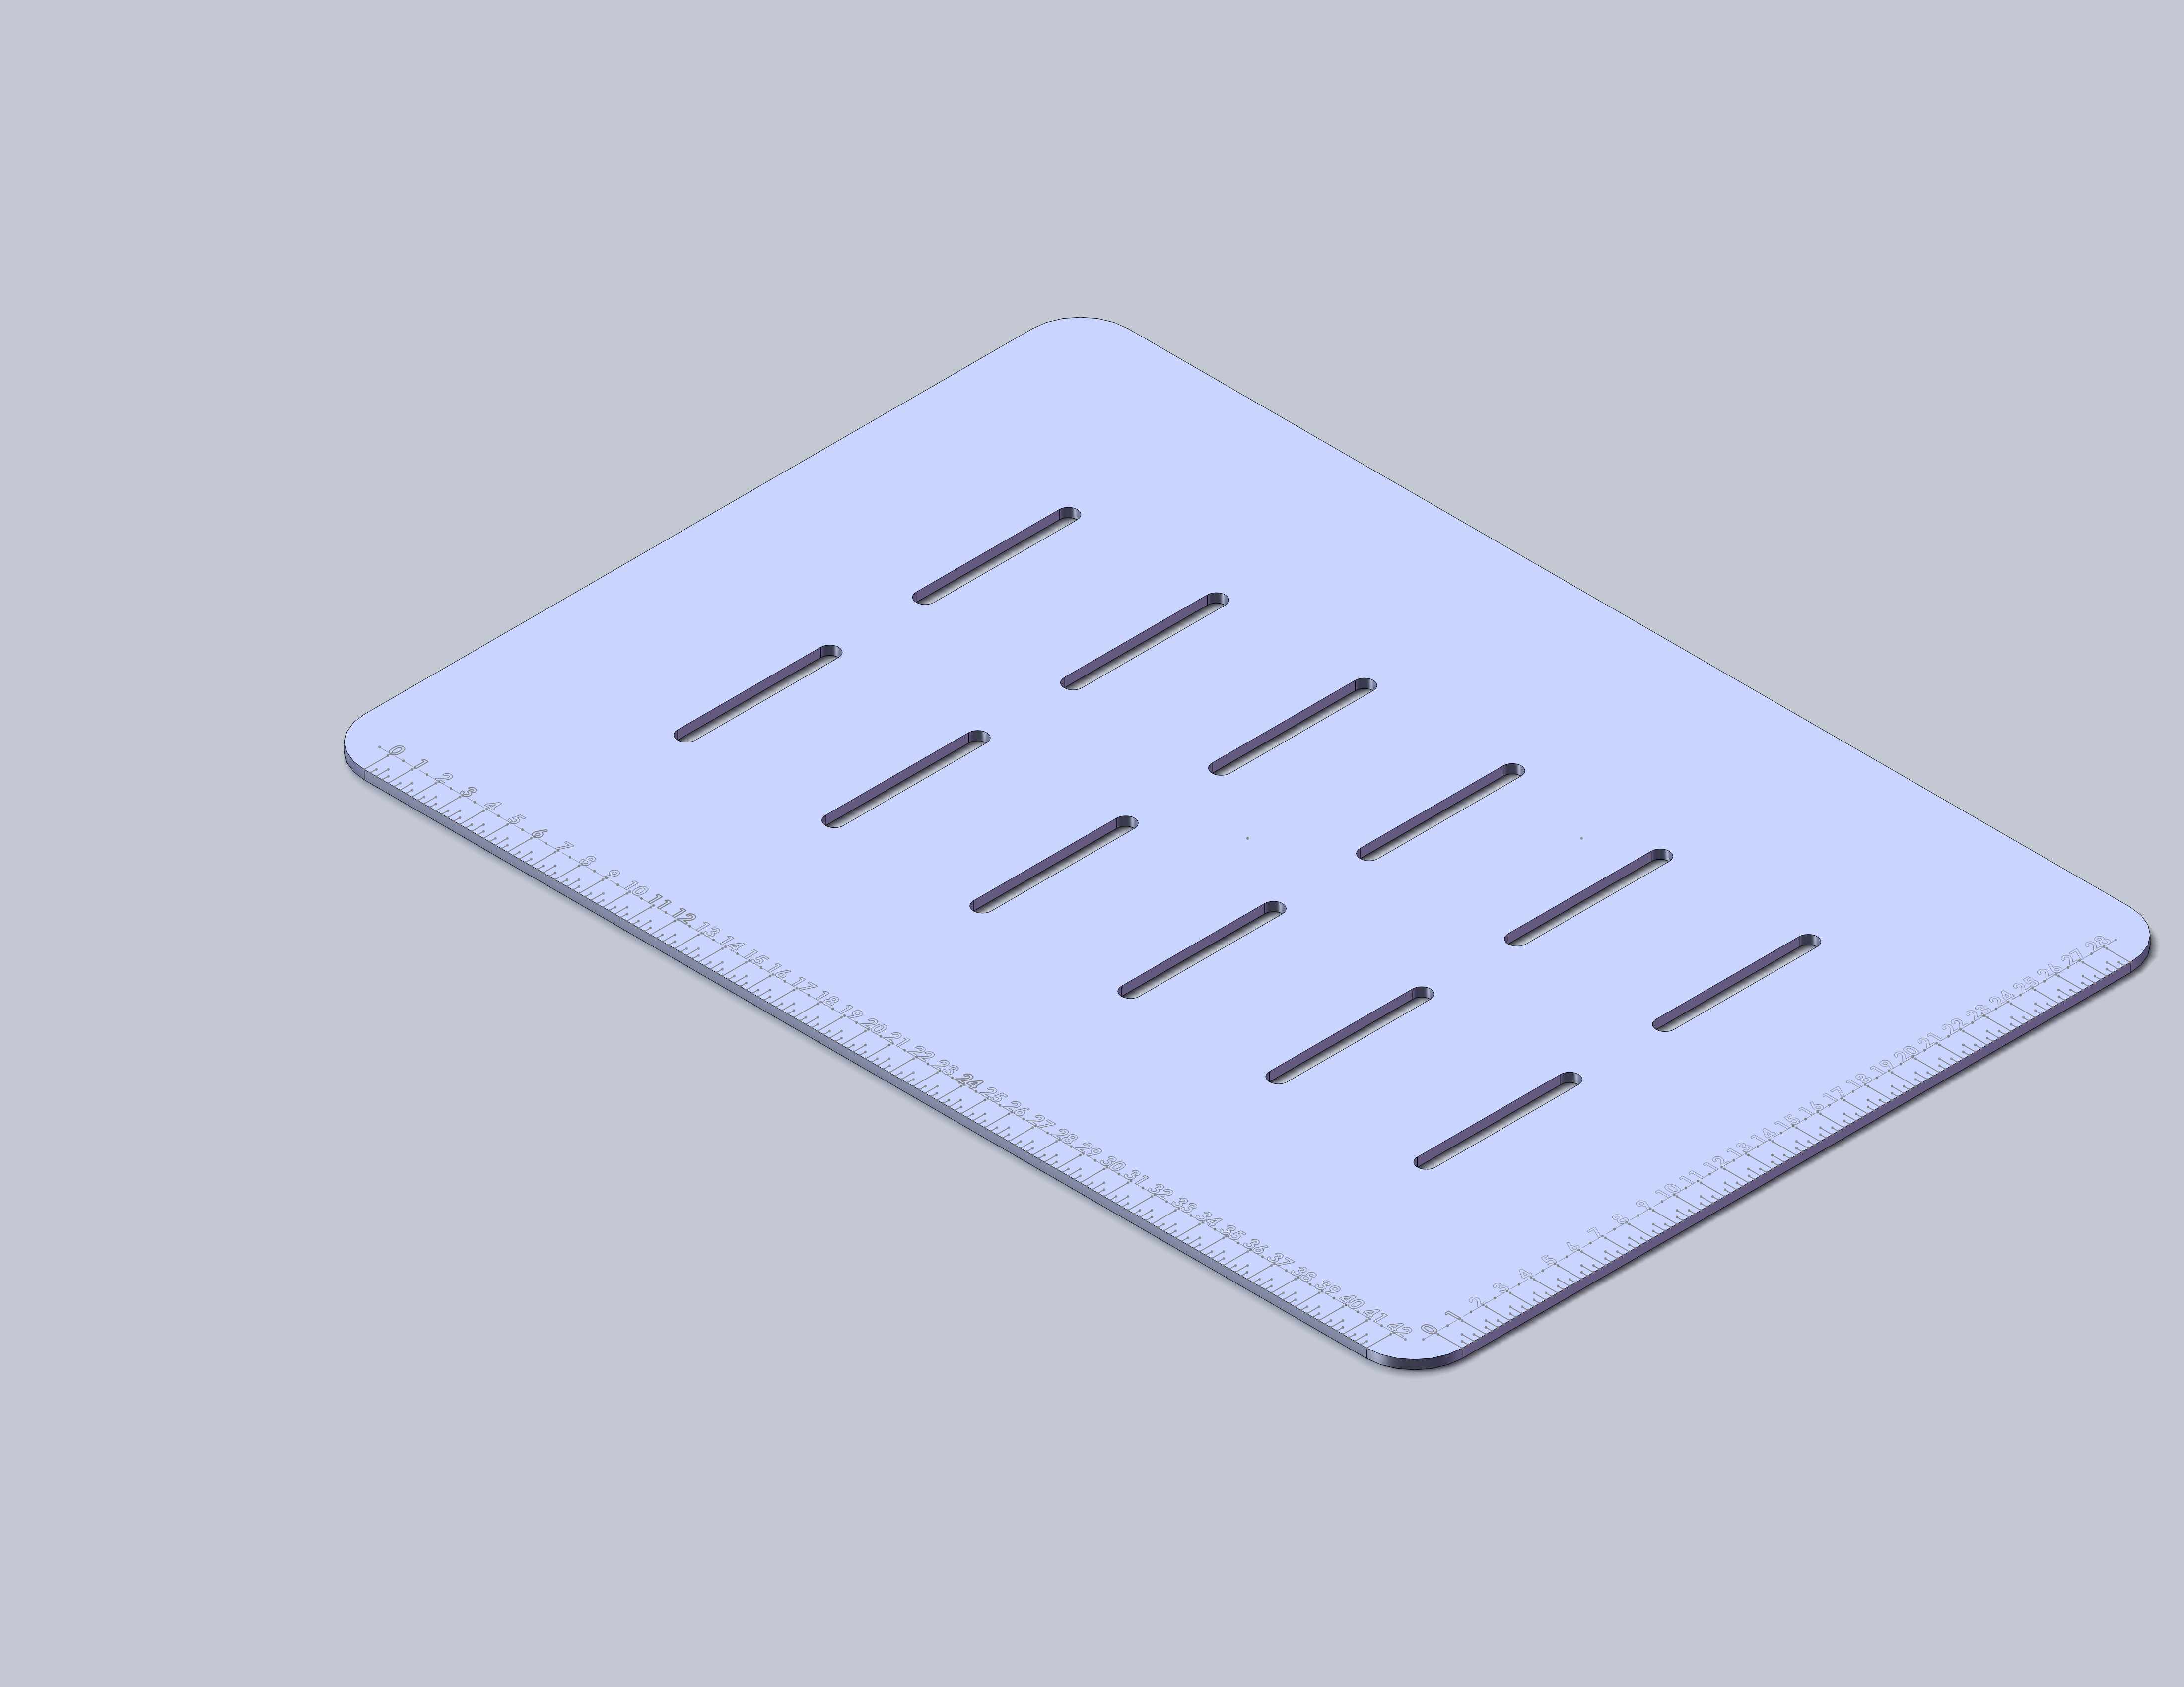
Here we’ve designed and cut out a 3/8″ 44w hot rolled steel welding table that measured 32″x46″ and weighs 150lbs. This is produced for a local fabricator who will be building the frame to go under this top. The one unique feature is the engraved ruler around two sides of the table. That way if you ever misplace a tape measure and need to get a rough 1/4″ measurement you can easily do so at the edge of the table. The table also has slots to allow for use of clamps or other fixtures while welding. Every project is very customer specific, even down to the custom chosen font. It might not seem like much, but when you’re getting something custom from Mint Design, it’s done exactly how you want, right down to the font.
This is one project that has been kept mostly under wraps for the last month and a half, it’s still a work in progress but this is the only preview we can provide. It’s a prototype, and yes it doesn’t show much. The production unit is been redesigned to be easier to manufacture and will be offered in three different powder coated colors. They’ll be ready before Fathers Day so keep posted!
A few of the other projects on the go are a custom CNC cut 1/4″ stainless steel handle on a samurai sword, some CNC cut race tracks out of 14ga steel, lots of powder coating and a fully polished 304 SS show car Cadillac exhaust system. Also an Arduino Uno (supplied from Newark Electronics) electronic/mechanical project that will be developed in the shop.
Also since getting back from Costa Rica mid-March I have been editing our trip video when I am not busy with my family or in the shop. It’s finally completed, so grab a seat and please enjoy our Costa Rica trip video until the next blog post!
CNC cut signs, powder coating, TIG welding
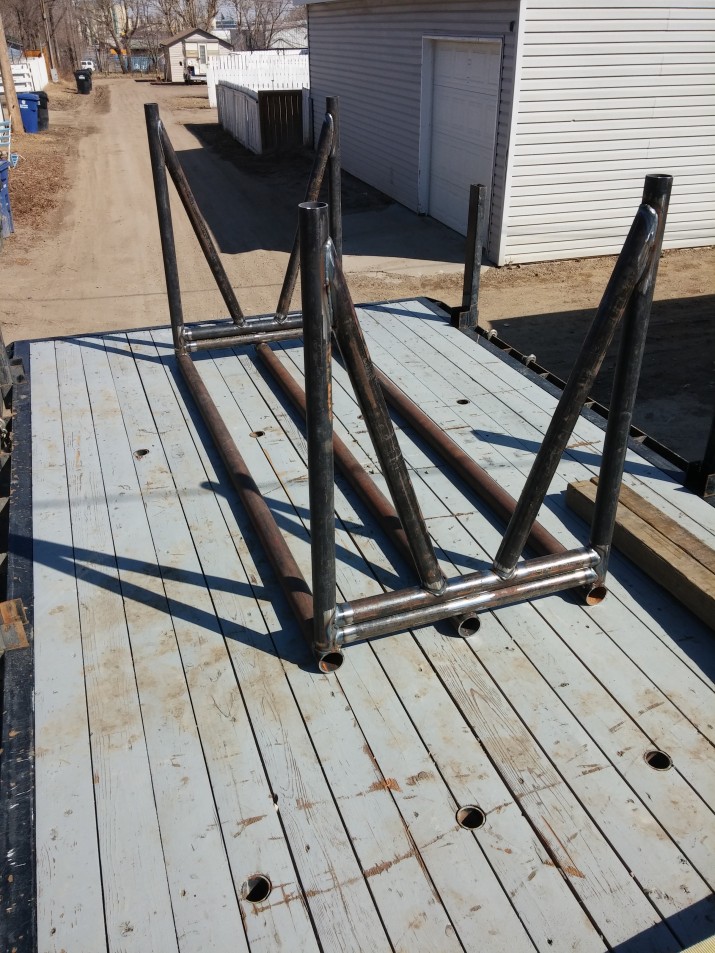
Lots of projects on the go, everything from CNC cut signs, powder coating, TIG welding stainless steel/aluminum parts to MIG welding a 280# steel pipe rack.
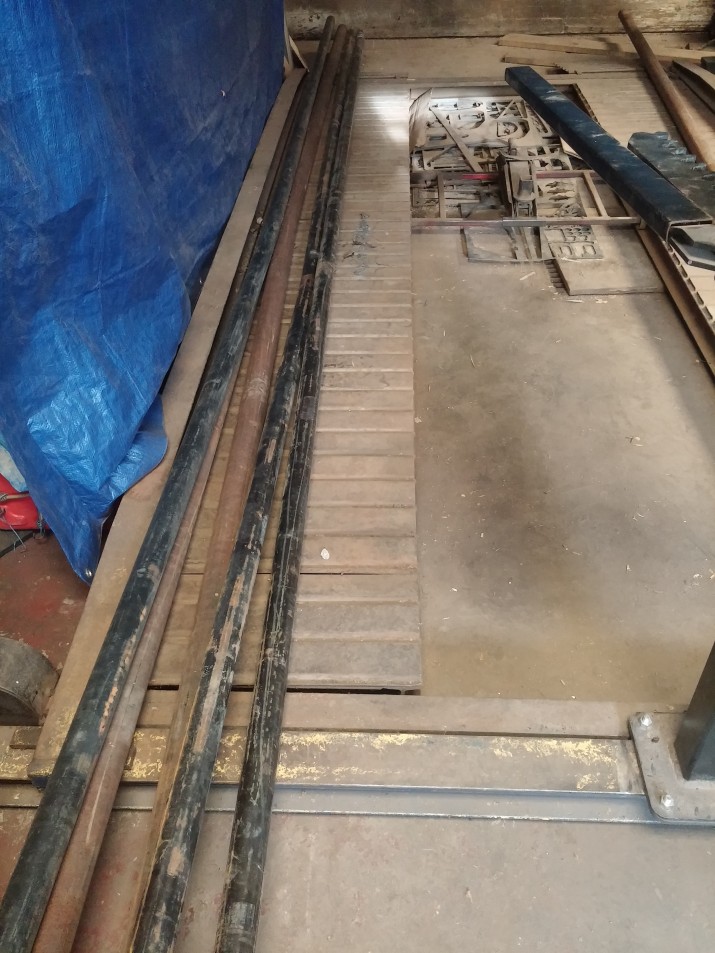
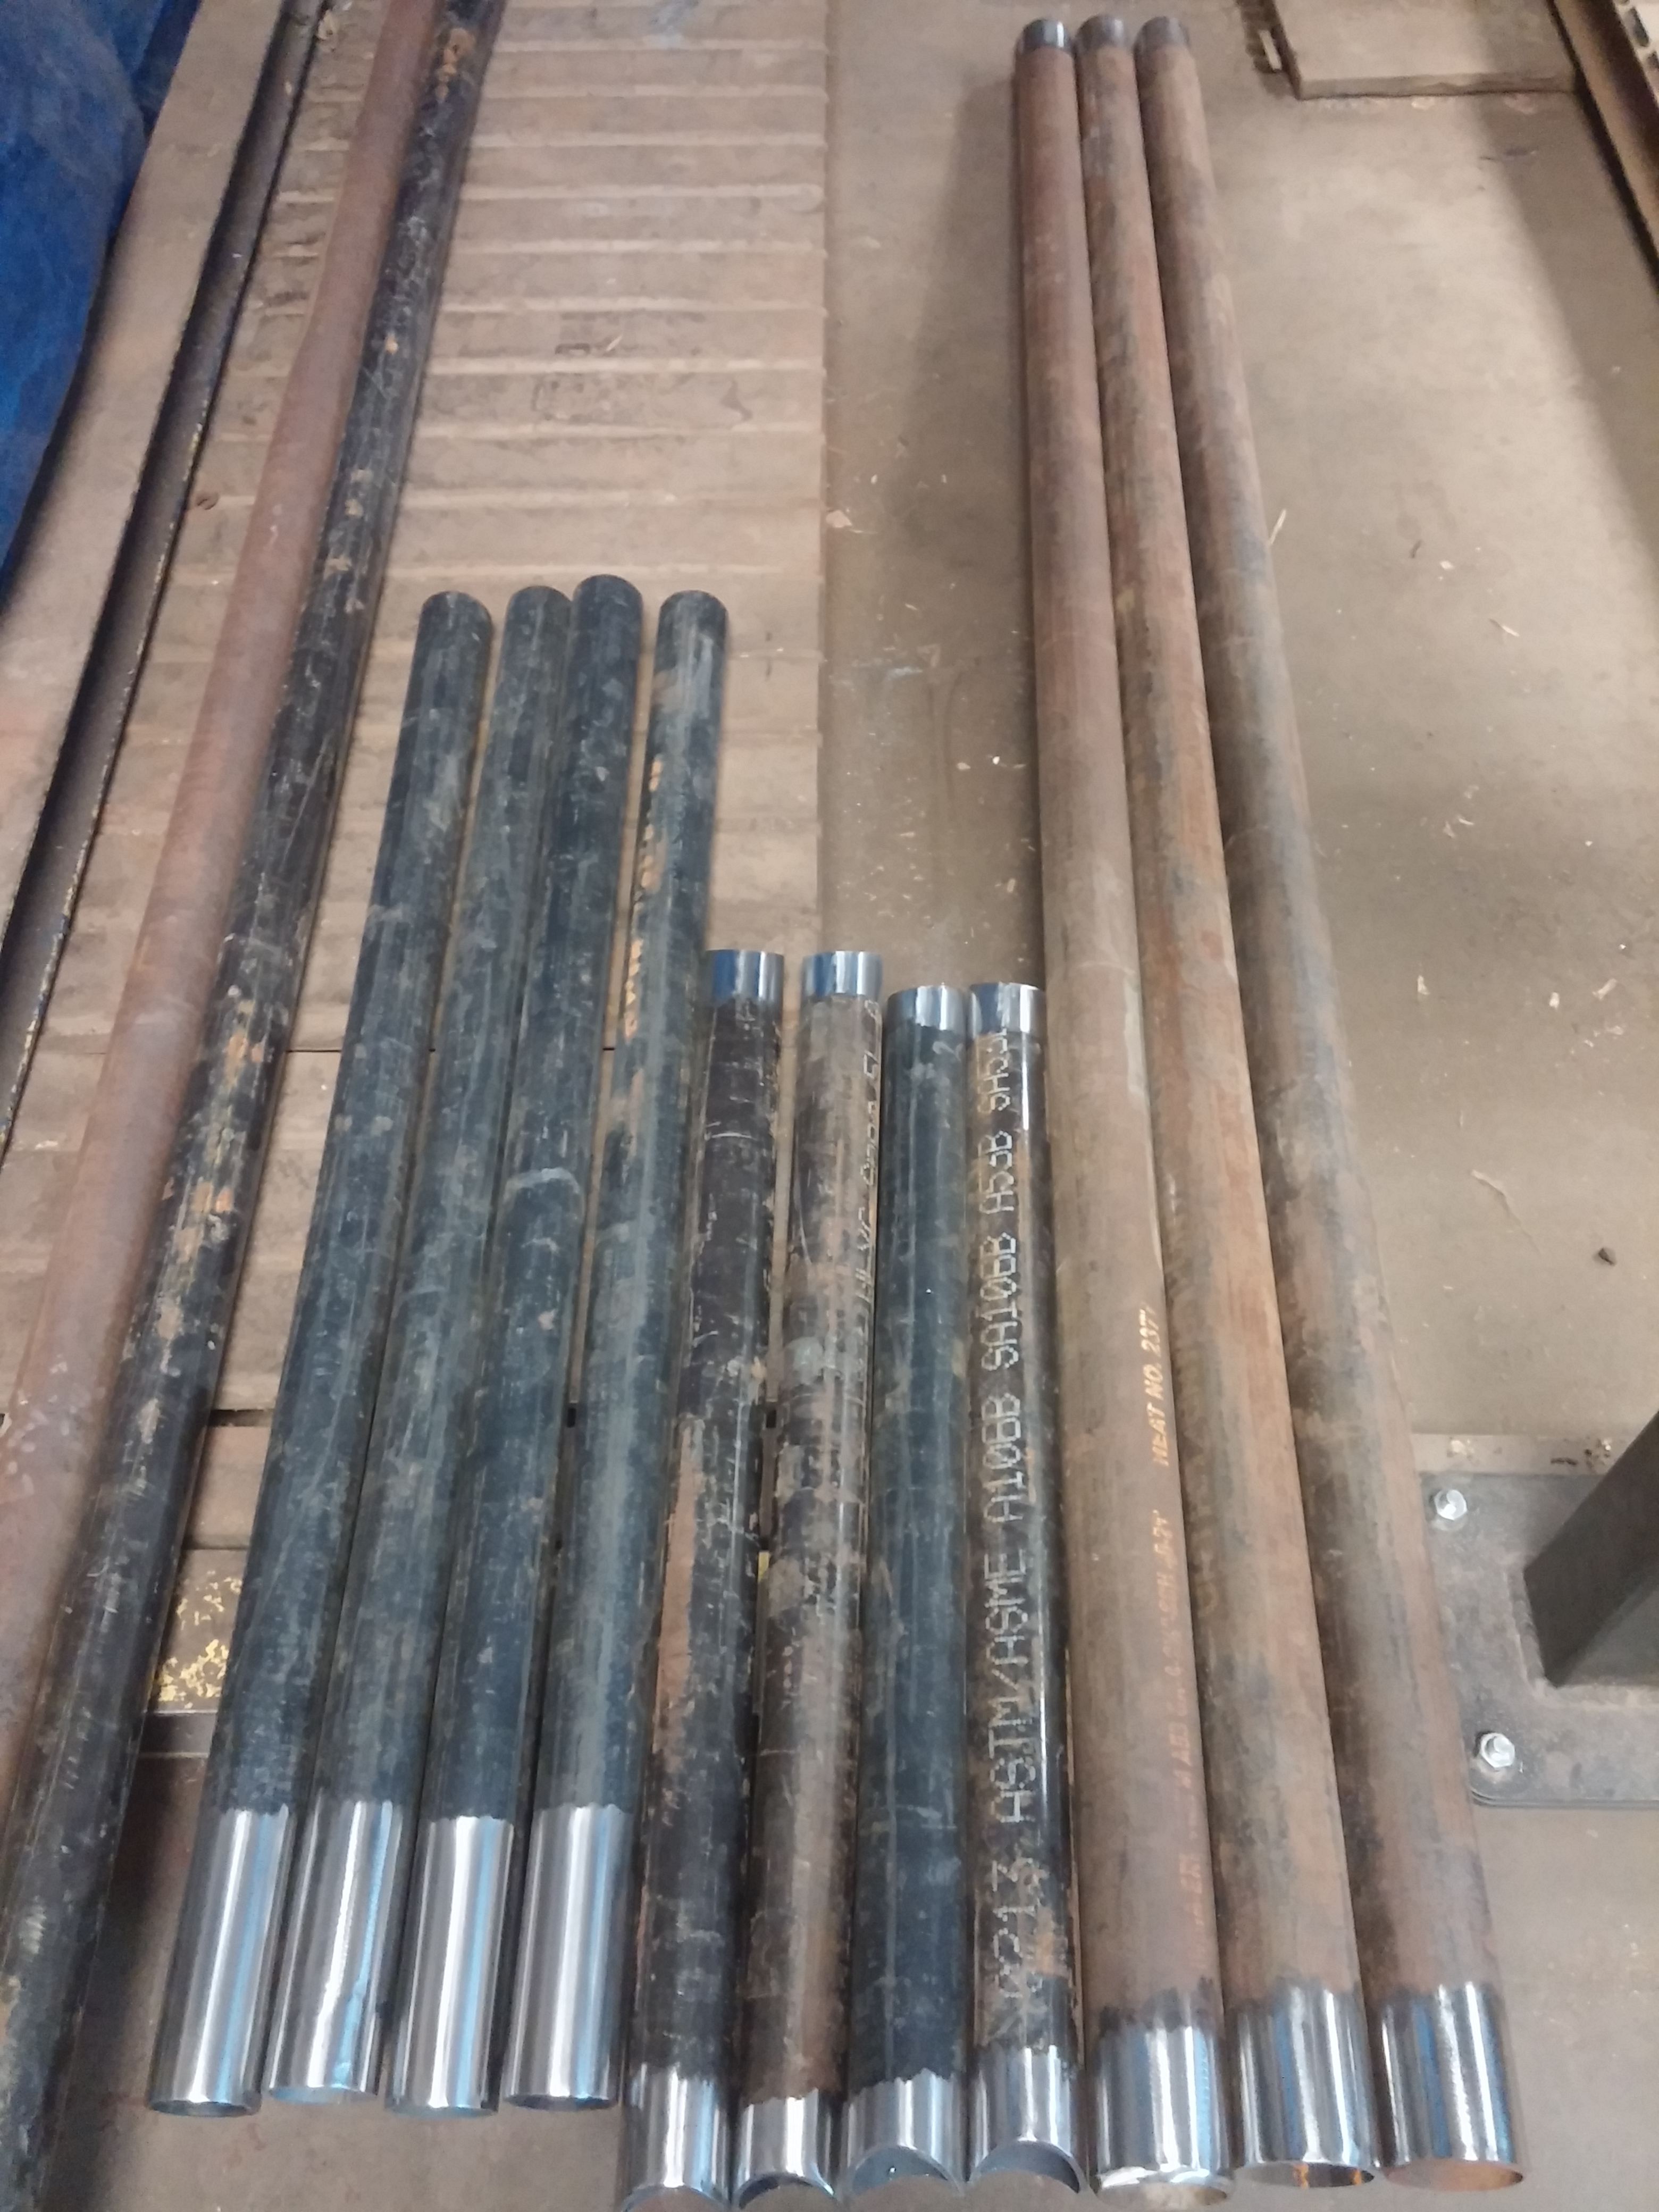
Most projects we supply the material for the job at hand, however we also accept customer supplied material too. Here we have some 2″ and 2.5″ SCH40 pipe dropped off and ready for processing. We had a design submitted from the customer and it is now time to get to work!
We took the customer design, modeled it in Solidworks to get an idea of weight and to help with creating coping templates for the “v” section of tubing.

Most tubing can be coped with a hole saw in a tube/pipe notcher. However with SCH40 material of this size coping it on the bandsaw is much quicker and more cost effective. Notice the c-clamp at the bottom left of the photo. This ensures a consistent cut location by allowing the tube to butt up against it prior to cutting. Repeatability just makes things so much easier and quicker.
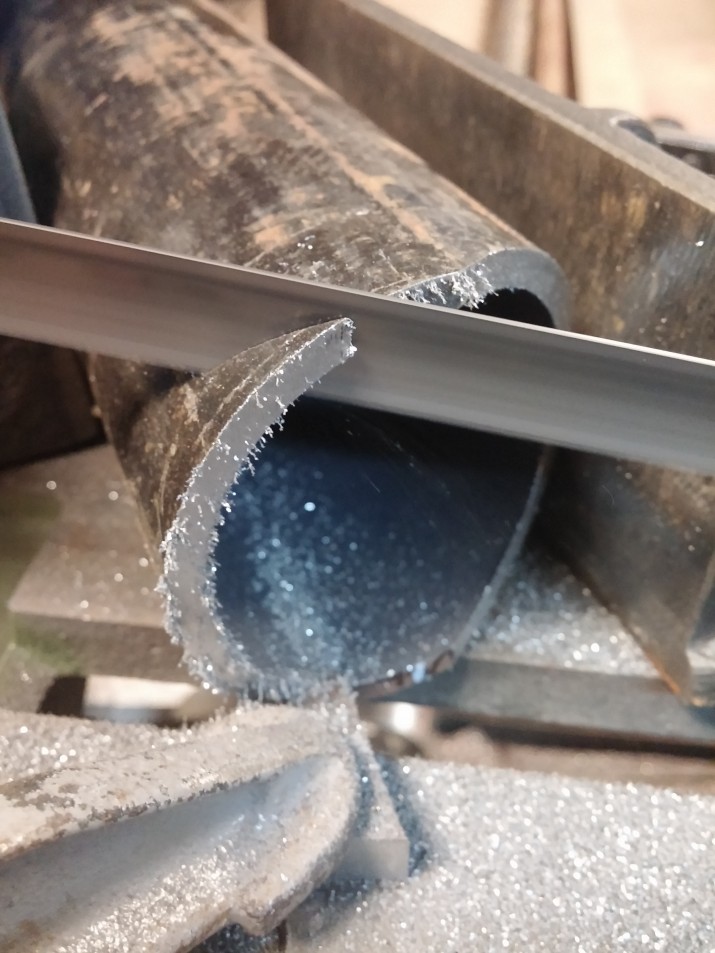
Here’s all the tubing processed (except for the “v” sections), the ends are cleaned down to raw material to ensure a good quality area to weld to.
And here’s the final product ready to head back to the client’s shop. It will be used to drop in various pipe via forklift and then allow it to be easily banded and removed as a whole with a forklift.
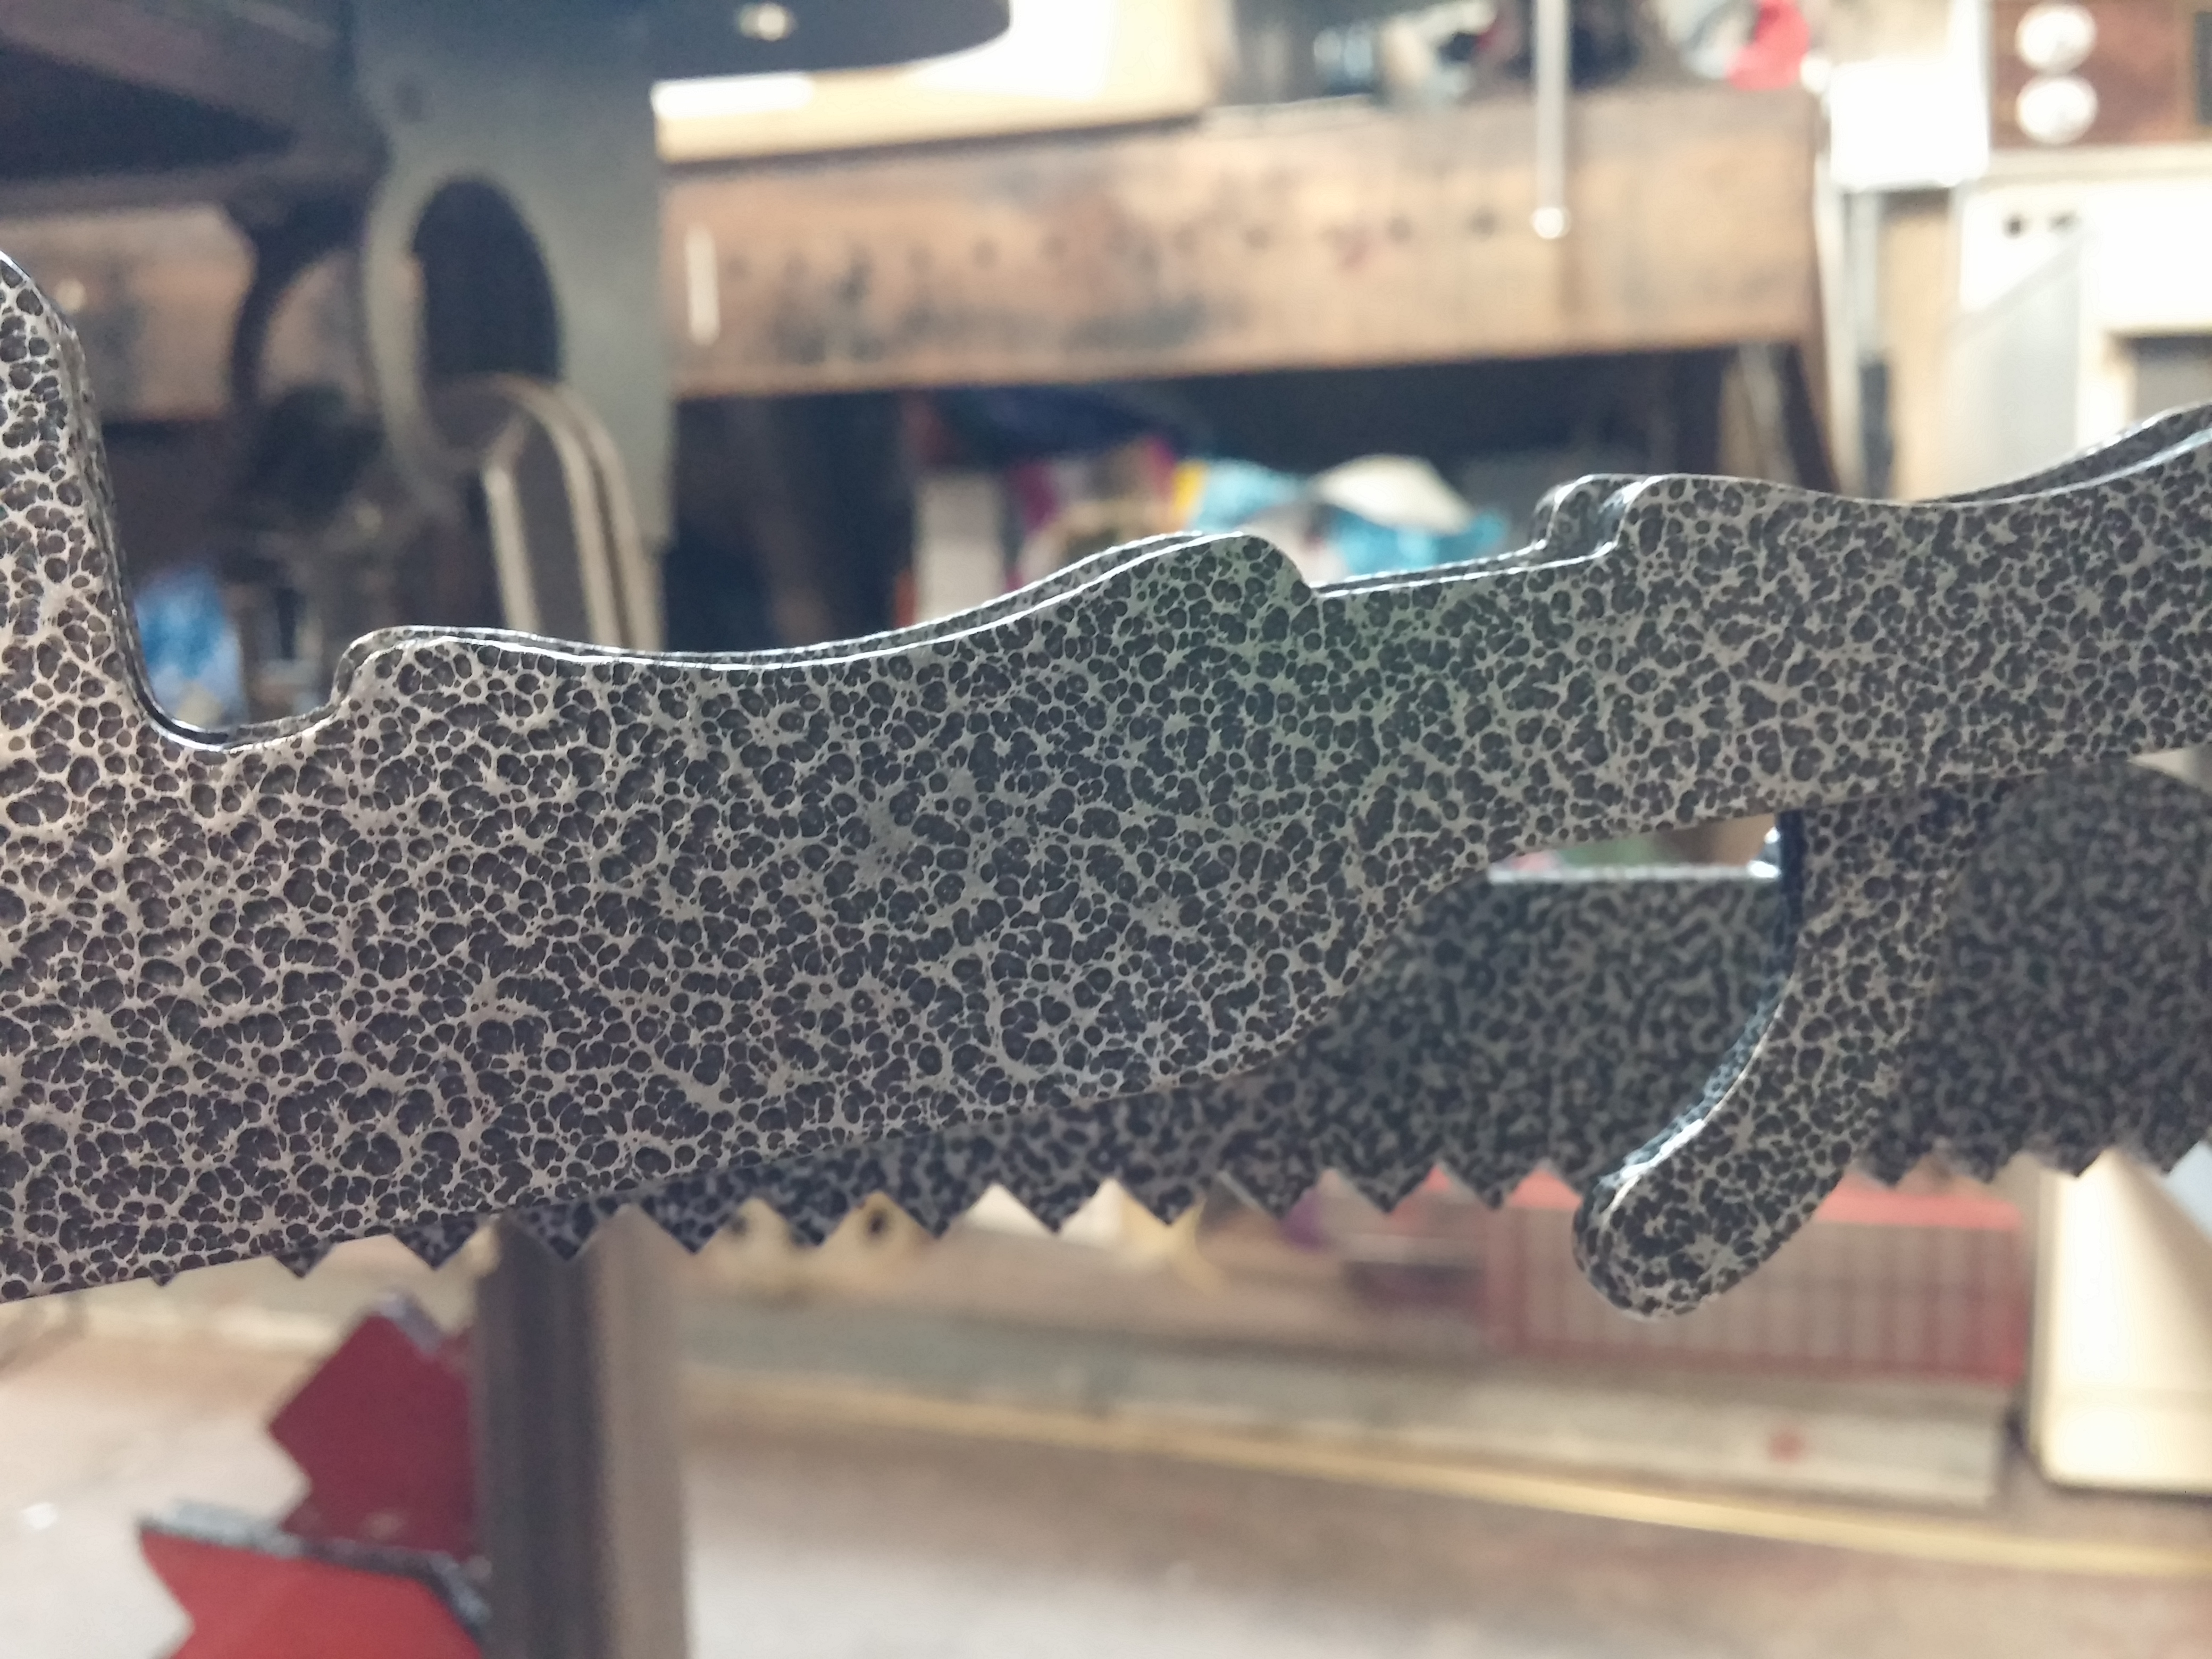
Here we have a modern sign made for a local home builder cut out of 1/4″ steel. This is after it is cut, acid bathed and media blasted. It has some weight to it and is now ready for powder coating. This is the first time we’ve powder coated a part that has been previously engraved. Notice the engraving near the bottom of the part?
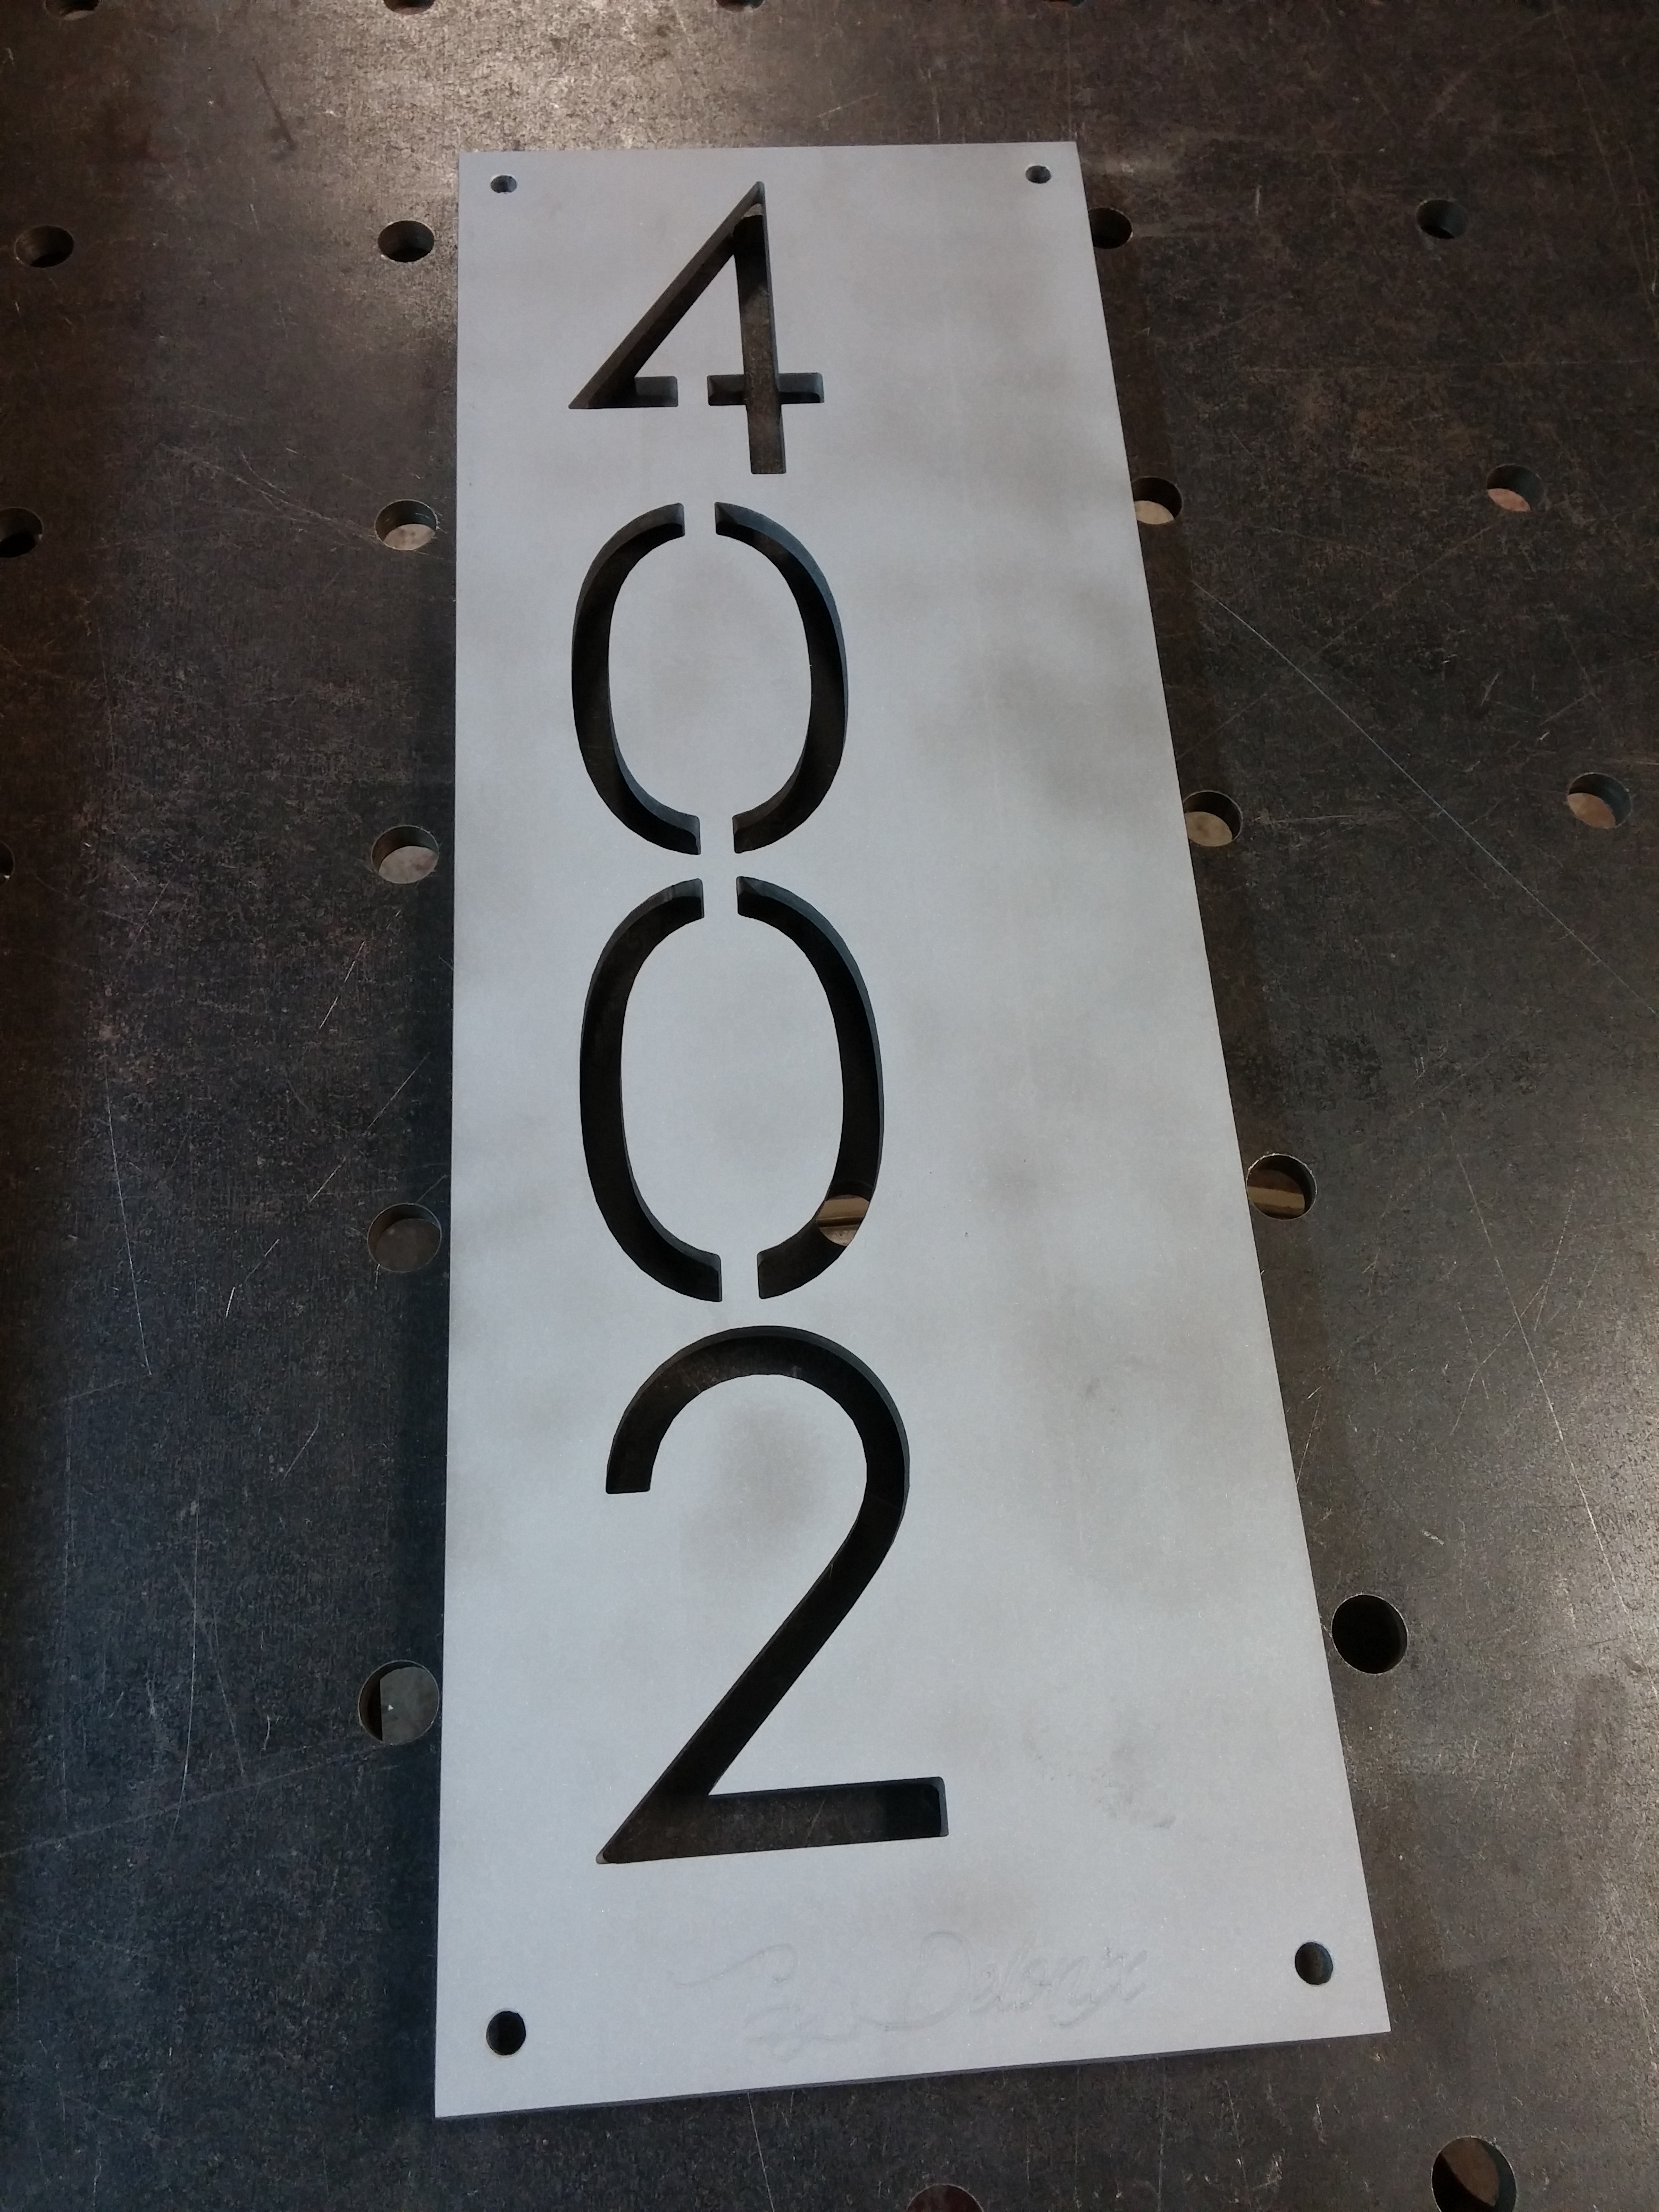
Here it is after having bonded silver vein powder applied to it. And the engraving disappeared…
Powder looks really good and has a slight texture to it, which is why it filled in the engraving.
So here’s the solution. Engraving and cutting a 16ga 304SS piece to be secured with the two bottom mounting holes. Looks much better!
Here we’ve got a few 304SS pieces that need welding, a few alignment marks from the customer and some tweaks are needed prior to welding.
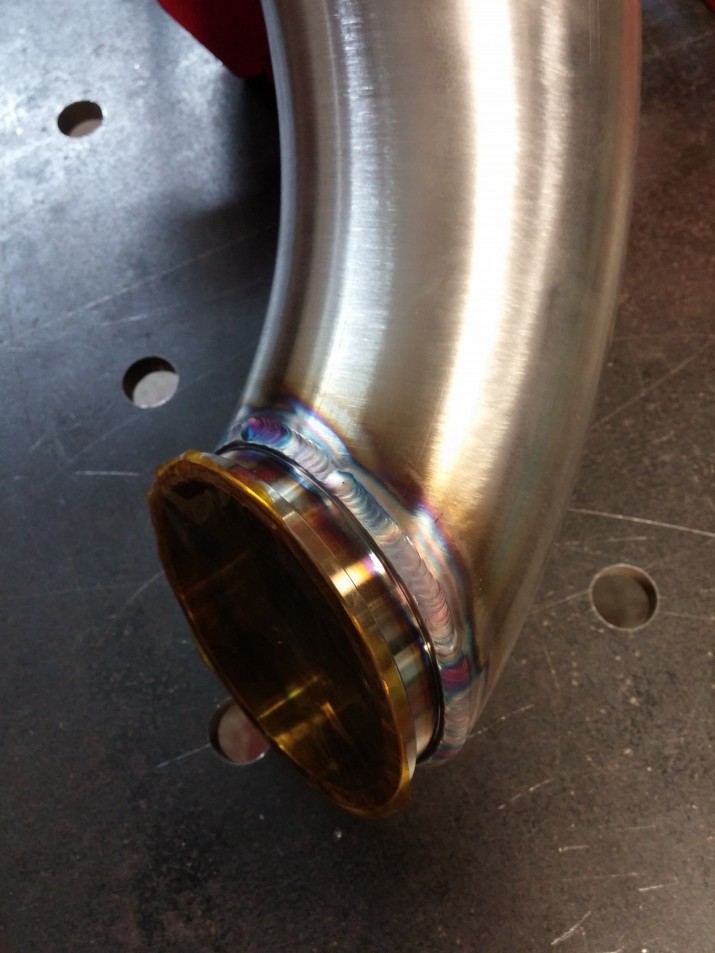
No problem! Everything stainless steel is backpurged to ensure that there is 100% penetration and to ensure that the inside of the weld is just as protected, strong and as beautiful as the outside weld.
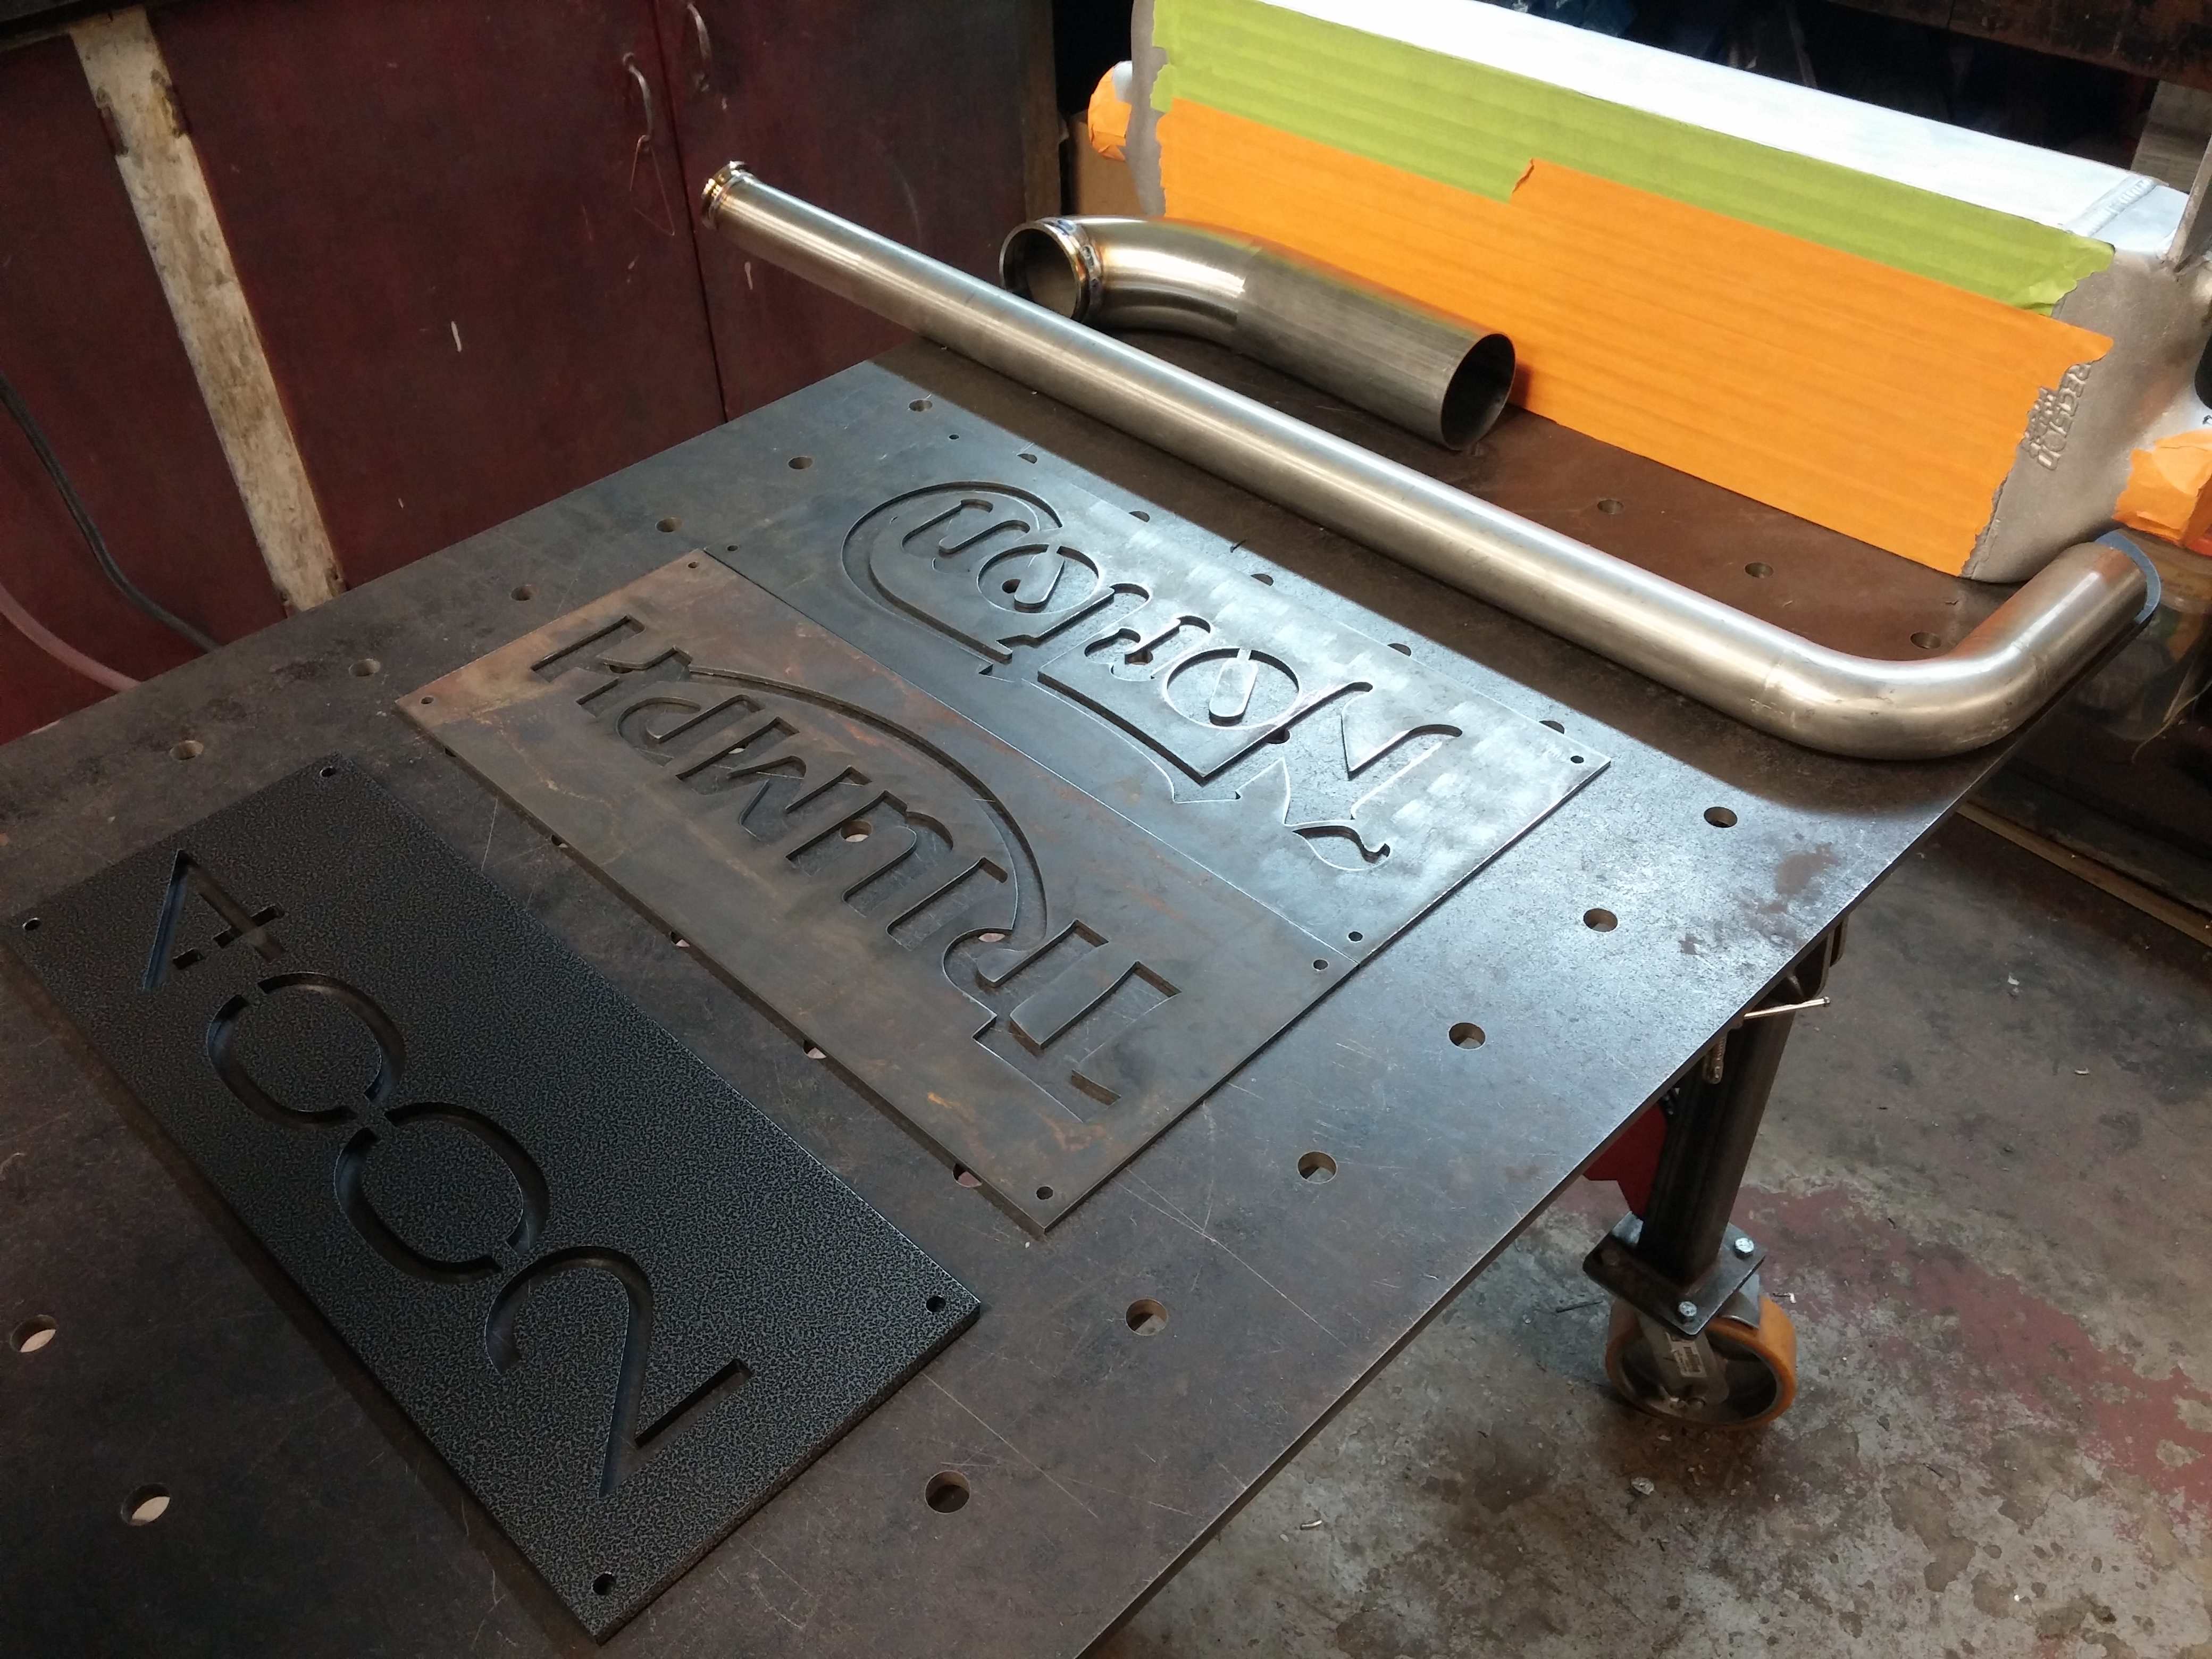
Miscellaneous parts needing some last minute work prior to a car show coming up. It’s not every day we can do same evening turnarounds…but in some cases we can make it happen.
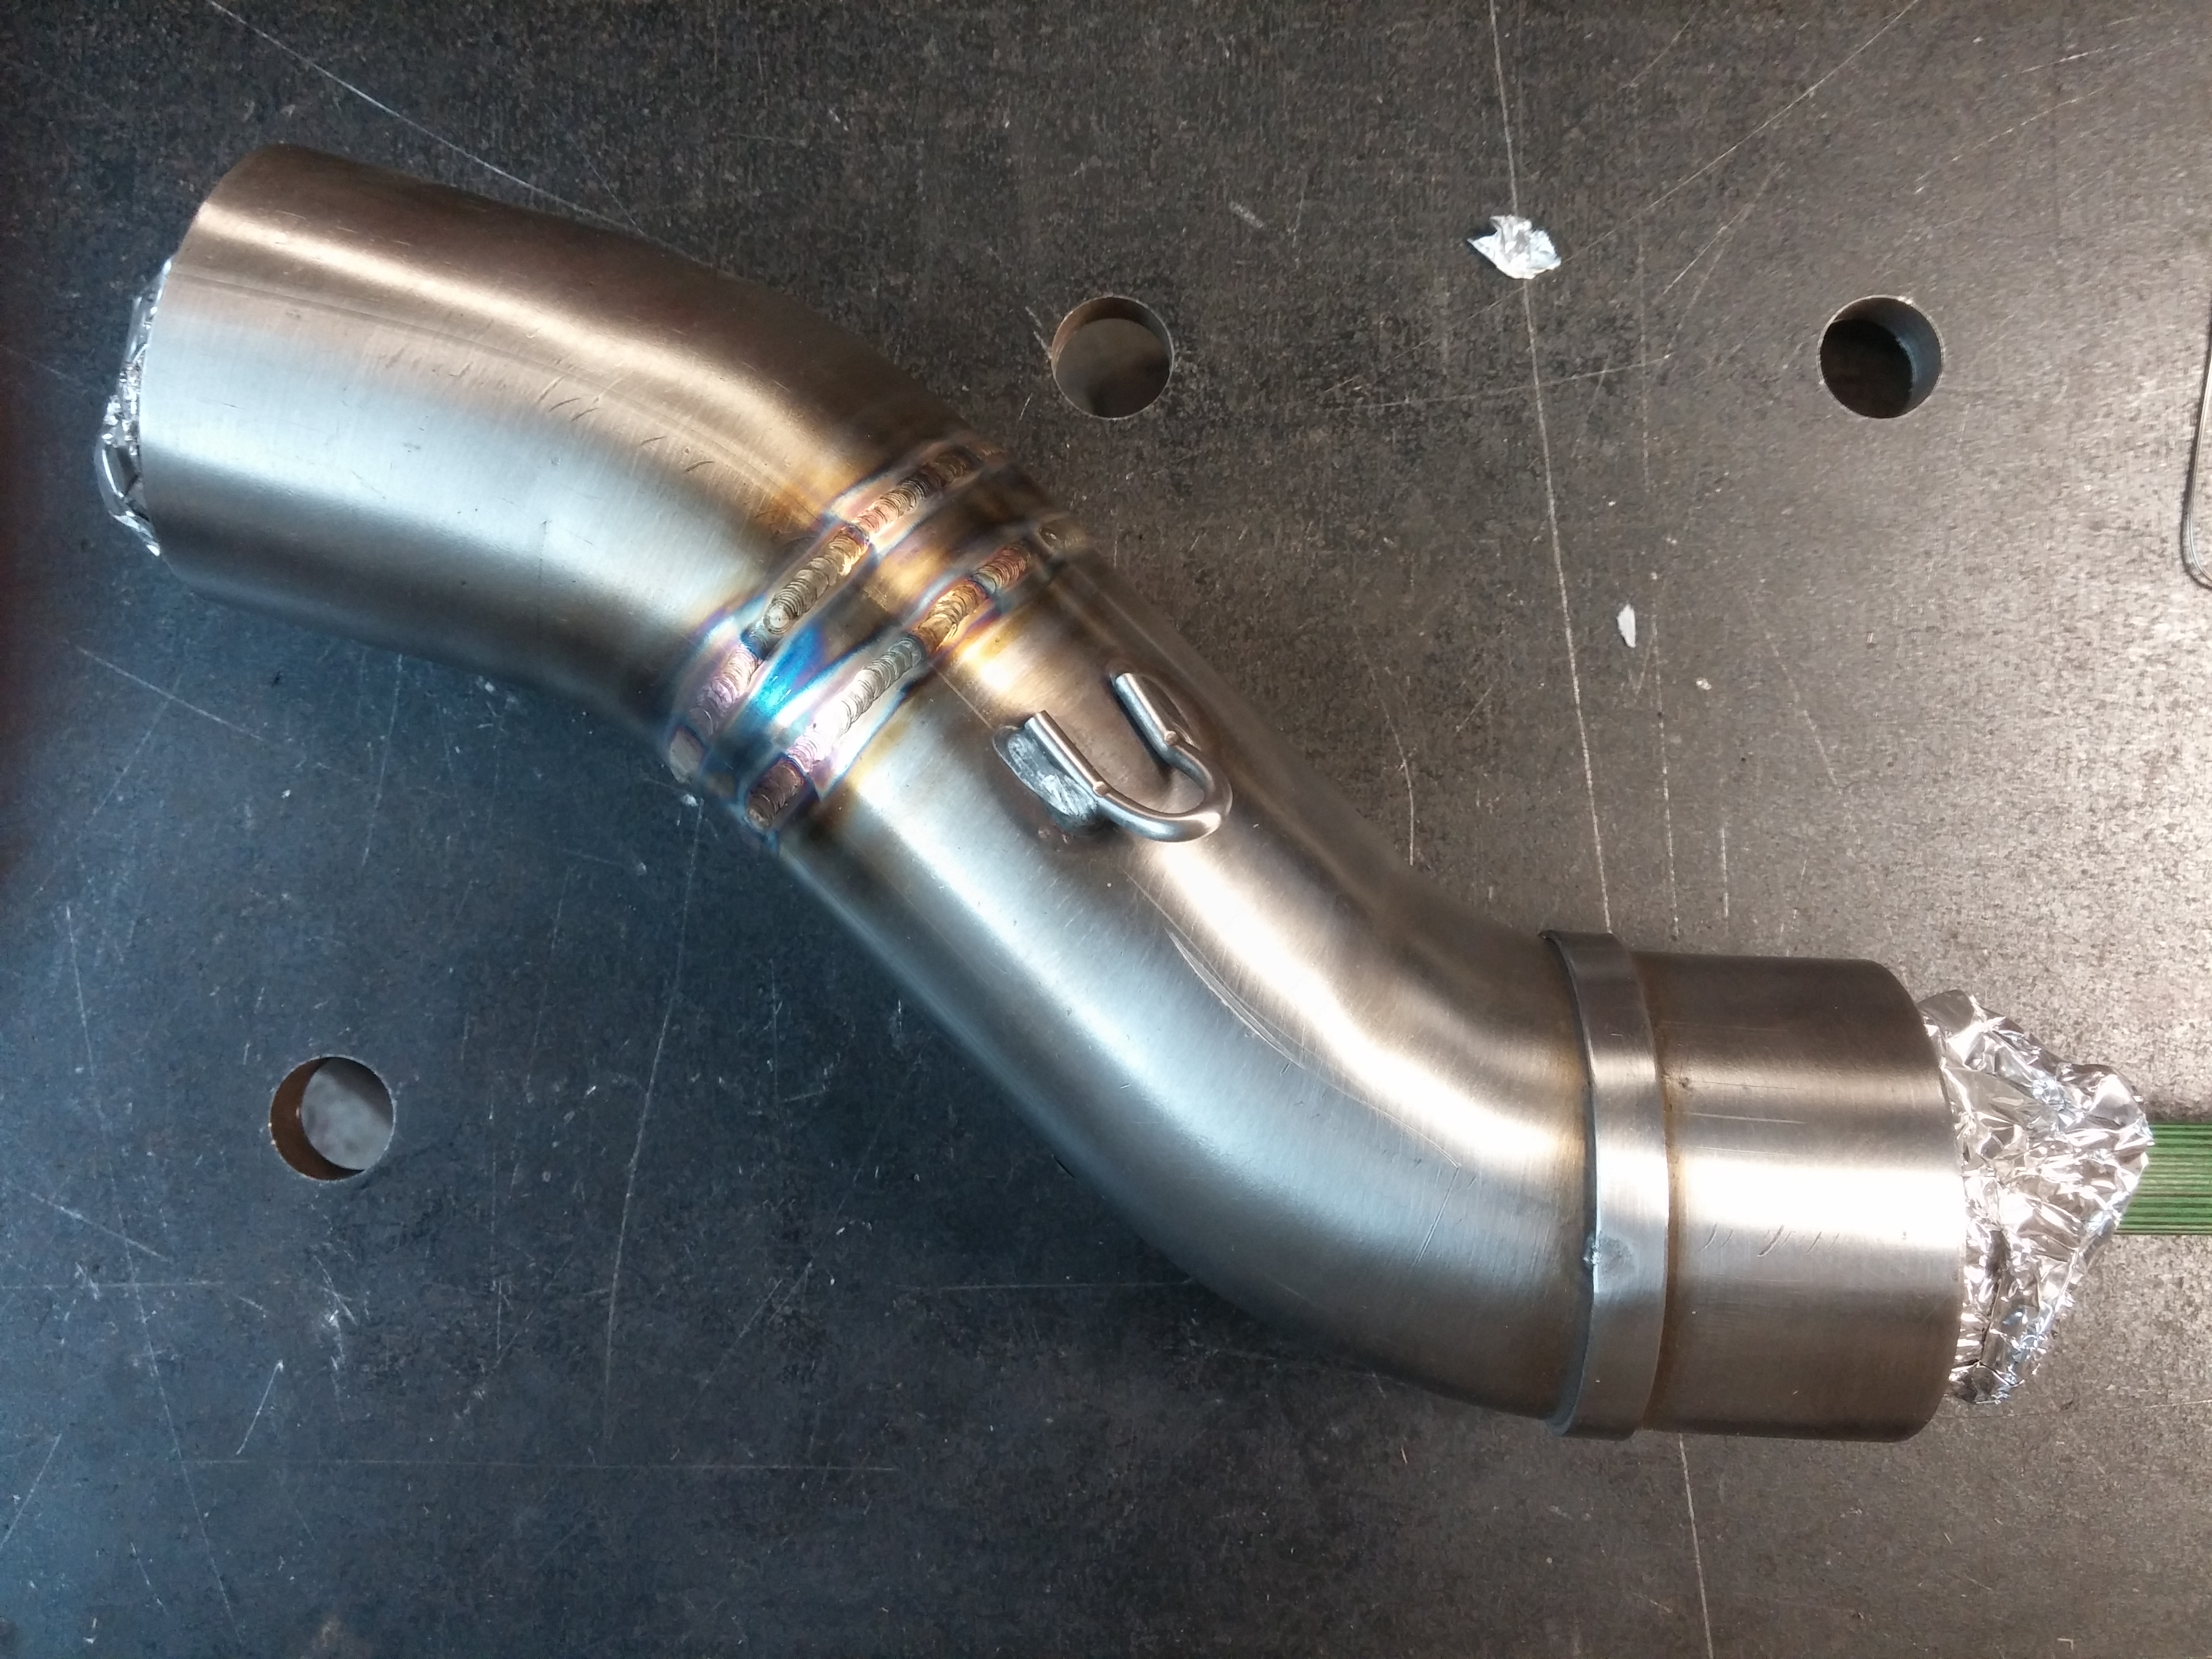
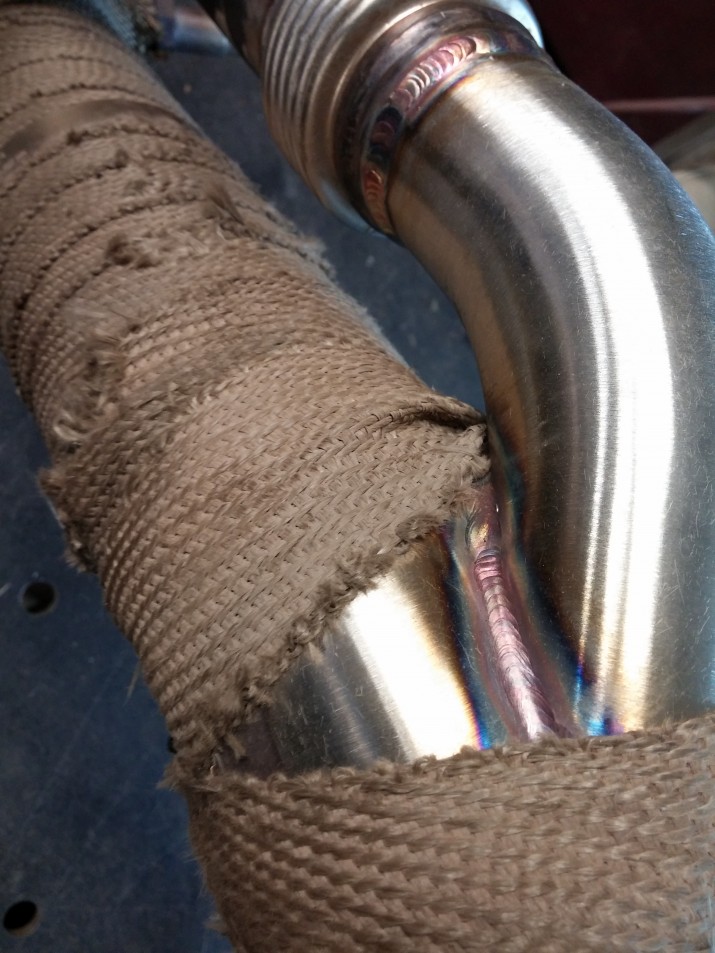
All done welding. 100% backpurged as per usual. The customer only wanted the first few inches of the tubing brushed as the rest will be covered up with ceramic exhaust wrapping insulator.

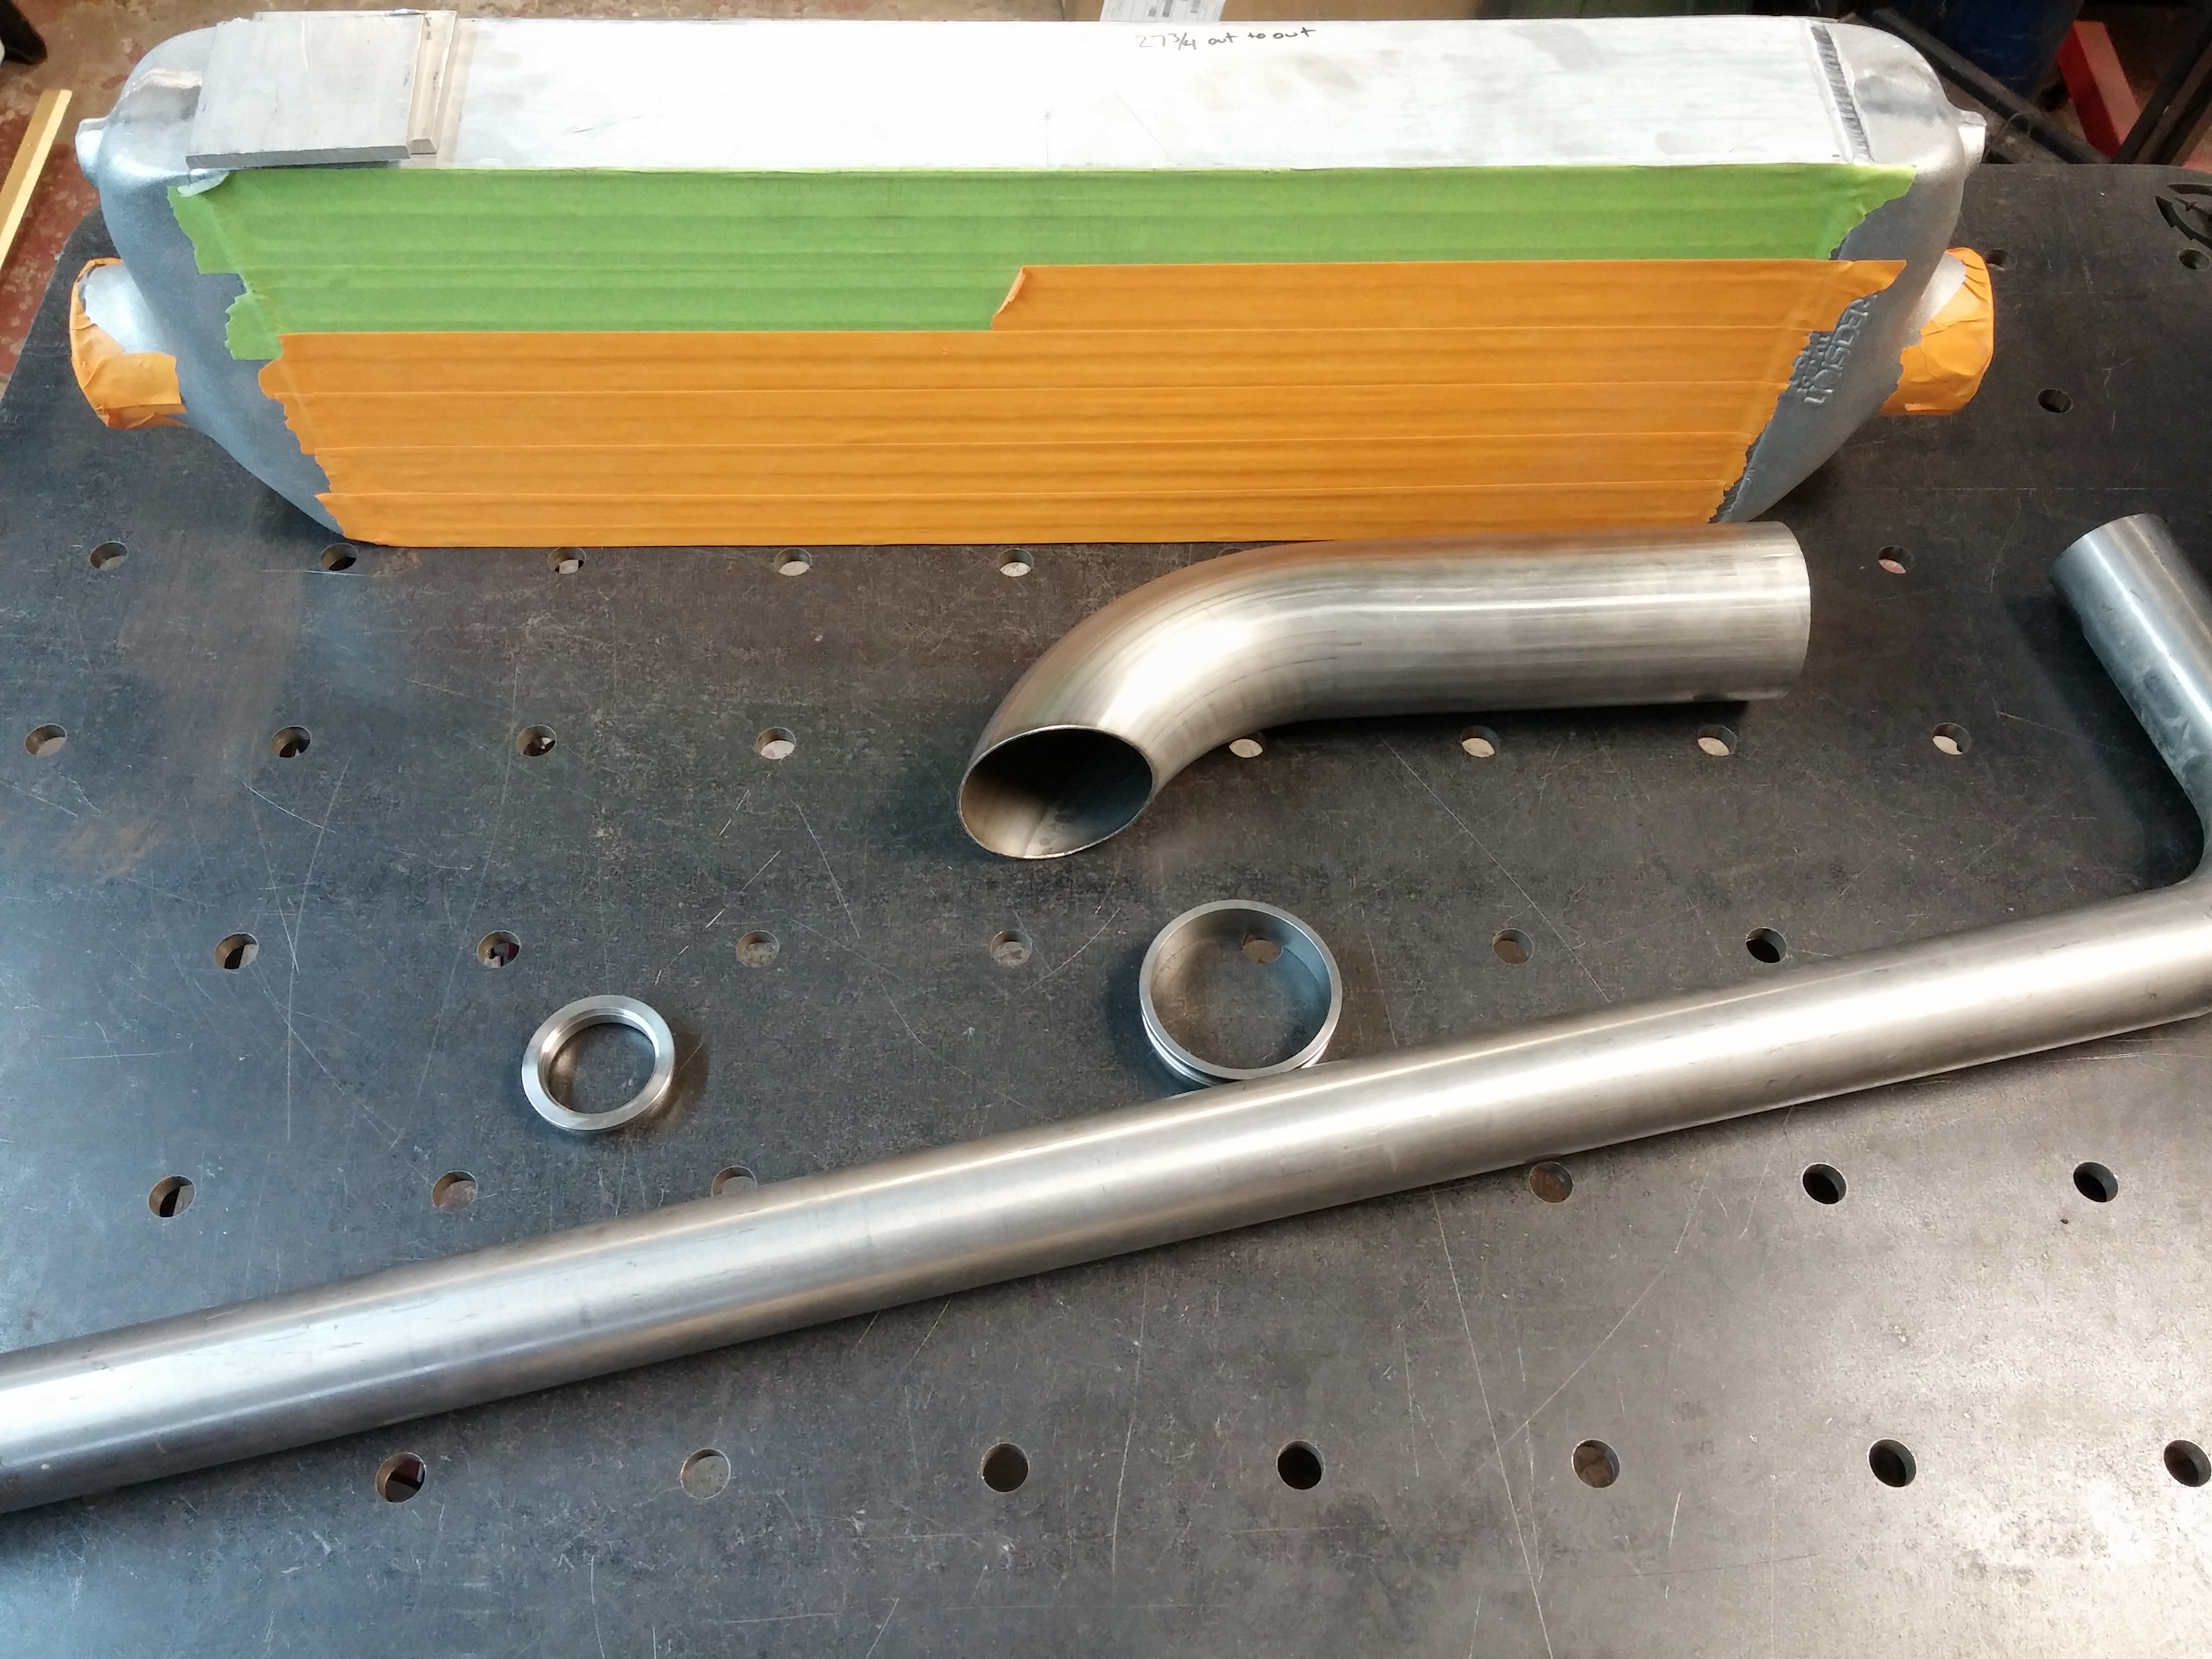
The intercooler had some brackets welded on as well as another SS dump pipe having a flange welded on.

Just some of the parts to pick up today before the Easter holiday!
Welding table top, exhaust and powder coating
We’re always working on a variety of projects so nothing is ever dull in the shop! Here are some of the things that have been cut and built recently.
Here a customer designed a slotted welding table top which will allow for the use of clamps in various positions in and around the table. It is 3/8″ thick hot rolled 44w steel.
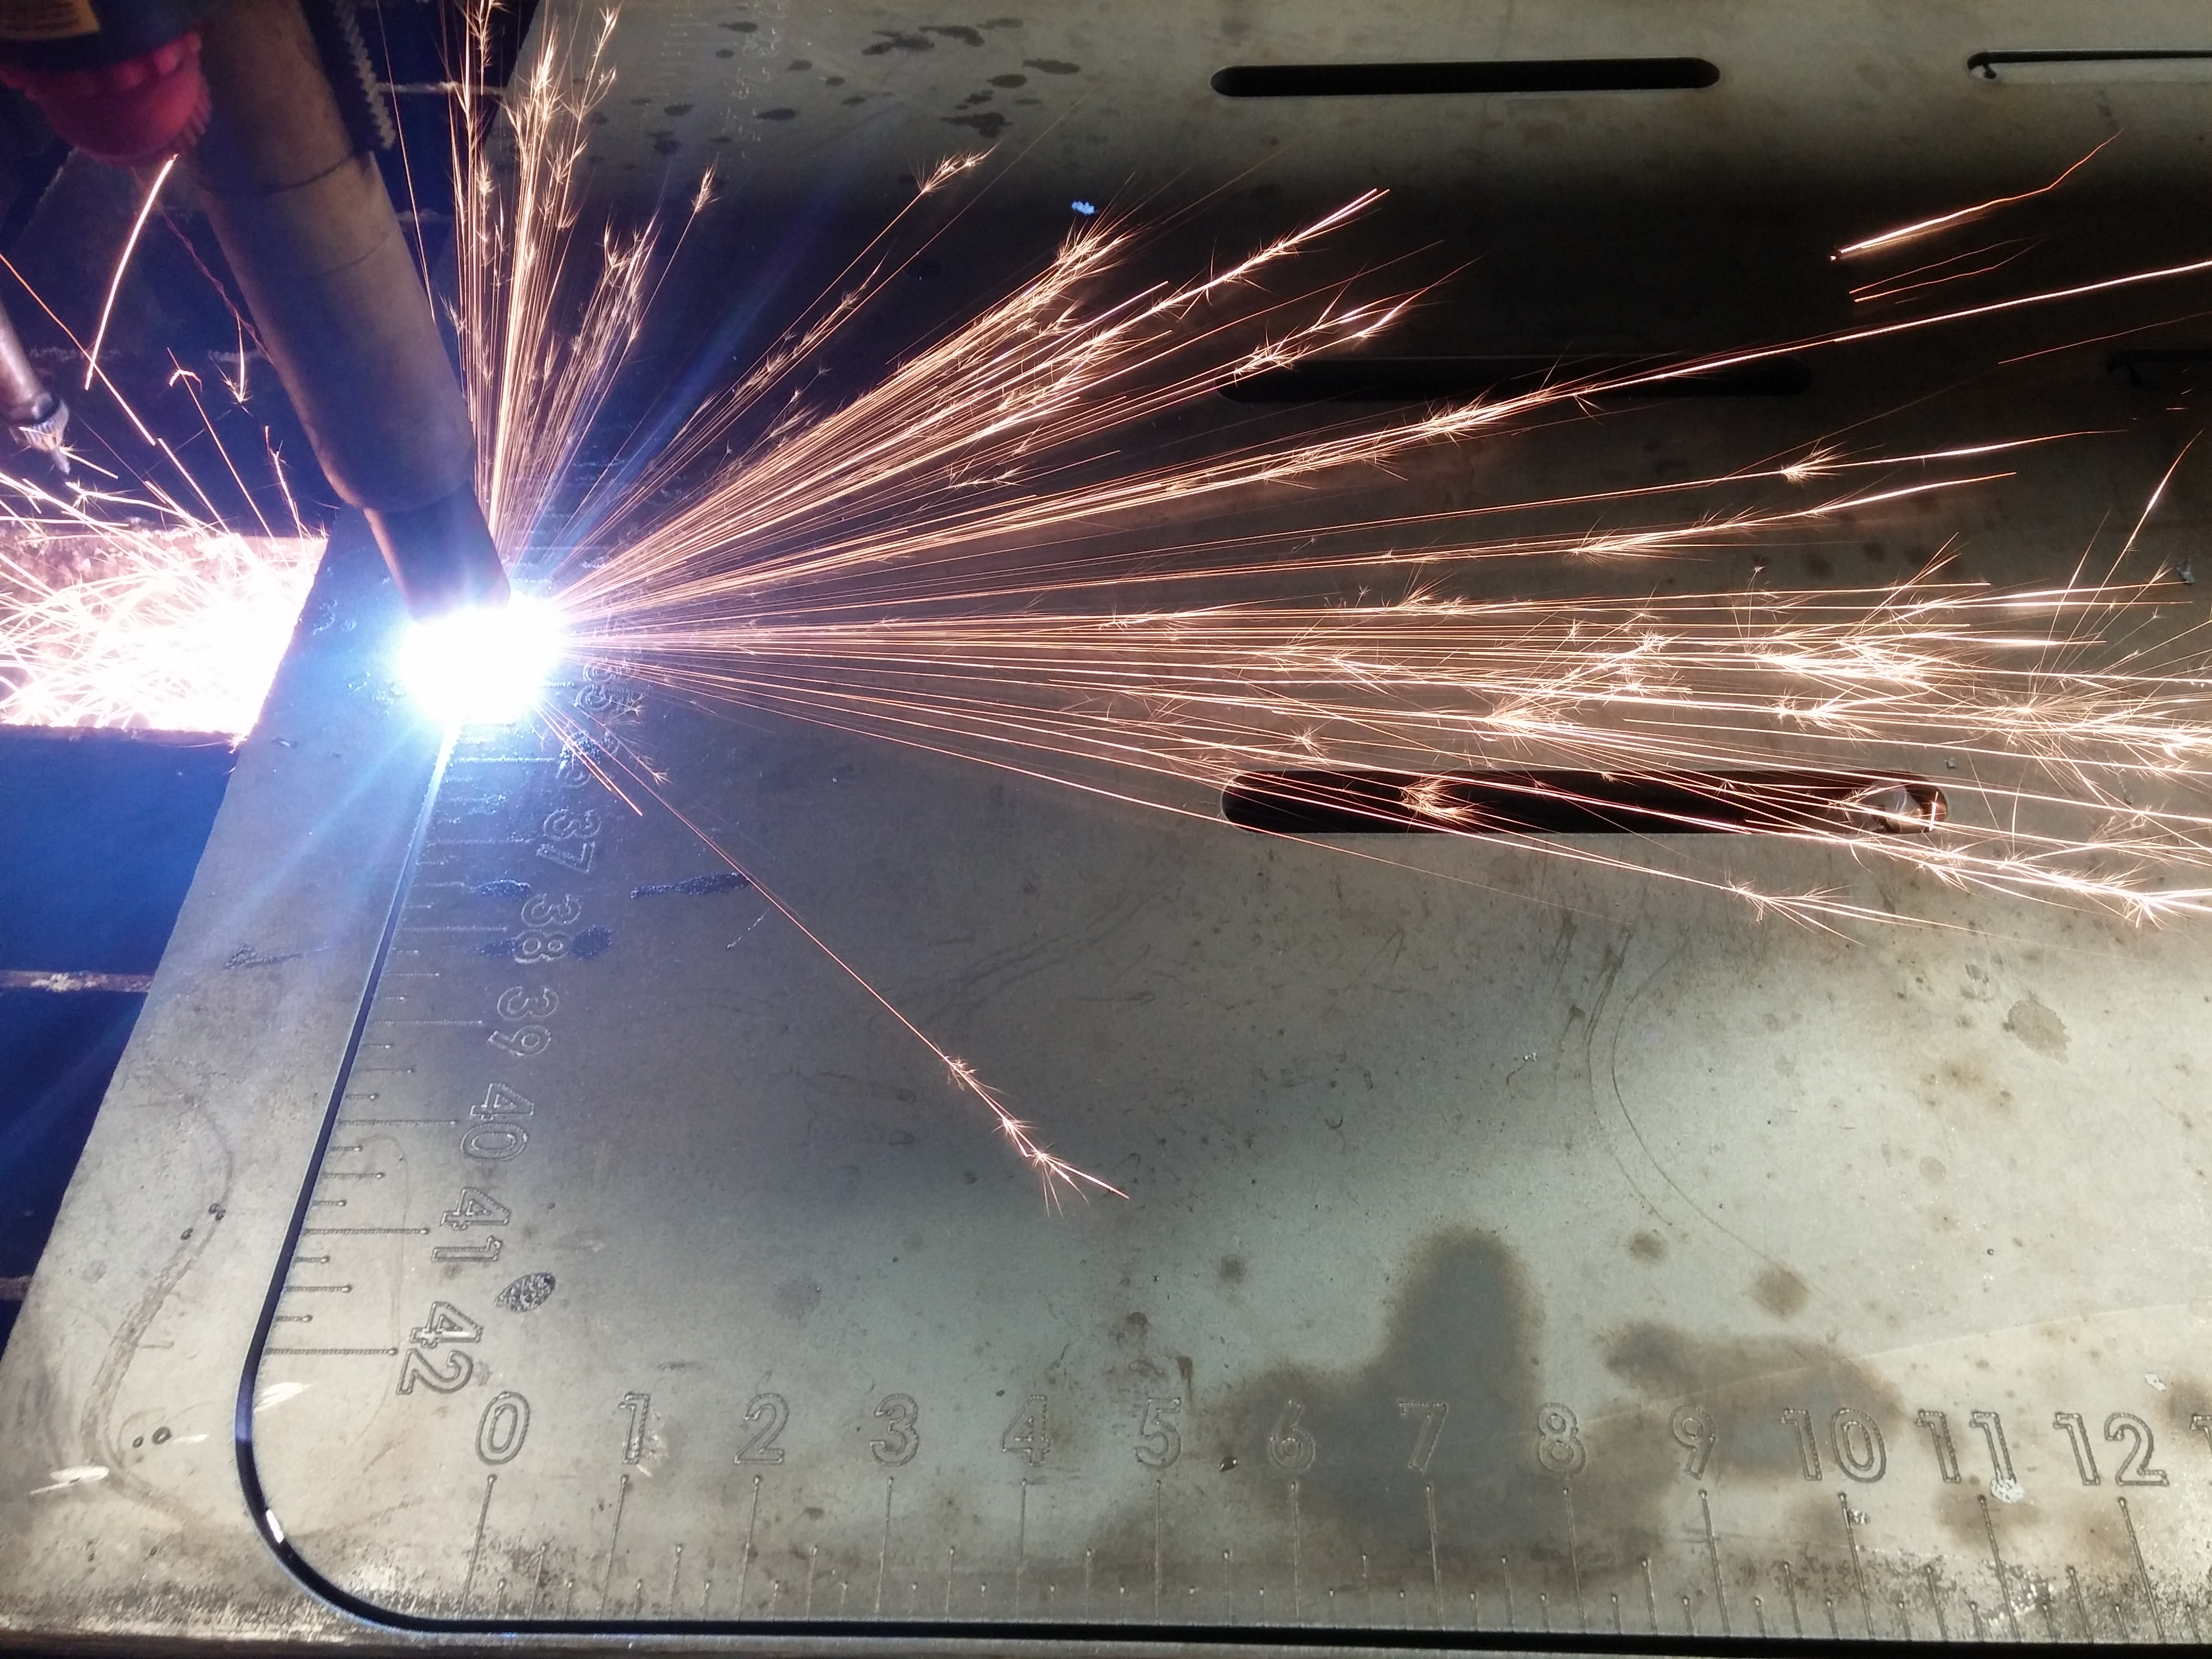
Nothing but the best! Our CNC table allows for high quality cutting with minimal dross. It allows for very quick clean up time which eliminates extra cost.
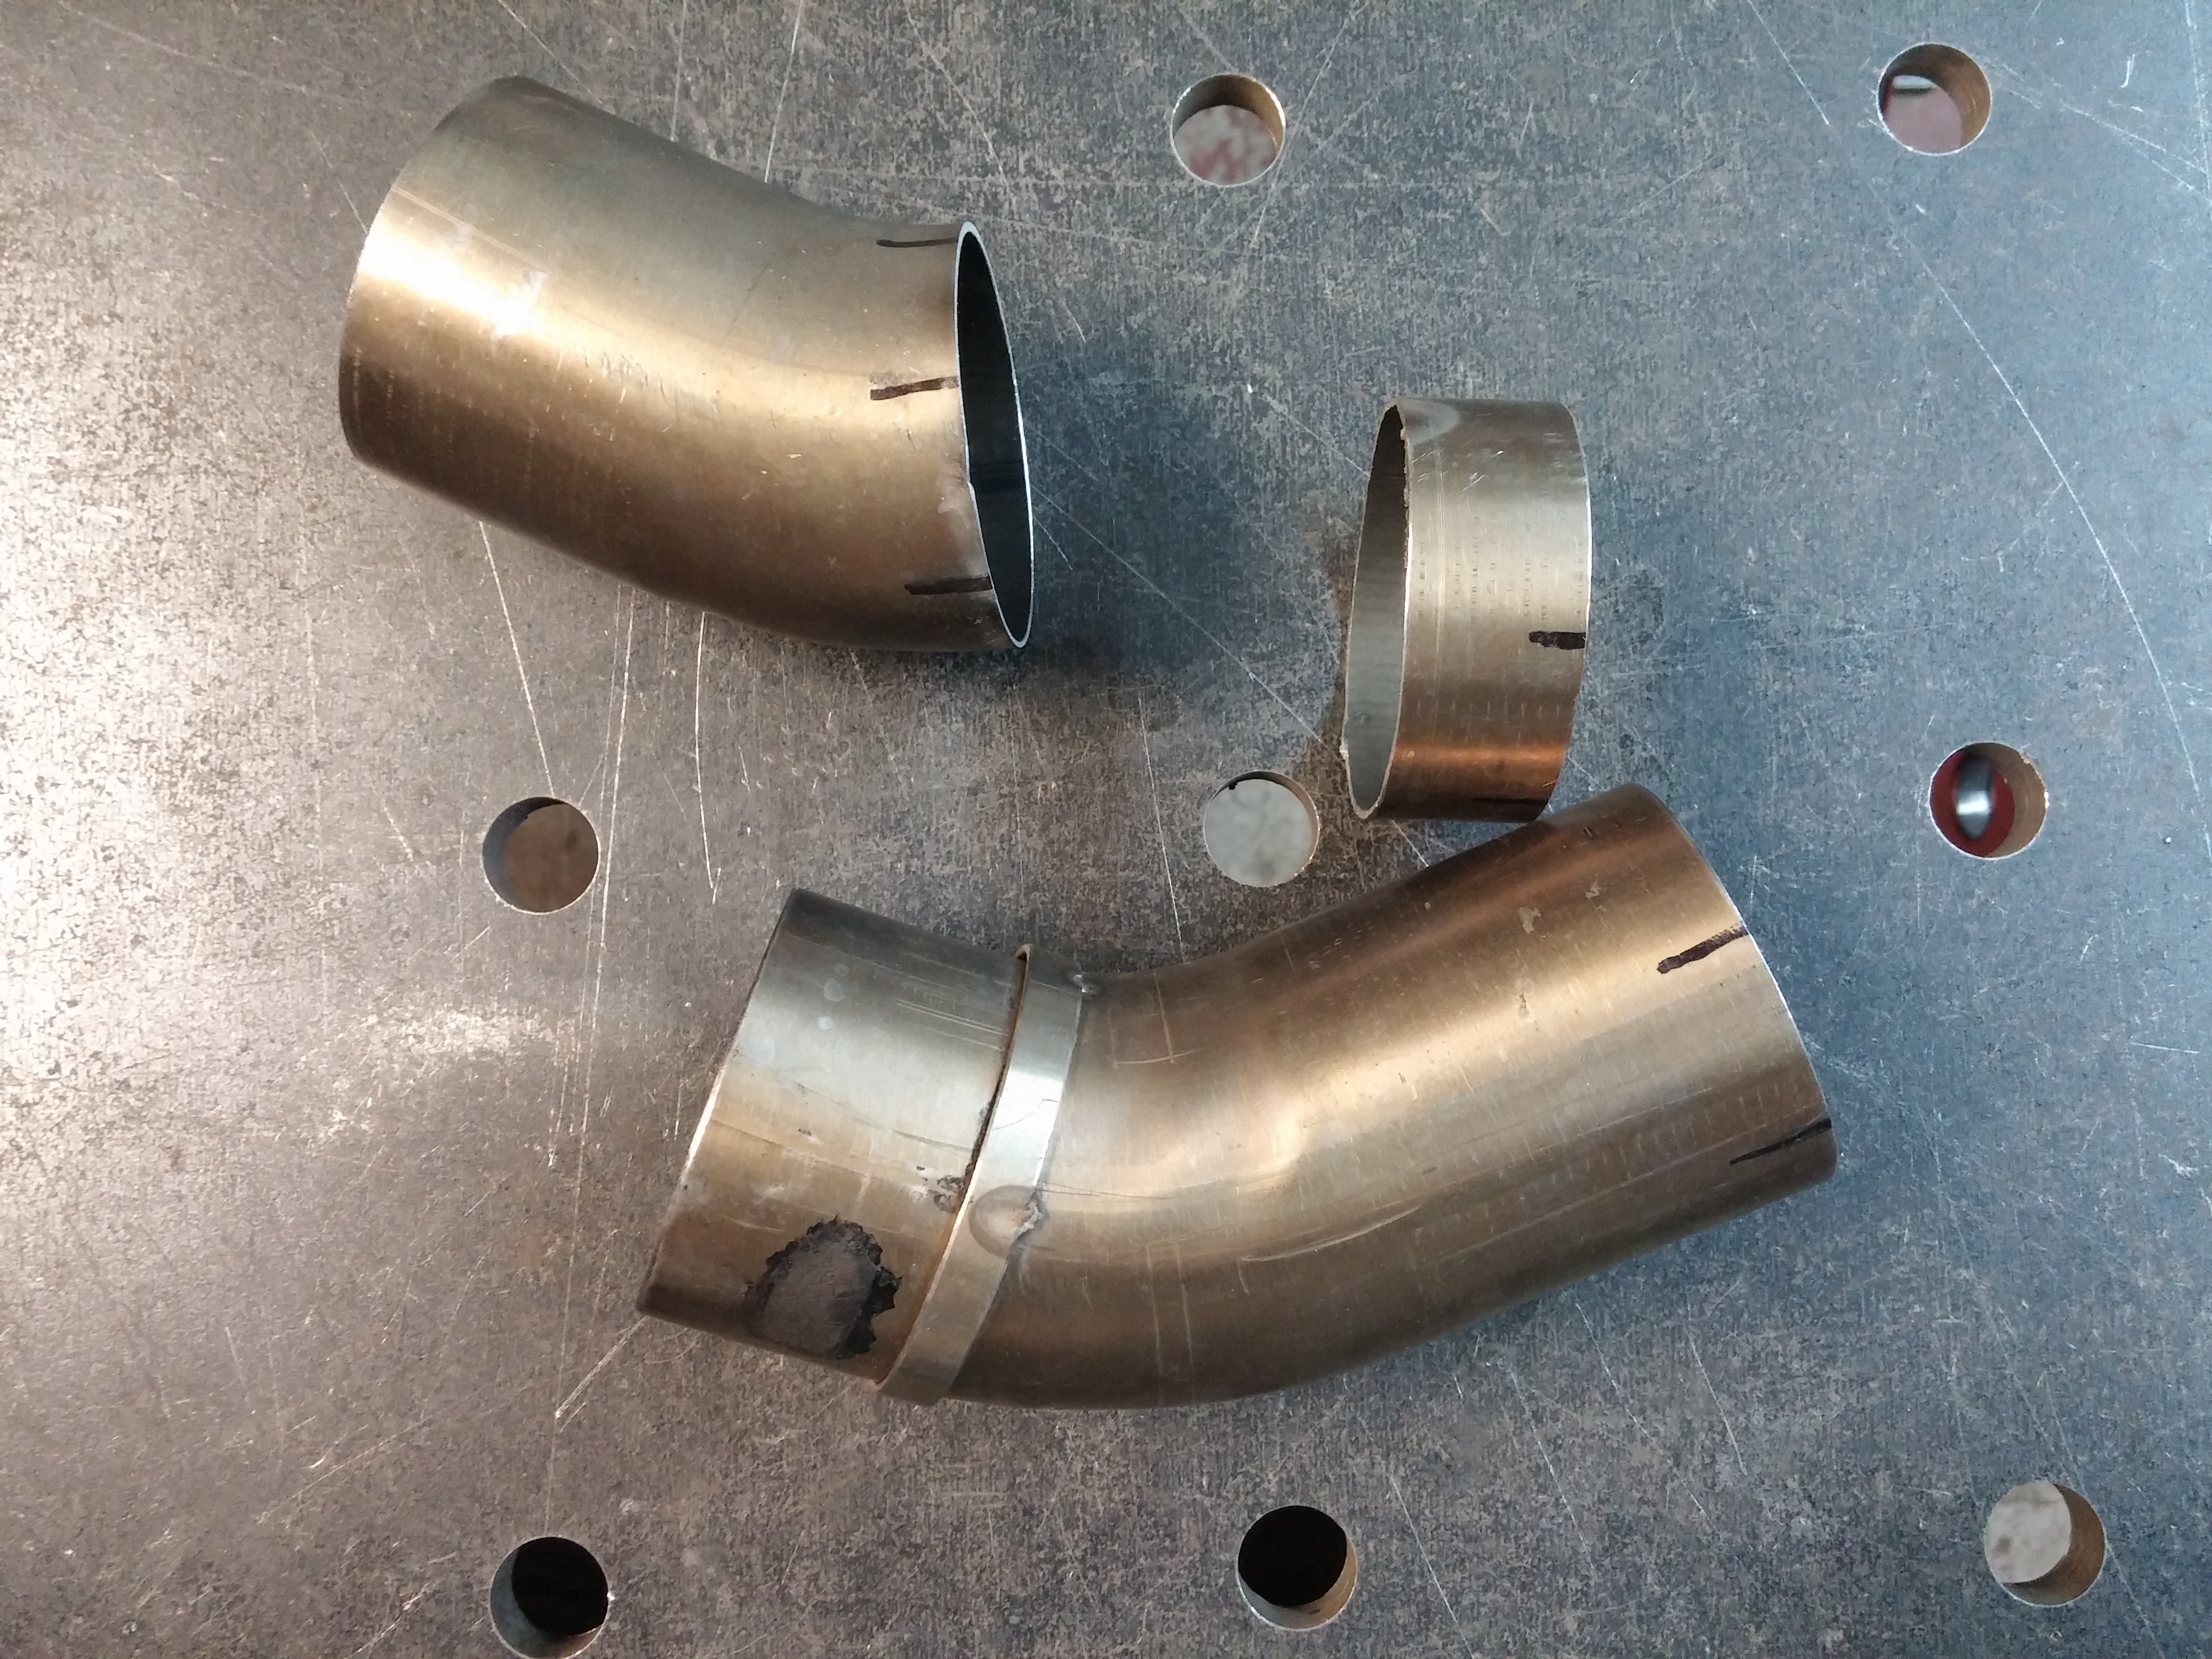
Here we have a Subaru external wastegate (EWG) dump that will be merging back into the downpipe. You can just slightly see the external wastegate dump to the right of the downpipe and just below the cross member.

After finishing the wastegate tubing and coping it to match up with the downpipe it is tacked in place to ensure the whole system can be removed from the car (it is very close to the front CV axle). 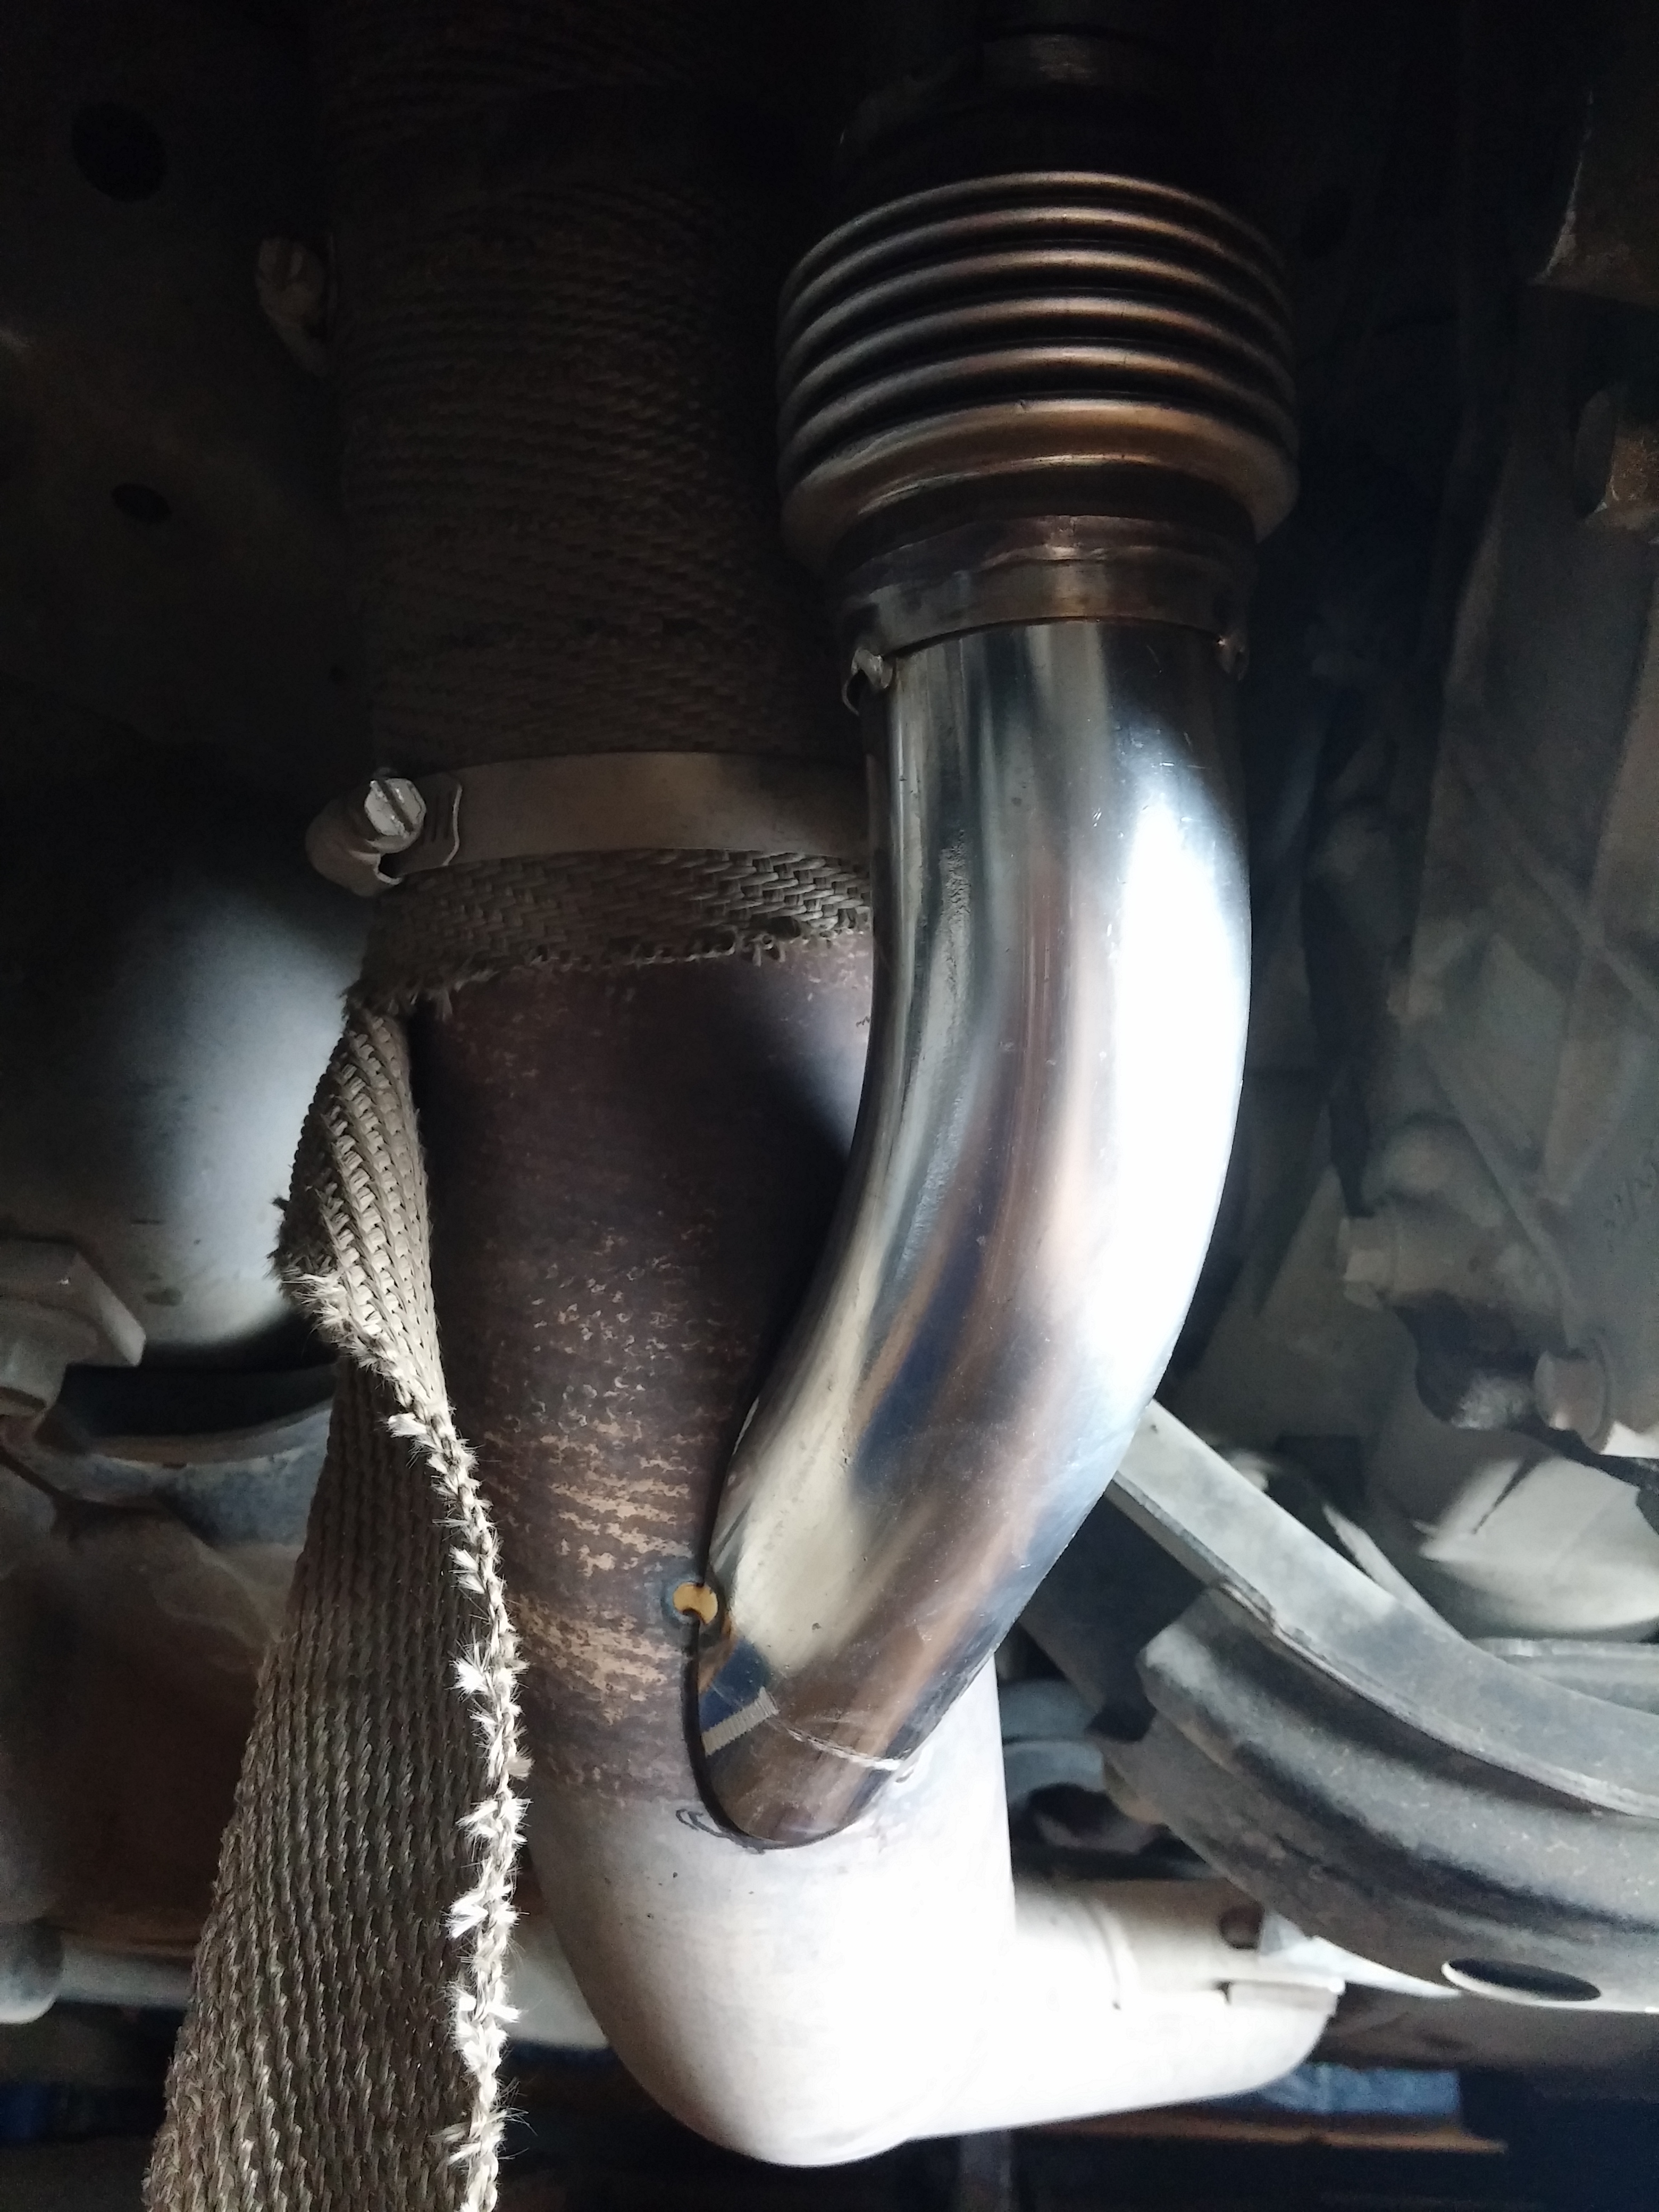
Now with it being removed the dump outlet is traced onto the downpipe, the tacks are broken and is ready for plasma cutting, brushing, final tacking on the car and then finish welding on the bench.

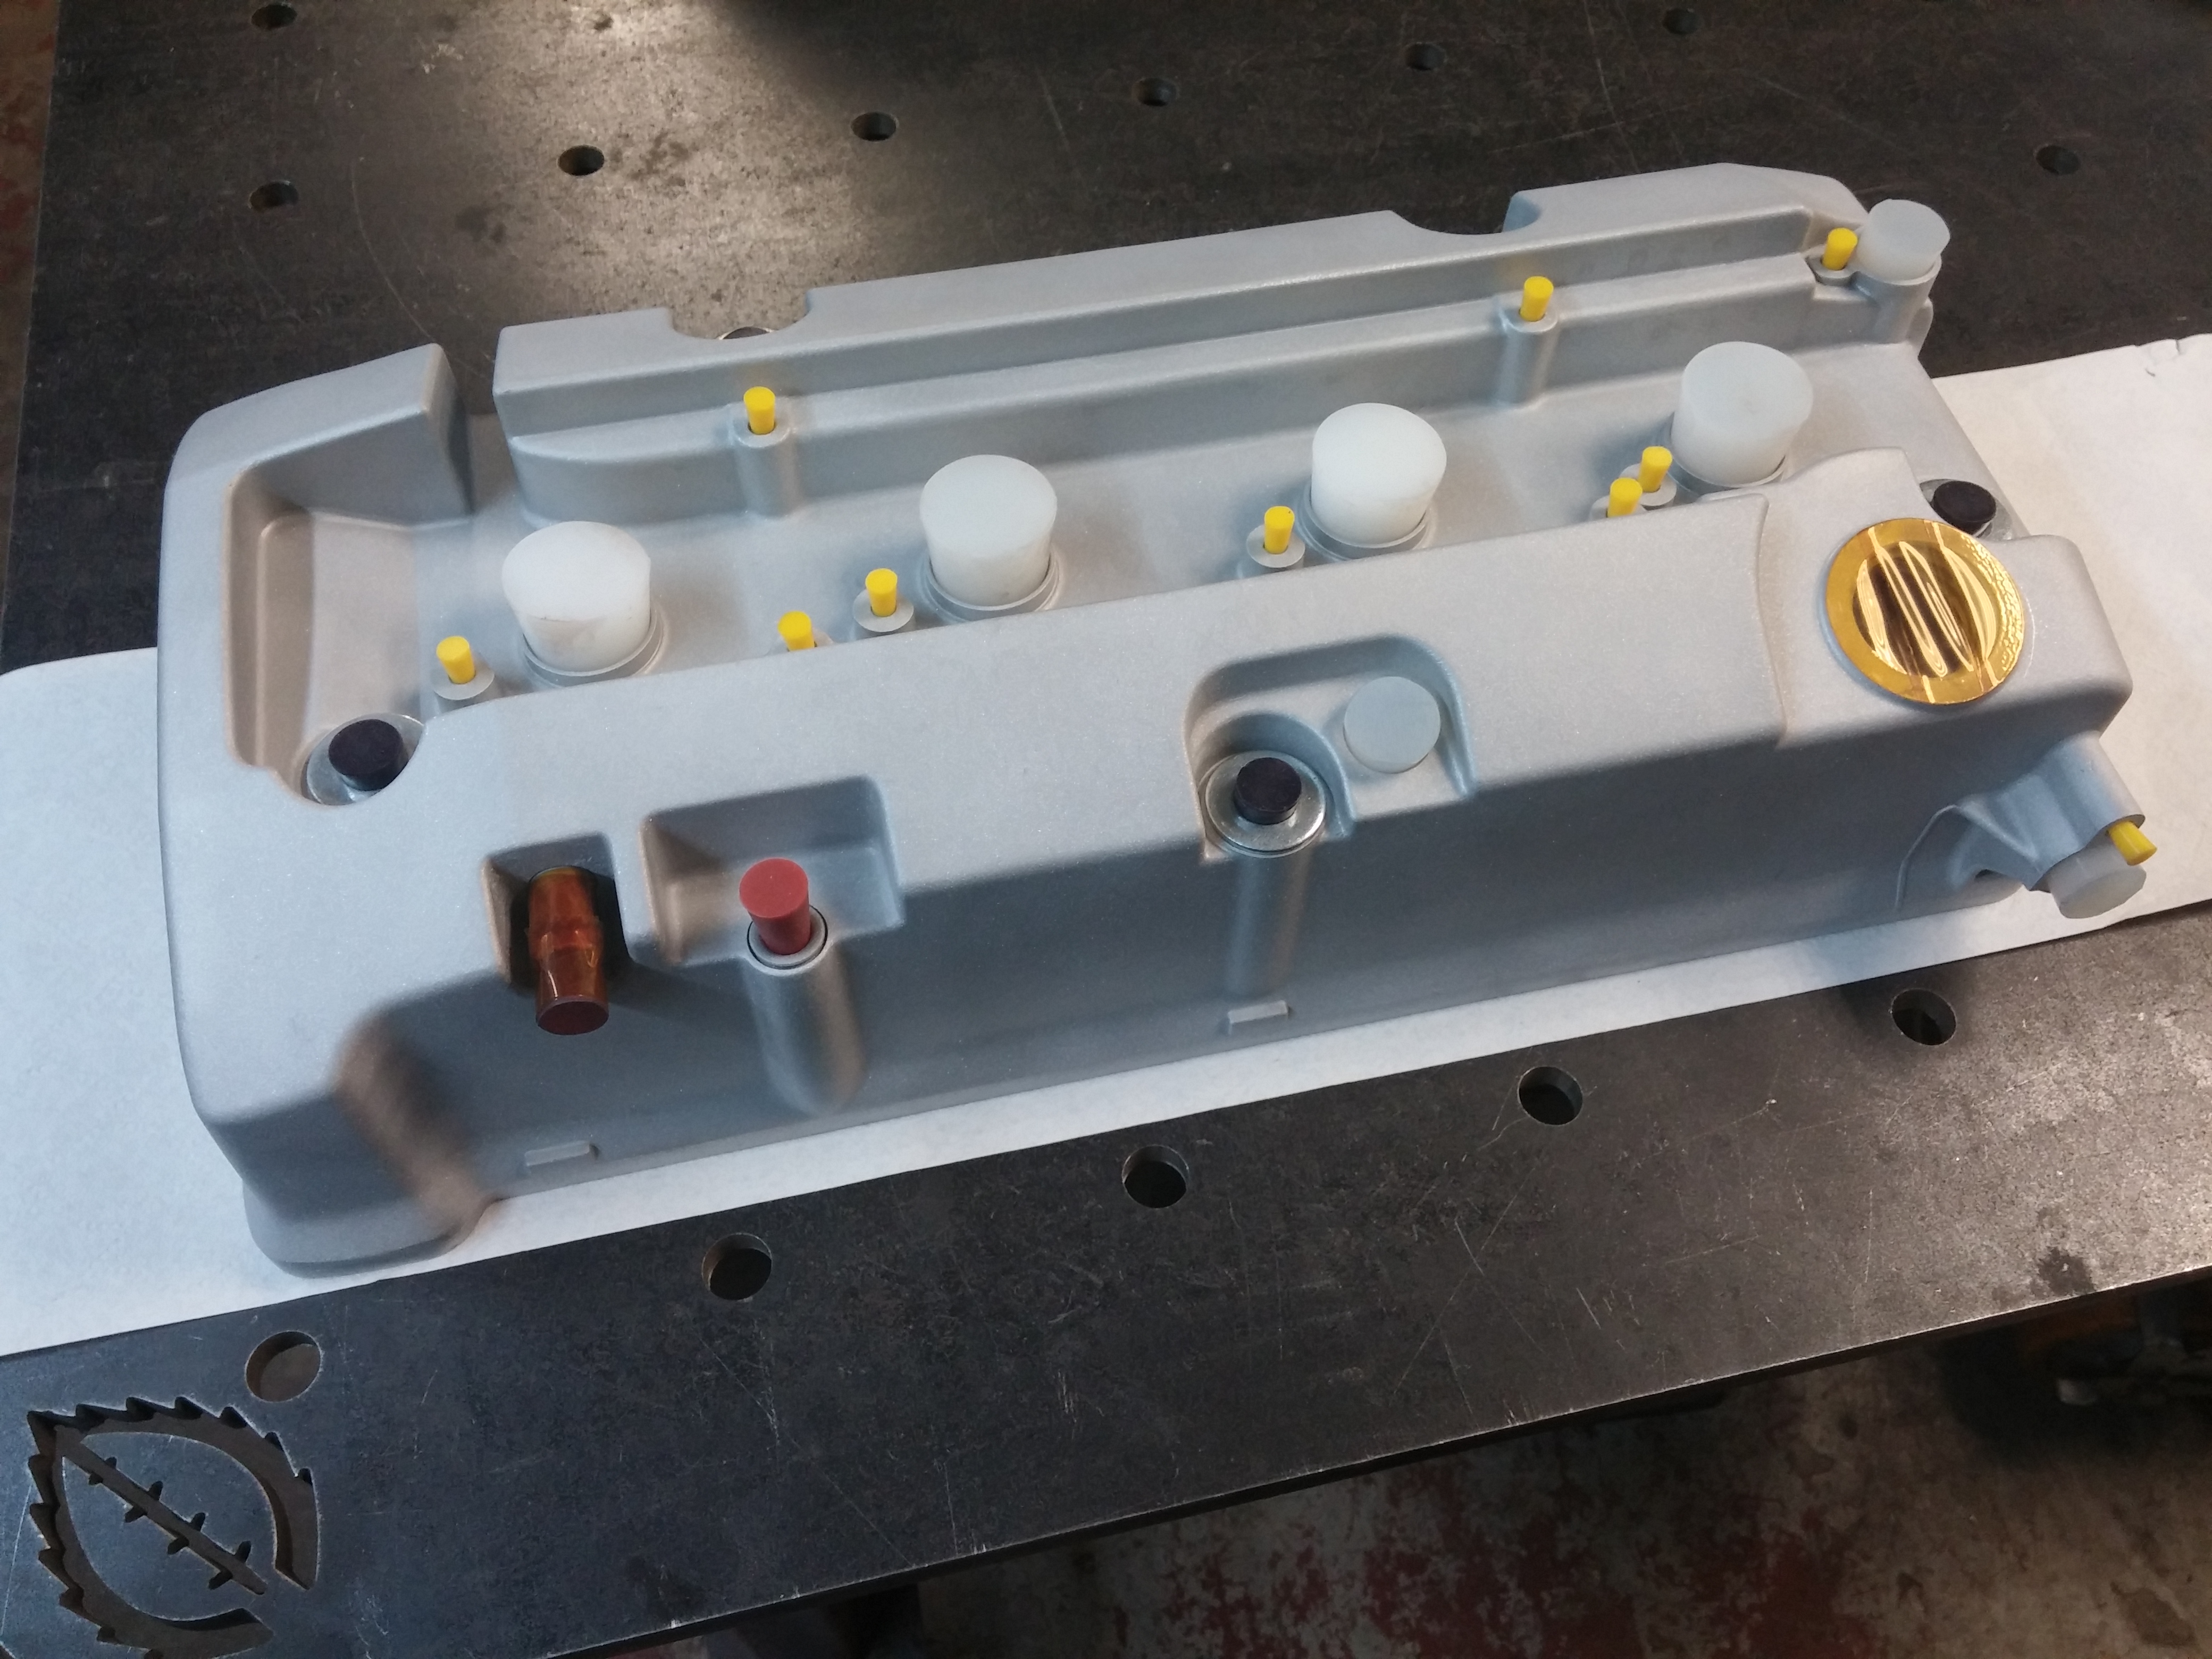
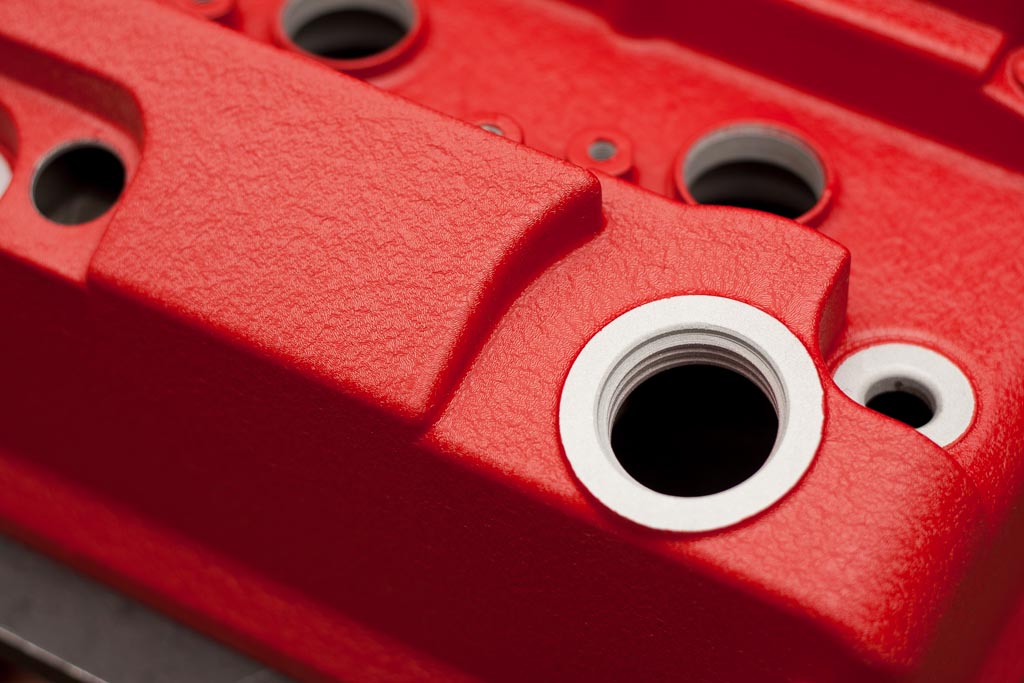
We also had a F20C (from a Honda S2000) valve cover getting ready for powdercoating. It is washed, blasted and then pre-baked. The pre-baking allows any oil in the grains of the aluminum casting to push out to the surface and be cleaned via another blasting process. Not doing this step could result in oil coming out during the powder coating curing process, and if that happens powder coating defects will occur. So cleanliness is very important.
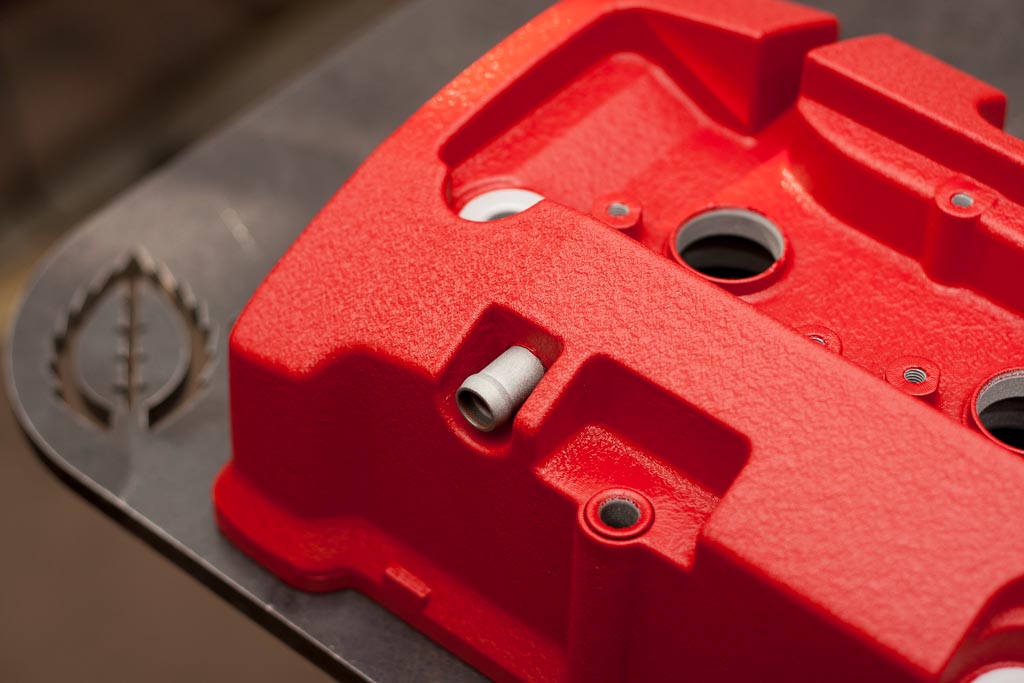
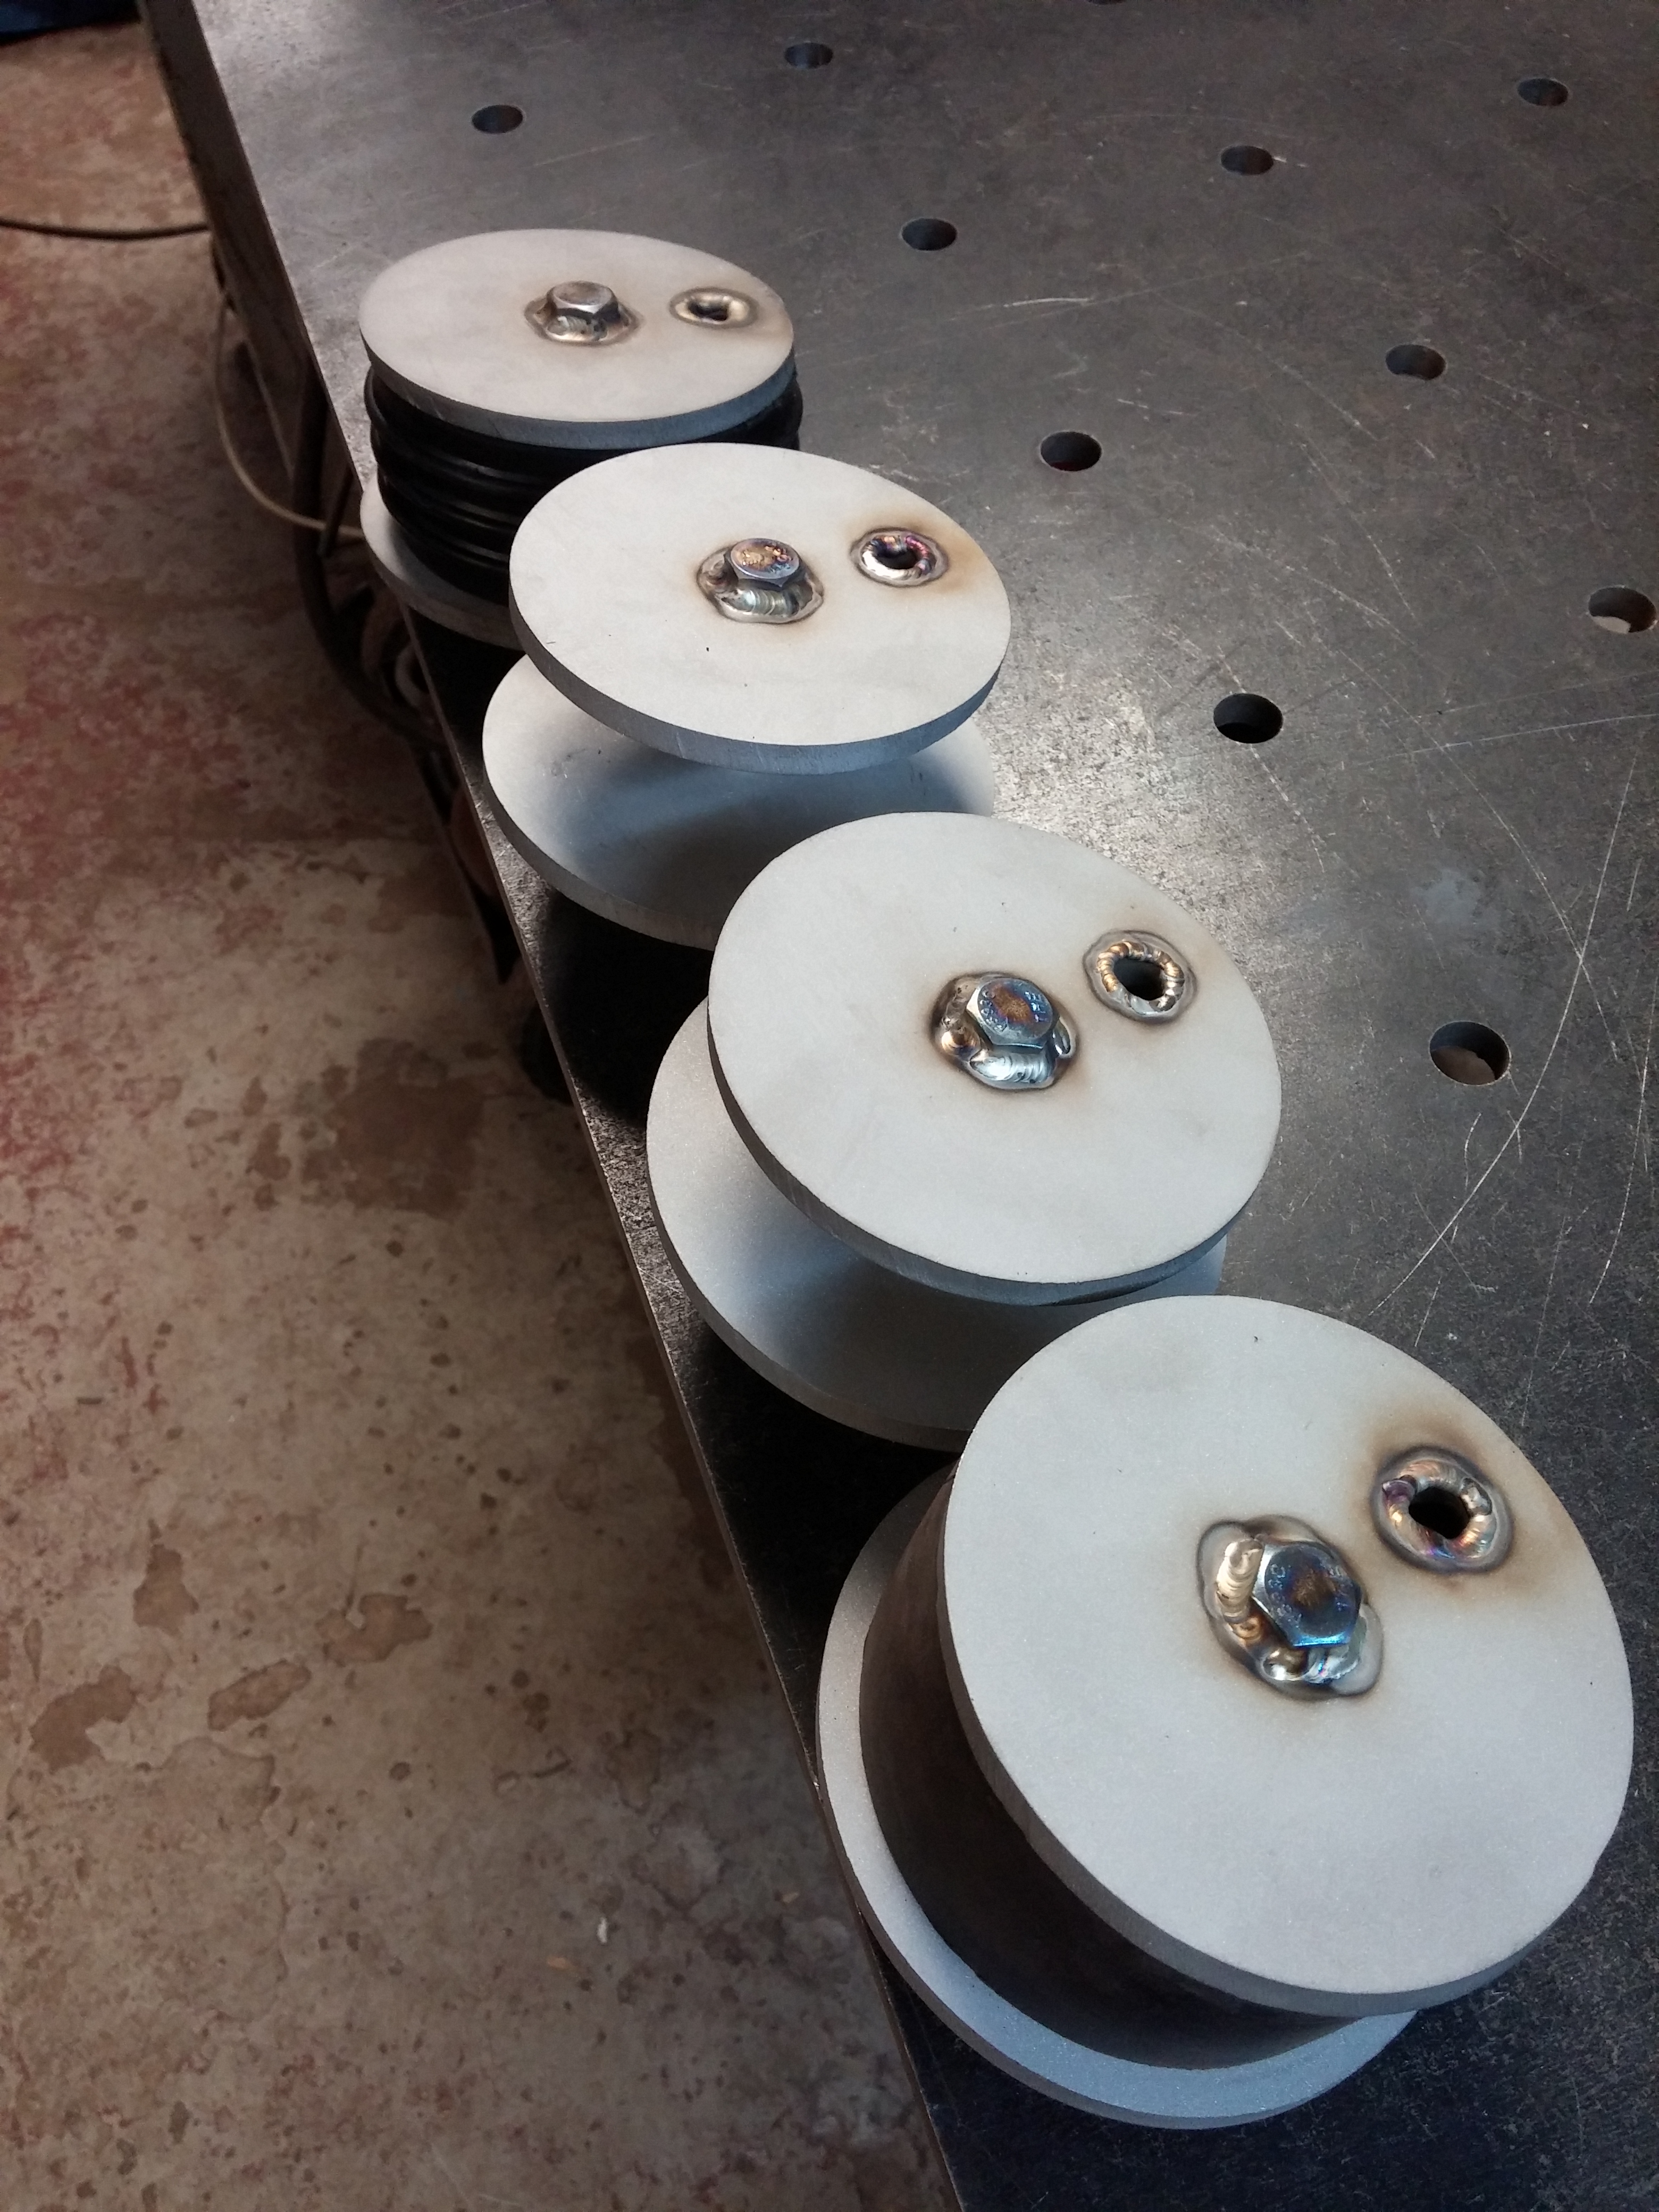
It’s hard to see in this photo but there is actually a 4″x6″ rectangular tubing that fits just inside the valve cover to elevate it off the rack. This doesn’t matter much for the pre-baking process, however during the powder coating curing process it is. Nobody wants indentations along the bottom of their valve cover from a rack!

All threaded holes, nipples and open fittings are plugged with silicone plugs and masked with high heat tape.
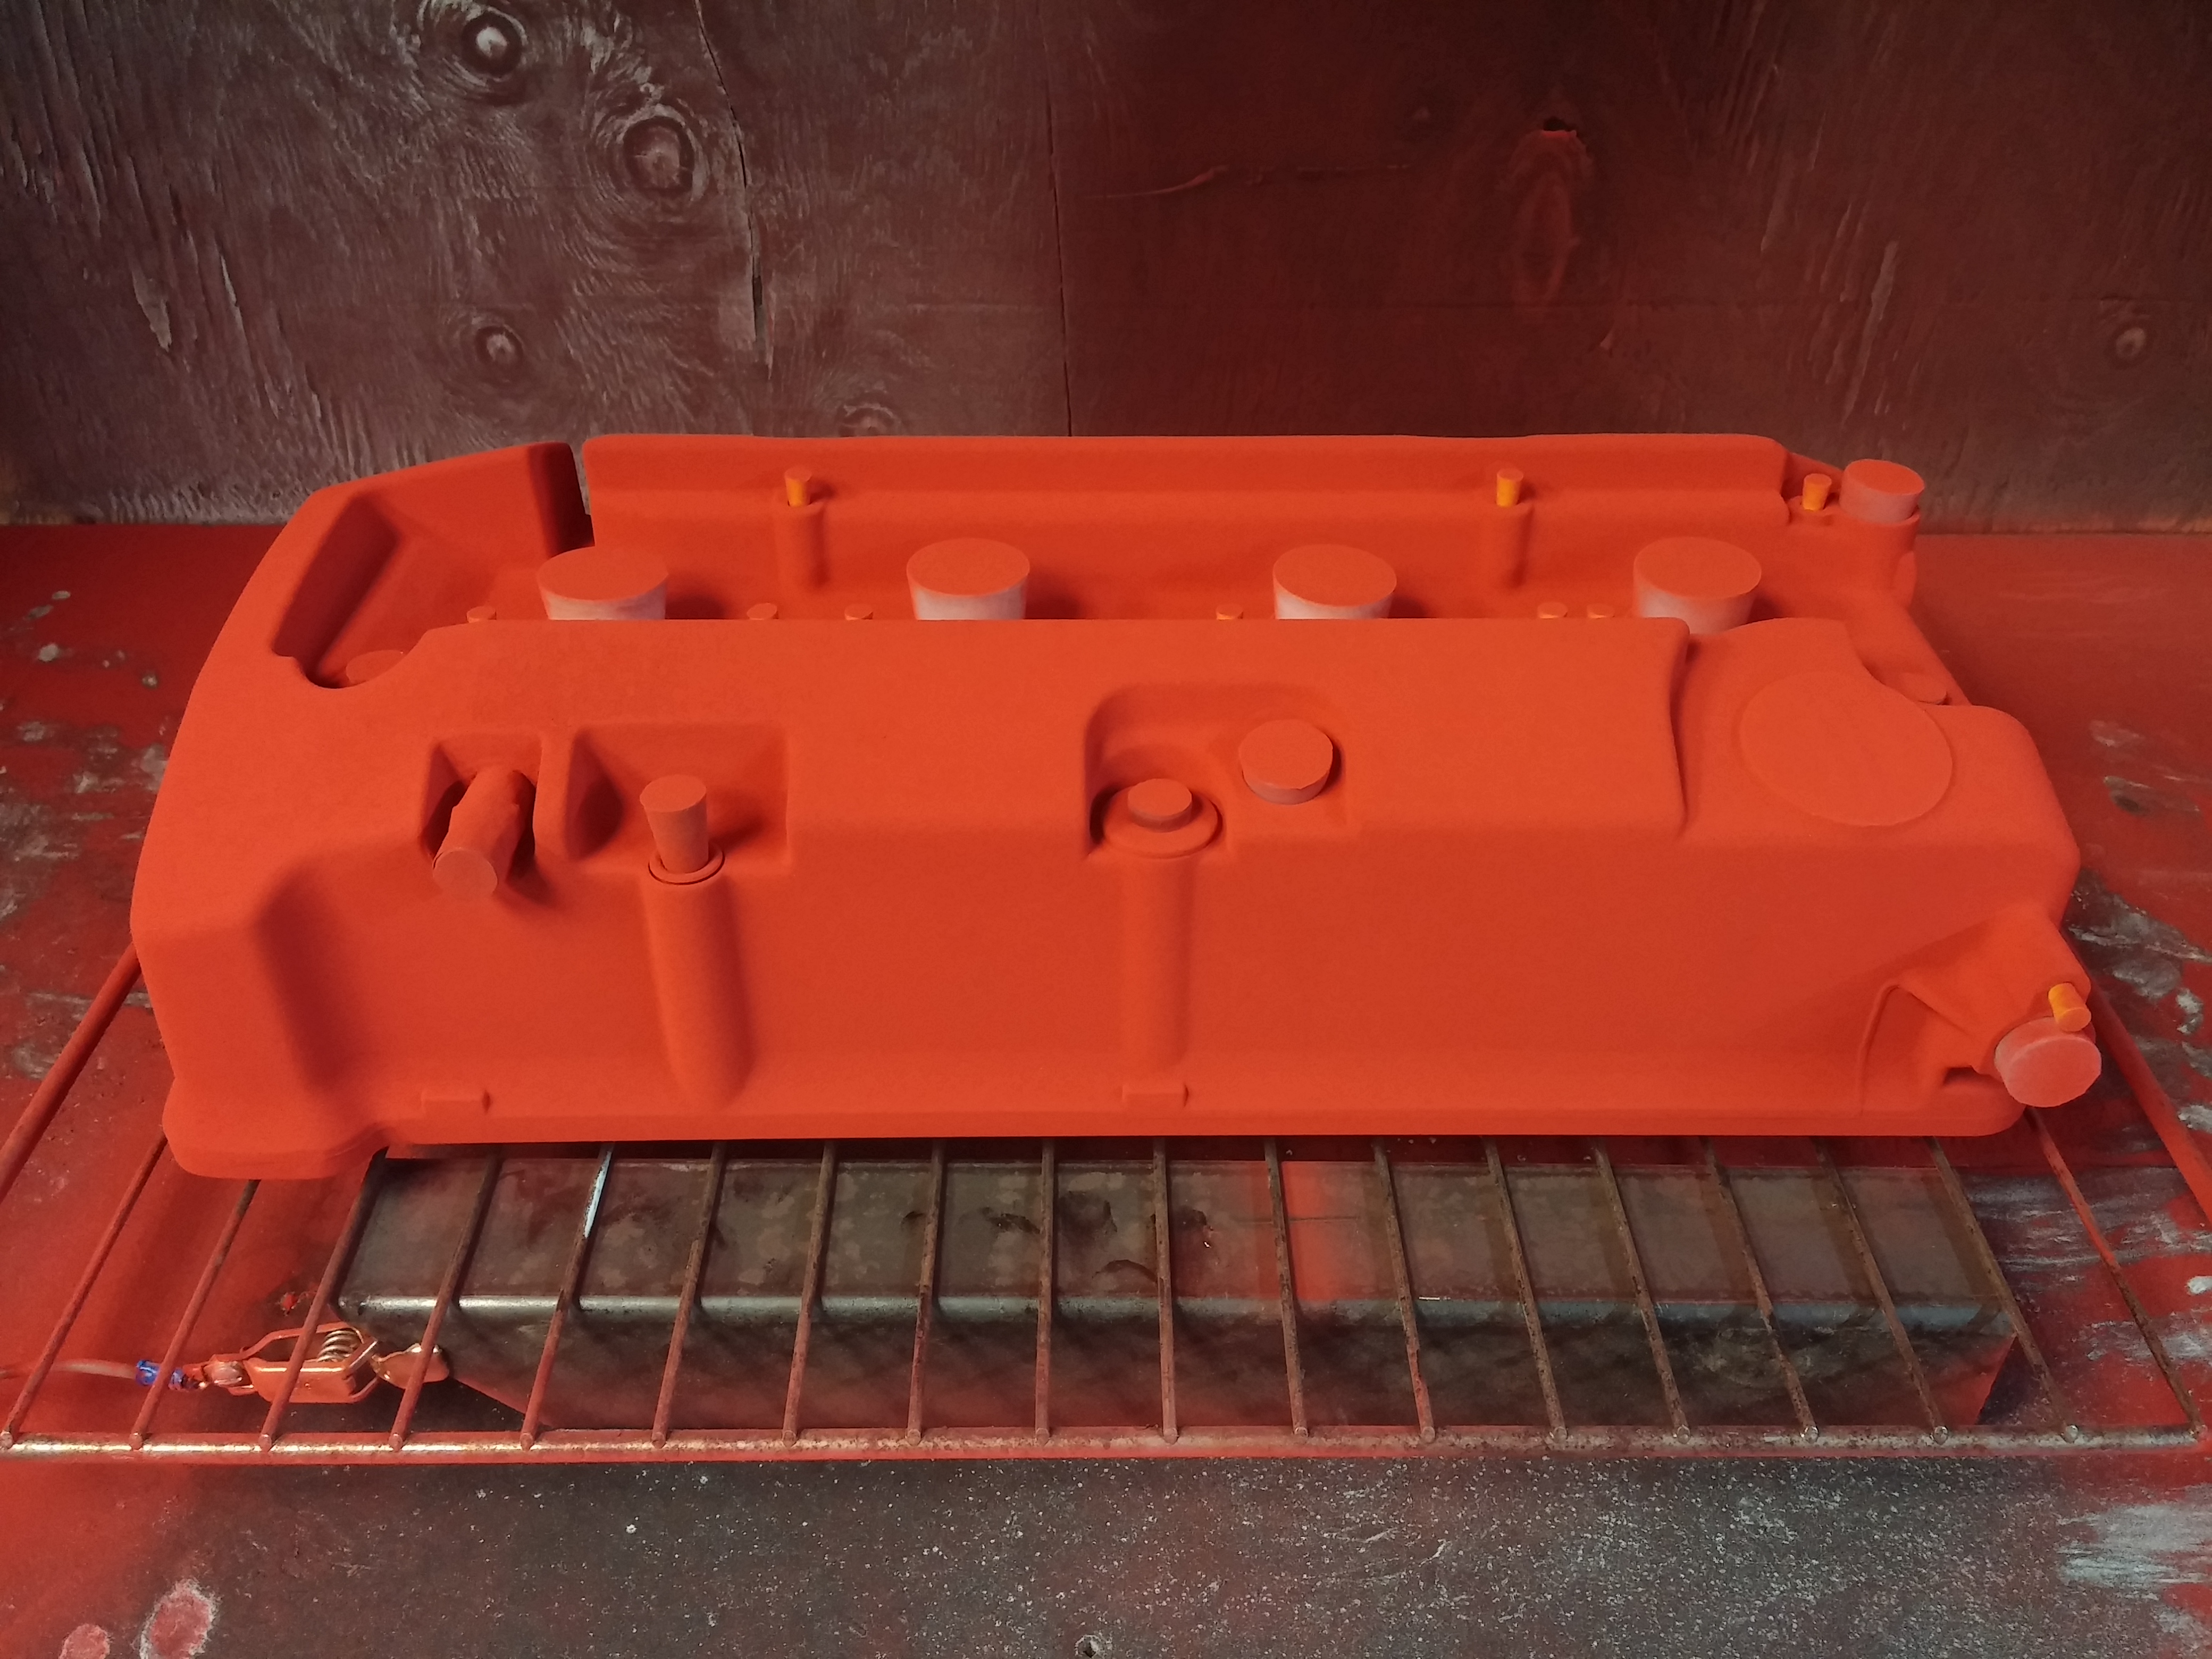
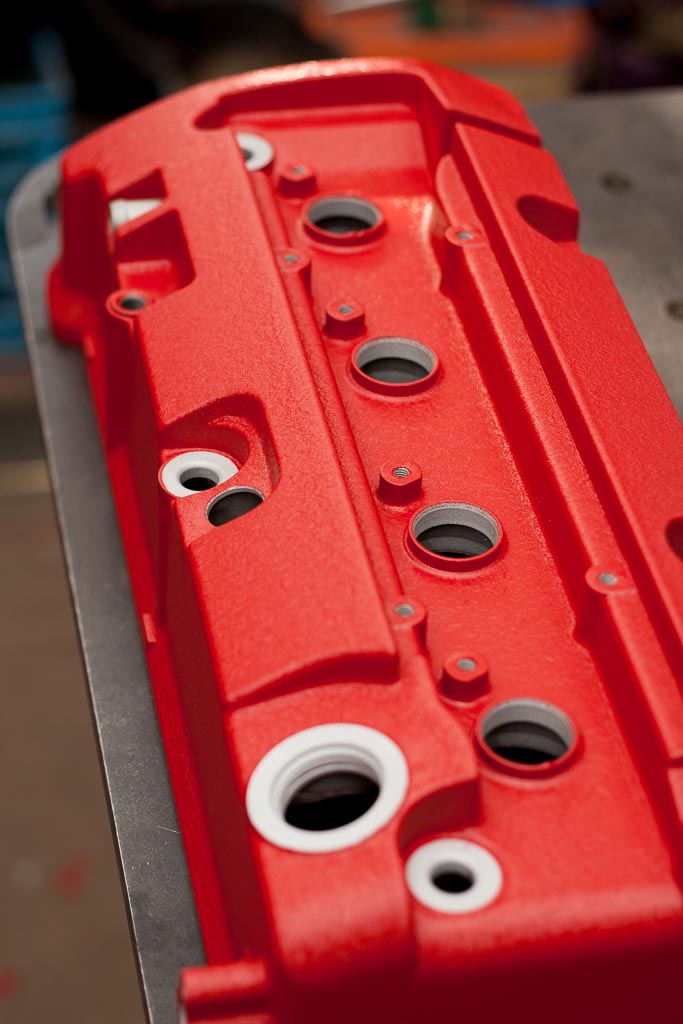
The customer chosen wrinkle red powder is applied. The powder coating equipment we use varies the charge voltage to the powder particles, so it avoids the faraday cage effect. Essentially sharp corners or deep recesses will actually repel powder, so by changing the charge voltage differently charged particles will “stick” in different areas. Thus allowing for a more consistent coverage and higher quality finish in the end. Now it’s ready to go in the oven.
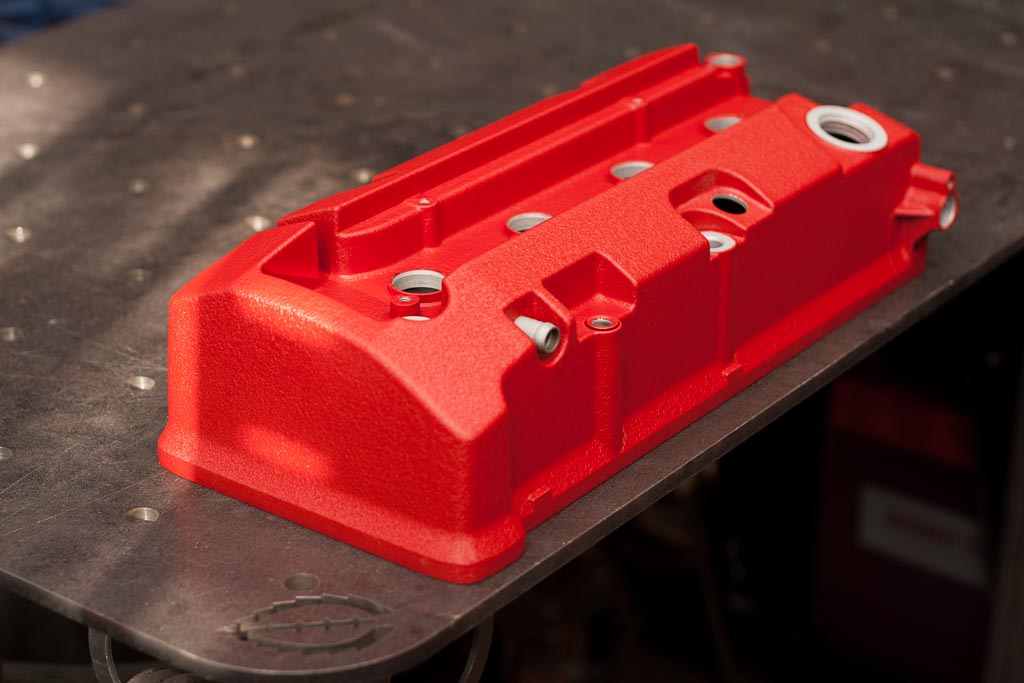
And here’s the final part after all the plugs and masking is removed. Nothing but the best for our clients!
Thanks for looking! If you’re interested more in our powder coating services, TIG welding or CNC cutting please click on the links. Or subscribe to the blog at the bottom right hand corner of your browser, click on the follow button. Stay tuned for another future project…
Refrigerated Air Dryer and Fab Work
Coming back from our Costa Rica vacation the shop has been busy! Thank you to all our patient clients! Here is just a snippet of a few of the things we’ve been working on since getting back.
CNC cut 1/4″ 304 stainless steel plates, media blasted, with SS hardware TIG welded in place. They’re used for checking pressure in a 4″ pipe at a dam site.
Some 10ga signs cut with customer supplied artwork. These will be painted and installed by the customer on a cabin somewhere in beautiful Saskatchewan.
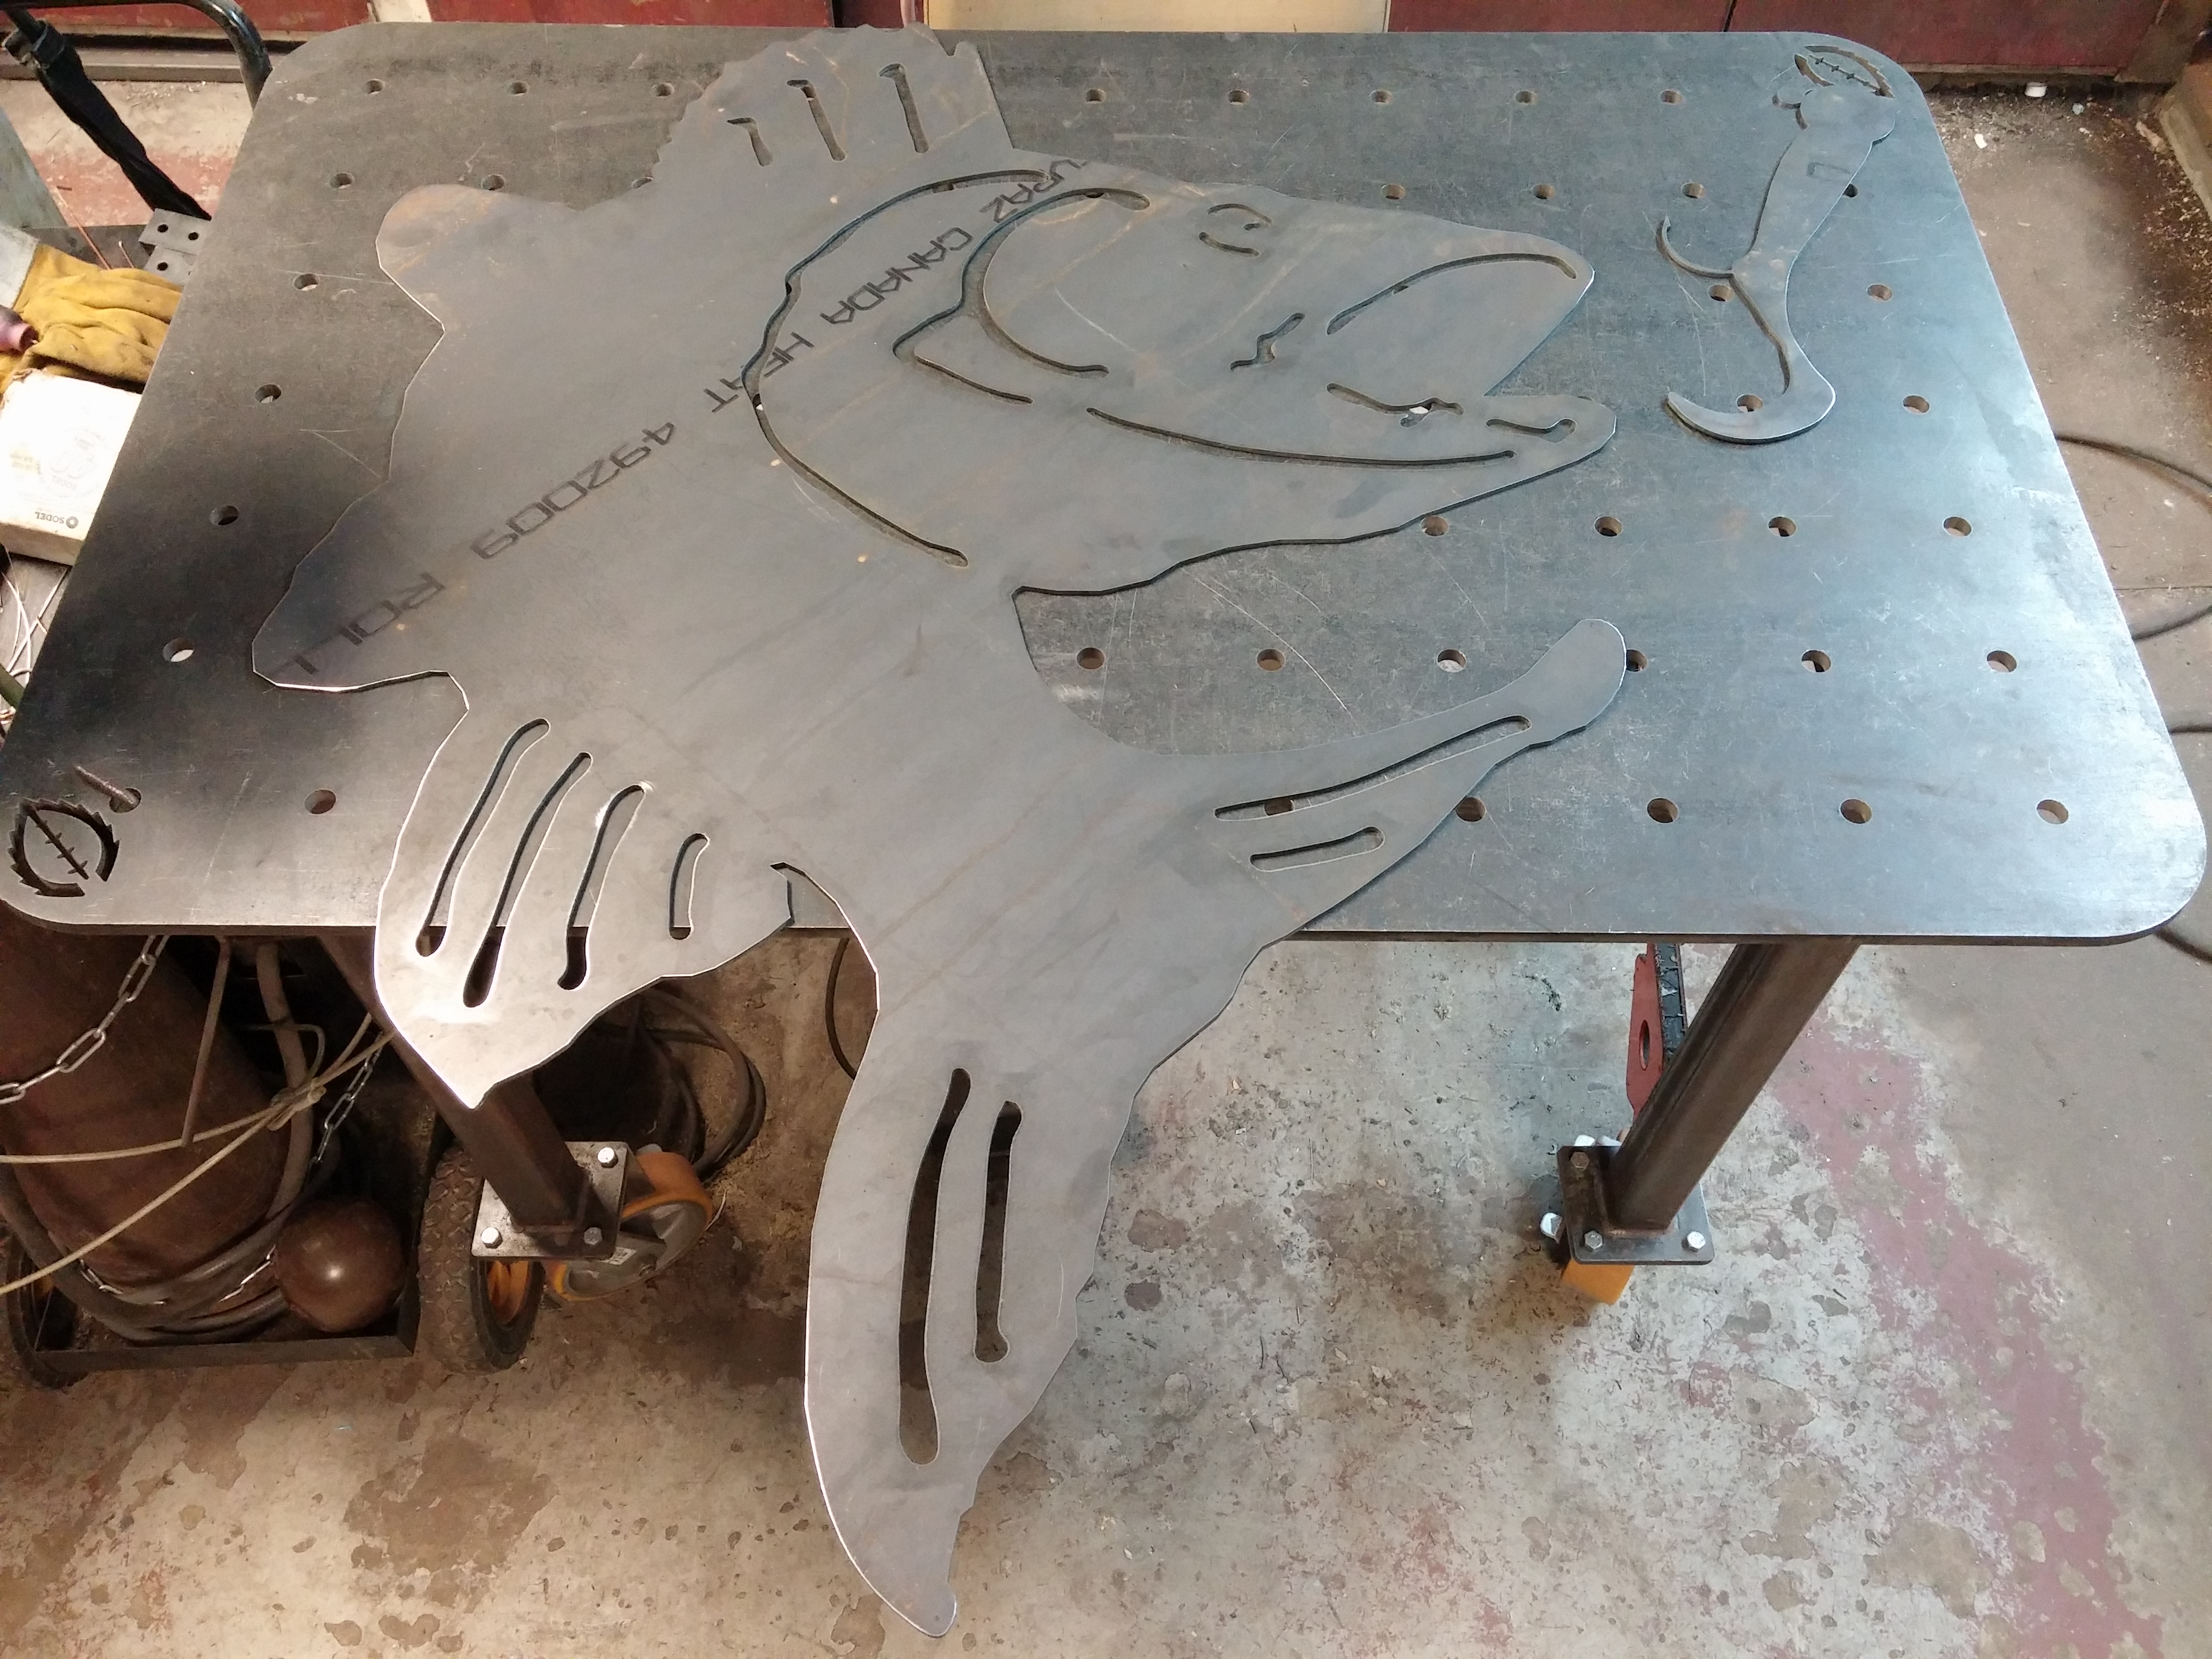
This fish was 36″x36″ and the lure is 19″ long.
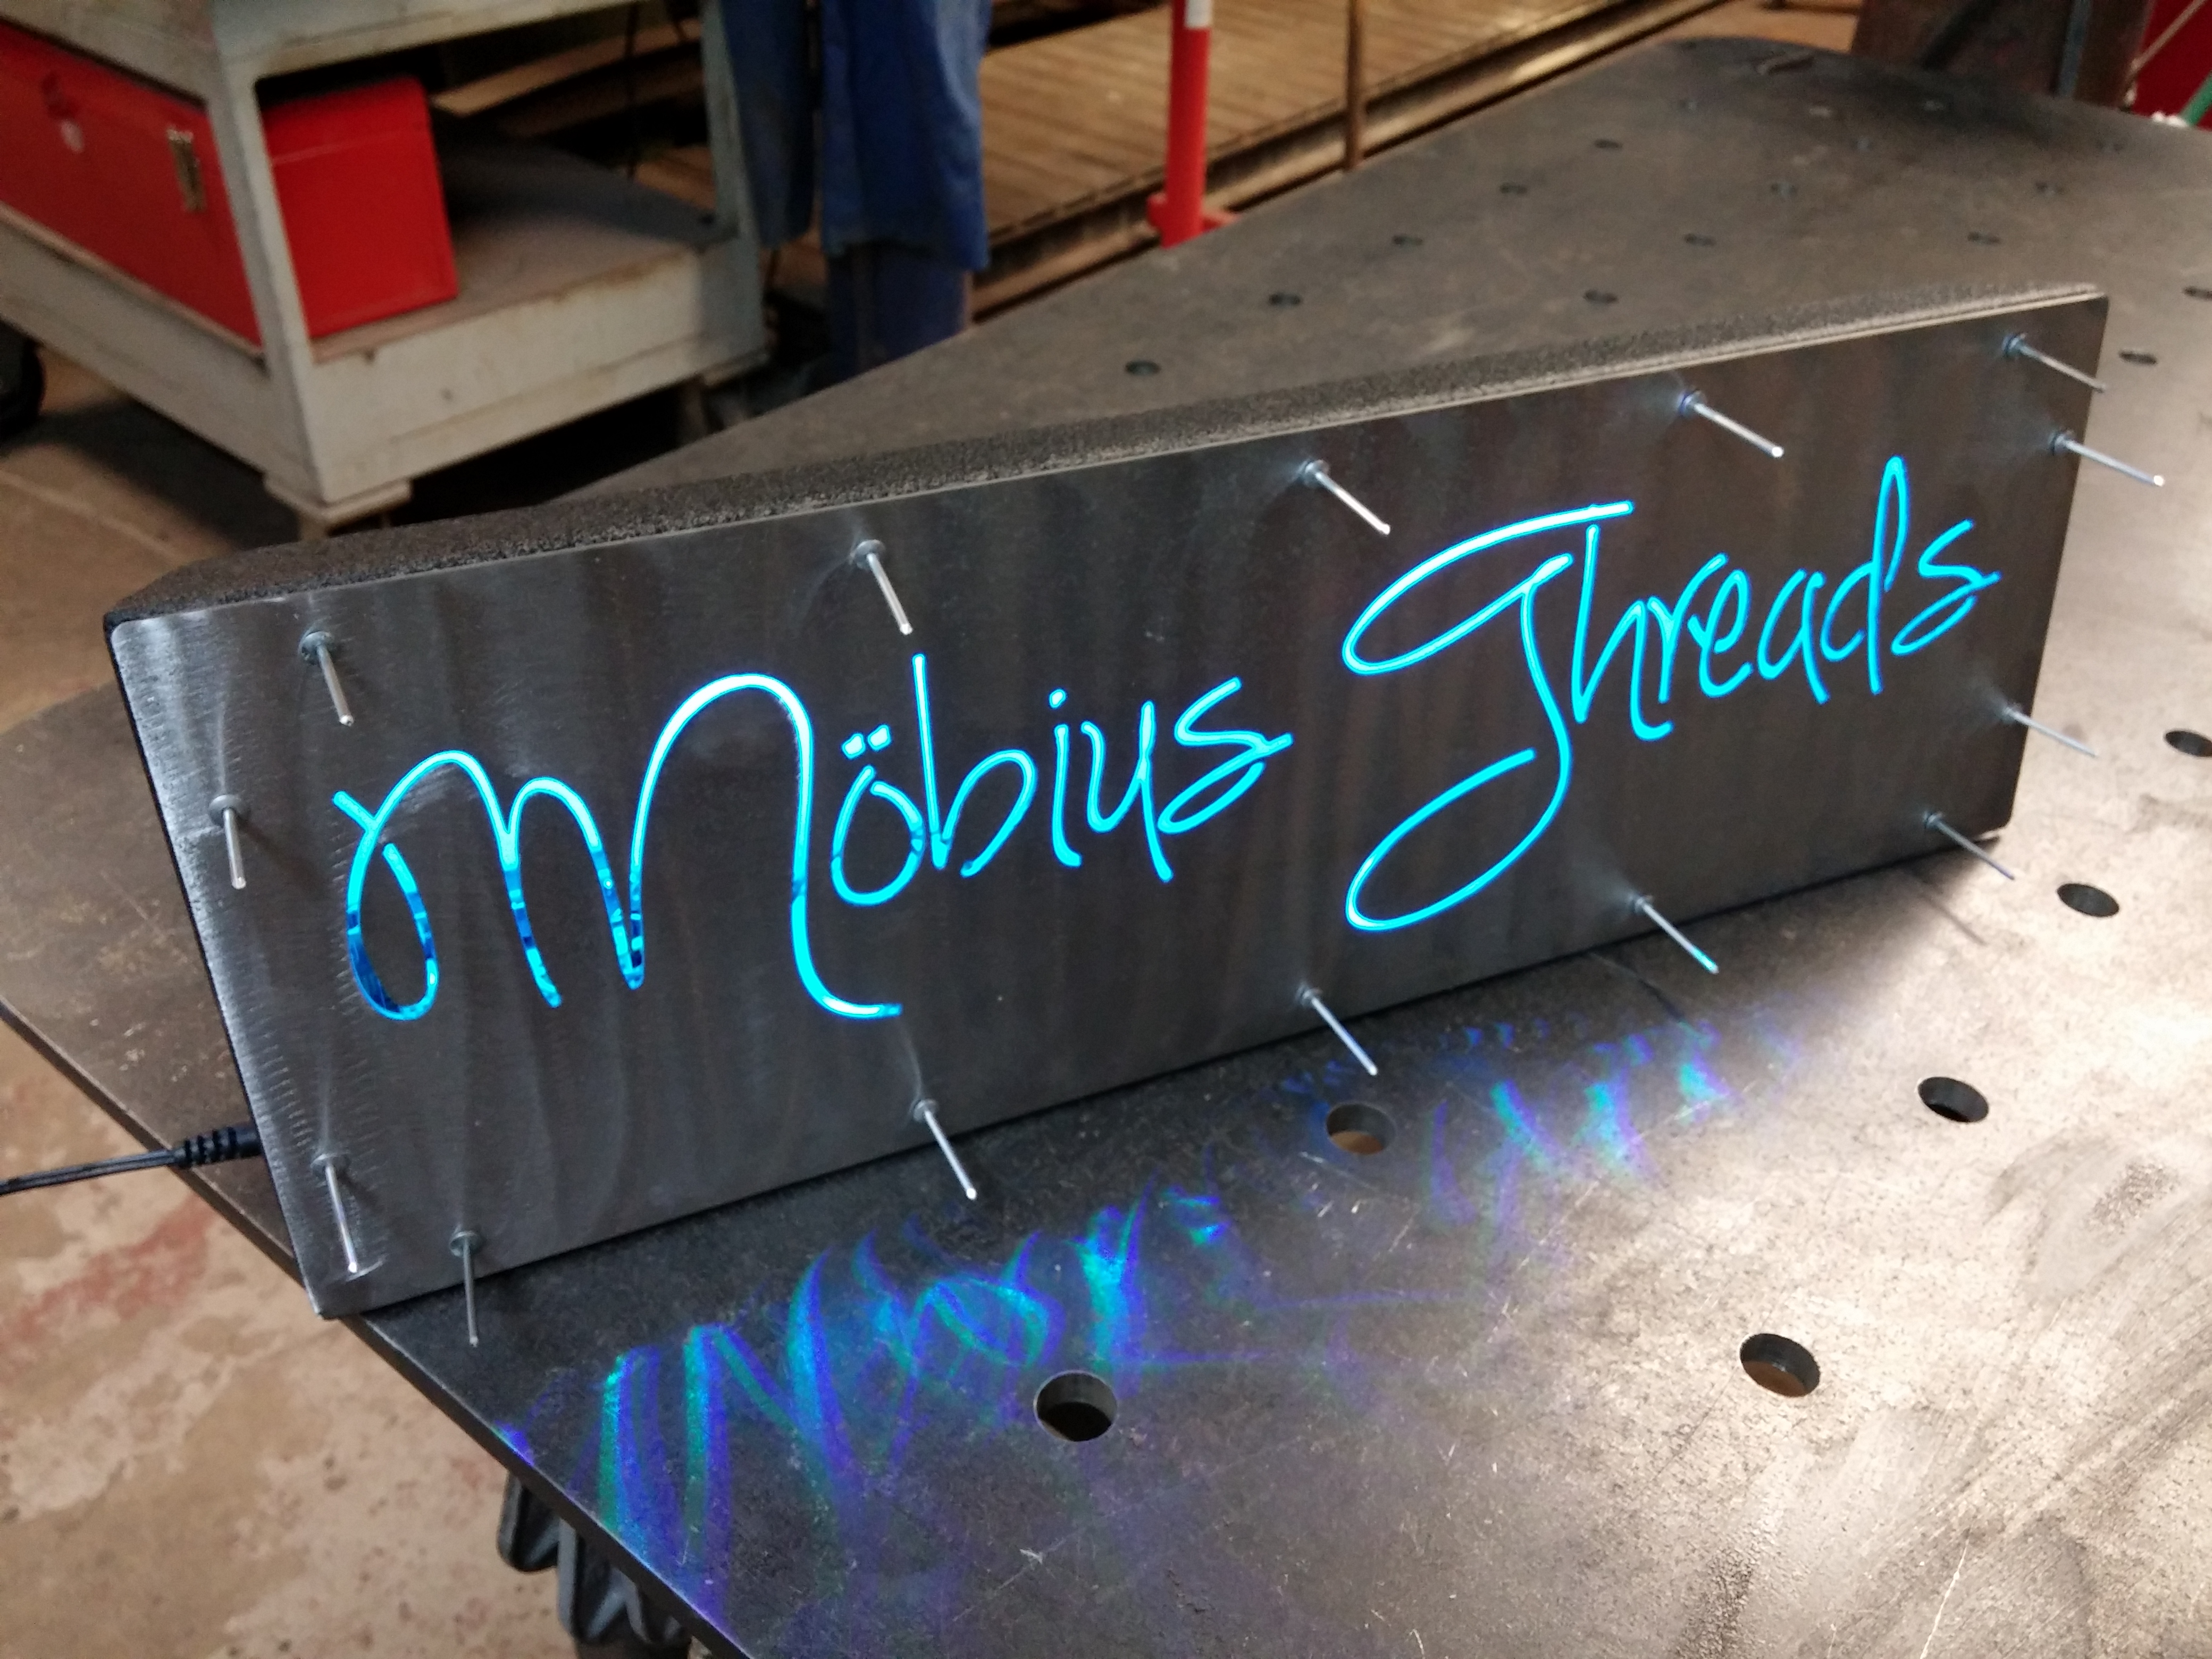
Also working on finishing up the prototype Möbius Threads backlit LED sign. The white LED strip was removed, an RGB LED strip was installed along with the drivers as well as a real time clock. So once programmed the sign will always know the date (until the lithium battery discharges in 5-10 years) and the date will control how the lights function based on season and special events without any intervention needed. Keep your eyes posted for these popping up in and around Saskatoon wherever Mobius Threads products are sold.
Here’s a short clip of it rolling through a few color sequences.
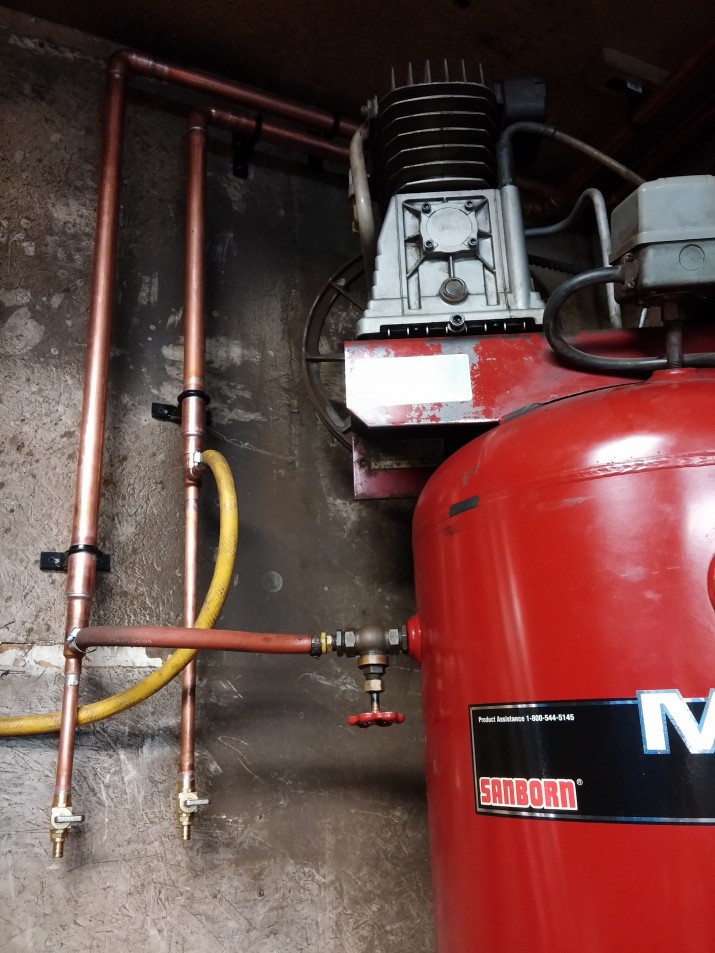
And this… Please excuse the dirty walls, this is in the very dusty dirty area of the shop. We’ve had some issues in the past with moisture when CNC cutting, so to alleviate that we finally plumbed in our refrigerated air dryer. This will reduce the air temperature of the compressed air to it’s dew point. This will allow the moisture to drop out of suspension and either separate out in the air dryer or settle in the 1″ copper tubing which will then run to a set of drains next to the air compressor. This will result in dryer air for all the tools in the shop, primarily for the media blast cabinet, CNC table and powder coating gear.


We’ve got more projects coming down the pipe. Stay tuned and thanks for looking!
In Costa Rica!
We all need time to unwind and relax. This blog post is different than any other on this site. There is no CAD or CNC cutting or even welding… So why bother write one, right?
Sometimes we get so busy we begin to miss the small things and it’s best to do a soft reset. Clear everything off our plate and have some alone time, or in my case a second honeymoon with my beautiful and talented wife of 5.5 years. Our little girl is being watched by her grandmother during this duration. It was a hard decision for us not to have her come along. However, this trip will strengthen our bond as husband and wife, and our little girl will get to spend some precious time with her grandmother.
My wife and I are both entrepreneurs, strategically acquiring more assets and the skills that go with developing new products and services. This allows us to offer products and services with extreme flexibility and total in-house control. With this comes a huge dedication of time and being good at balancing work and family life. Sometimes some work days go from 8am till 5pm,then it’s usually play time with our babe, Mila, until she is tucked in bed at 9-10pm (she’s a bit of a night owl). Once she’s asleep, we’re back working till midnight or later depending on deadlines or customer requirements.
Our fantastic new and repeat clients allow us to be our best. This is usually by the customer expecting something unique and of very high quality. We thrive off this. Whether it be creating custom scarves or fabricated structures. Nothing is “normal”, everything is unique.
When there is downtime we’re finding ways to make use of that time to work on prototypes, building our businesses and our brands. For example this blog post is being written as we are flying over the Yucatan peninsula on our way to Liberia, Costa Rica from the George Bush airport in Houston, Texas. It’s hard to rest, even on vacation.
We’ve got a lot planned in Costa Rica, we’ve even pencilled in a sponsorship on this trip with the creation of our trip video.
I am not a cinematographer however I will consult with those in the know, pick up a camera, use it to the best of my ability. Then sit down and learn the editing program to produce the final video. So keep your eye out for a video shortly. Till then… Pura Vida!

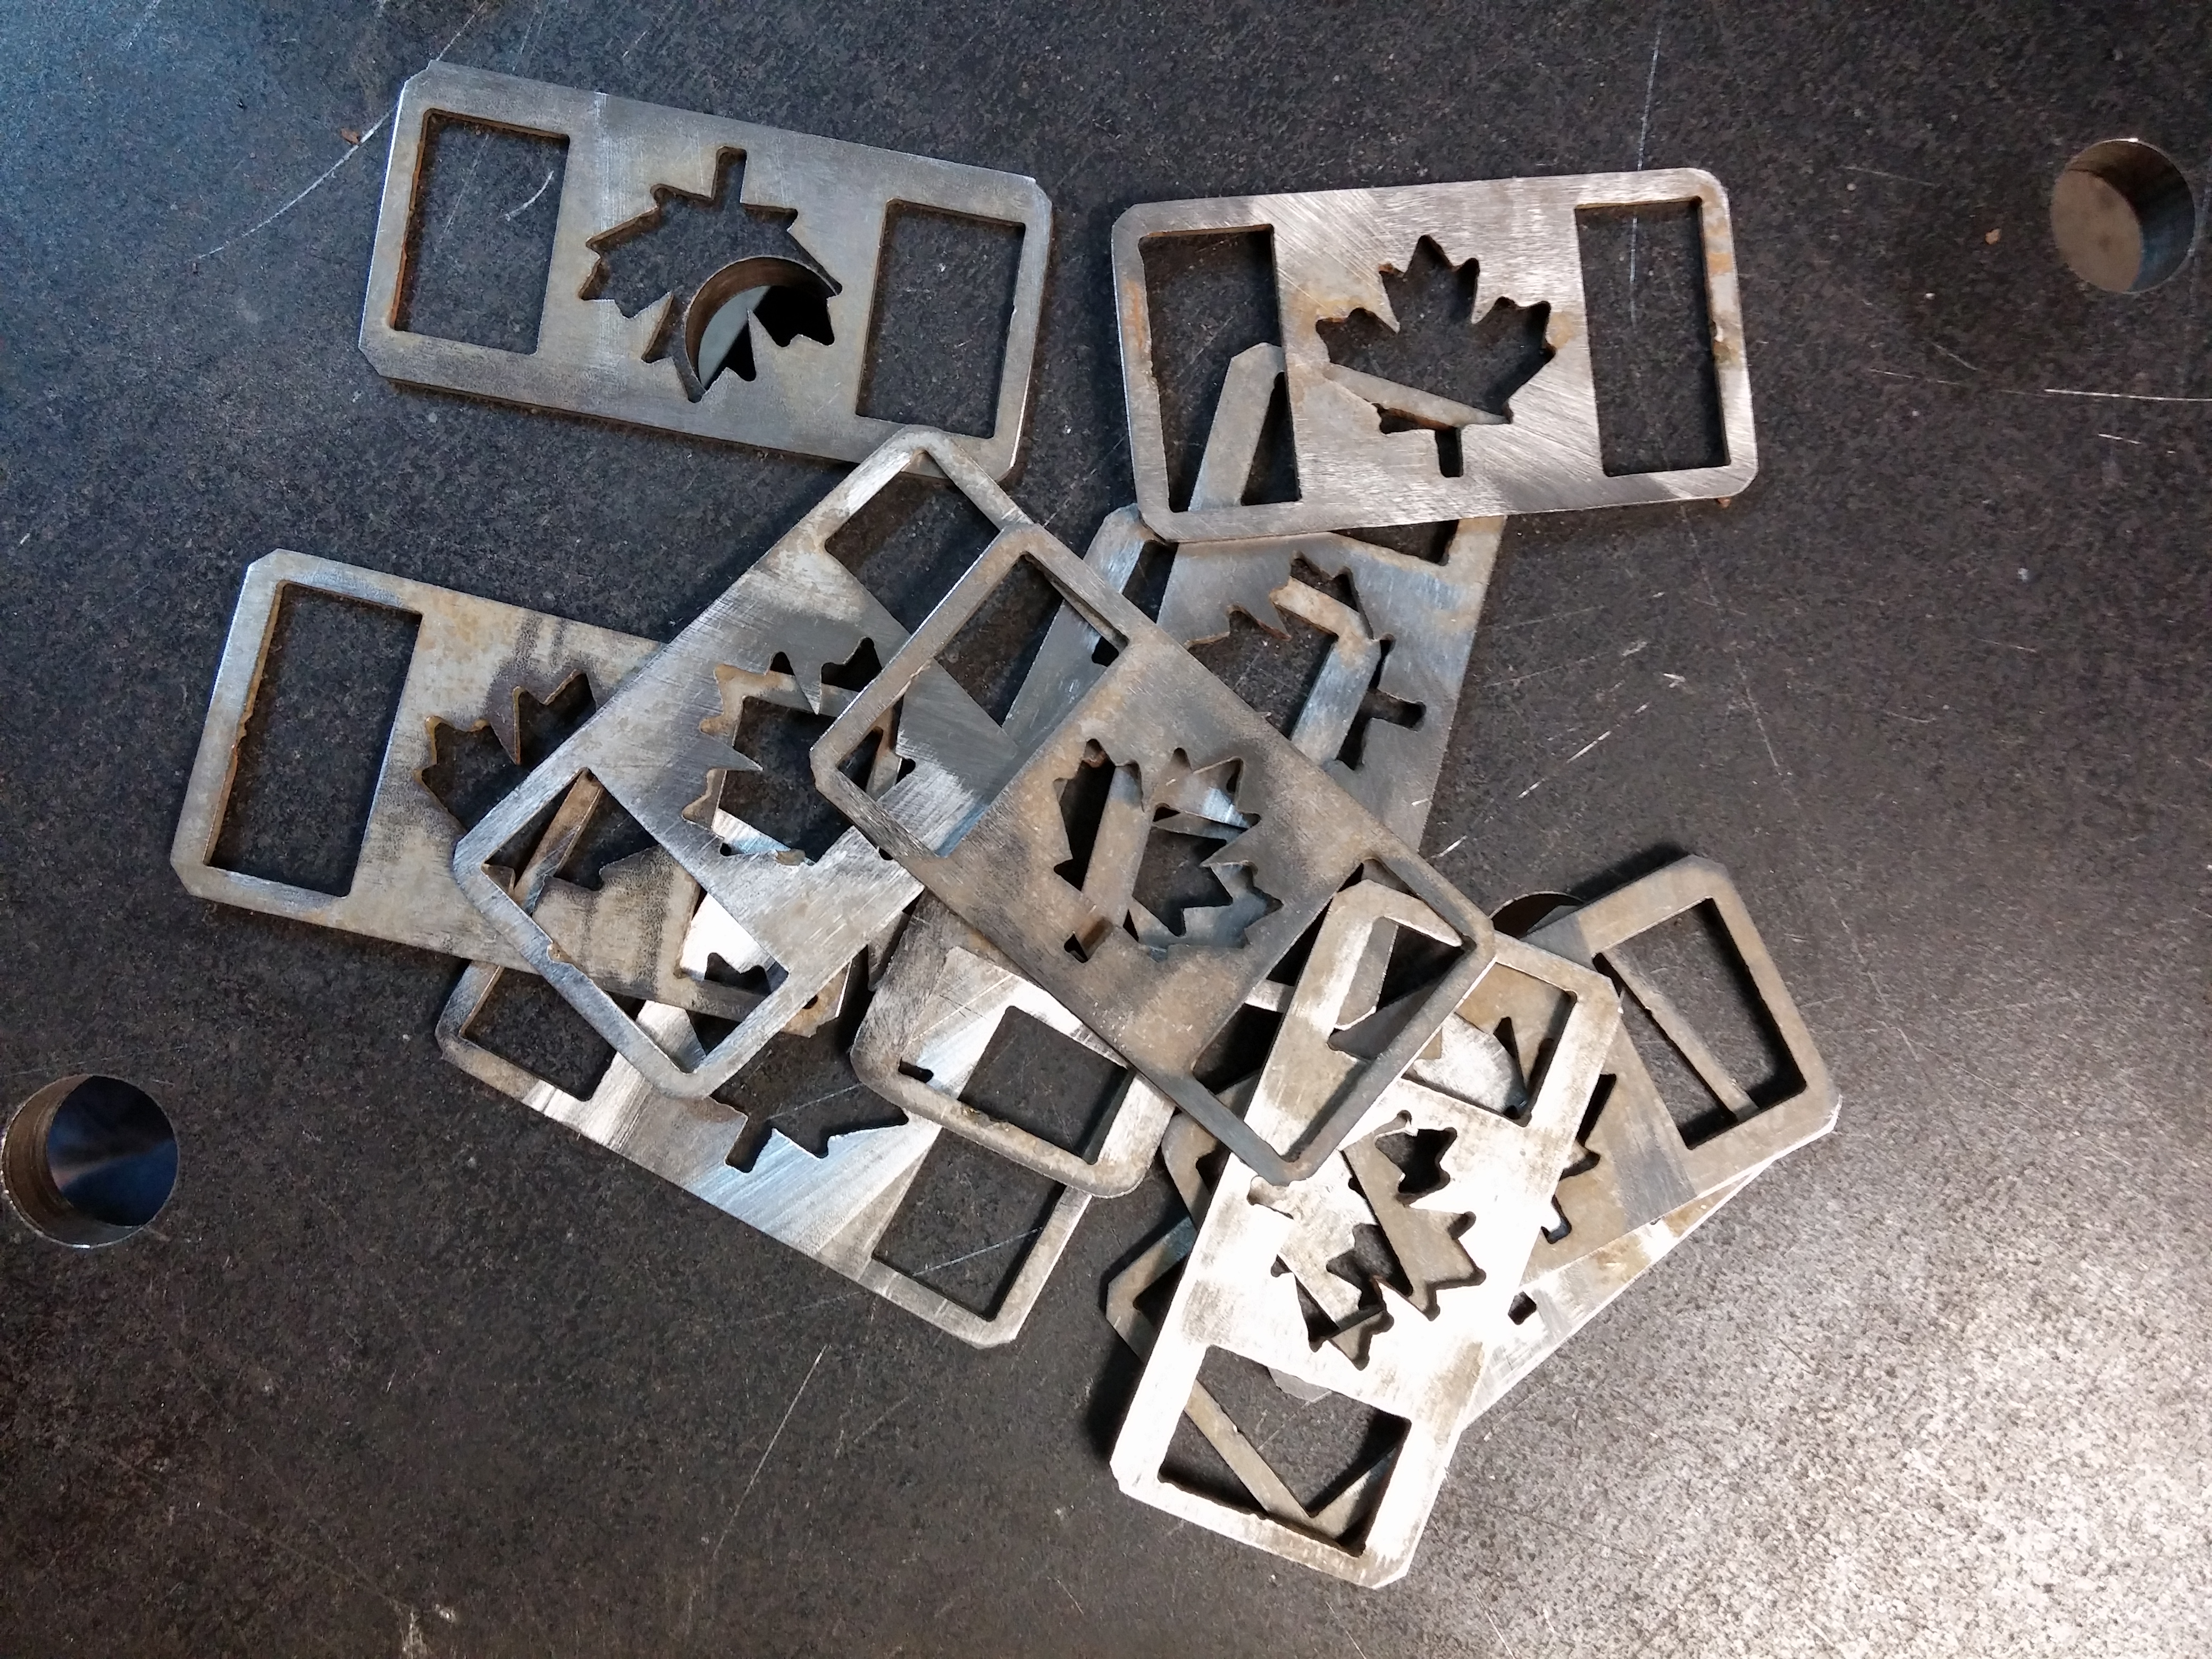
Go Canada!
My wife and I have been planning a vacation for a while to Costa Rica and the time is finally here. So instead of buying the typical cheap quality Canada flag luggage or backpack tags, why not make it instead? We slotted this in with the Mobius Threads sign on the previous blog post. It is cut out of 16ga steel to be as light as possible. Here’s a few photos. Go Canada!
Here the parts are cut off the table and submitted to an acid bath to remove the dross and mill scale.
The tags are then bead blasted to ensure a clean, textured and oil free surface to get it ready for powdercoating.

These are the parts after powder coat. We used a Super Durable Wet White and Wrinkle Black for the tags. Just to allow them to be used on light or dark straps.

Here’s some examples of the white. There are two different sizes cut, one for 3/4″ straps (on the left) and another for 1″ straps (on the right).

Red and white sure go well together!

Go Canada!
Testing the new Brake
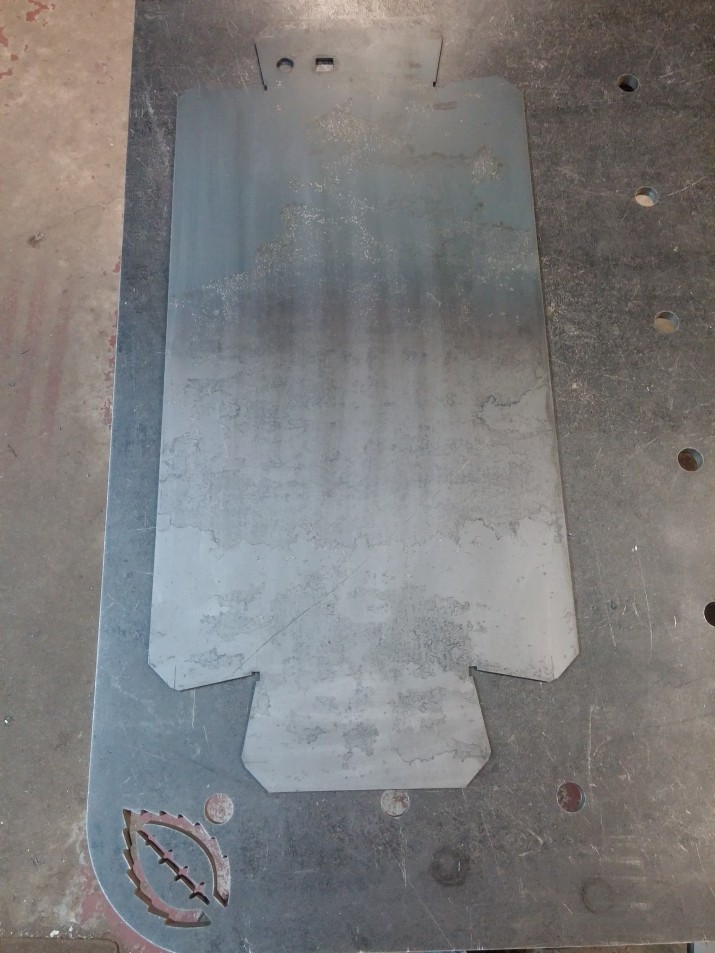
We’ve been busy working on a few various projects and we’ve finally had time to do some testing the new brake. Here’s a project we just worked on and recently completed, this blog post describes the process that it took to build it. The part was designed in Solidworks and then a flat pattern was created and then cut on the CNC table.

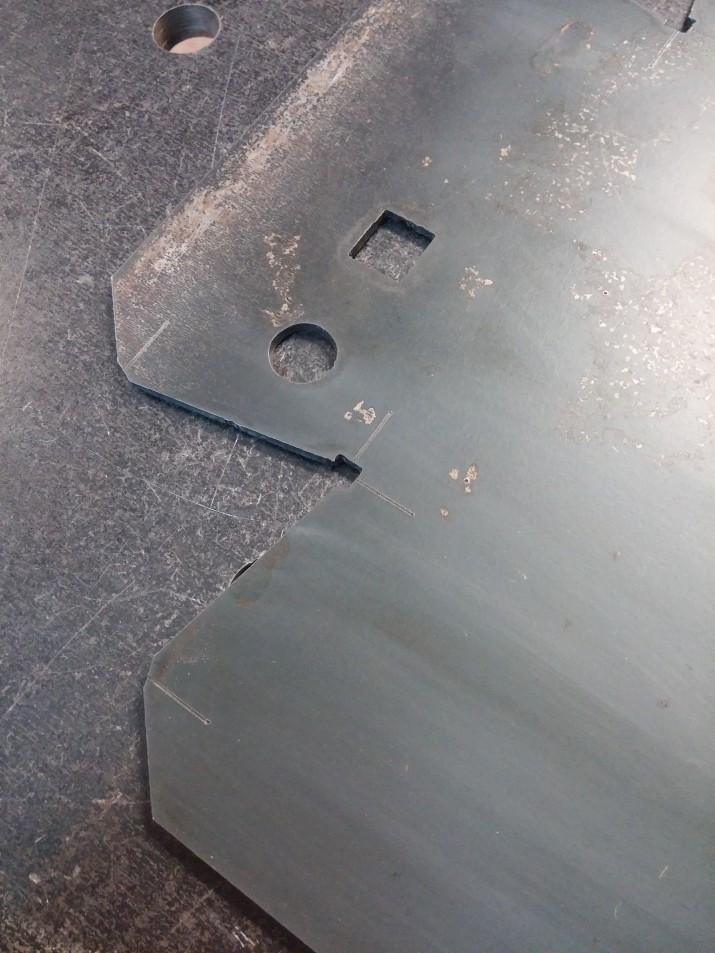
The engraved marks indicate the bend line locations. And the two barely noticeable centermarked locations are for two #4-40 countersunk screws to pass through to allow for an Arduino to be mounted inside. The holes allow for 12v power and USB access for programming.
The box is not a typical 90 degree box, it is tapered from the front to back so when it sits on the base it will tilt the sign slightly back. So the first four bends are bent to 100.6°.
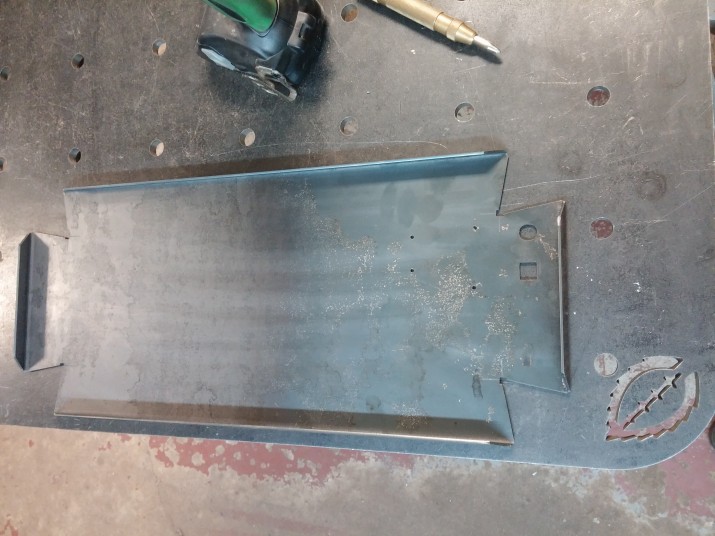
Removing some teeth in the brake to allow for the secondary bends.
These next four bends will be formed to 79.4°. which will close up the box.
Here it is finished forming. You can see the four #4 holes for mounting the Arduino Uno.
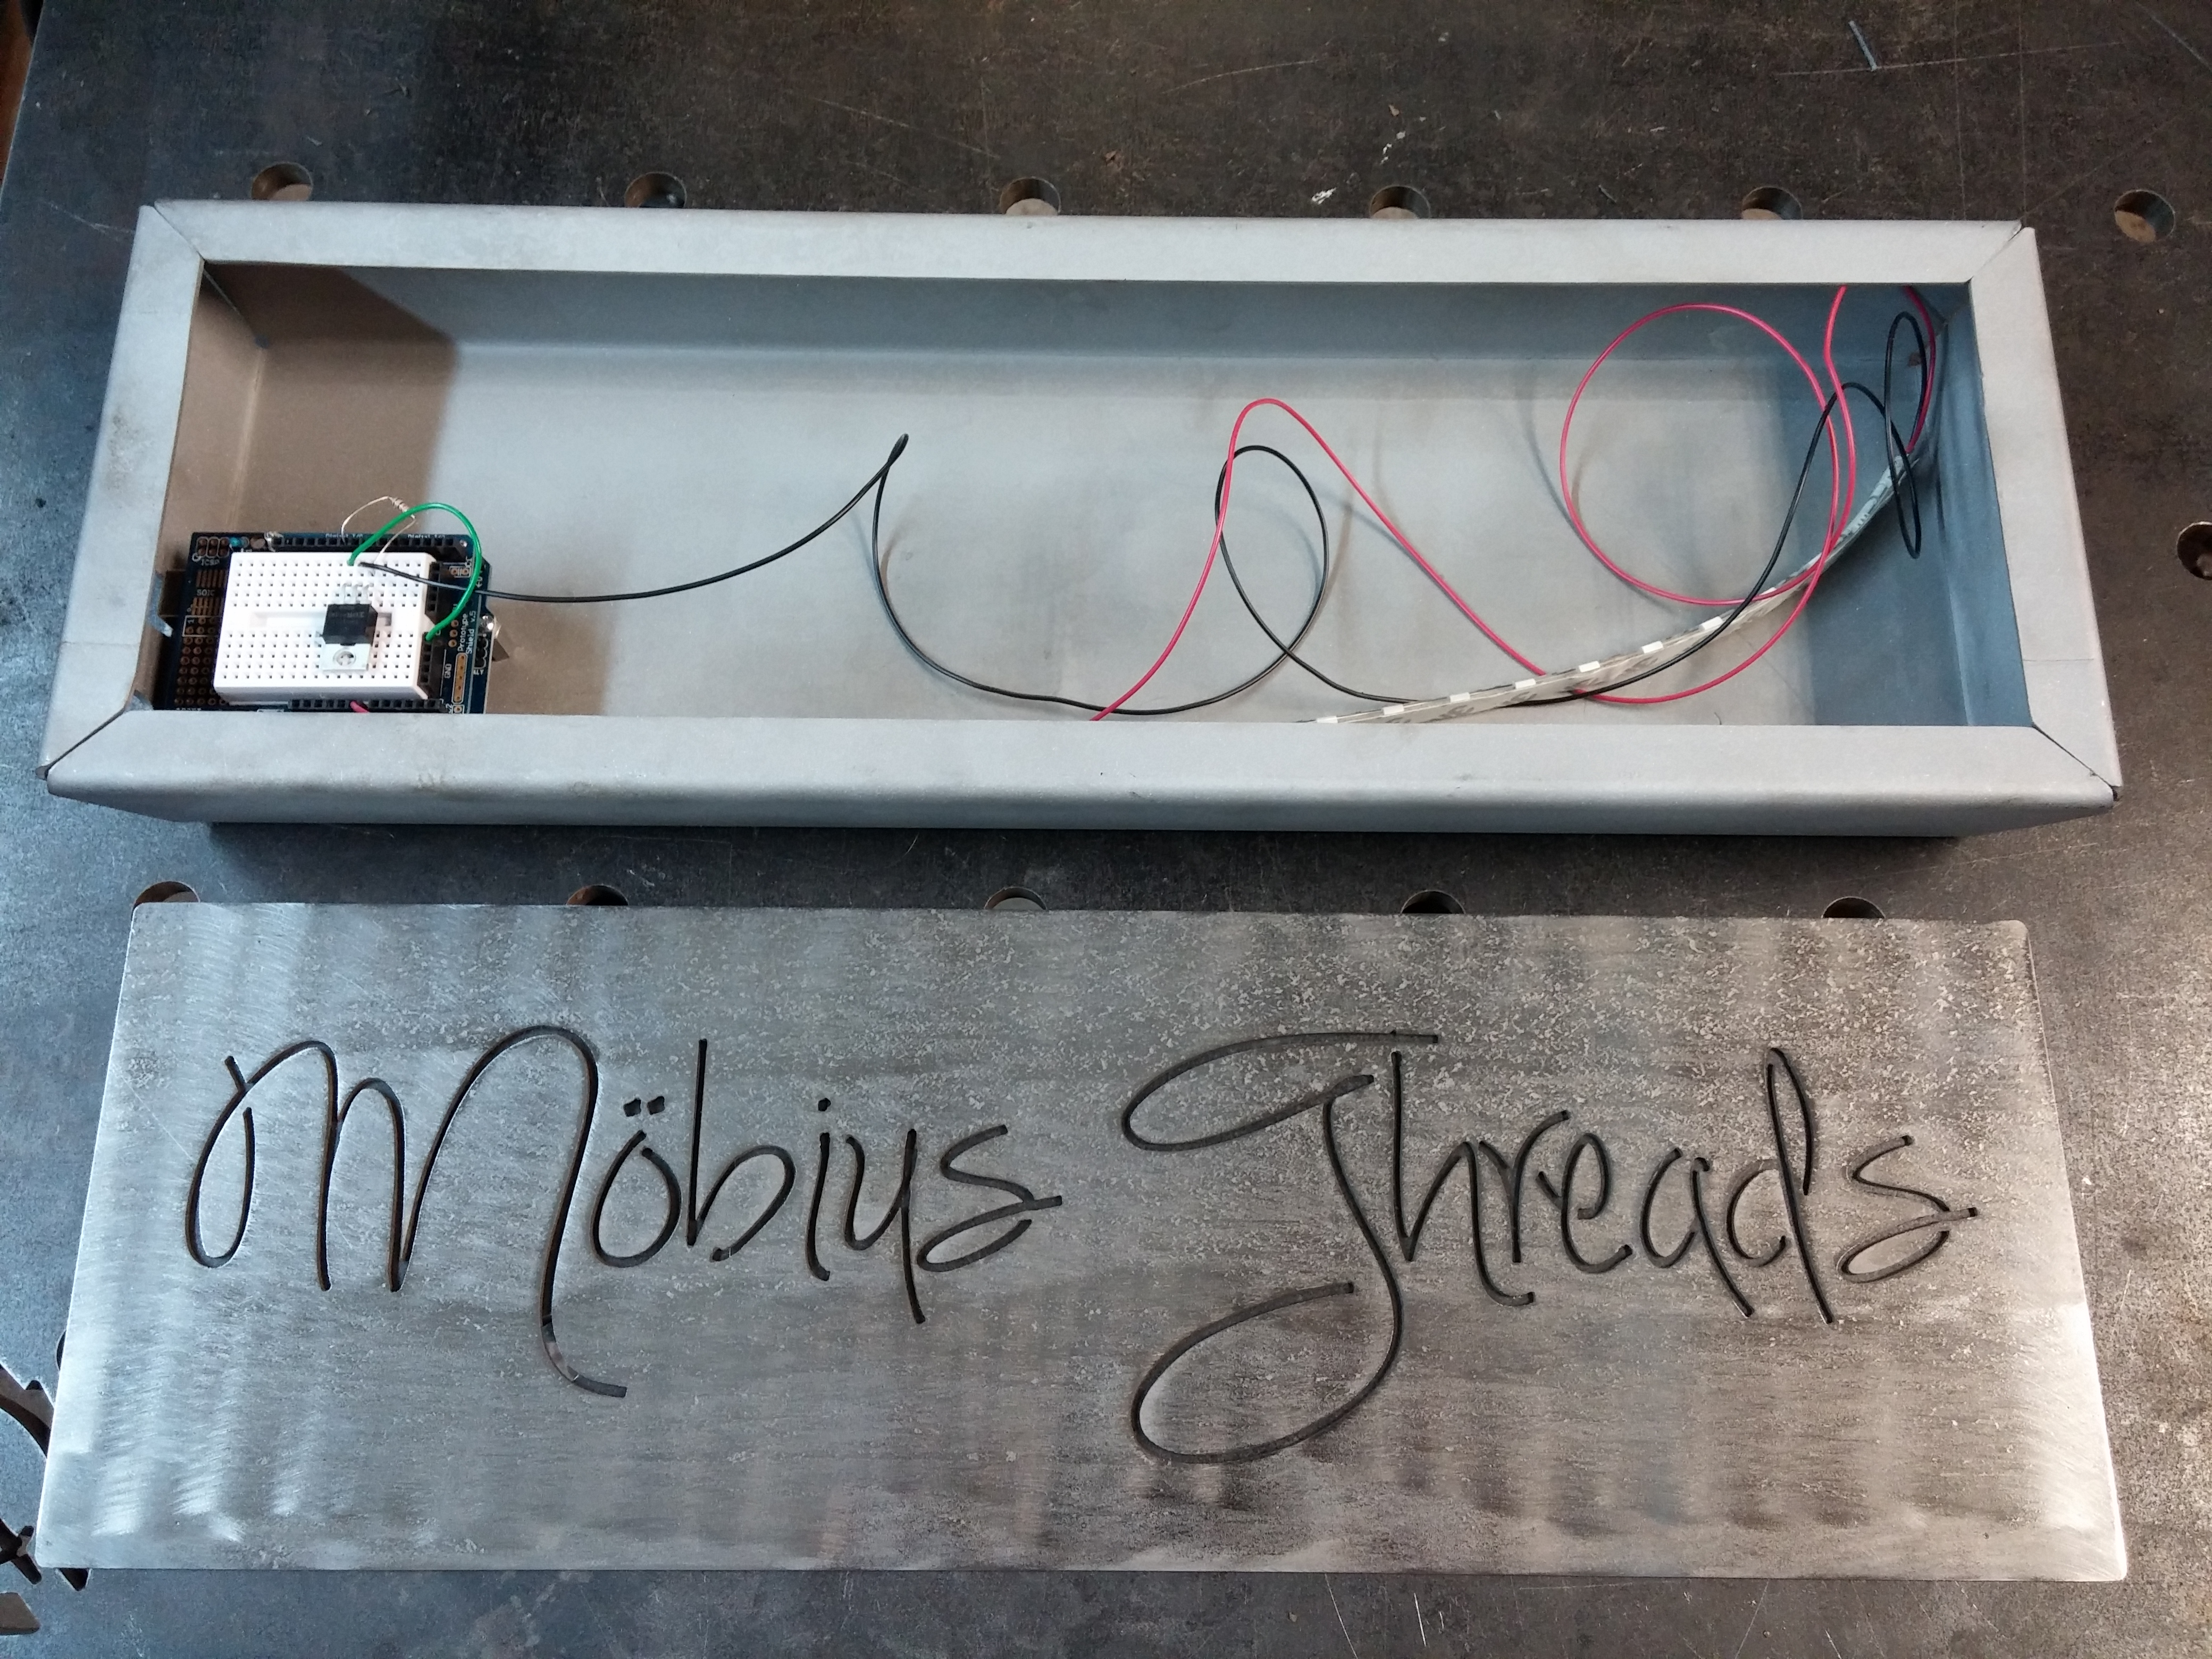
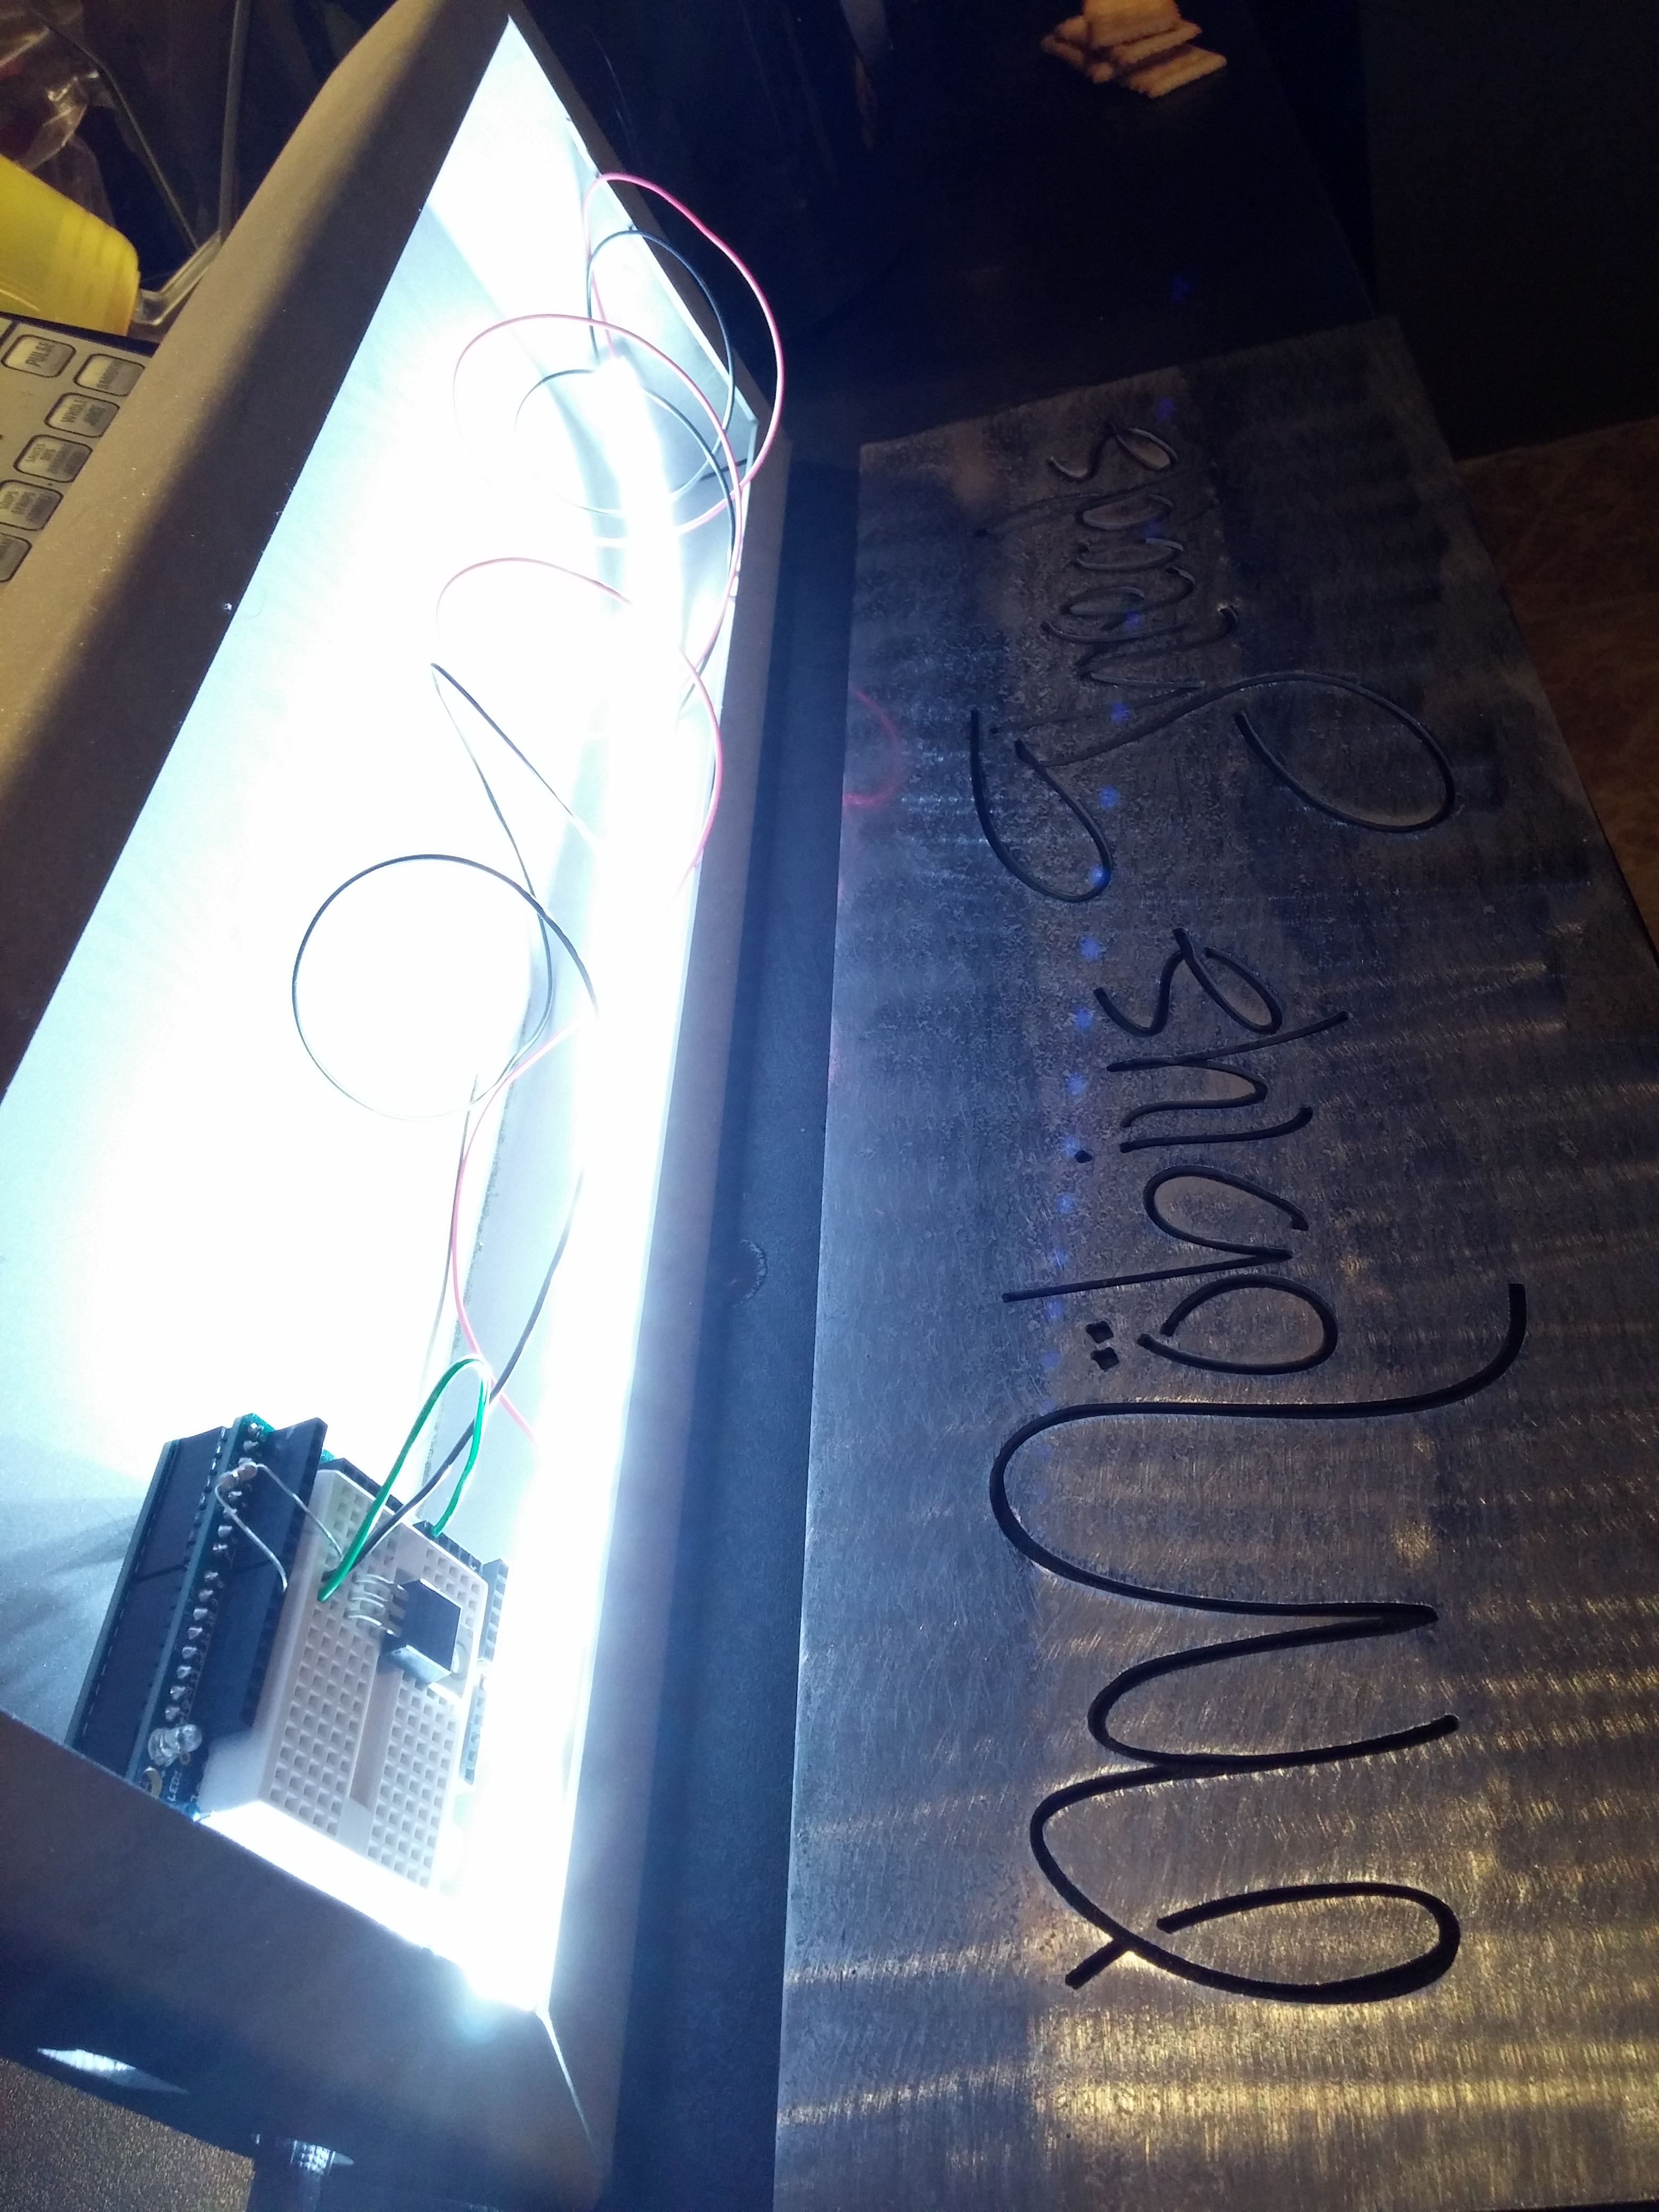
Next the box goes through an acid bath to remove the mill scale and then bead blasting to give it a nice finish to work with during testing. Also the front panel is cut out of 16ga steel sheet. Here you can see the Arduino mounted with a prototype shield installed. This allows for quick wiring and testing of code. In this photo the LED strip is a 12v white LED, however the final version will most likely have a RGB LED strip. This is an overkill application for the use of an Arduino, however the cost of the electronics is a very small percentage of the project.
Here is the preliminary testing to get an idea of how bright things will look and allowing some experimentation with the code.
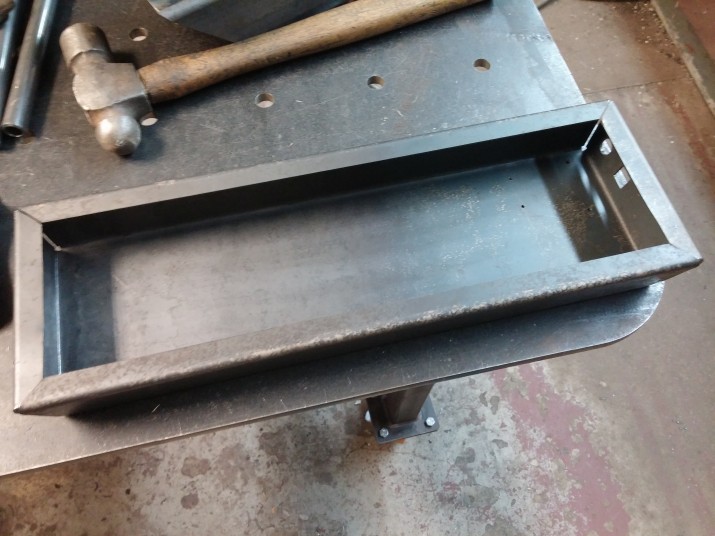
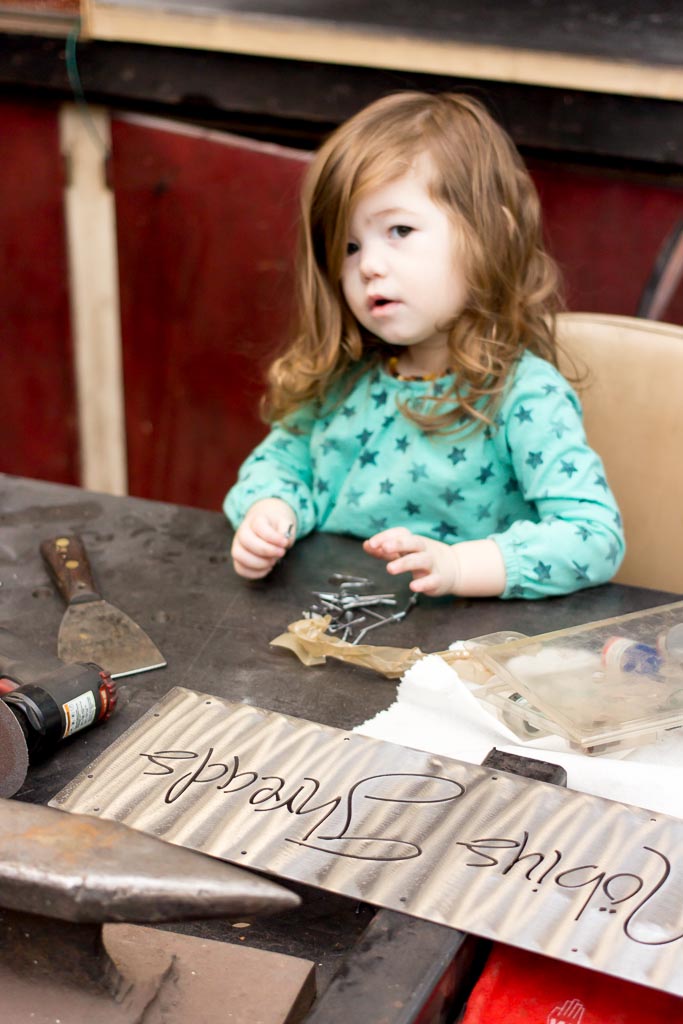
Before final assembly the front panel is drilled in all the center marked location (center marking was done by the CNC table prior to any plasma cutting). The corners of the box are TIG welded and ground down smooth. Then the box is then powder coated with wrinkle black powder. Here’s my daughter making sure all the rivets are accounted for prior to final assembly.
All the pieces ready for assembly (sans Arduino Uno).
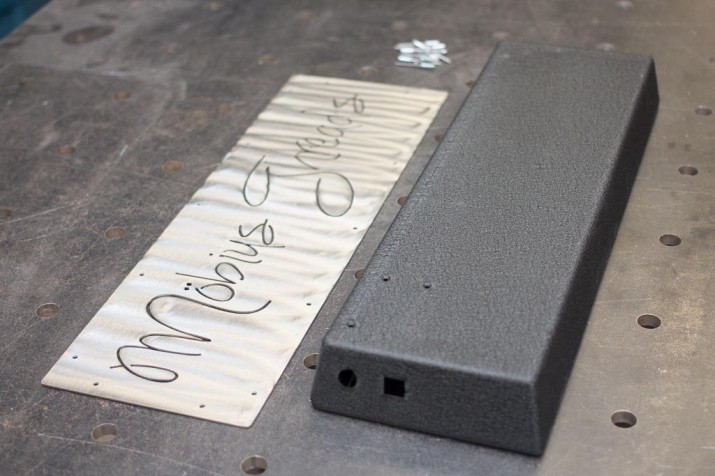
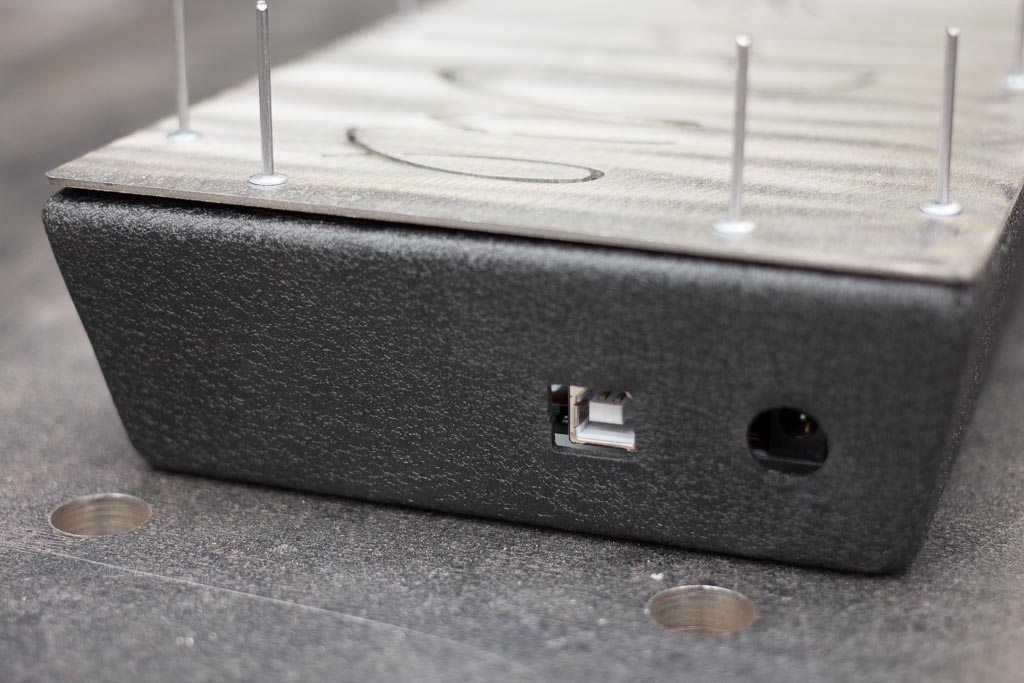
Here the Arduino Uno installed, wired and ready to go. The Type B USB port is left open to allow for reprogramming of the Arduino, to the right of it is the power entry port. That allows an AC-to-DC adapter (wall-wart) 12v power supply to run the Arduino as well as power the LED’s.
This is just a prototype light box, once the design is solidified dozens of these will be made and sent out to retail shops carrying Möbius Threads line of scarves, headbands and breast feeding covers.
Setting up equipment and updating the site
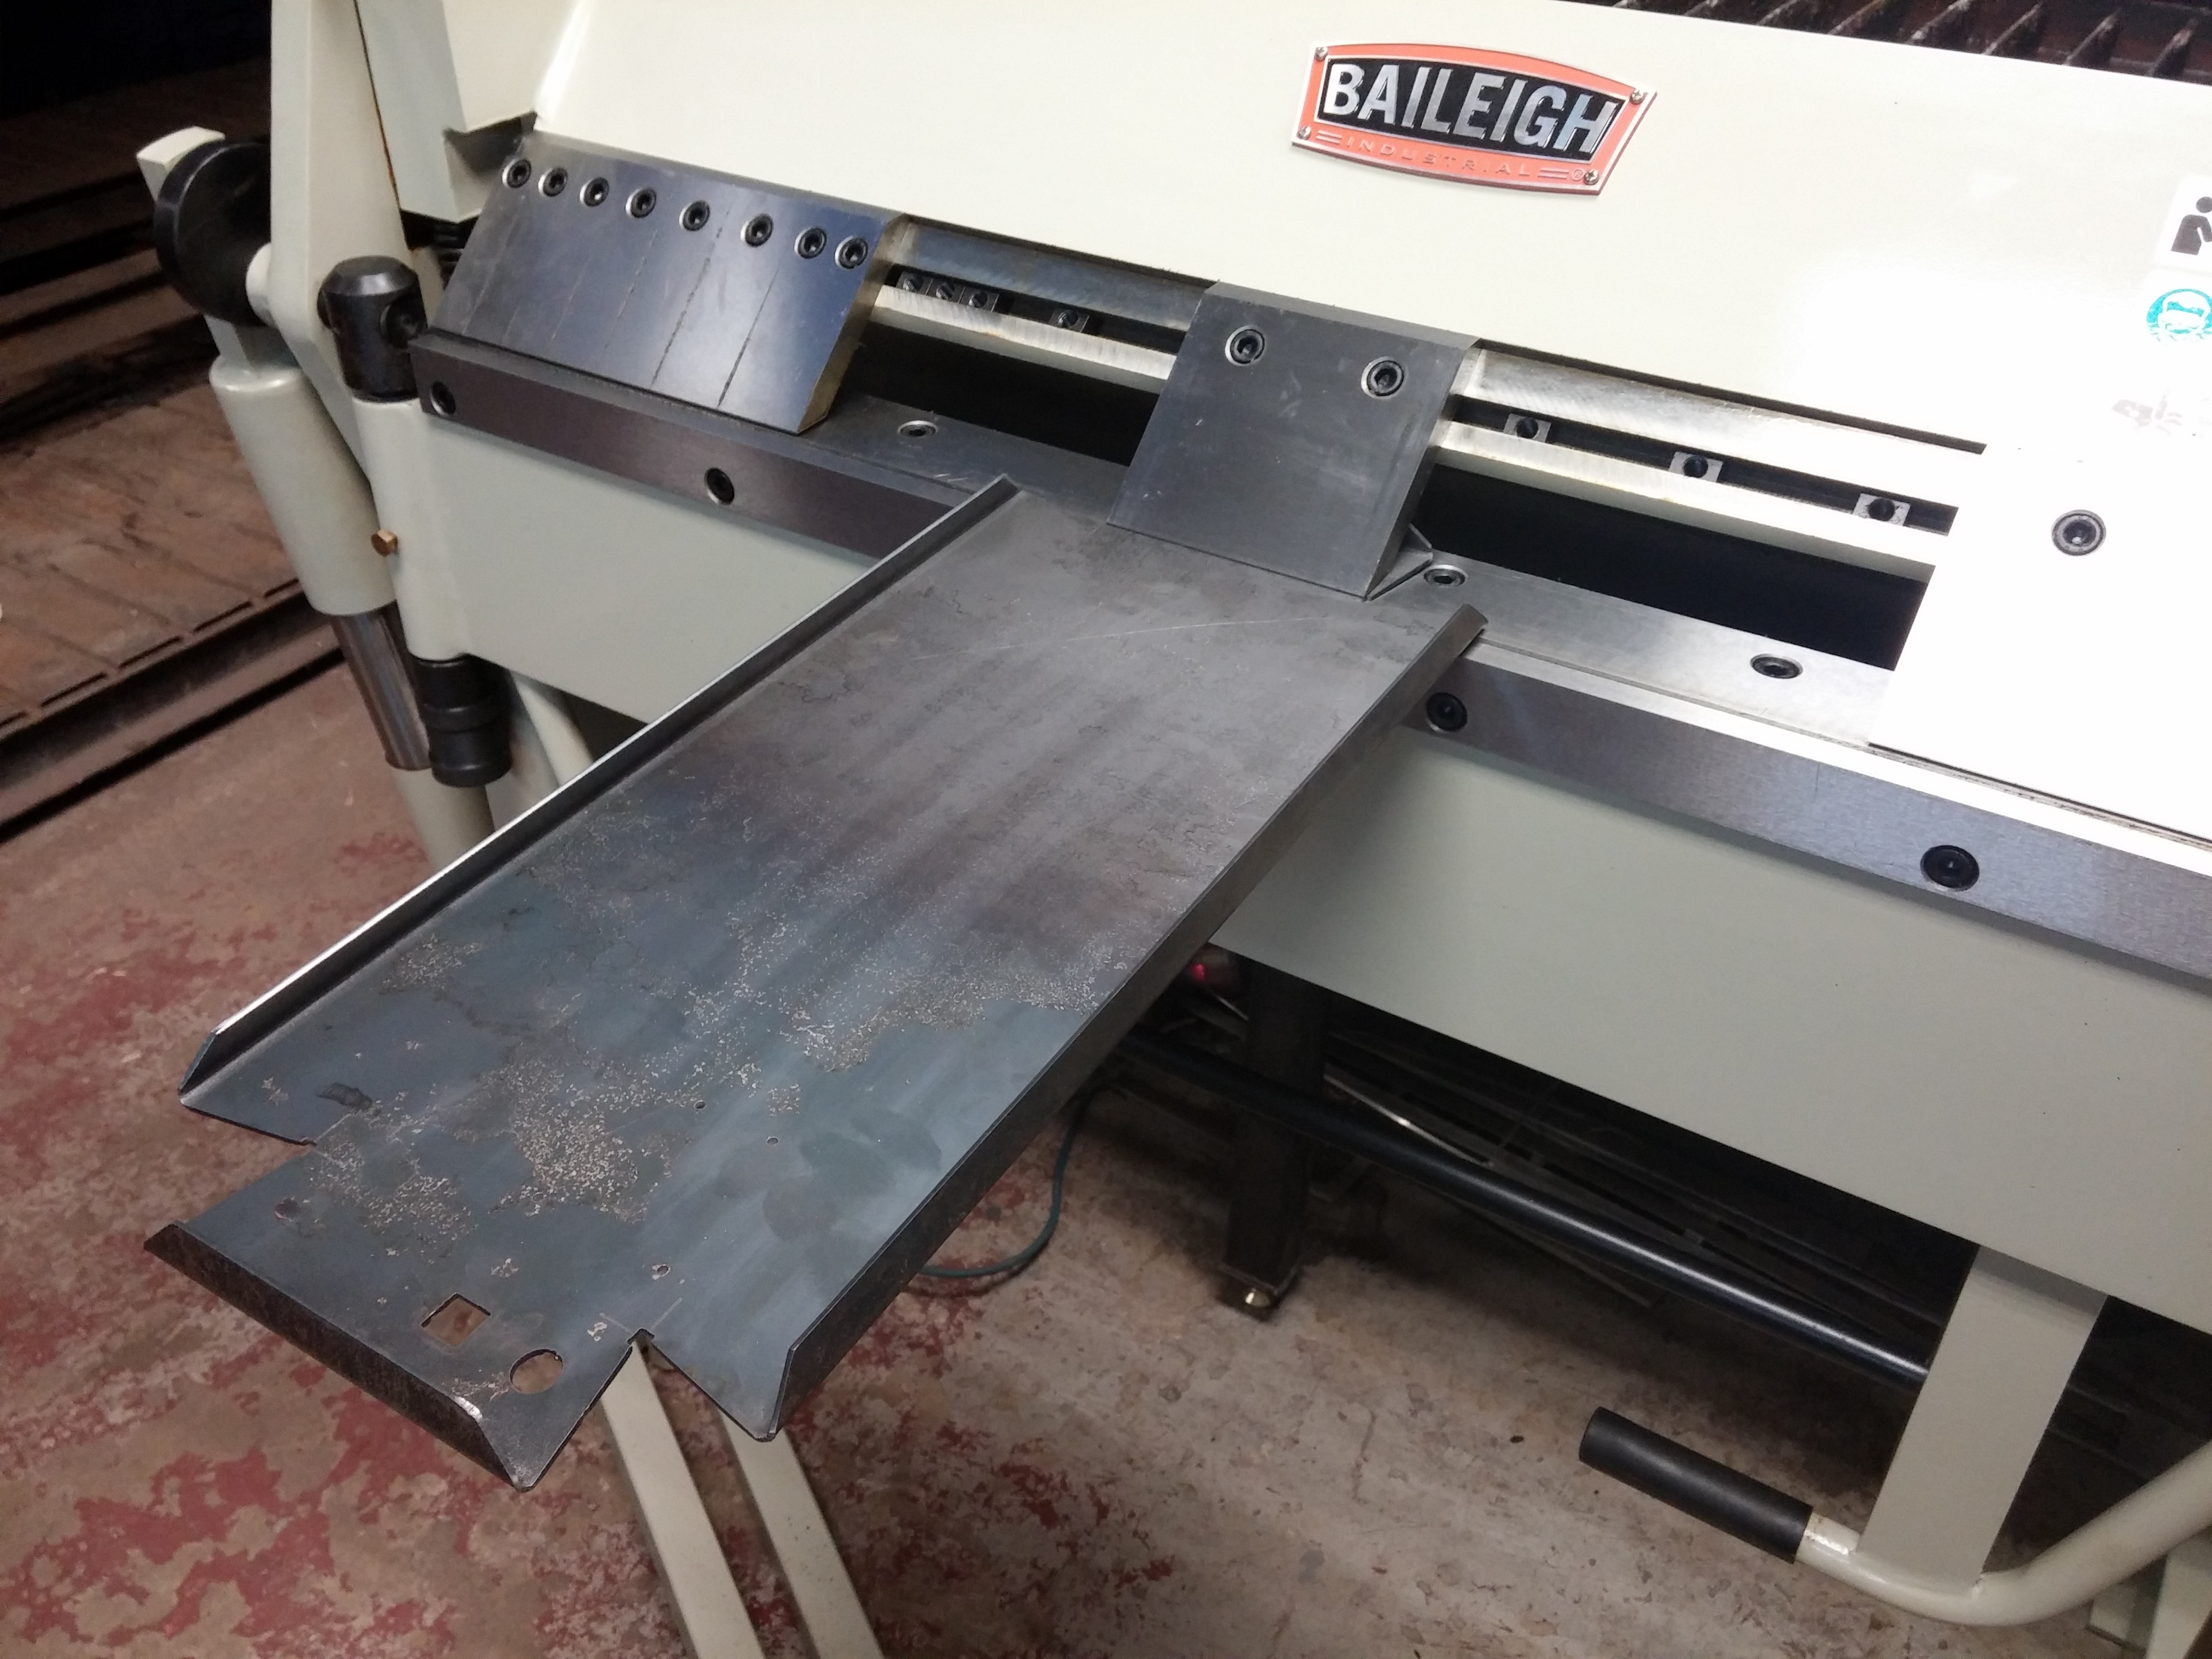
Well we’ve been busy setting up equipment and updating the site as of lately. We moved the Baileigh box and pan brake into position and it’s now ready to be put to work. There may be a CNC backstop being built for it in the future (time permitting of course). The press brake has been welded up and is ready to go as well. Here are a few photos.
There is some clamping prior to welding the angle iron piece in place. This will reduce the chance of warping due to all the heat. You can also see the black tick marks to ensure consistent start/stop locations while moving from either side and end to end, to attempt to spread the heat out evenly to reduce the chance of warping. After welding the guide rods needed a little bit of a tweak but nothing a light tap with a rubber mallet couldn’t handle.
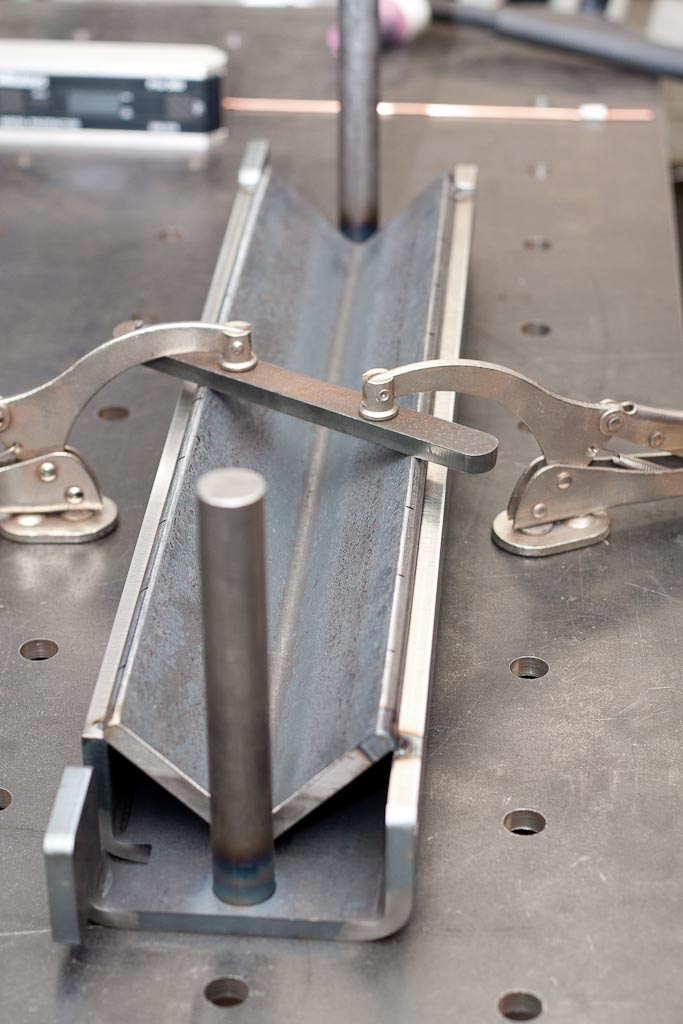
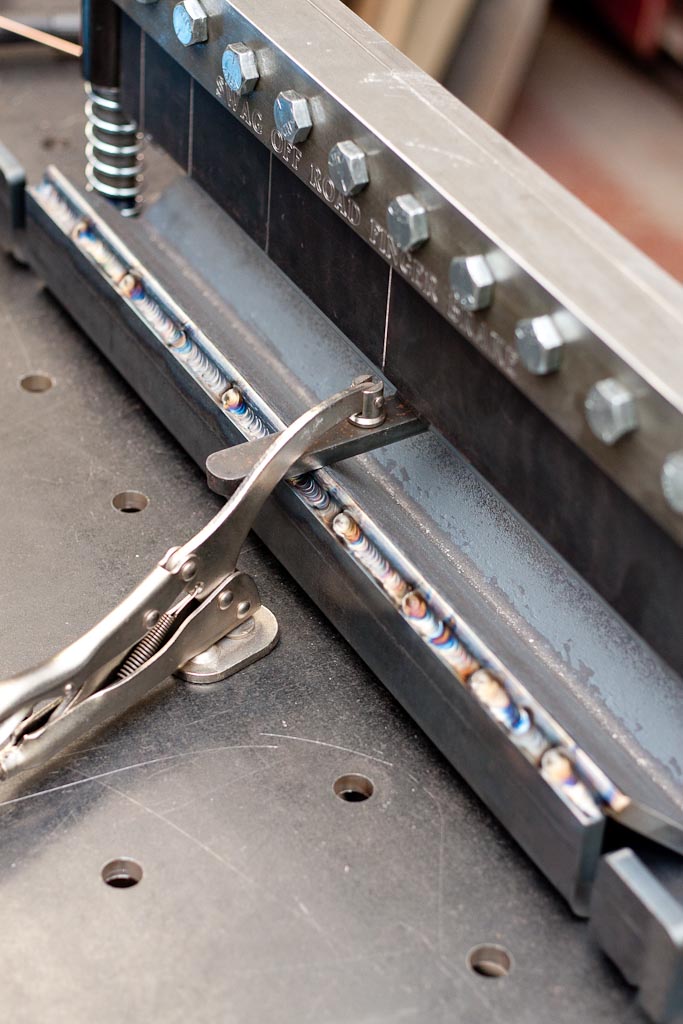
This will be loaded into the 50 ton hydraulic press and ready for any work that comes it’s way. Check out our updated services page. We have now added sheet and plate bending to the list of services available from Mint Design.
More equipment and cutting
Well Mint Design has been busy in the shop immediately after New Year’s! We’ve got more equipment and cutting going on in the shop. We’ve addressed deficiencies in 2013 and taken in a lot of feedback from our clients. The three main areas were dust control (from all the bead blasting prior to powder coating), obtaining drier compressed air (to improve CNC cutting, bead blasting and powder coating) and the ability for bending CNC cut parts (long thin pieces to short thick pieces). We’re in the process of building, setting up and testing all these new pieces equipment, all while keeping our shop running and turn around time as short as possible. We’ve got a lot of things on the go! Here we are cutting some 1/4″ plate, with AVHC lockout with 60% cut speed for all the holes (results in straighter holes with less taper) and 100% cut speed with AVHC active when cutting the bend lines and perimeter. These brackets are destined for a motorcycle shop in the Saskatoon area. 
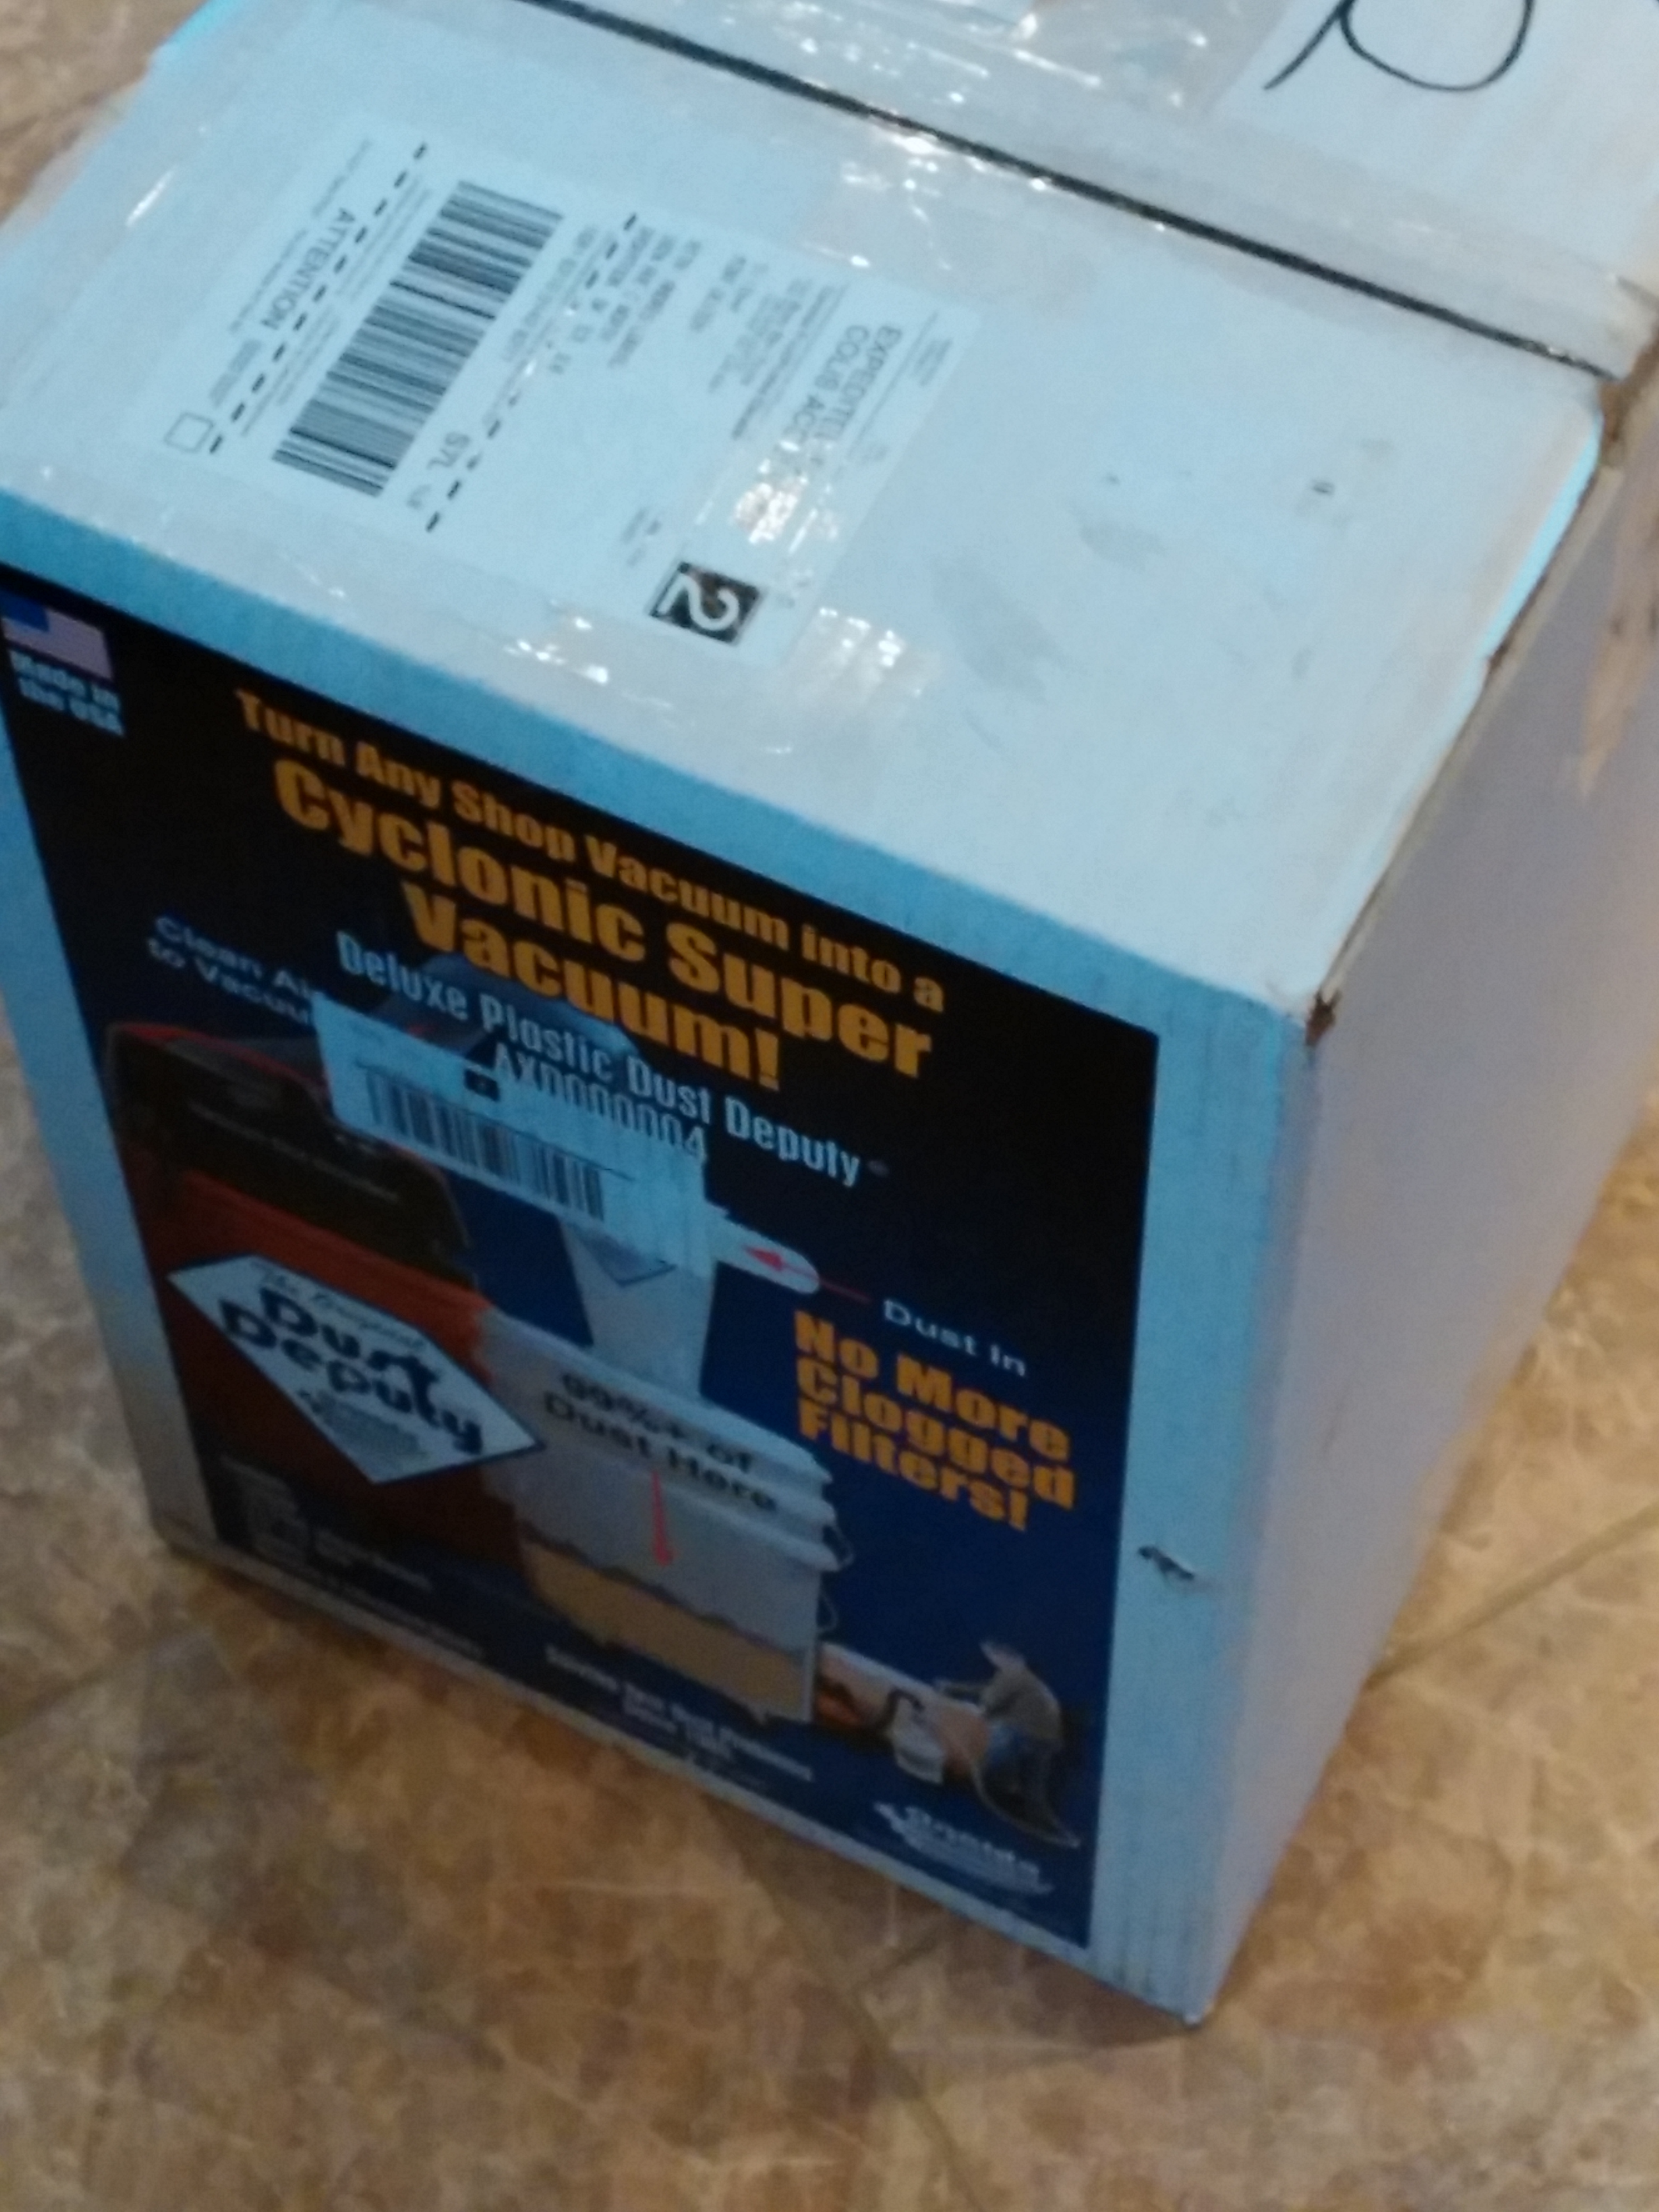
We also picked up something to reduce the dust in the shop and reduce plugging the shop vac filter with media dust from all the bead blasting. Most would use a dust collector, however floor space is a premium in our shop and the less cleaning of bags and filters the better. This dust collector uses basic centrifugal force to have the dust drop out of the air and into the bucket, with minimal dust entering the shop vac. Similar to the cyclone technology touted in Dyson’s and other bag-less vacuums, same principle just on a larger scale. This should prolong filter life and reduce the level of maintenance required. We’ll be sure to post updates once it is set up and how well it works.
And finally we had our Baileigh box and pan brake show up. Due to our small shop it took a bit of creativity, a lot of safety straps and muscle to move this 750lb unit around the shop! Thanks to the local Fastenal rep., Matt, for the patience while we unloaded it from the truck onto the hoist. It was a bit tricky without a forklift or the use of any overhead crane. After it was unloaded it was unboxed and then maneuvered into place next to the CNC table. 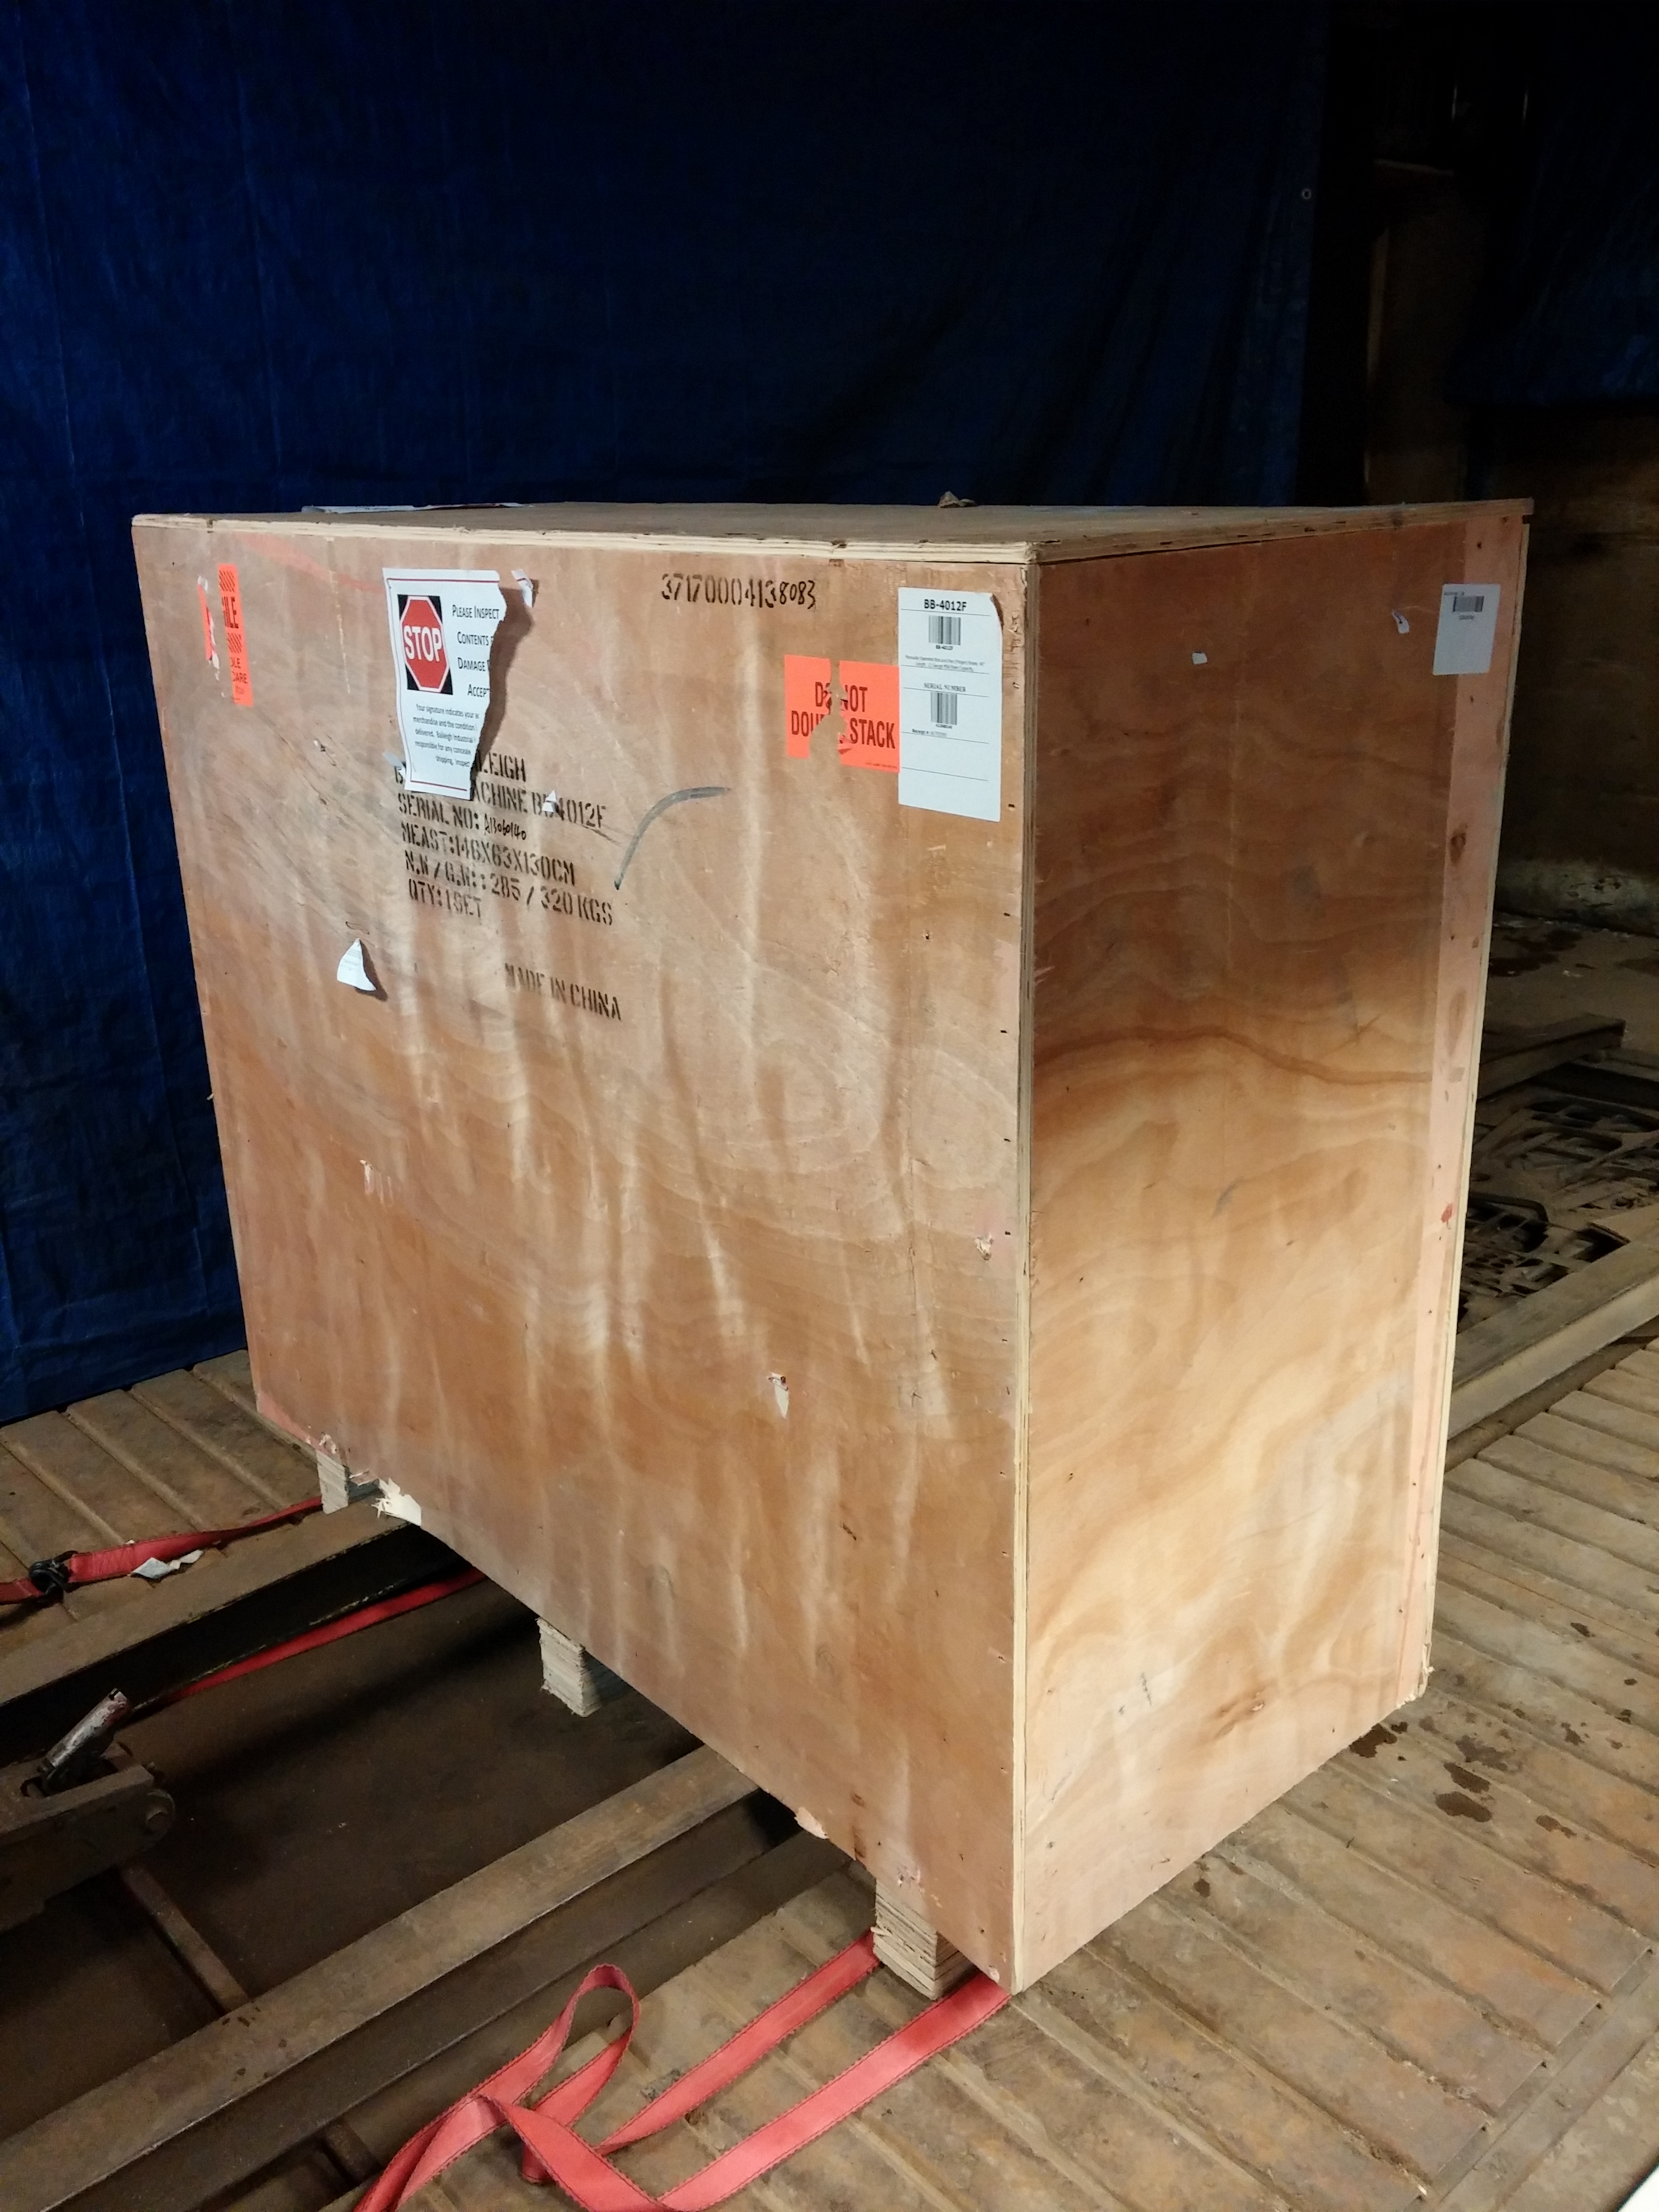
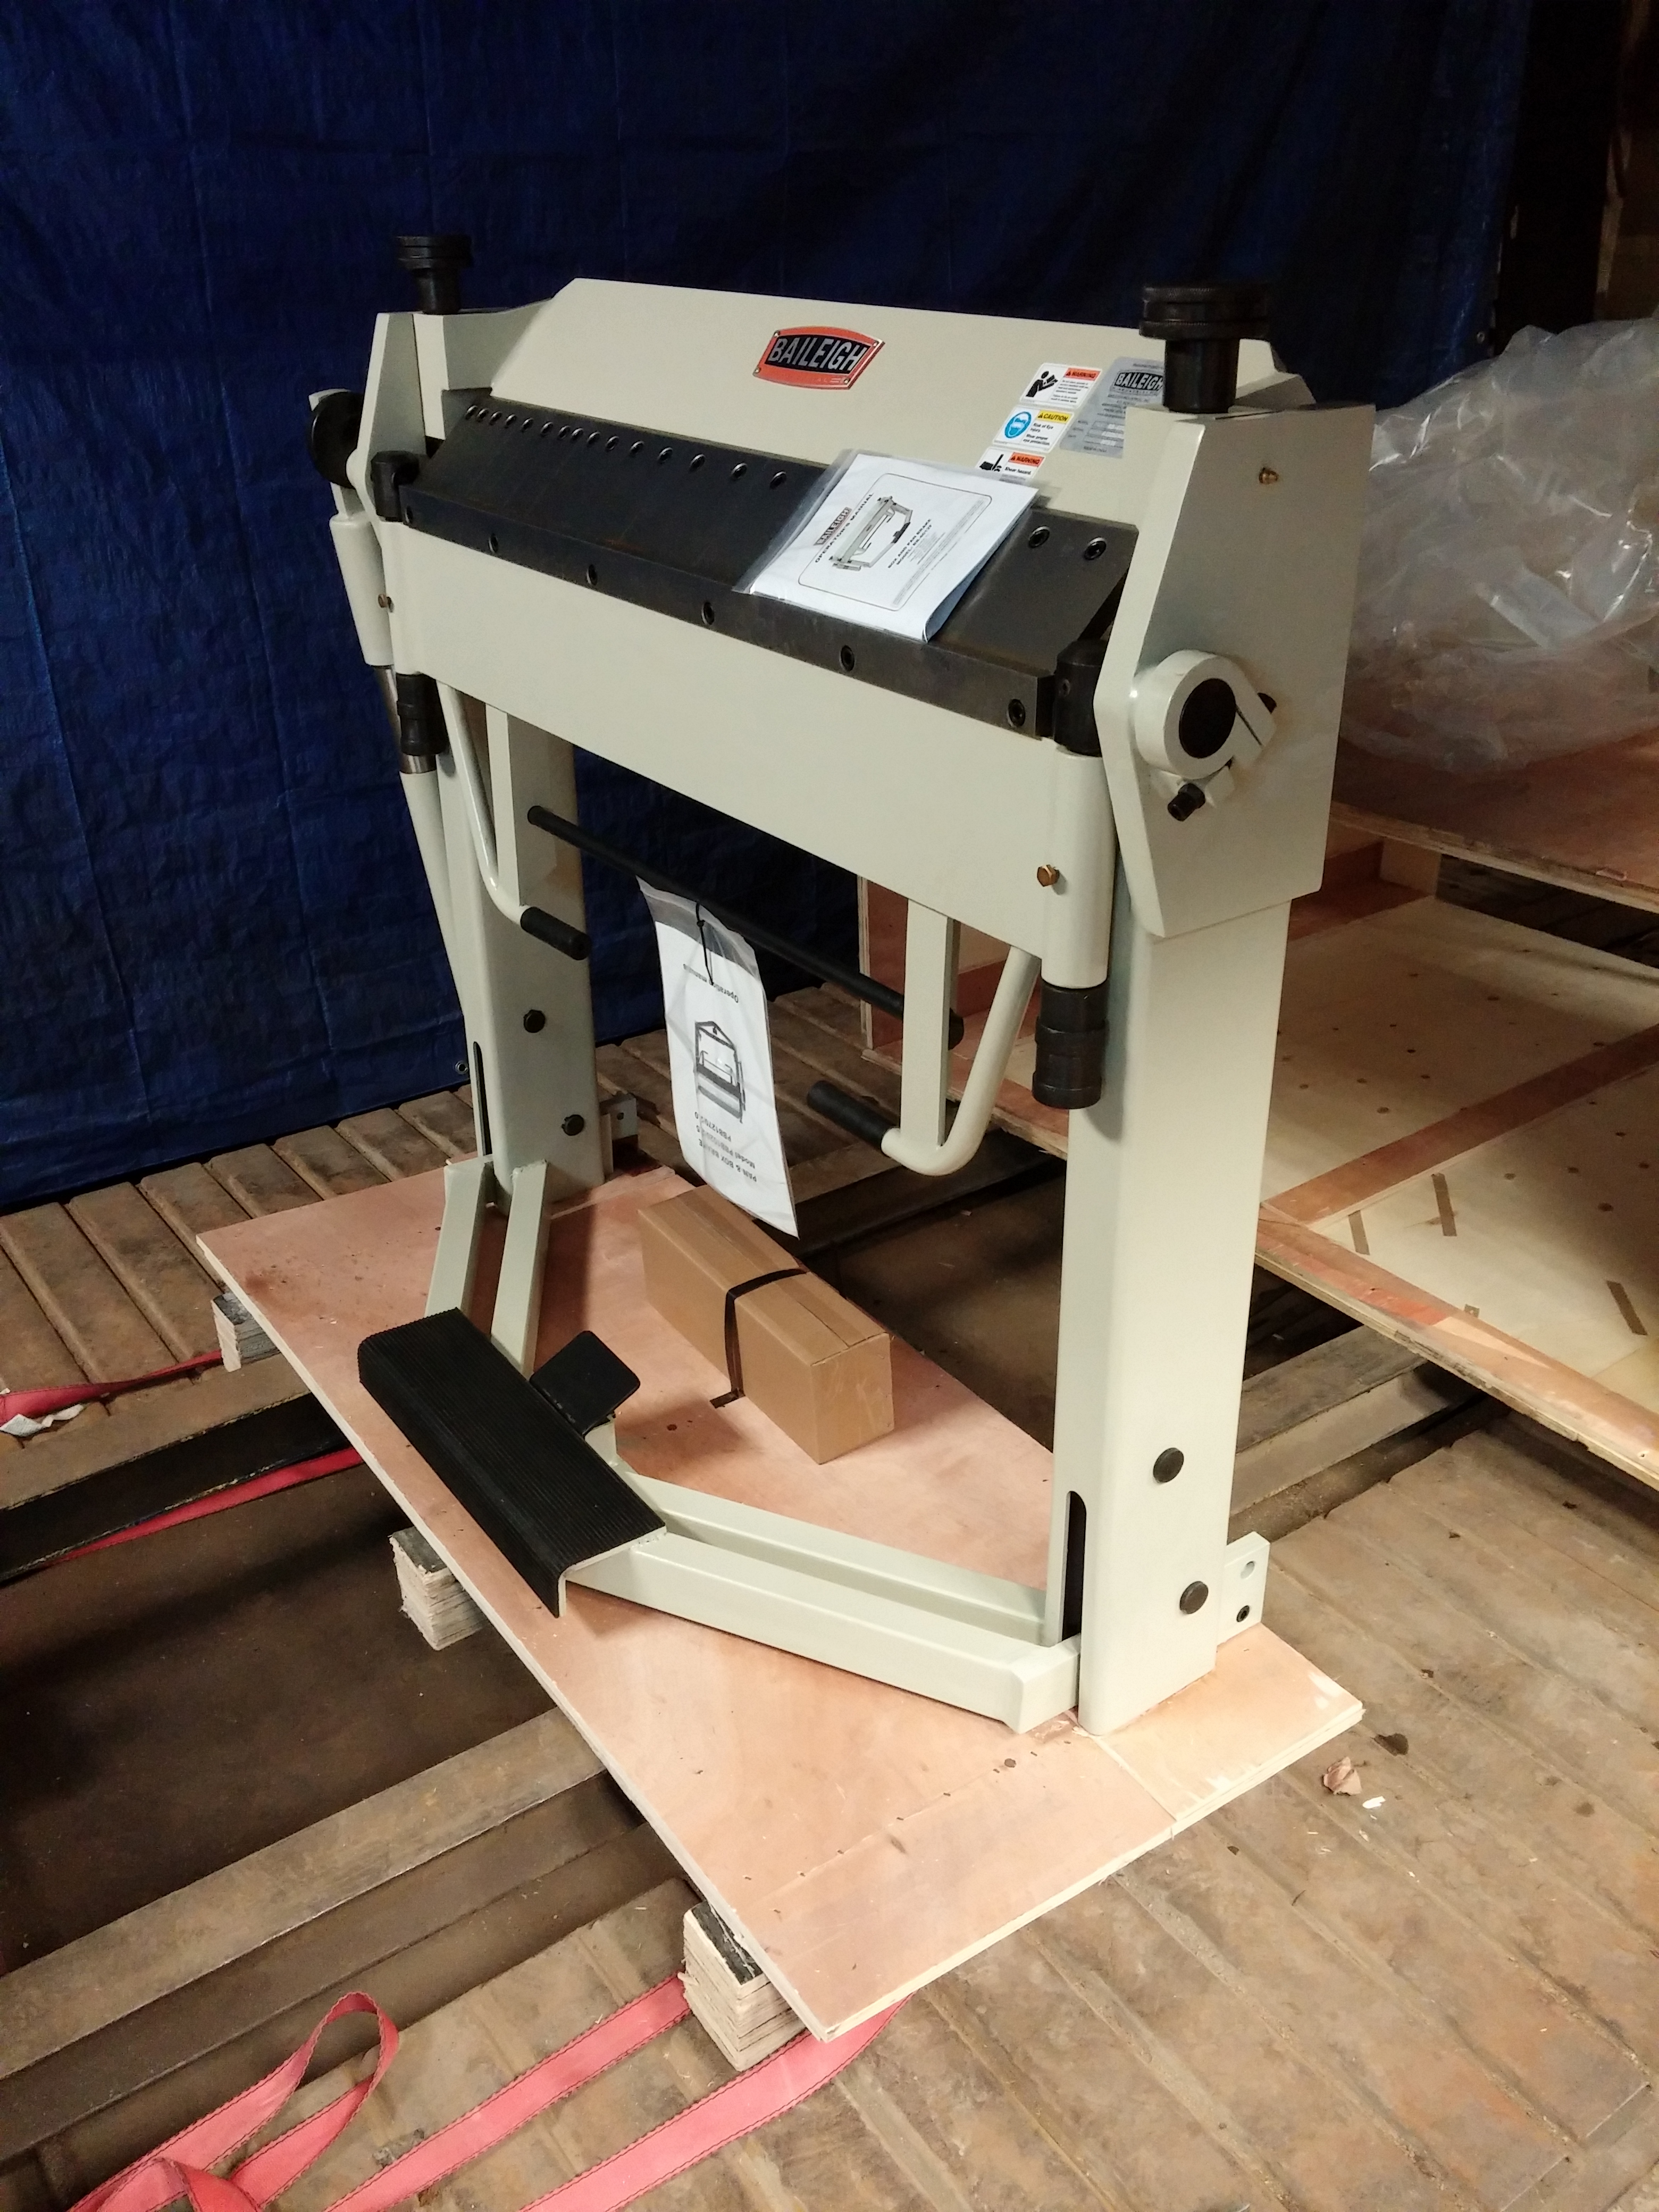
This box and pan brake will allow us to do 12ga at 40″ wide, anything thicker we can use our hydraulic press and other tooling to bend up to 5/8″ steel plate. Keep posted for our new bending services in the near future!

